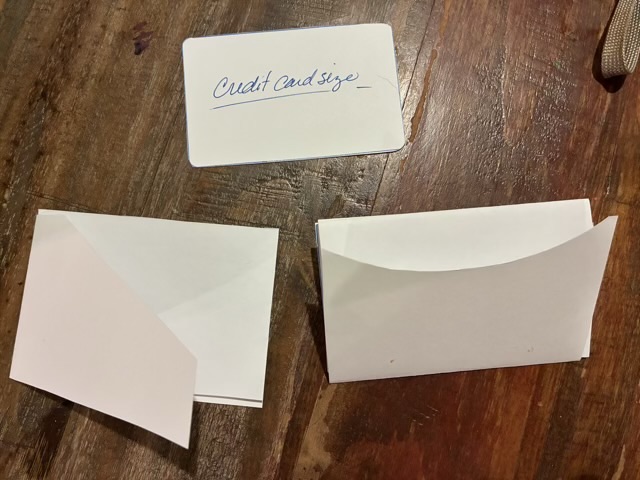
I designed a couple variations of minimal wallets by starting with paper mock ups.
Photo description: paper mock ups for two wallet designs, the bottom left has an angle access and a traditional quarter fold insert, the bottom right has a scoop access and an accordion fold insert, top middle is a credit card mock up
After getting my dimensions figured out with paper, I designed the leather cut out in Adobe Illustrator, and used a blue diode laser cutter to cut and emboss vegetable tanned tooling leather.
Photo description: leather with embossed design after cutting with a laser and rinsing with water, the folding
I stained the leather and let it dry, then applied a coat of resolene, which will make it water resistant.
I wanted the insert to have RFID blocking capabilities, so I used spray glue to adhere cotton quilting fabric to faraday fabric.
Photo description: cut cotton fabric glued to faraday fabric using spray glue on the back of the cotton
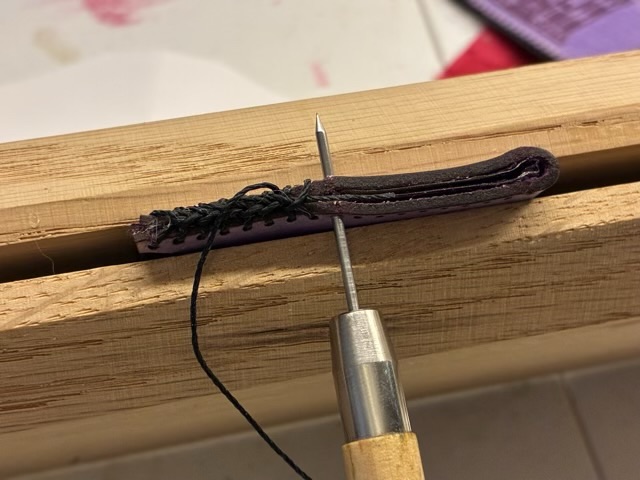
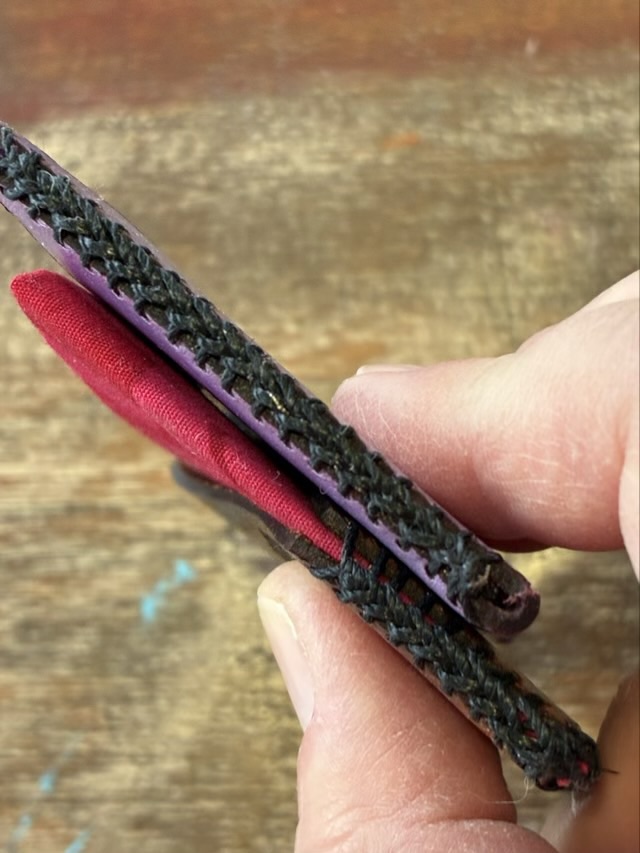
My favorite part of this project was learning a new-to-me edge stitch: triple loop lacing. It took a few tries on scrap leather to get the hang of it, but it was worth it. I love the braided edge look with the heavy waxed thread.
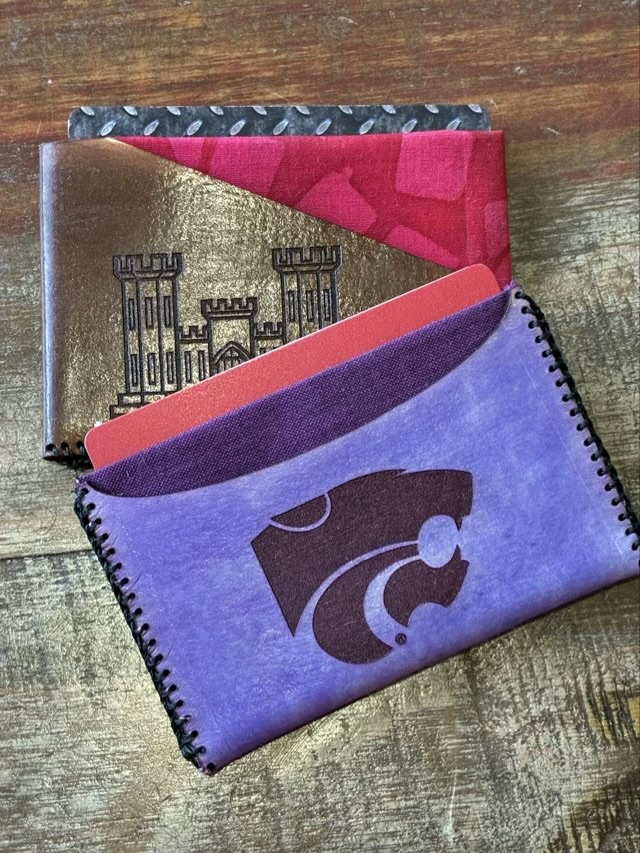
Photo description: using an awl to poke through the fabric using the precut leather holes as guides, the leather is secured in a book clampPhoto description: close up of the edge stitching on two leather and cloth minimalist walletsPhoto description: finished wallets with gift cards in the center pocket. Each wallet has three pockets: front, middle, back
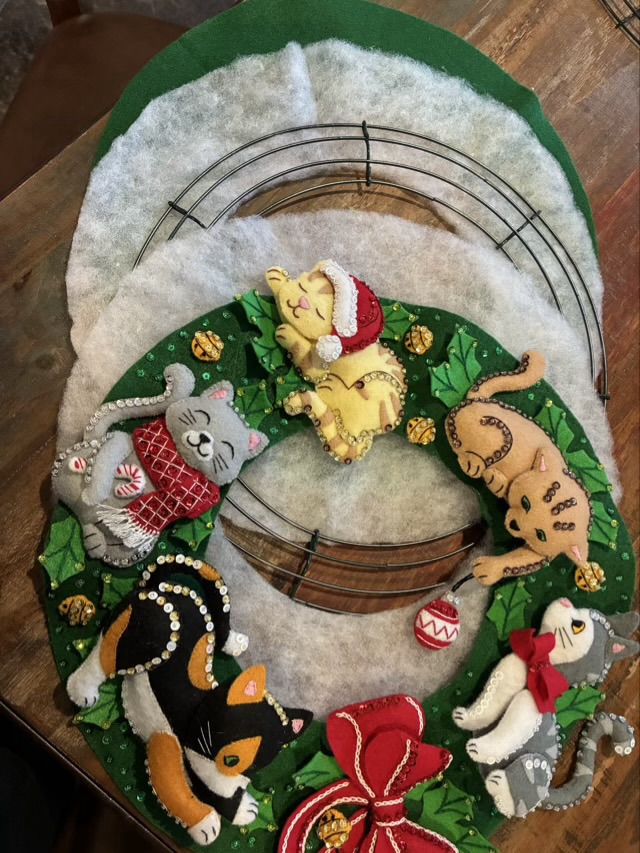
I’ve finished my Bucilla felt wreath kit with a final deviation from instructions. I was supposed to cut out a donut shape of cardboard to go between layers of quilting batting. Instead, I bought a wire wreath support. The cardboard would have worked fine, but the wire makes me feel better. The wreath is 16” in diameter, but a 14” wire support fit better.
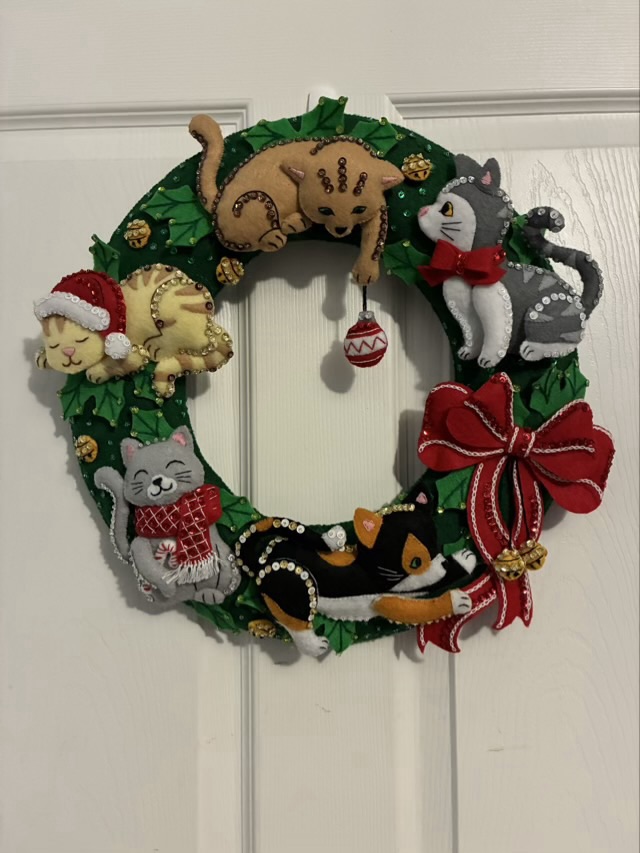
Photo description: wreath parts laid out before sewing: green felt back, quilt batting, wire wreath support, quilt batting, decorated felt wreath topPhoto description: my signature mark and the year stitched in yellow embroidery thread on the back of the wreath prior to sewing all the layers togetherPhoto description: finished Bucilla felt House Cat Wreath with deviations hanging on an interior door
I also used a bit of wire attached to the wire frame through the felt for the hanger.
I have done a felt kit now, I don’t think I will do another. I did get lots of interesting ideas while completing the project, though.
The last ornamentations for the Bucilla felt wreath kit are many tiny embroidered and sequined AND stuffed felt bells.
Photo description: Nine yellow felt bells with only the embroidery done, sitting on a calico cat
The pattern only has seven decorated sides, with the back sides unadorned yellow felt, but it bothered me that in the picture for the pattern one of the bells on a string was turned backwards, showing the plain side. So for those two bells, I decorated the back as well, increasing the tiny sewing required.
Photo description: felt bells stuffing, assisted by a bamboo stick
I found that using a bamboo stick to place the stuffing in the tiny elements of the felt wreath really helped.
Photo description: finished felt bells attached to the wreath in the indicated positions, dilute calico investigating the felt on the floor
Honestly, if I had had tiny metal bells in my stash, I would have put those on instead of spending all that time embroidering and adding sequins. I definitely had Edgar Allan Poe’s poem going through my head the whole time.
After the felt cats, the next step of the Bucilla wreath kit is a large red bow. This post almost had a different title, because as I put the bow together I realized that there weren’t enough red sequins left. Hm. I had a choice, do another deviation from pattern and use a different color sequin, or source more red sequins. I’ll admit that I raided my kid’s felt kits for the sequins (that have sat unused for two years, so there were no tears or admonishments).
Photo description: In process Bucilla felt wreath kit with five felt cats and a large red bow on a background of green and holly leaves
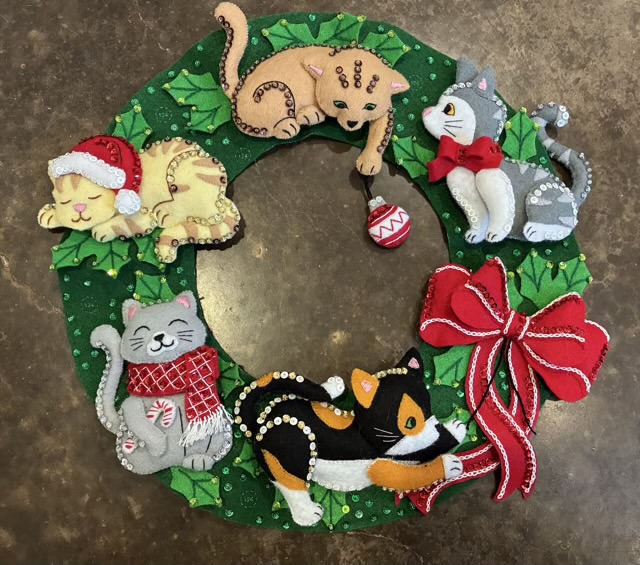
I changed almost everything on the last felt cat for my Bucilla kit. I took felt from my stash, cut new parts, cut different pieces from the pattern, altered the angle of the head and feet slightly, and mixed up the sequins so that I could have a black, orange, and white calico cat.
Photo description: felt calico cat with one orange leg and one black leg, and one orange ear and one black ear and a white belly and pawsPhoto description: in progress Bucilla House Cats Wreath made from felt and sequins with five cats, that deviate from the pattern
I have had two calico cats with one orange leg and one black leg, Shadows and Izzy. Izzy was born after Shadows passed and we joke about reincarnation.
Photo description: Shadows the calico cat with a black right front leg and an orange left front legPhoto description: Izzy the calico cat with a black left front leg and an orange right front leg
I have a few more things to finish on the wreath: a large bow and some bells. I don’t think there will be much more deviation in the sewing.