Throwback Thursday: eye wreath

In October of 2016, I painted ping pong balls with irises and pupils and glued them on a wreath frame decorated with short lengths of dark red glittery ribbon and mounds of black netting to make a Halloween decoration.

Photo description: front view of eye wreath made of ping pong balls and ribbon
Photo description: closer side view of the same wreath

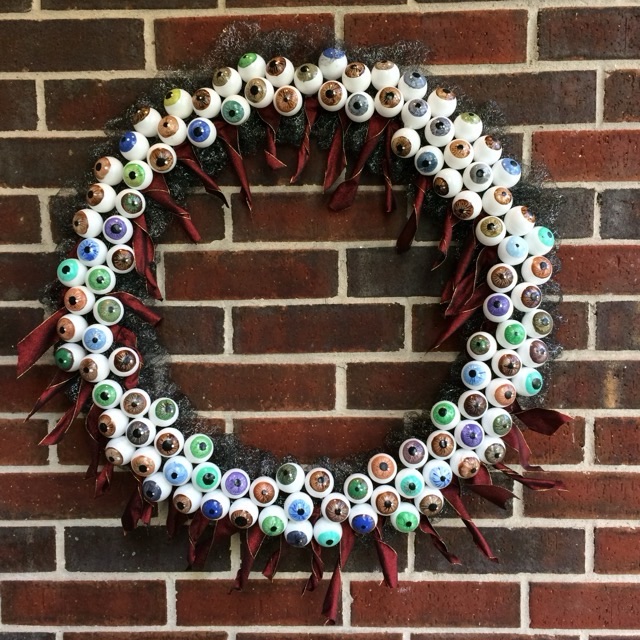
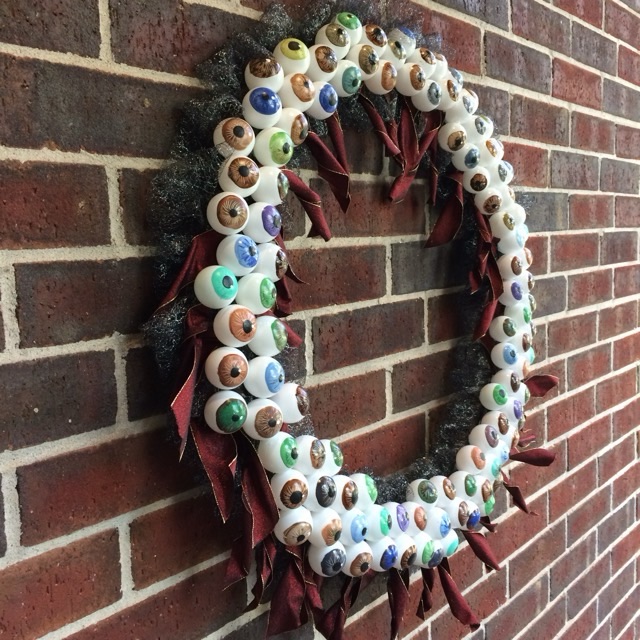
This was a short-lived wreath. In storage the acrylic paints rubbed off the ping pong balls, and the hot glue released its hold. And while it was interesting to play with different iris colors, it didn’t take long for painting that many ping pong balls to get tedious. If I were to do it again, I would look into making the eyes more realistic, maybe with some clear epoxy, since the true impact of this piece is achieved on closer inspection. There would be fewer eye balls as well!

Throwback Thursday: ribbon wreath

Sometimes things just don’t work out the way I hope. In December 2015 I made a large wreath from poultry wire and ribbon. It took me over a week to get all the loops of ribbon installed, and I had to buy more ribbon because I underestimated yardage. I should have made it smaller, but the thought of undoing it was worse than just pressing forward.

Photo description: hollow tube wreath frame made from poultry wire
Photo description: closeup of how I attached the wired ribbon to the poultry wire frame
Photo description: in process picture with looped ribbon work in stripes
Photo description: finished wreath sitting on a table that is three feet deep, the wreath overhangs the table
Photo description: wreath hung on an outside window because it was way too big for a door

The little bow I put at the bottom was woefully out of proportion to the huge wreath, but at that point I never wanted so see another loop of ribbon, possibly ever. I also didn’t care for the overall look when finished. I did learn from the process. I learned that looped projects take way more material than wrapped (logical). Storing such a large thing is difficult and the poultry wire frame didn’t hold up to rough handling. Ribbon is expensive, especially before the holiday sales.

Throwback Thursday: ribbon bookmarks

Here is a great throwback for Thursday! I used to make so many of these braided bookmarks. This picture is from December of 2014, and I love the way the red and white book marks have a secondary pattern effect.

Photo description: six green and yellow braided bookmarks, and four red and white

I make these with 1/4” flat ribbon and usually braid a long length, then iron the long ribbon before applying more ribbon as a band with some white glue and cutting sections a good bookmark length, usually about 8”. The trick to these is that the ribbon is never folded as I braid. The seven-strand plait stays flat and the bias weave of the ribbon lets it lay in smooth curves.

It is a fun braiding project, and inexpensive. Materials needed are: 1/4” satin ribbon, scissors, white glue, parchment paper (to protect the ribbon while ironing), and an iron.

Throwback Thursday: beach theme

Today we look back at August 2013 and the library bulletin board to welcome kids back to school. I did a concept test on a regular sized sheet of paper, using strips of sand paper for sand, and ribbons for water. The kids love running their hands on the bulletin board, so I thought the sand paper would give them something nice and tactile.

Photo description: beach scene on black paper with paper umbrella, paper book stack, strips of sand paper, twisted ribbons, and paper sun and clouds
Photo description: full sized bulletin board with a bonus book cover and I added a crumpled texture to the sun and clouds

The fun part of the full board is that there was a vent that blew air across the surface, making the ribbon move and giving motion to the ocean. I did not use backing paper; I was still fire shy after the previous year’s board was deemed a hazard by the fire marshal.