Bag bow

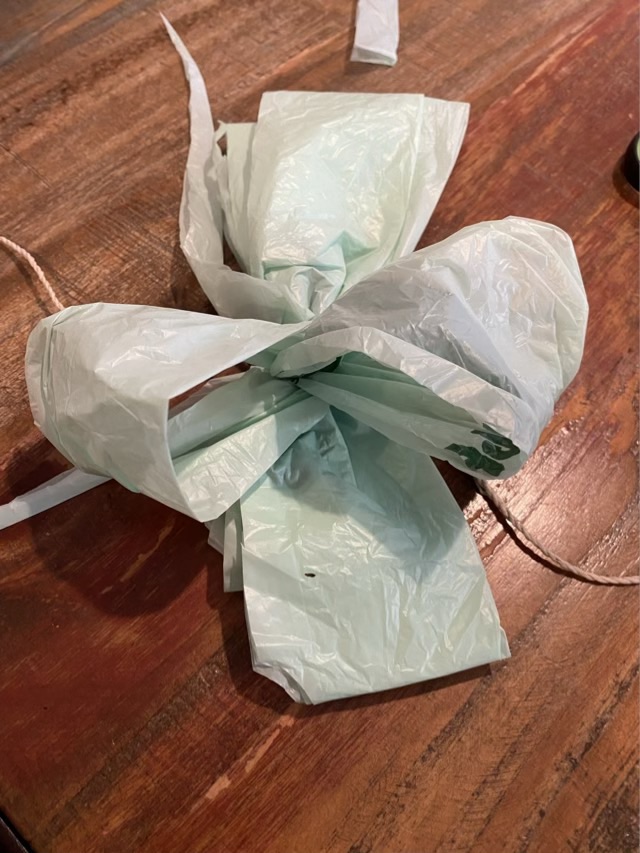
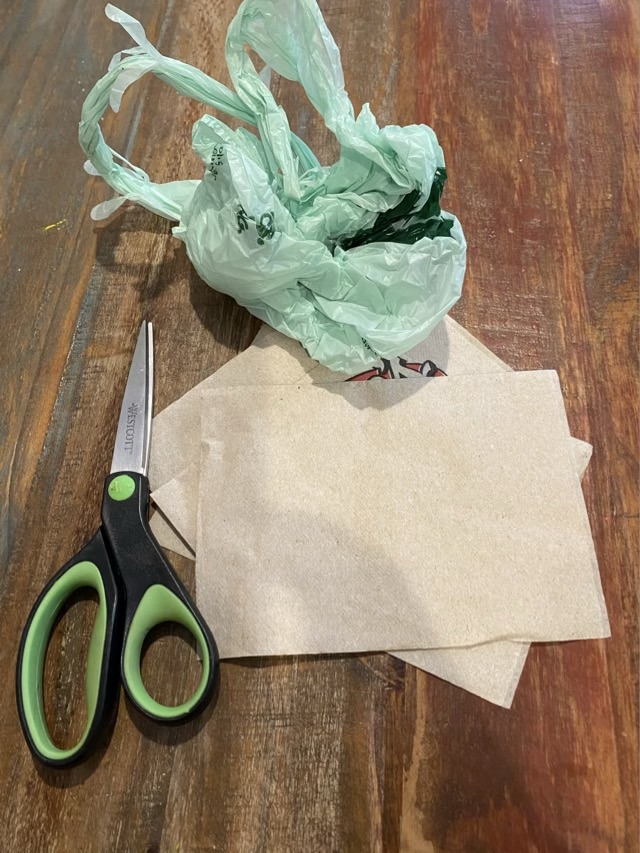
When you don’t have a bow for a present, but do have the plastic bag from the store and some fast food napkins, you can make a bow.

Photo description: bow made on the go from a Lowe’s bag and twine made from paper napkins
Photo description: green plastic bag, unbleached fast food napkins, scissors

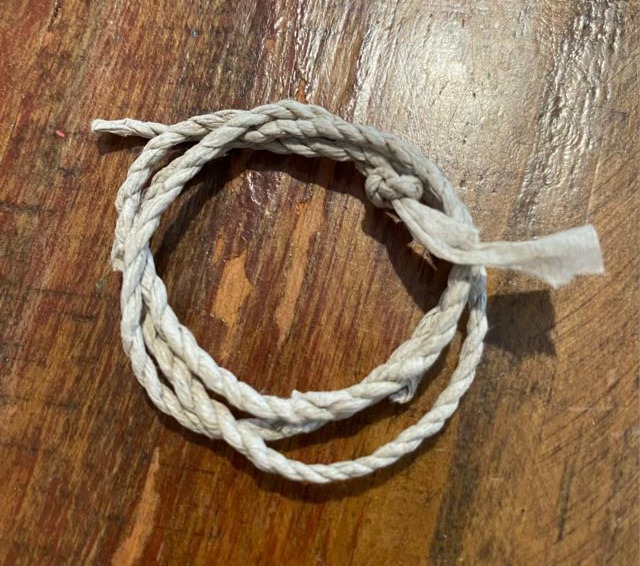
I usually have some napkin twine in my car as an emergency craft project. I prefer the unbleached napkins because the resulting twine is more aesthetically pleasing, not strong, but artful. I tear about 1/2” strips from the napkin, fold it in two, twist the single strand away from me, and twist the two strands together toward me.

Photo description: half inch strip torn from a paper napkin
Photo description: adding in a new strip of paper at the middle, between the existing strands
Photo description: a small section of paper napkin twine, knotted at the end

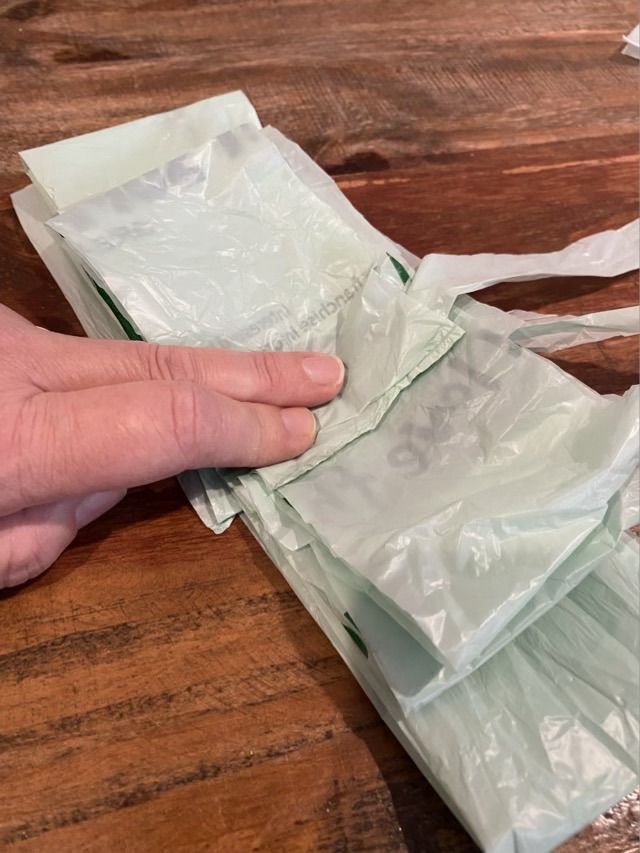
To make the bow, I smoothed out a plastic shopping bag, the kind with handles, and cut it into four equal width sections, two long, two short.

Photo description: plastic bag cut vertically into four sections

I start with the long sections and fold the ends to the middle with about a half inch overlap.

Photo description: plastic bag section folded with the ends to the middle and overlapping

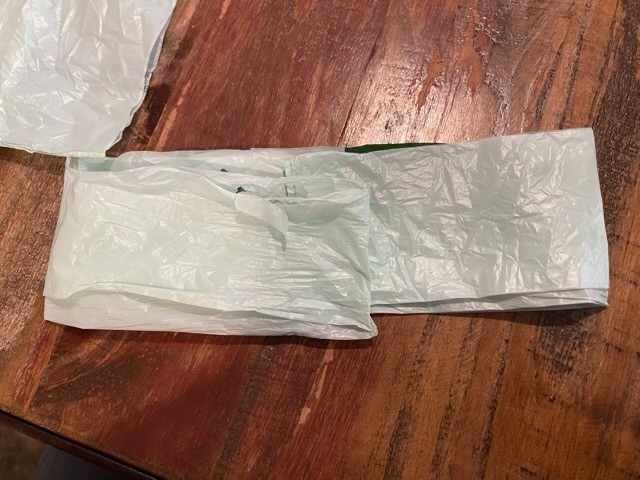
I repeat the fold for all four bag sections, then stack the four pieces with the longest on the bottom. Often, cutting the bag results in mis-cuts, sections of bag that don’t go from end to end. I pull these out as added decorative elements.

Photo description: all four sections of plastic bag folded and stacked, with some off cuts pulled out as “ribbons”

Using my paper napkin twine, I scrunch together the center of the plastic bag stack and tie the twine around using a square knot on the long side (back of the bow).

Photo description: plastic bag sections tied together with paper twine

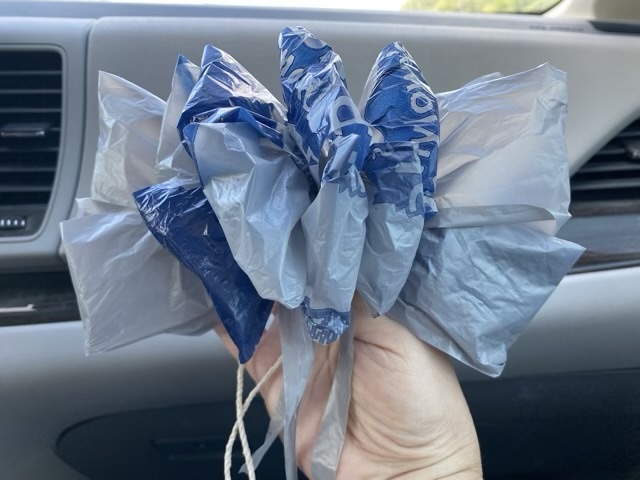
Then comes the fiddly bits (for me). Each loop of plastic from the stack gets opened up and pulled away from its partner(s). This fluffs the bow and gives it volume. I work from the back forward, and one side at a time.

Photo description: back two loops of bag separated, pulled gently 90 degrees apart, and rounded
Photo description: finished emergency bow made from a shopping sack and paper napkin twine

Clear origami crane

Many years ago I learned how to fold paper cranes. It is my go-to fidget when I’m waiting and there is paper available, mostly a situation I encounter in restaurants. My cranes have become smaller and smaller as my kids grew and the paper available diminished. I went from coloring sheets to sugar packets. My favorite so far has been a minuscule crane folded out of clear plastic.

Photo description: clear origami crane folded out of a plastic wrapper. Penny for scale. Sitting on the surface of an iPad.

Custom packaging

As much as I love cloth bags, sometimes you need packaging you can see through that is inexpensive. For my spinning starter kits I needed a long narrow plastic bag. I have a whole bundle of large clear plastic bags, but they are twice as wide as I needed for this application. I found that if I ran my quilting mini iron, set to high, down the center of the bags, it was enough to melt and separate the bag into two, with a well sealed seam. The iron does come with a blade attachment, but the blade cut the plastic too fast and didn’t heat the plastic up enough to melt it.

Photo description: Cork squares laid down on the table to protect the surface, two newly created long narrow plastic bags, with a mini iron to the side, blade assembly unused.
Photo description: Same table with one bag filled with a spindle and three samples of different animal fibers.
Photo description: Two completed Spinning starter packs, with insert containing instructions and resources.

I tied off my bags with some of my old hand-spun yarn oddments. Another good use for left-over yarn!

DIY bobbins

In my Grandma’s stash of knitting supplies, there is a stack of bobbins she made from plastic containers. I decided to follow suit, and make more bobbins from my used plastic lids.

Grandma’s bobbins (left), commercial bobbin (bottom), ricotta cheese lid (right)

There are no signs of tracing on Grandma’s bobbins, I’m not sure if she wiped them off, they wore off, or she made so many she didn’t need to trace them. I need trace lines, so I used a thin sharpie to outline the commercial bobbin.

Tracing the bobbin onto the lid

I cut out the traced design with kitchen scissors.

Cut out bobbin

I think cutting was a harder task for Grandma; the plastic she used was much thicker than mine. It is a visible reminder that plastics manufacture has changed, and products are using less plastic per item now.

Grandma’s plastic (left), modern plastic (right)

Despite the thinner material, my new bobbin works great to organize the extra bits of thread I’m accumulating as I warp my Inkle loom.

Newly made bobbin wrapped with pearlized cotton