In March of 2017 I hand carved and painted a fishing lure for my Dad.
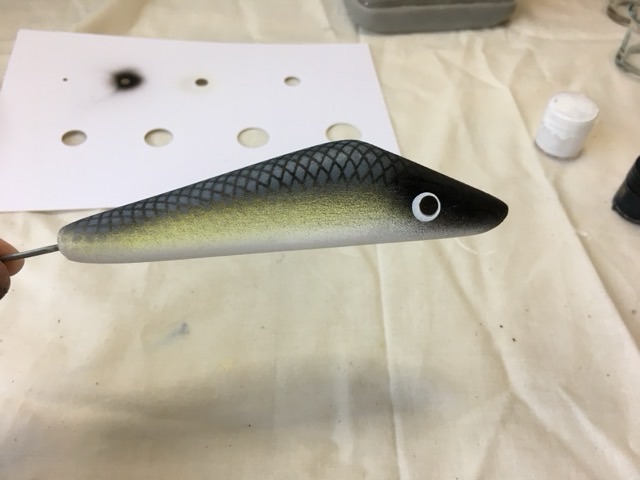
I did coat the lure in a water proof gloss finish, but didn’t take a picture at the time. Below is a picture of the lure in 2026.
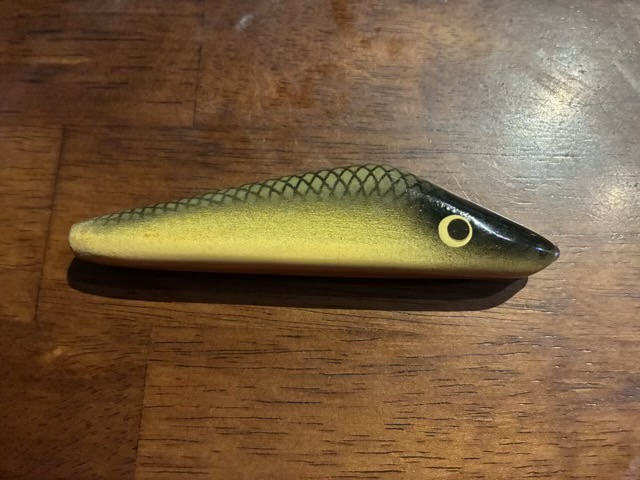

In March of 2017 I hand carved and painted a fishing lure for my Dad.
I did coat the lure in a water proof gloss finish, but didn’t take a picture at the time. Below is a picture of the lure in 2026.
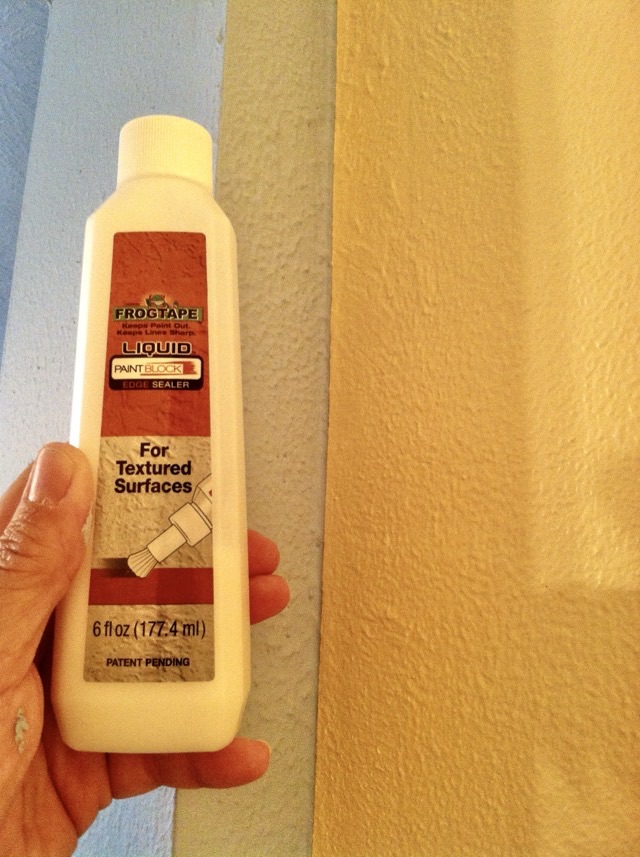
In September of 2013, I was repainting the rooms of our house and discovered liquid paint block. Essentially it is clear latex paint that you apply over the edge of the painter’s tape so that it sucks down into the cracks and crevices not blocked by the tape, rather than the colored paint. It makes for much crisper color changes, especially for inside corners.
This has become a Throwback Thursday post not only to share the trick, but so that I have it documented in a different place and will perhaps remember it when it comes time to paint again.
And because it is May Day, and I can’t make it to get flowers to everyone’s porch, here is a picture of white bearded iris blooming in my current front yard.

The next part of the Zonai banner was a graphic on the silk panel. The silk was recycled from my grandmother’s swing jacket. It has a beautiful blue/green shimmer, but the jacket doesn’t fit anyone in the family anymore. I used a section for this cosplay banner, and I plan on parting out the rest of the silk for other long-term projects.
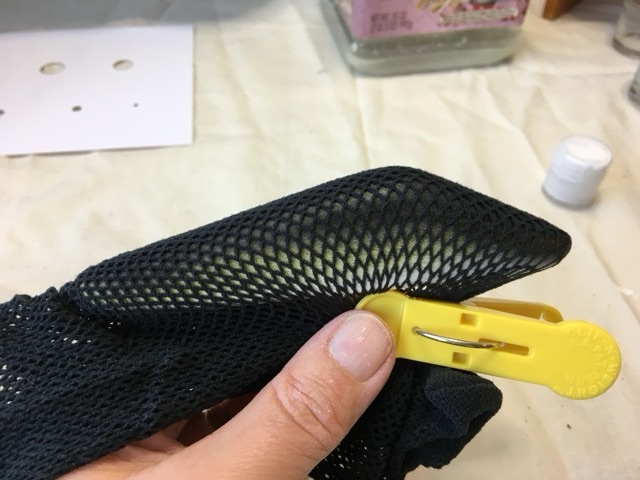
For the graphic, I replicated the design in Adobe Illustrator, then cut a card stock stencil using my laser cutter.

I did a test of the stencil before applying it to the silk, then “bounced” the acrylic paint onto the surface of the fabric.
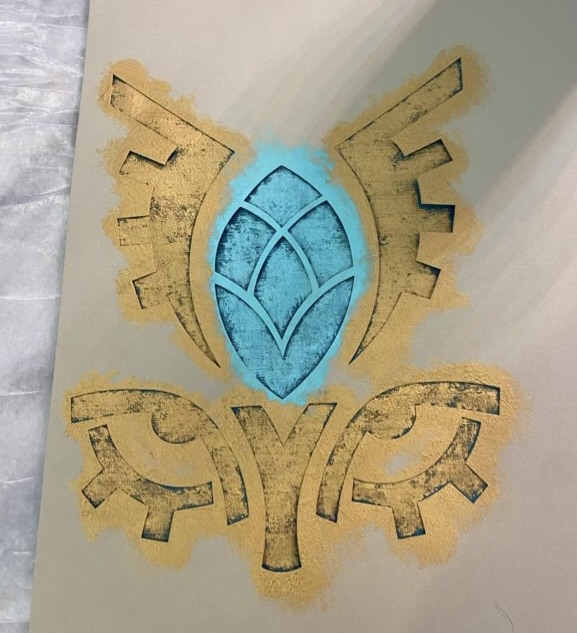
The method did not work as well as I hoped, and left a rough edge that I didn’t care for.
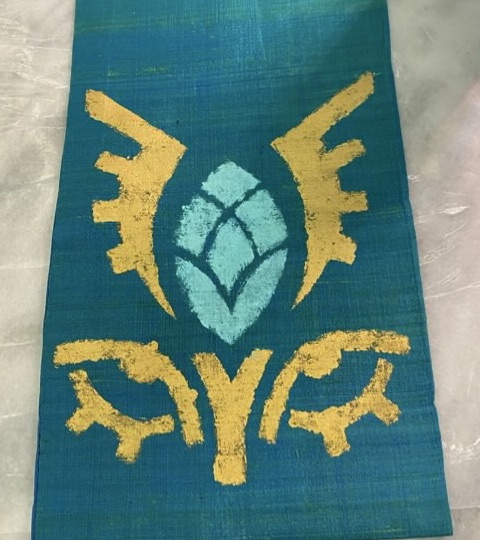
I went over the stenciled image with a paint brush and more acrylic paint to clean up the edges.

I was able to fix the graphic, and I would still use a stencil if doing a similar project, but would make sure I was using a stiff stencil brush and I would thin the paint before pouncing it on.
My folks gave me a laser engraver, because I spent so much time at their house playing with their laser. My level of craft ability has now reached dangerous (on a scale of “beginner”, “how cute”, “nice”, “wow”, “dangerous”, “how?”, “mastery”). I started with my business logo on rock, painted brass, and a thin slice of purple heart wood that I sliced on my band saw.

The rock ended up with a mottled white design that does not wash off. It has a pleasant texture but probably won’t survive a sealant (testing on that later).
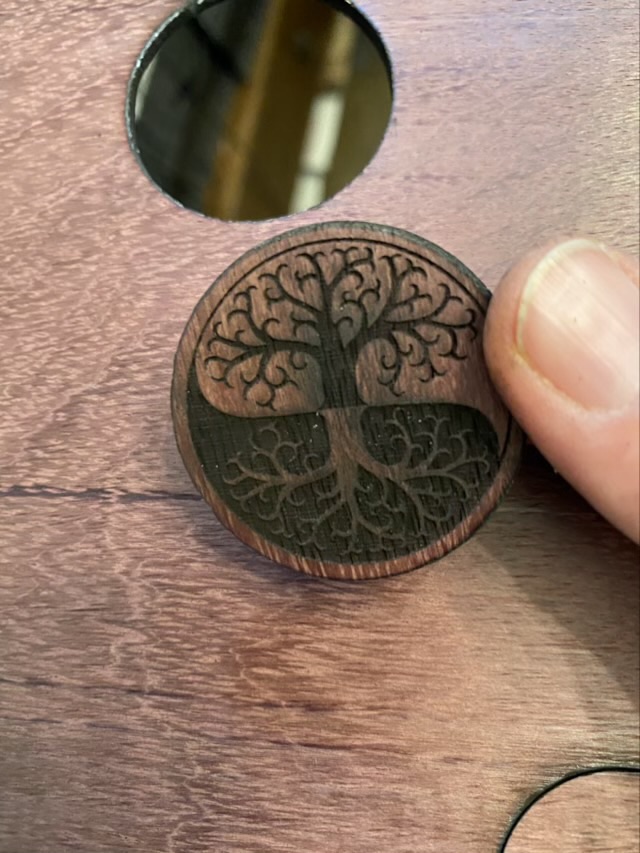
I’m still experimenting with settings. The purple heart with logo was a little too intense and the burn carried outside the design.

I tried a circle of brass (I used a jeweler’s saw to cut it, the blue diode laser won’t cut brass). I originally did clean brass, but it only made a ghost image, so I spray painted the blank with black primer paint, let it dry, and ran it again. I quite like the result.
My head is swimming with all the possibilities.
