DIY stitch holder

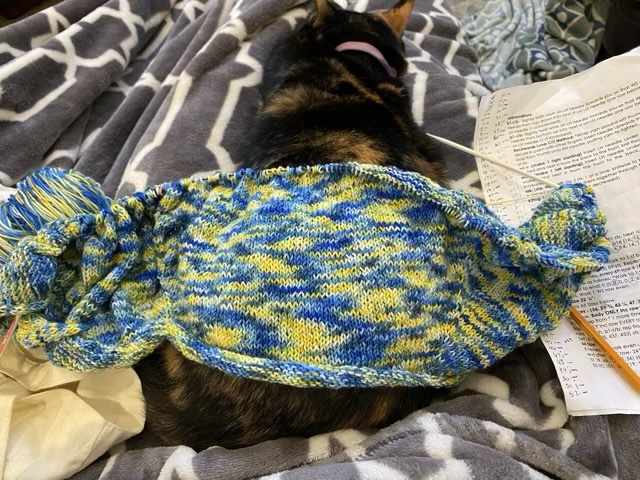
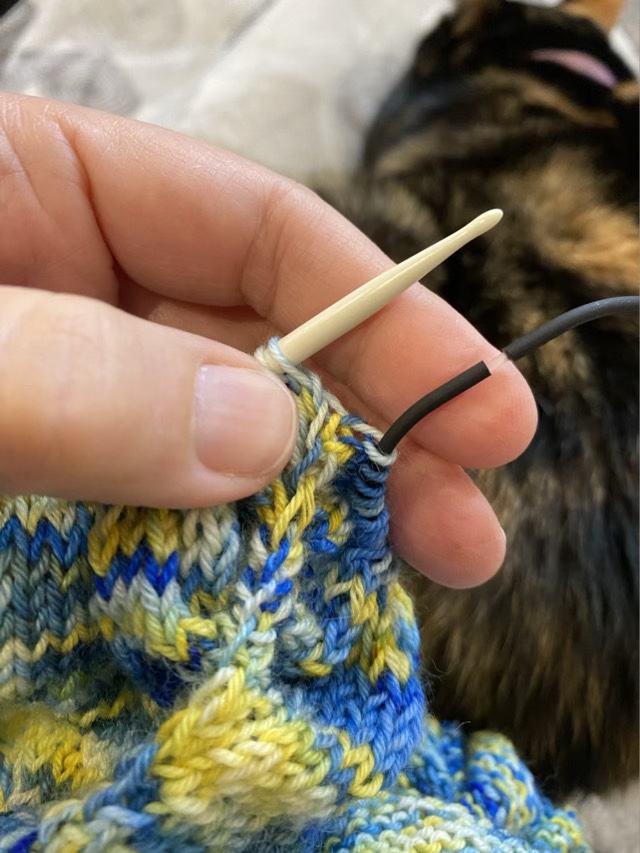
I’ve made it to the split of the arms and body on the cardigan I’m knitting! This is momentous because after I separate the stitches for the sleeves each body row will have less stitches, which will make progress seem faster. There are a couple ways to hold the stitches for the arms, waste yarn, or a stitch holder. I found some pony bead elastic in my stash, which is a thick, but hollow, rubberized cord marketed for stringing beads. The end of this cord fits over the tip of my needle, making it much less scary to slide the stitches off the needle and onto the cord.

Photo description: Black flexible cord slid over the tip of a Prym circular knitting needle, in preparation for sliding stitches. Two cats in the background in close proximity.

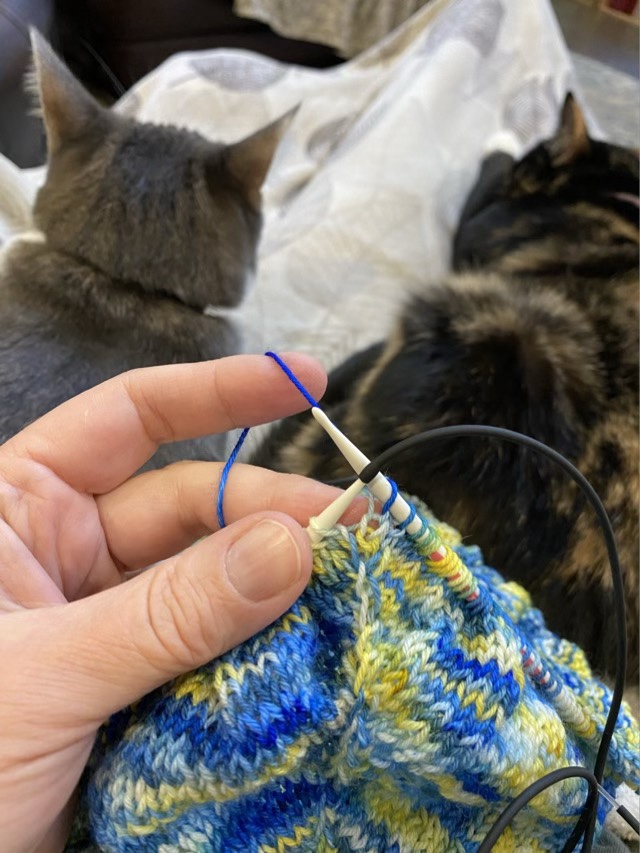
The cord comes in long lengths, making it possible to cut it as long as I want it, which in this case is large enough so the garment can be tried on during construction. In the package there are also small connectors that slide into the ends of the cord, closing the loop.

Photo description: Knit stitches slid onto the cord and the cord closed with a clear solid connector. One cat in the background. Thor pushed his luck, Izzy noticed and told him off.

Now onto knitting the body!

Forever project

I picked up my knitting again and progressed a little farther. I keep telling myself that this is the worst bit, row-length-wise. I’m making a top-down cartigan with raglan sleeves, and across the shoulders, before the arms are separated from the body, the row has around 300 stitches and is increasing. I’m close to separating the sleeves and then I hope the work will at least perceive to go faster. I posted a couple shorts on YouTube of my real-time perl and knit. It is slow going.

Photo description: Yellow and blue knitting section on circular needles laid over a calico cat.

Rolled brim hat

So I thought a rolled brim knit cap was some kind of knitting voodoo. I was looking up patterns to see how to do it. Y’all, it is just knit. Stockinette stitch, which makes the familiar v shaped stitches that we associate with knitting, is unbalanced and curls without a stabilizing edge (like ribbing). So the rolled brim is the natural state of a knit tube. Hm. So I tried one, and sure enough the edge curls. I even managed to do the crown of the hat in knit using seven decreases, then ran the end of the yarn through the last seven stitches and pulled tight to form a nice little rosette in the center. I threw some embroidery on to see how that went.

Photo description: Green and white knit hat with vine embroidery.
Photo description: Crown of the hat showing seven slightly spiraled sections neatly closed at the top.

I used superwash merino sock weight yarn. I would do things differently next time, so I’m not going to write up a pattern. For posterity sake I’ll write down details, though. I used two size 2 circular needles; a slip, slip, knit decrease on each of the seven sections, sometimes separated by a row of knit; and attempted a stem stitch for the embroidery. The stem stitch stretches with the fabric, but I don’t like how it doesn’t make a continuous line. That might just need practice, though. I was hoping for more of a spiral on the top of the hat too.

Woven hat band

For my Dad, I took an end section of my Inkle woven band (post from yesterday) and made it into an adjustable hat band.

Woven hat band

I sewed where I wanted to put the end before cutting it, then sewed it over again to catch all the ends inside the seam. For the pin, I used a shanked button from my button stash. I believe this one is vintage, but sometimes my buttons get mixed. To make a button into a pin, I use a spiral wire with the end sharpened.

Back of button and handmade pin converter
Button installed on pin converter

I brushed out the fringe on the woven band and shaped it to mimic a feather. The weaving is doubled back so won’t unravel, and I think the spray of yarn adds a bit of flare to the band (although it will probably have to be combed out straight occasionally). To set the band size, the pin holds the ends of the band together.

Fringe and pin

Weaving handspun

After spinning all my merino wool roving, I used it to warp my inkle loom. This is my first time weaving with my own hand-spun yarn.

Inkle loom half warped with hand-spun yarn

I did learn to review instructions before starting, I thought I could warp the loom, then put on the heddles, but I forgot the warp path for non-heddled yarn is different. I had to go back and untie and retie many warp threads. Lesson learned.

Weaving started using recycled plastic strips

I used strips of plastic cut from an empty laundry container to start the weaving and keep it straight. This also saves some unwoven warp to keep as fringe in the finished weaving.

Helper (not)

Weaving went slowly because I couldn’t progress while the kitten was awake. He wanted to help.

Wool build up on heddle strings

Another challenge was the halo on my wool. The little fibers that stray out of the spun yarn like to stick together, especially when passing other little fibers on other threads. Oy. I found if I went slower and took time to separate the warp threads when I changed the shed, things went smoother. The felted wads on heddle strings are a testament to how much wool likes to felt.

Finished band

I gave the band a light felting, just by taking it back and forth from hot water to cold water. I then laid it out to dry.

Gently felting the band

Happy Father’s Day to all those that give stability and guidance. Tomorrow I’ll share what I made for my Dad.