Jewelry repair: bracelet

My mother-in-law asked me to take a look at a broken bracelet. It is a lovely piece with metal beads and a metal focal, that was strung with elastic. The elastic had been knotted and fitted with knot covers that then connected to jump rings, and those knot covers were where the elastic failed. Knot covers are risky jewelry components. They work well for silk strung lightweight beads with a large solid knot that will hold inside the knot cover. Elastic is hard to knot securely, especially at the end. Metal beads are also hard on both elastic and silk, and tend to fray the stringing material faster than smooth beads.

Photo description: broken bracelet laid out on a bead board with remaining components

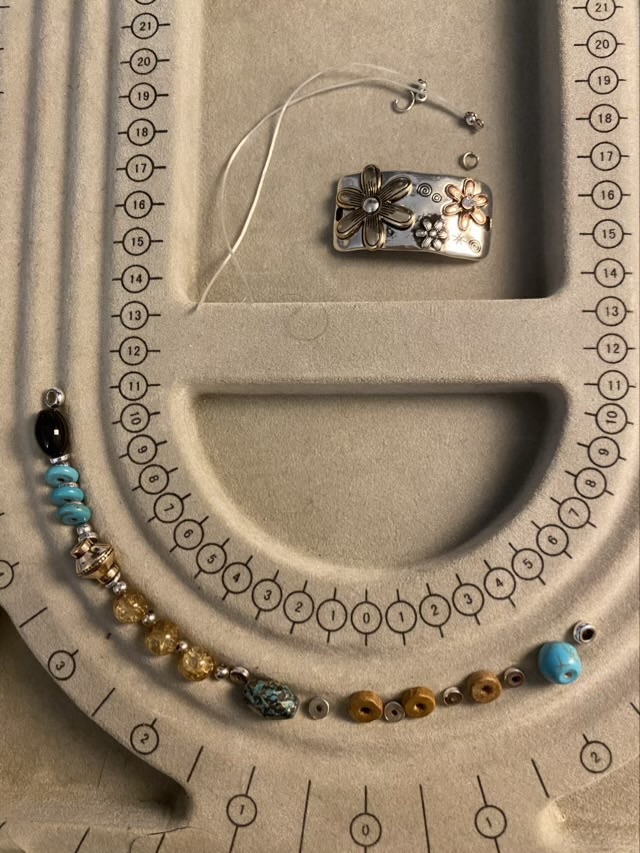
Rather than risk another elastic mishap, I switched the bracelet to a clasp style. The focal actually works well to receive a lobster style clasp. I used 49 strand beading wire with double crimp beads for durability and added some coordinating metal beads to make enough length that the bracelet is loose when clasped.

Photo description: repaired bracelet on a bead board
Photo description: bracelet shown clasped

I can’t guarantee the bracelet won’t break again. It is one of the reasons I don’t make and sell jewelry anymore: even well made jewelry wears out and is prone to breakage. I don’t mind this kind of fixing, though.

The other reasons I don’t make jewelry: over a third of booths at every craft show I’ve been to sell jewelry, and I don’t wear necklaces and rarely bracelets so I’m not even advertising my own work.

Simple earrings

I needed red earrings for a chorus performance. Hm. I went through my stash and found sparkly red beads, wire, and ear hooks.

Photo description: one long earring strung with red crystal beads, with the second earring parts including the silver wire, beads, ear hook, and pliers

I bent the end of the wire into a very small loop, strung on the beads, and made a larger loop that connected to the ear hook. Simple, sparkly, red.

Throwback Thursday: necklace pins

These necklace pins are from September 2010. I like dual purpose pieces, and these pins that are also a necklace focal are some of the best I’ve made. I crafted the pins from sterling silver wire and Swarovski crystal beads; one represents a Bluebonnet and the other Queen Anne’s Lace wild flowers.

Photo description: hand made broach crafted of sterling silver wire and Swarovski crystal beads depicting a Bluebonnet blossom and leaf
Photo description: hand made broach crafted of sterling silver wire and Swarovski crystal beads depicting a Queen Anne’s Lace bloom
Photo description: Bluebonnet pin on a hand knotted Swarovski pearl necklace with coordinating earrings and bracelet with custom heart clasp
Photo description: Queen Anne’s Lace pin on a crocheted rope of Swarovski crystal beads. The rope has sterling silver wire running through the center to make it hold shape and is crocheted with thin silk cord strung with beads

Throwback Thursday: Silver work

This is another favorite jewelry project I made back in January 2010. I used silver clay, some with cubic zirconia inclusions, to make unique beads, created custom wire elements, small chain link florets, and built links with end caps and beads.

Photo description: custom silver necklace with unique hand made links and custom clasp

This necklace did not do as well in the Fire Mountain Gems contest, which disappointed me because I thought this one displayed more technical skill. In hindsight, that is probably why it didn’t do well, it isn’t something easily duplicated, so wouldn’t advertise their products to the best advantage.

Live and learn.

Throwback Thursday: silver clay

In April of 2009 I made one of my favorite metal clay jewelry sets. Metal clay is fine particles of silver suspended in a medium to make it workable like clay. It is then fired in a kiln to burn off the organics leaving nearly pure silver in the slightly smaller shaped form, all without forging or soldering.

Photo description: silver clay pieces ready for the kiln. The cork supports burn away in the high temperatures.
Photo description: after firing the pieces need to be cleaned with a brass brush
Photo description: fired metal pieces polished to a mirror finish by tumbling with polishing media
Photo description: custom metal clay links and clasps combined with sterling silver production elements and Swarovski crystal to make a necklace, bracelet, and earring set

The metal clay does give options for designs that are difficult to achieve with traditional gold smithing tools, but requires its own set of specialty tools like the kiln.