Woven elastic

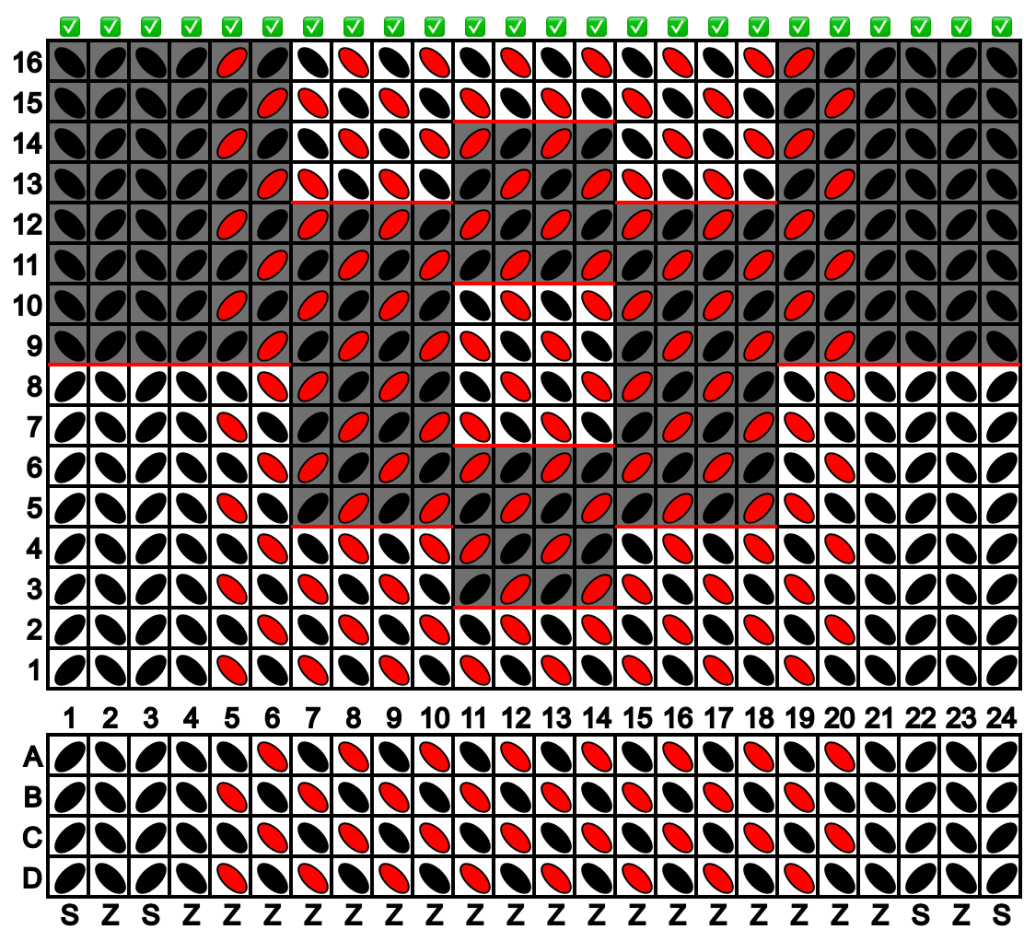
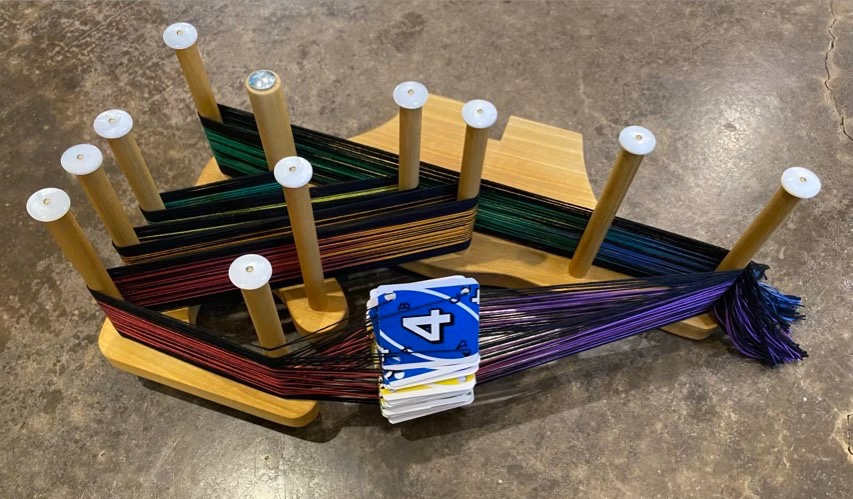
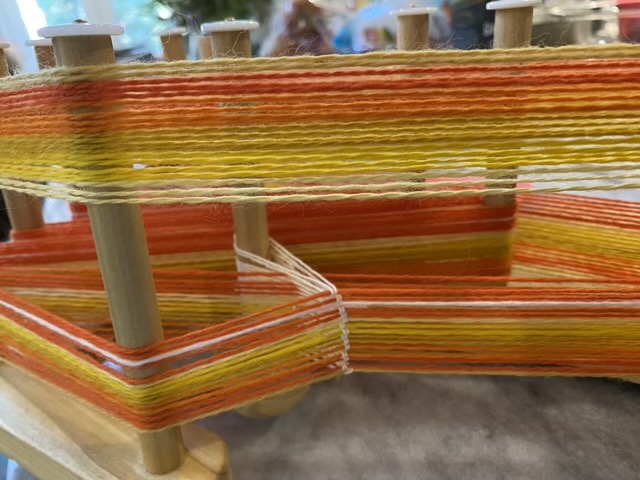
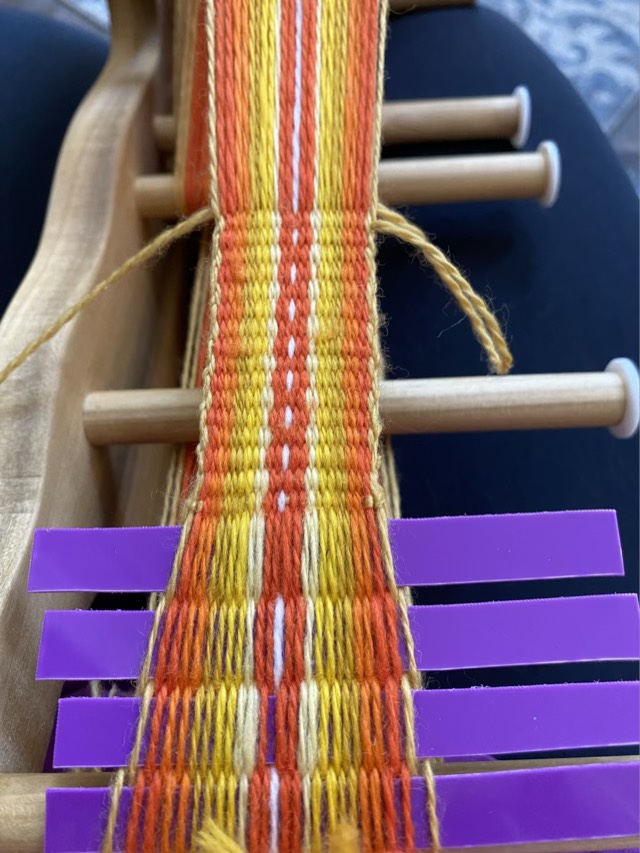
My Mom requested a stretchy woven watch band. I took one of the plain purchased bands she had so I had the hardware, and I purchased colored shirring elastic thread. I set up a 22 card tablet weave on my Inkle Loom using a pattern I found on Pinterest. An interesting thing about tablet weaving patterns is that the result changes depending on how the cards are turned. It took me a little time to figure out how the pattern worked, so I decided to make four different patterns on the same band, then cut them later. I also had quite a shock when I removed the band from the loom and the elastic contracted, creating different issues.

Photo description: shades of purple, gray, and black elastic thread woven into a band and laid out to show the different patterns next to the black purchased band

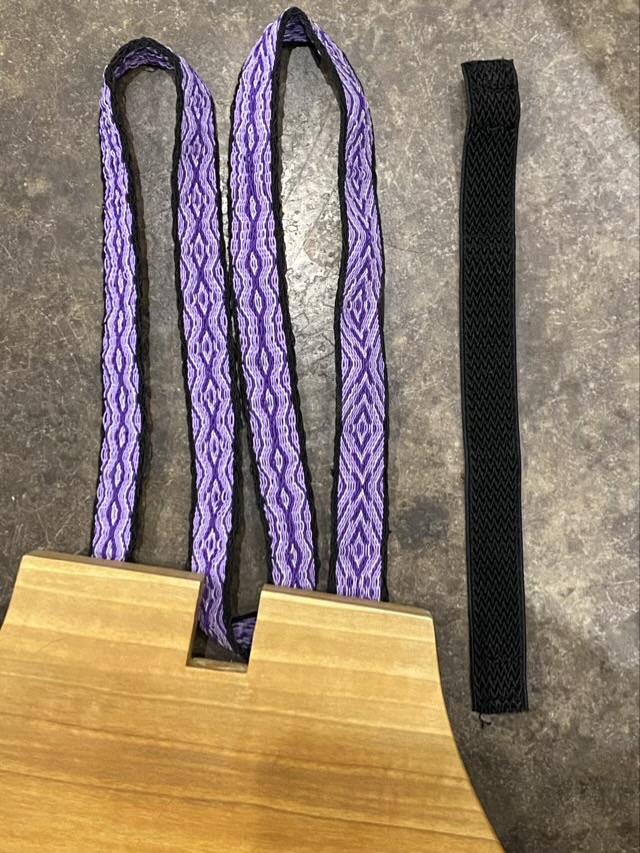
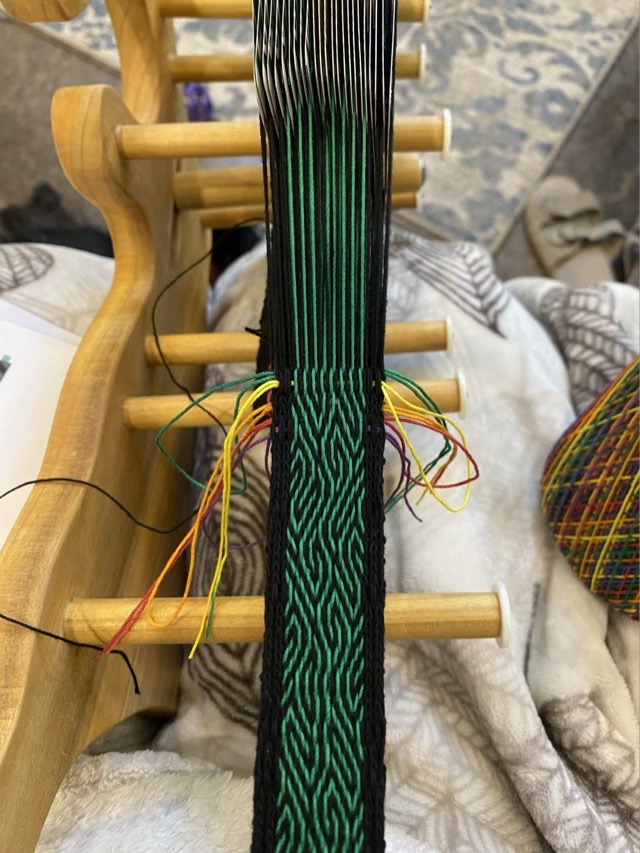
When I warped the loom, I didn’t pull the thread completely tight, it is quite elastic, but on hindsight could have loosened it up a little more. I did pull the weft thread taught. If someone is reading this to get hints on the how, I recommend trying a non elastic weft. On the final band three of the designs puckered strangely, one in the middle and the other two on the edges. I think this is due to the tension or uneven tension on the warp and the pattern. It was difficult to get an even pull on all 88 threads when it was so elastic.

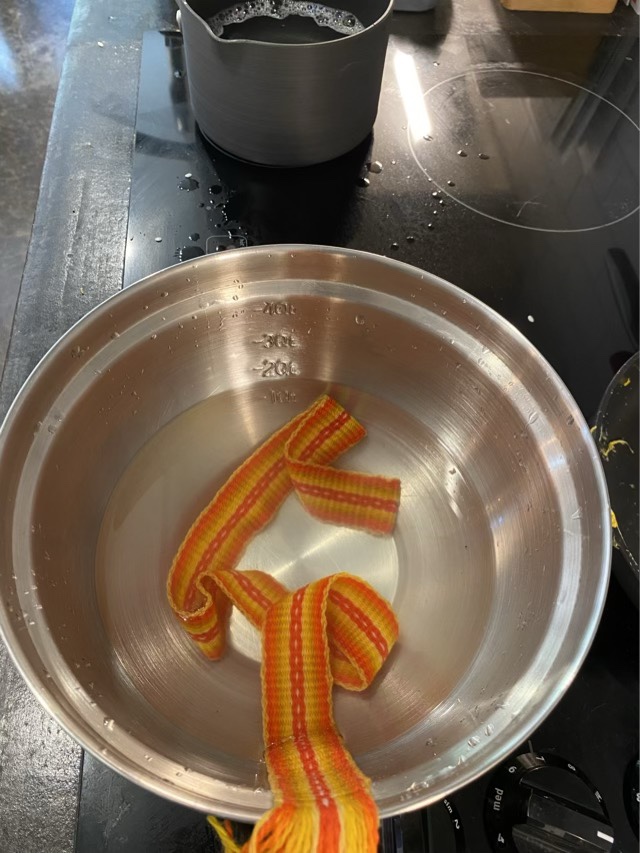
I had at least one decent section, so the next quandary was how to cut it. Ideally, it needed to be cut and sealed to prevent the elastic from unraveling. I happen to have a laser cutter. I couple experiments with settings, and I was able to cut and, in the same process, seal the band.

Photo description: picture of the computer screen focused on the woven band with a cut line positioned between patterns

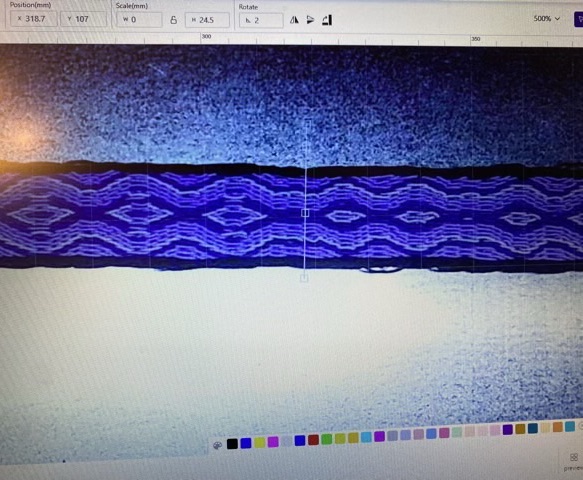
I put the band on a sheet of steel, and used high power and a slow speed to cut the band. It look a couple of experiments with settings to get a cut with minimal burn.

Photo description: cut band with minimal unraveling

To protect the end while threading it through the hardware, I wrapped it in washi tape.

Photo description: washi tape wrapped end threaded through the slide

Sewing was a little challenging because of the thickness, but this little three-in-one sewing tool was a life saver.

Photo description: using a sewing tool to pull the needle through the band
Photo description: finished band on a calico cat

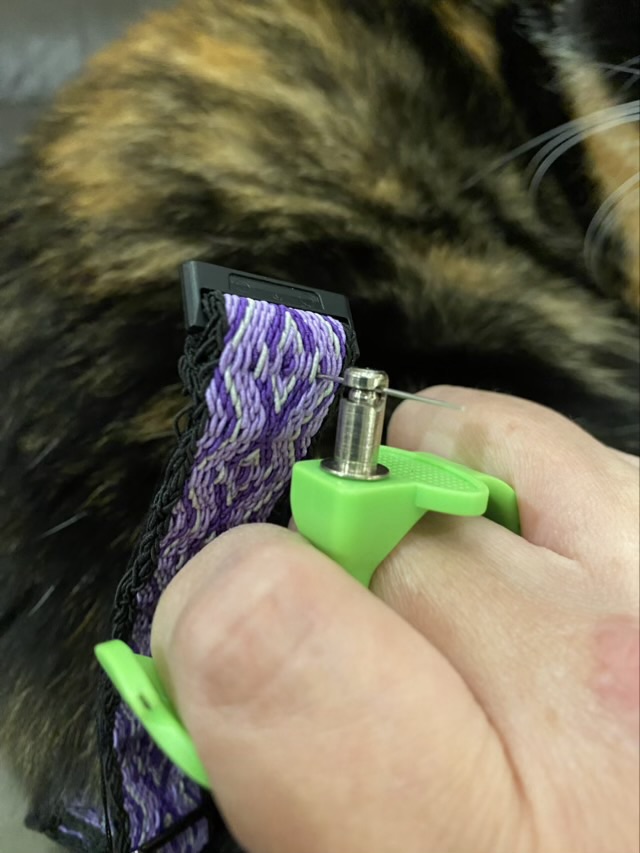
The most unfortunate part of the whole project is that I didn’t realize the slides on the ends have an up and down. I installed them both upside down. Nuts.

Honored

I follow an Inkle band weaving group on Facebook that is under new administration, who are trying to clean up the site and get it back to Inkle weaving (and not a repository for spam). They asked for submissions for a new banner image, and my rainbow tablet weave won by popular vote!

Photo description: Private Inkle Band Weaving group on FB with my rainbow band as the banner image.

They said they would change the image frequently, which is also good. I’m excited that mine was the first picked!

This band went on to become the strap for my ukulele.

Ukulele strap part 1

I decided my ukulele needed a strap. Maybe it was mostly an excuse to design a new card woven pattern, maybe it was to use up cotton crochet thread, most likely I decided to make it myself because I don’t have enough works in progress.

I used this tablet weaving designer, and came up with this pattern.

Photo description: Tablet weaving pattern diagram generated in Tablet Weaving Draft Designer v1.5.0. Diagram shows how to setup the cards in the tablet, and which way to turn each card for each pass of the weft thread.

I warped my loom with #10 cotton crochet thread in black and rainbow. The rainbow warps I aligned by color. It was quite serendipitous that a color repeat in the thread was just a little longer than my warp length, so I could have all the colors, and very little waste.

Photo description: Handmade Inkle loom warped with black and rainbow thread with weaving cards made from an Uno deck.

I used the black thread as the weft, and started with a few passes held straight with lengths of 18 gauge wire, then doubled the weft back on itself for several rows. To end, I used a loop method to draw the weft back on itself to help lock the weaving in place.

Photo description: Weaving in progress showing a wavy green and black pattern with solid black edges and rainbow colored loops along the weft pass to use to draw the weft backwards.

I love this pattern. It is balanced so the twist does not build up in the warp, except when I make a mistake. Even when I miss a turn or double a turn, it still looks cool, and it is double sided! Win! I love the middle, but the edges vex me because they are not even (an artifact of the balanced weave). I may try a plain woven edge next time around (my youngest has requested one for her uke.)

Photo description: Finished woven band with color changes along the spectrum in the same wavy pattern.

Now to make it useful in addition to decorative.

Woven hat band

For my Dad, I took an end section of my Inkle woven band (post from yesterday) and made it into an adjustable hat band.

Woven hat band

I sewed where I wanted to put the end before cutting it, then sewed it over again to catch all the ends inside the seam. For the pin, I used a shanked button from my button stash. I believe this one is vintage, but sometimes my buttons get mixed. To make a button into a pin, I use a spiral wire with the end sharpened.

Back of button and handmade pin converter
Button installed on pin converter

I brushed out the fringe on the woven band and shaped it to mimic a feather. The weaving is doubled back so won’t unravel, and I think the spray of yarn adds a bit of flare to the band (although it will probably have to be combed out straight occasionally). To set the band size, the pin holds the ends of the band together.

Fringe and pin

Weaving handspun

After spinning all my merino wool roving, I used it to warp my inkle loom. This is my first time weaving with my own hand-spun yarn.

Inkle loom half warped with hand-spun yarn

I did learn to review instructions before starting, I thought I could warp the loom, then put on the heddles, but I forgot the warp path for non-heddled yarn is different. I had to go back and untie and retie many warp threads. Lesson learned.

Weaving started using recycled plastic strips

I used strips of plastic cut from an empty laundry container to start the weaving and keep it straight. This also saves some unwoven warp to keep as fringe in the finished weaving.

Helper (not)

Weaving went slowly because I couldn’t progress while the kitten was awake. He wanted to help.

Wool build up on heddle strings

Another challenge was the halo on my wool. The little fibers that stray out of the spun yarn like to stick together, especially when passing other little fibers on other threads. Oy. I found if I went slower and took time to separate the warp threads when I changed the shed, things went smoother. The felted wads on heddle strings are a testament to how much wool likes to felt.

Finished band

I gave the band a light felting, just by taking it back and forth from hot water to cold water. I then laid it out to dry.

Gently felting the band

Happy Father’s Day to all those that give stability and guidance. Tomorrow I’ll share what I made for my Dad.