I have a new favorite way of making washcloths. Although I love the diagonal knit cloths, I really am a slow knitter. It takes me literally hours to knit one washcloth. Crochet however takes half the time for the same size cloth, and a simple single crochet, chain one pattern is easy to remember and makes cloth with a nice texture that is not so thick that it takes days to dry.
Photo description: Natural white cotton crocheted washcloth with loop.
I use a hook one size bigger than what is recommended on the label, then chain 30. In the second stitch from the hook, single crochet (sc), then chain (ch) 1. Skip a chain loop, and repeat the sc ch1 across. Turn the work, sc in the previous sc, ch1, repeat across. Continue rows until the fabric is square (test by folding it diagonally.) Sc around the outside, making a ch7 loop at one corner. I find 2sc in the other corners is sufficient to turn the corners.
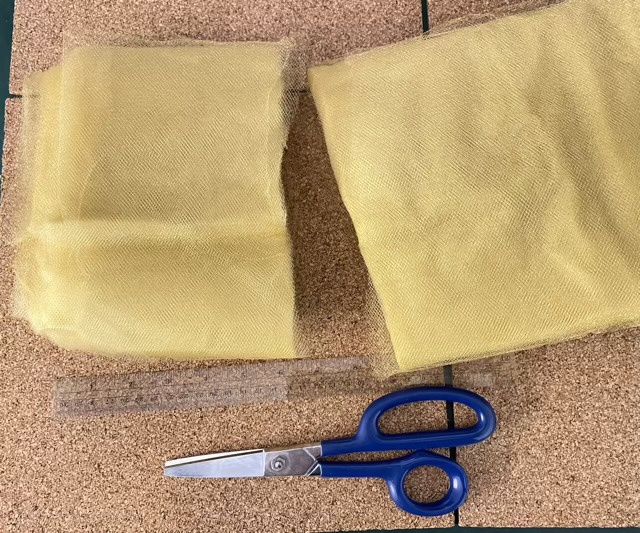
I have been experimenting with nylon tulle fabric (fine mesh fabric, usually in the bridal section). My sewing machine cleaning instructions include using this kind of fabric to gently clean screw threads. If it can handle that kind of work, scrubbing dishes without scratching should be a breeze. I ordered 15 yards, and chose the gold color. I tried cutting narrow strips, but found that sections about 6-7” inches wide worked well to crochet bulky scrubbies. I used leather shears to cut off a section of the bolt. (I’ve since found out that tulle comes in 6” widths in the ribbon section, so we’re going to store that info away for later.)
Photo description: Gold colored nylon tulle fabric folded in bolt form, with 7” cut off one end with leather shears, ruler in front for scale.
The cut strip was double layered, because that is the way fabric is laid in a bolt. To make the material manageable, I wound it nostepinne style on a dowel.
Photo description: Two balls made by wrapping nylon tulle strips around a dowel at a 45 degree angle.
I tried various methods to make the scrubbies, but came back to the basic crochet half-double stitch round. For my skill set, that is the neatest (as in tidy and well formed).
Photo description: Stack of 9 circular crocheted scrubbies, sitting on a table.
To make these, I use a size M hook and start with a magic circle, crochet 8 Half-Double Crochet (hdc) stitches, pull the end tight and slip stitch (sl st) into the first hdc. The second row starts with two chain (ch) stitches, then has two hdc in each hdc from row 1. I crochet the end in as I go. Sl st to beginning the of the row. The last row (yup, just three rounds) starts with 2ch, then 1hdc in the previous hdc, 2hdc in the next, repeat around. Cut material, pull through last stitch, join to first stitch and weave in the end. Easy peasy and fast.
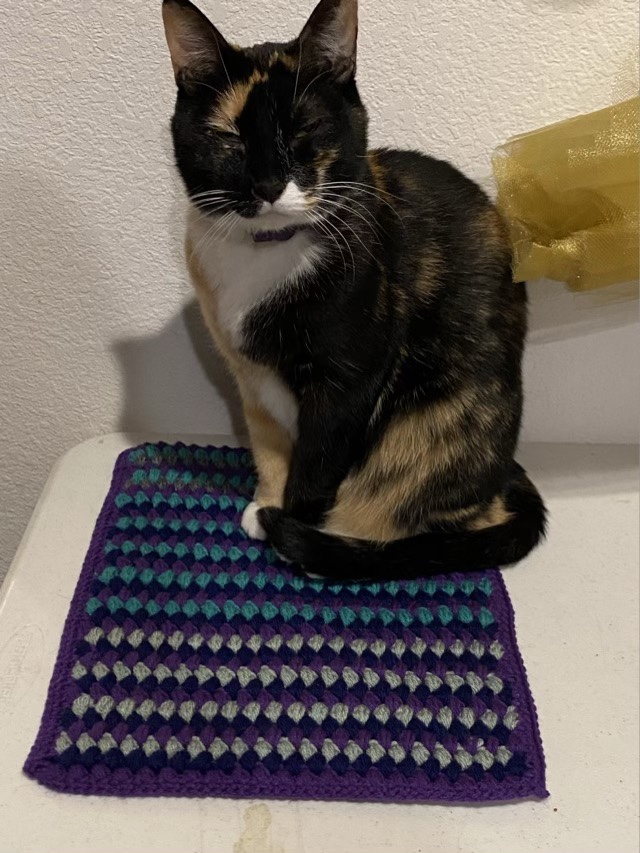
Crocheting cat mats is a great stash busting activity. Pairing worsted weight acrylic yarn with a puff stitch results in a cushy mat that seriously dips into the bag of leftovers.
Photo description: Multicolored mat made with crocheted puff stitches in rows of alternating color.
To make the mat use a size G hook with worsted or medium weight yarn in three or more colors.
Chain 43, or multiples of 2 +1 to get the desired size.
Row 1: Starting in the second chain from the hook, single crochet (sc) across.
Row 2: turn, chain (ch) 2, *yarn over, skip first sc and insert hook in the second sc, yarn over, pull up loop to match the height of 2 ch. 3 loops on the hook. In the same sc, yarn over, insert hook, yarn needle over, pull up loop. 5 loops on the hook. Repeat to get 7 loops on the hook. Yarn over and pull through all seven loops. Ch 1. Repeat from * across.
Row 3: Change color. Leave the other color attached if doing a three row repeat. Ch 2, *yarn over, insert hook in the first ch space, yarn over, pull up loop to match the height of 2 ch. 3 loops on the hook. In the same space, yarn over, insert hook, yarn needle over, pull up loop. 5 loops on the hook. Repeat to get 7 loops on the hook. Yarn over and pull through all seven loops. Ch 1. Repeat from * across.
Row 4: Repeat Row 3.
Row 5: Pick up the first color, which should be at the starting side. Continue with puff stitch pattern picking up the yarn color that was left off two rows down. If you want to change color every row and not have a three row repeat, or you run out of yarn, weave in the ends, or crochet over the ends as you go.
Continue making rows of puff stitches until you reach the desired length.
To finish the edge, single crochet along the top and sides for two rows. Pull yarn through last loop. Weave in ends.
Put mat where the cat can find it.
Photo description: Calico cat with a pleased expression sitting on a crocheted mat.
I modified another t-shirt. I don’t care for crew neck t-shirts (sensory thing with fabric touching my neck), so I cut off the binding, and used black crochet thread to make a blanket stitch all around the neckline, then added a simple chain 3, double crochet repeat pattern row. I like 3/4 sleeves, so I used the same 3 chain, double crochet pattern to lengthen the short sleeves, and added a scalloped edging by making five chain 1, 1 double crochet in every other junction.
Photo description: Black Smashing Pumpkins t-shirt with black crocheted lace at the neck and sleeve.
I am not historically a lace person, but the practicality of it in our Texas heat is appealing. The idea of practical lace also amuses me.
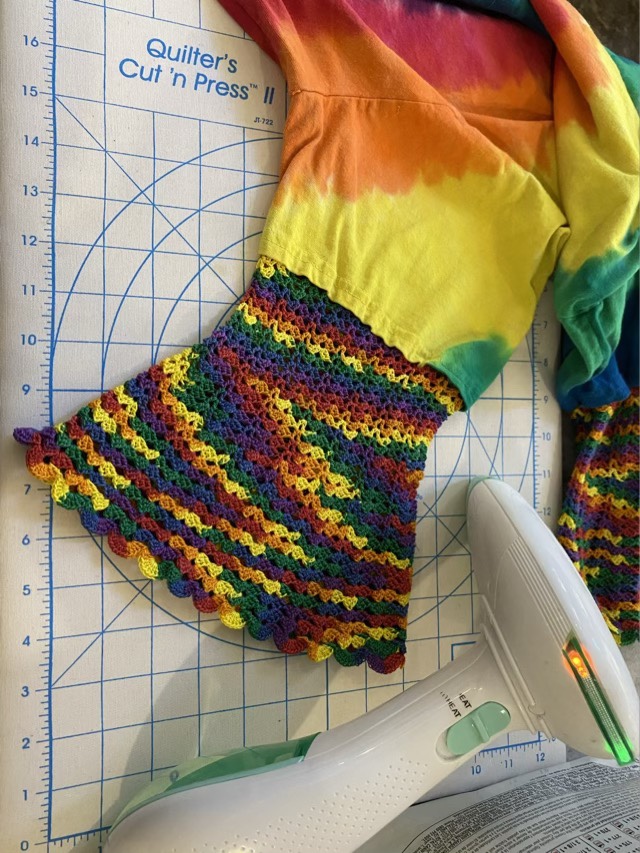
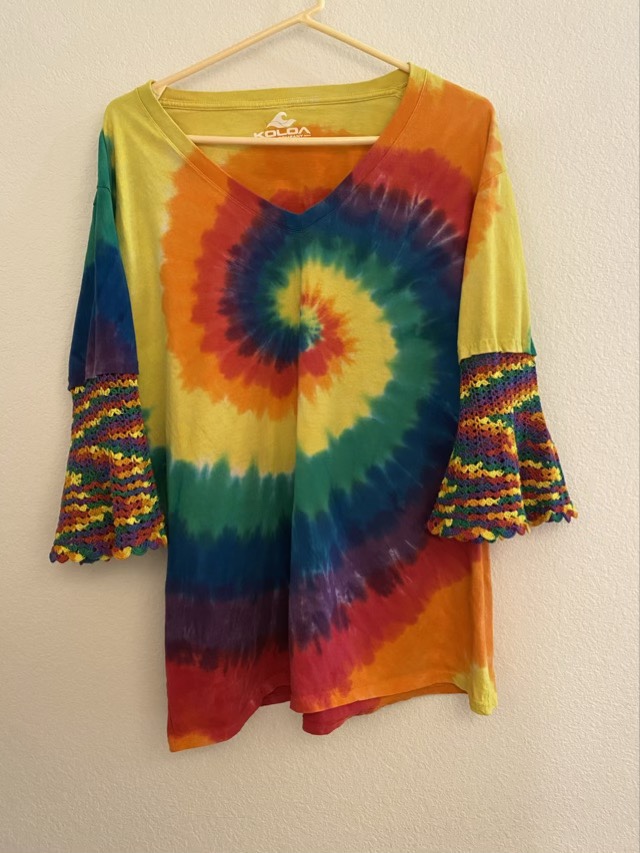
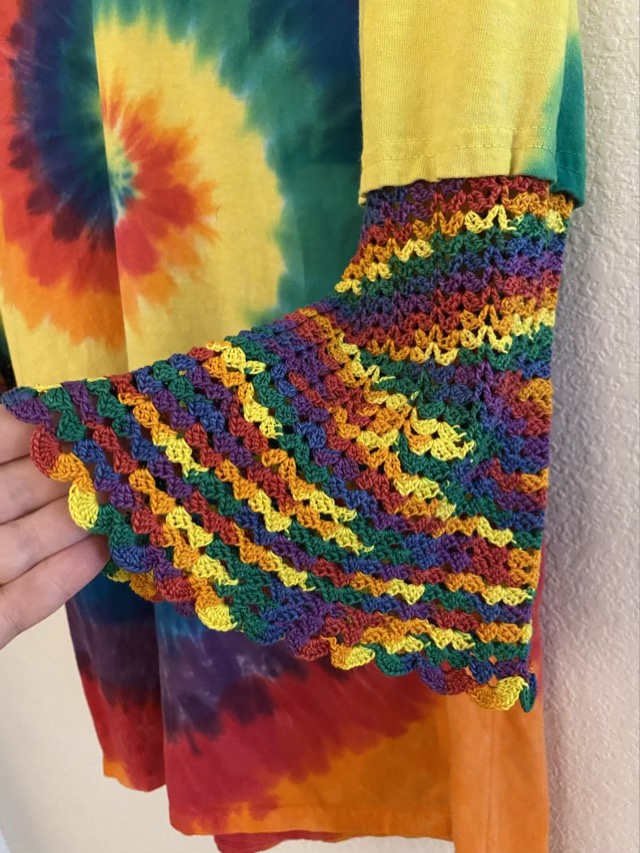
I really wanted bell sleeves on my tie-dyed t-shirt. My first attempt did not please me, so I ripped it out and tried again. I tried some crocheted lace with worsted yarn, but it was too thick and stiff. So I fell back on a crochet standard: number 10 cotton. This cotton is in every craft store, and nearly always comes in at least white, black, and rainbow. It is great for crocheting lace. I sewed a chain stitch to the inside of the sleeve hem, then crocheted in the round a simple alternating shell pattern.
Photo description: Rainbow colored fabric, with a rainbow colored cotton thread sewn as a chain stitch, showing the needle mid-stitch.Photo description: Rainbow colored crocheted lace bell sleeves on an ironing board with steamer at the ready.
When the sleeves were done, I steamed them, which worked brilliantly to even out the stitches. The rainbow thread made serendipitous color pooling as the stitch pattern changed, which goes along with the tie-dye nicely.
Photo description: Rainbow tie-dyed spiral t-shirt with crocheted lace bell sleeves.Photo description: Close-up of bell sleeve being held open.
So here comes the crochet pattern and math, for those that are interested.
With needle and crochet thread, make an embroidered chain stitch around the inside hem of the sleeve. The size of the stitches should be slightly larger than a crocheted chain done with a size 0 hook.
Row A: With a size 0 crochet hook (2mm), join the thread to the first chain, chain (ch 3), double crochet (dc) into the same chain, ch 2, 2 dc in same chain. Skip 2 chains, (dc, ch 1, dc) in same chain. *Skip 2 chains, (2dc, ch2, 2dc), skip two chains, (dc, ch1, dc). Repeat from * around. At this point you can tell if the work is bunching up the fabric, or ruffling out, depending on how long the embroidered stitches were. If it is not to your liking, rip out and use a different number of skipped chains. This is the only place it will matter, just note how many shell sequences you make, so you can match it on the second sleeve. For instance, if you have 72 chains and 12 shell sets, each shell set will span 6 chains, so you’ll skip two chains between shells. A shell set consists of a shell stitch and a v-stitch.
Row B: Slip stitch (sl st) into the center of the first shell, (ch3, dc, ch2, 2dc) into same shell, (dc, ch1, dc) in next V-stitch, *(2dc, ch2, 2dc) in next shell, (dc, ch1, dc) in next v-stitch. Repeat from * around.
Repeat row B, 8 more times, or until the straight part of the sleeve is the length you want. Now we will start the bell.
Row C: Sl st into the center of the first shell, (ch3, 2dc, ch2, 3dc) into same shell, (dc, ch1, dc) in next V-stitch, *(3dc, ch2, 3dc) in next shell, (dc, ch1, dc) in next v-stitch. Repeat from * around.
Repeat row C, 4 more times.
Row D: Sl st into the center of the first shell, (ch3, 2dc, ch2, 3dc) into same shell, (2dc, ch2, 2dc) in next V-stitch, *(3dc, ch2, 3dc) in next shell, (2dc, ch2, 2dc) in next v-stitch. Repeat from * around.
Repeat row D, 4 more times.
Row E: Sl st into the center of the first shell, (ch3, 2dc, ch2, 3dc) into same shell, (3dc, ch2, 3dc) in each shell all the way around.
Repeat row E, 4 more times.
Row F: Sl st into the center of the first shell, (ch3, 3dc, ch3, 4dc) into same shell, (4dc, ch3, 4dc) in each shell all the way around.
Row G: Sl st into the center of the first shell, (ch3, 12dc) into same shell, (13dc) in each shell all the way around.
Join first shell, weave in ends, steam.
It writes up much more complicated than it works up.