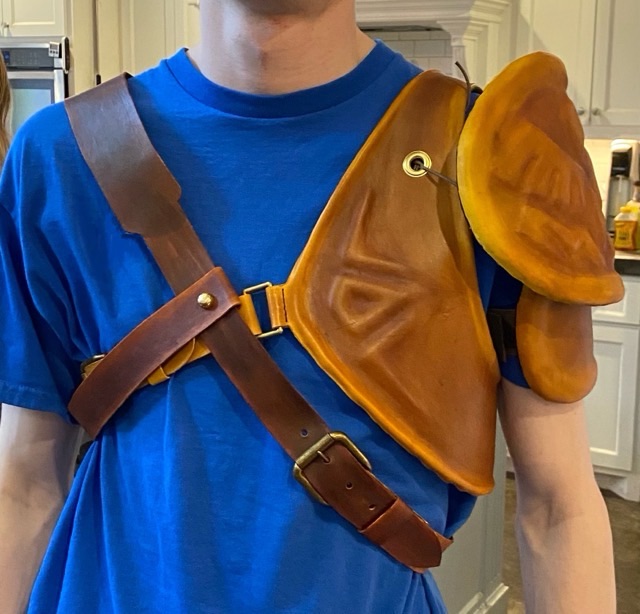
Reveal! Here is a picture of the two leather cosplay pieces I made for a Link costume.
Photo description: leather pauldron, vest, and cross-chest belt made from EVA foam sheet and 3/4 oz tanned leather
I think the pieces came out well, especially for cosplay. I hope that they hold up to use. The sewn areas should be fine, it is traditional construction for leather. It is the foam and hot glue that I worry about.
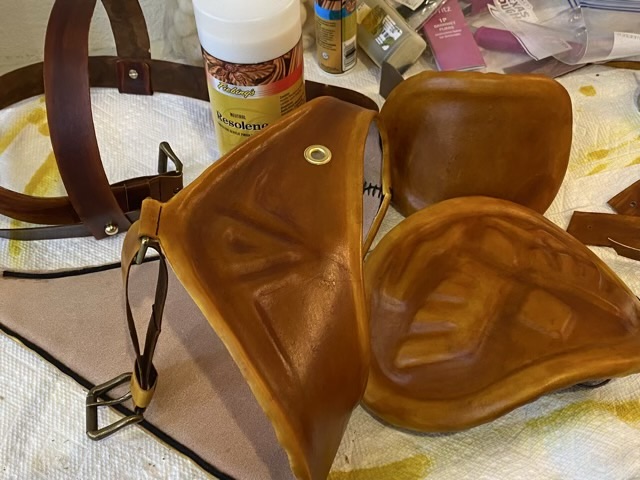
I did put a sealing coat on all the leather to help protect it from accidental spills. It put a nice shine on the leather as well.
Photo description: finished pieces coated with Fiebing’s Resolene
For the finishing touches on the cosplay Link armor, I used leather cement to attach the leather to the EVA foam, so the leather didn’t loose form when worn. To retain the rolled edge, I glued in cotton macrame cord.
Photo description: leather cement used to attach EVA foam and cotton cord to the underside of the vest
I sewed on metal buckles and hardware using a saddle stitch and corset stitch with waxed linen cord.
Photo description: square link sewn into the leather of the vest with a saddle stitchPhoto description: laying out the holes for a belt buckle and leather stayPhoto description: finished leather belt with cross strap attached with brass mushroom screw rivetsPhoto description: inside of the pauldron pieces with the lower one secured with wide elastic, and the upper one with cotton cord ties
For future reference, when placing grommets, make sure your pliers can reach the intended location. I set my grommets in too far, and had to use a vice to attach the metal, which was a pain.
Photo description: useless grommet pliers because I set the hole too deep
Time to dye the leather cosplay armor pieces. Where I am not partial to dying fiber, I don’t mind dying leather. Fiebing’s leather dyes are easy to use, especially with daubers or large wool pads (synthetic works fine too). First, I lightly dampen the leather, not so much that the color changes, but so that it is cool to the touch. Then I apply the color. The method of application effects the final color variation; small circles with a dauber produces a mottled color, large swipes with a pad gives more even color, but without some of the interesting depth. Applying color over existing color produces different looks as well. I always do a color swatch test when color is critical.
Photo description: freshly dyed leather treated with Buckskin colored dye
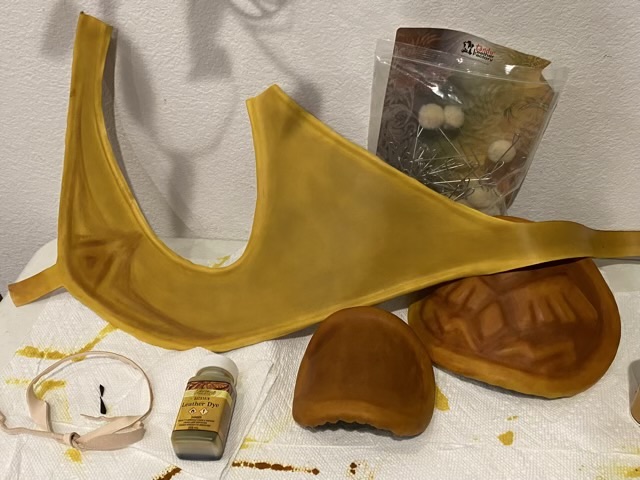
When the leather dried, I had a surprise.
Photo description: dried dyed leather, but the vest is several shades lighter than the pauldron pieces
The pauldron was a nice brown, but the vest was yellow, and they should have matched. What happened is that when I dyed the leather, the pauldron pieces were dry, and I rewetted them. The vest was still wet from shaping. They had a similar moisture content by feel, but obviously not a similar dye take up. Rewetting the vest and applying several more coats of dye fixed the issue.
For the straps, I dyed the underside with a dark brown dye, which also changed the surface color. I liked this effect, because Link’s armor is not all one color.
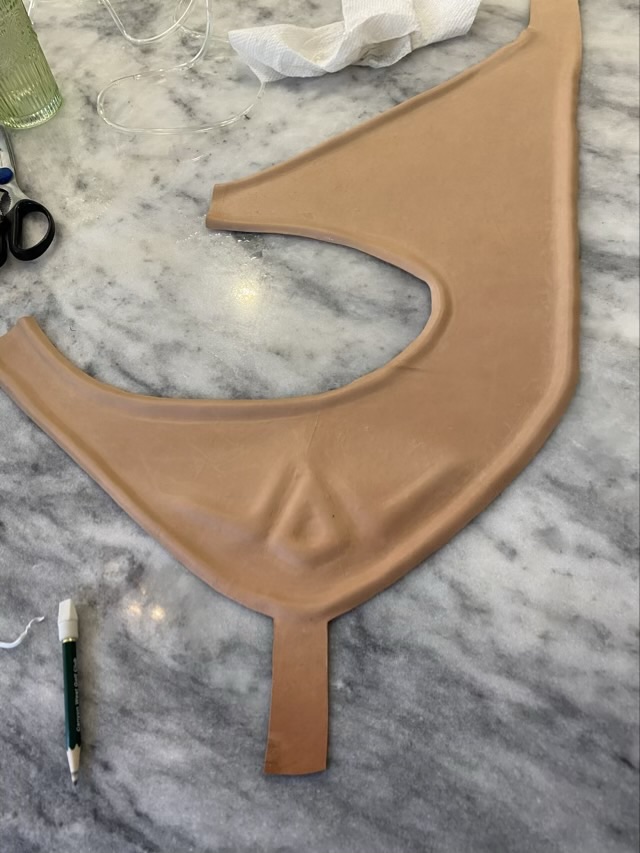
Now we get into wet shaping the leather I cut for the cosplay Link armor. To help bulk up the shape and give me something to shape to, I made forms from EVA foam sheet. The foam is water proof, so wet shaping the leather won’t damage it.
Photo description: EVA foam sheet formed into a two piece pauldron Photo description: 3/4 oz tanned leather wet formed over the EVA foam formPhoto description: leather vest wet formed with pieces of cut EVA foam and clear tubing
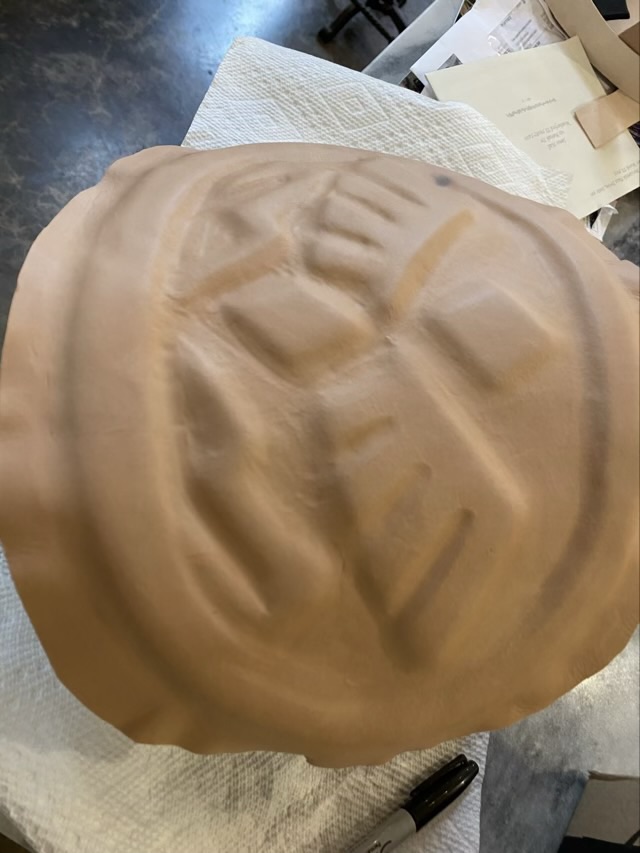
I continued to press the shape into the leather as it dried. The clear tube that I used the shape the edges of the vest worked well to start, then I removed it and hand shaped the ridge. When the pauldron pieces were dry, I trimmed the edges so they just wrapped the edges of the foam.
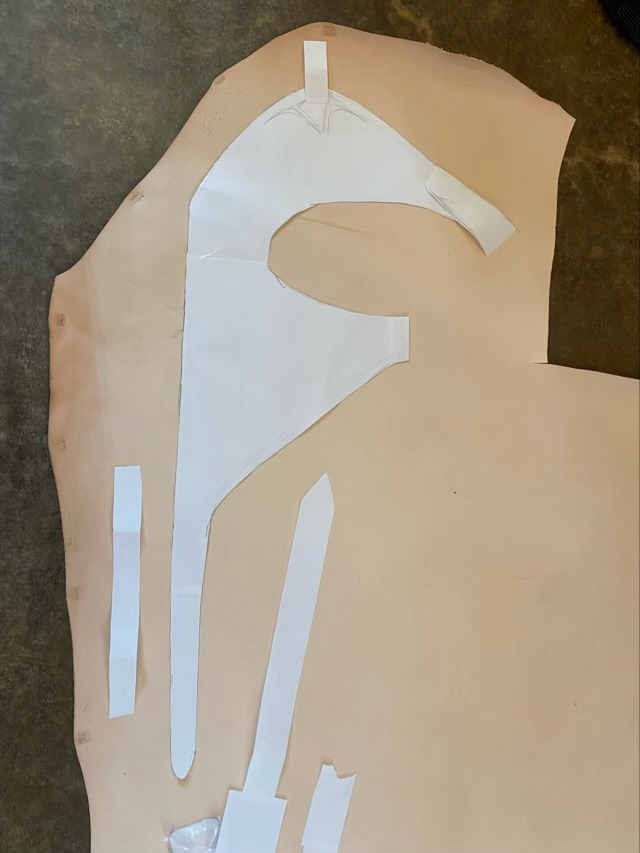
Yahaha! I’m not done making Zelda cosplay pieces! Yay! I also jumped on the opportunity to make some leather armor for a Link costume. I cut pattern pieces from paper for the fitting, then cut the leather using the paper as a guide. The leather is vegetable tanned tooling leather 3/4 oz, which is thinner than typically used for actual armor, but is suitable for cosplay where it is better to be light weight.
Photo description: paper patterns laid out on a side of tanned leather
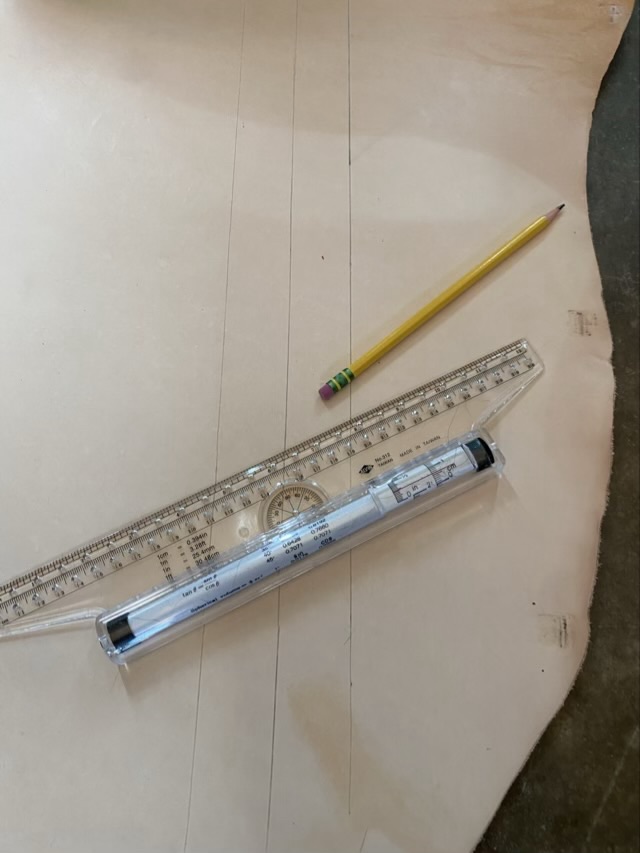
I used my rolling ruler to lay out strips of leather for belts. It isn’t as precise as a strip maker, but worked better than I thought it might.
Photo description: rolling ruler and number 1 pencil on a side of leather marked with pencil lead
3/4 oz leather can be cut easily with kitchen shears, which also makes it nice for cosplay applications.