In September 2014 I made a button art tree by sewing colored buttons to a stretched canvas.
Photo description: tree on canvas made entirely with sewn on buttons
My button grandma had a high distain for anything that destroyed buttons, such as glue or cutting off the shank, since that makes them unsuitable for button collectors. So all the buttons are recoverable from this art, should they need to be. I do like how I used the lighter colors to indicate light direction.
In May of 2013 I was into making sculptural wood and wire photo frames.
Photo description: oak wood photo frame with wire tree and Mother of Pearl buttons as leaves
I cut the frame from hardwood, sanded and finished it, then put a peg hole and dowel in the back to function as a stand. I drilled holes for the wires, epoxied them in and shaped them. I added tabs to the back to hold the photos in. Did I take a picture of the back? Not of this one.
Photo description: back of an owl photo frame showing peg stand, metal tabs, and hanging hardware. The eyes of the owl were fused glass with iron oxide pupils that matched the tone of the wood. the back of the eyes can be seen in the photo.
My photo skills took a slip back at this time. Many of the photos for the other frames were blurry, or at a strange angle, and others were taken with photos in them. Some of the photos of photos were decent, but since I don’t post faces on this blog, it made them unsuitable for future use. In my past-self’s defense, I had two young children and I’m frankly lucky to have remembered to take pictures at all.
In September 2011 I was experimenting with ways to make jewelry from buttons without destroying the button. One of Grandma’s pet peeves was when buttons had been glued or cut to “upcycle” them (she was a button collector).
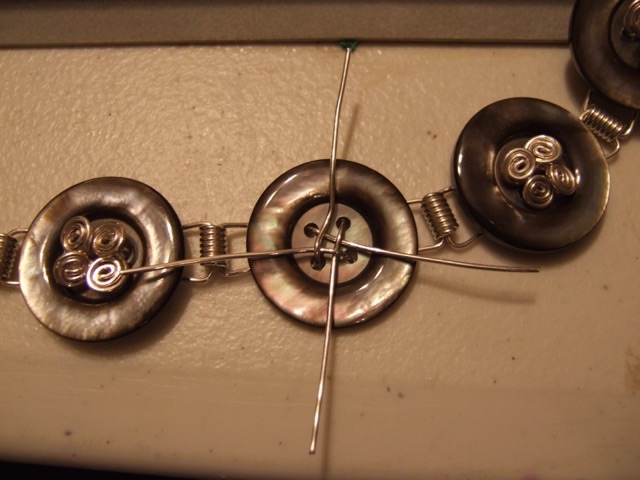
I came up with a wire wrap that utilized a four hole button, making it into a link component.
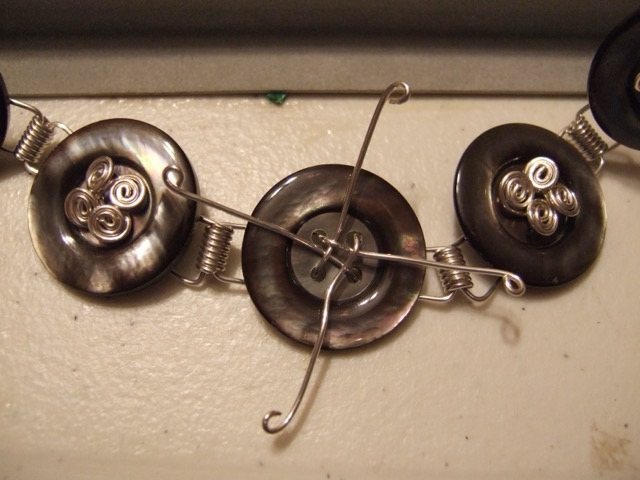
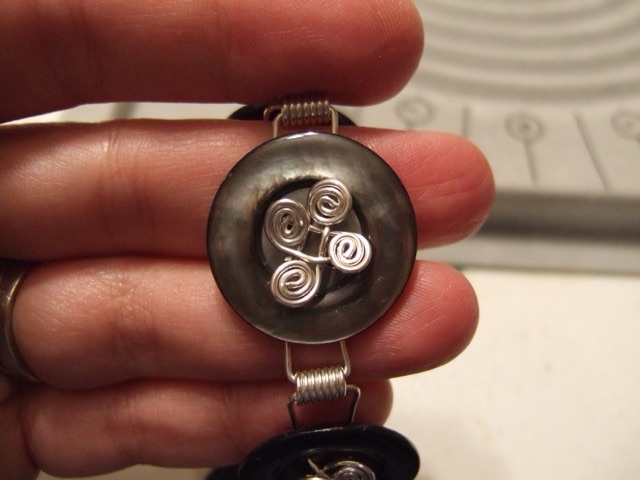
Photo description: first step of a button spiral cluster using two pieces of 20 gauge sterling silver wire threaded though hand made wire coils, then the button holes, then interlocked Photo description: step 2 begins making each leg of wire into a spiralPhoto description: close up of finished spiral cluster securing a button nondestructively Photo description: full necklace with identical buttons wire wrapped in silver
I actually took production photos for this necklace, for which I am now very thankful.