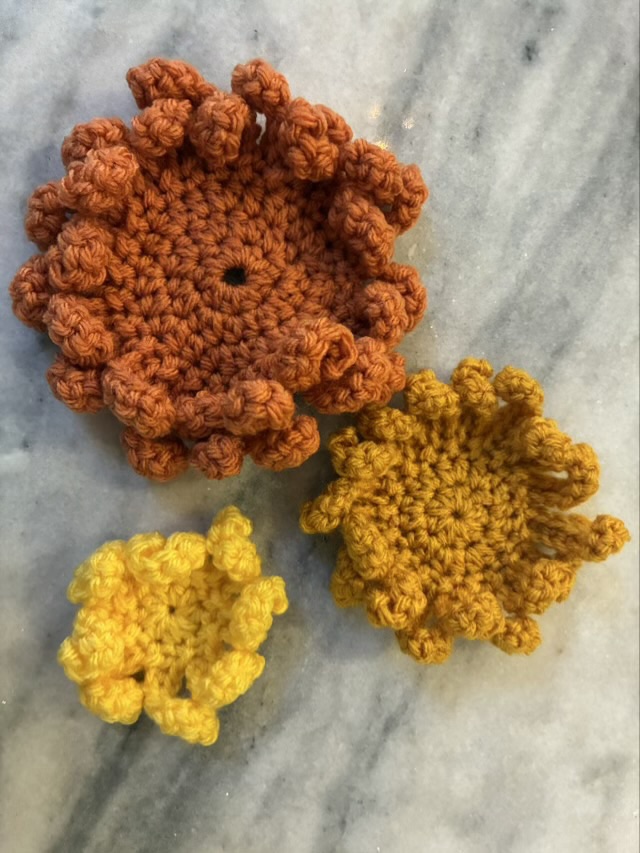
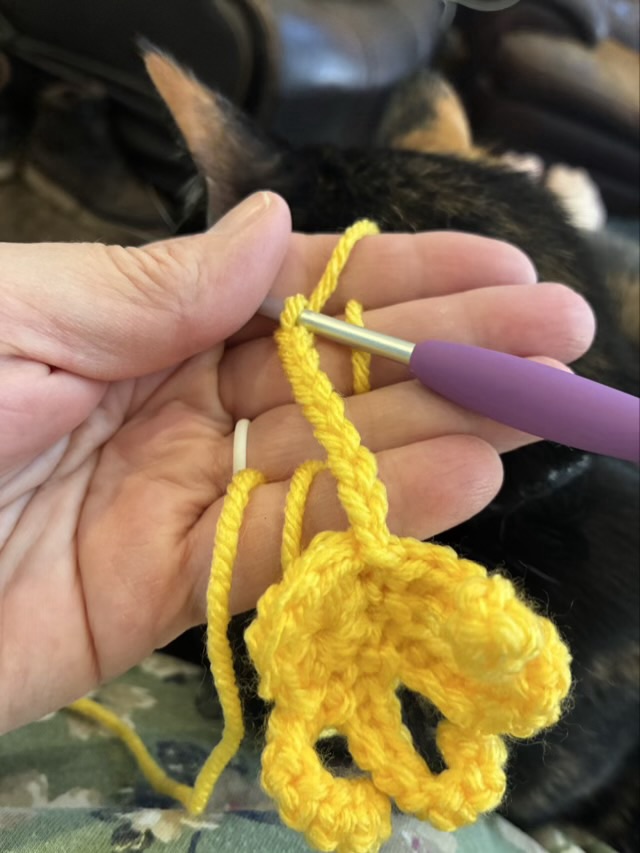
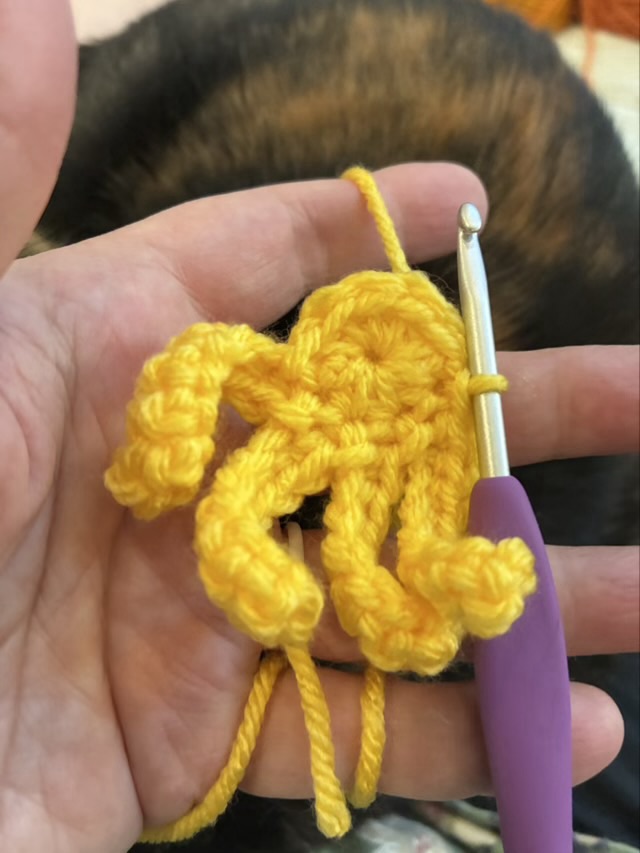
I’m experimenting with crocheted flowers for my wreath. To make a mum-like flower I used four colors of acrylic yarn and made four layers of petals, each with the same type of “petal” but with different diameter centers and thus different numbers of petals.
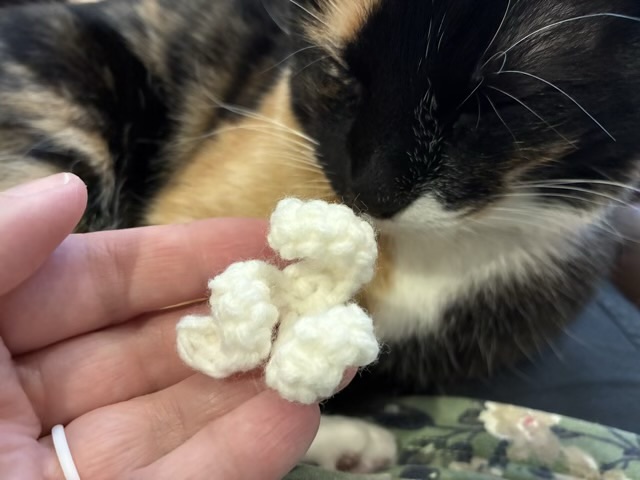
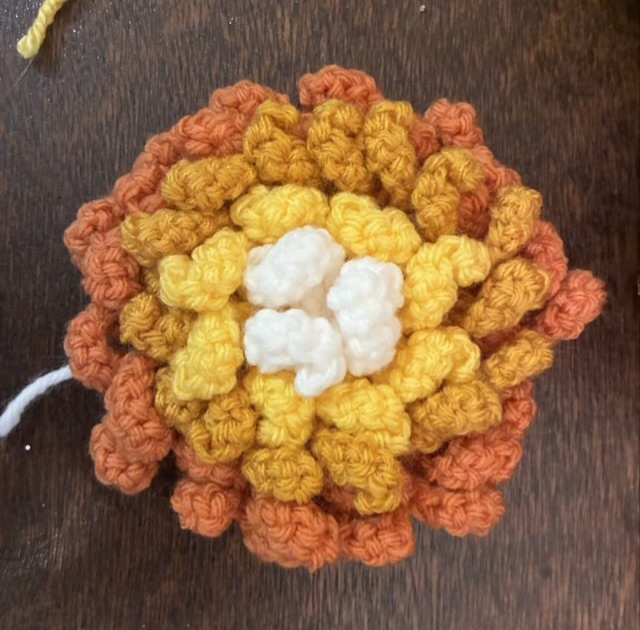
Photo description: first three layers for the crocheted mum in shades of yellow and orange showing the difference in center size and petal countPhoto description: center layer in white acrylic yarn with no center and just three petalsPhoto description: the assembled crocheted mum with four layers of color from white to yellow to orange
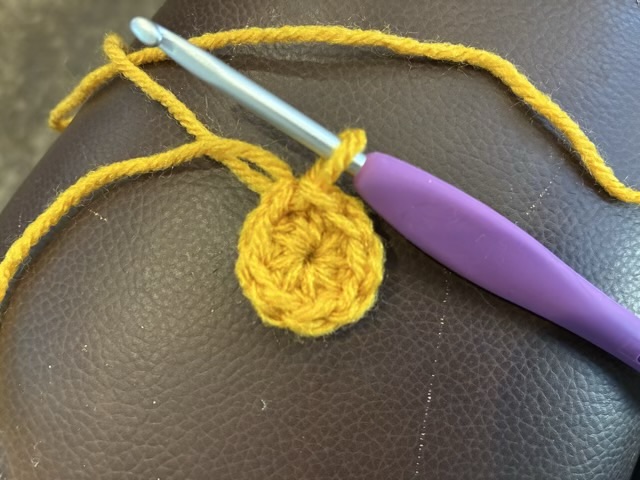
To make the layers, half double crochet into a magic circle eight times, slip stitch to join.
Photo description: eight half double crochets into a magic circle, with the circle pulled tight and slip stitched into the first half double crochet
To make the petals, chain 9.
Photo description: yellow petal layer with the start of a petal with nine chain stitches
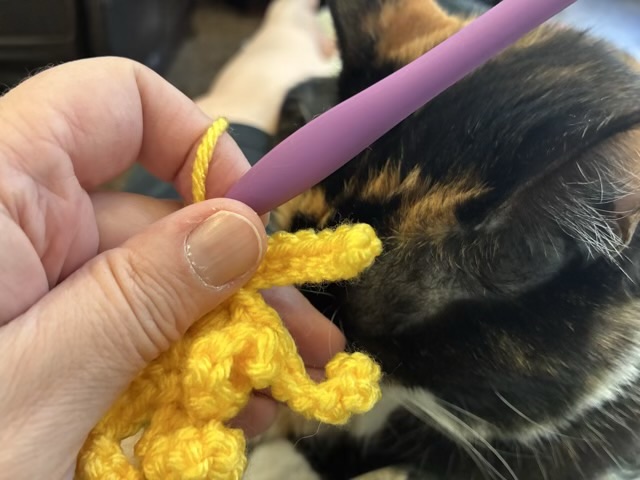
Skip the first chain and single crochet eight along the rest of the chain.
Photo description: single crochets along the chain to give the petal width
Slip stitch into the next double crochet on the round. Then make the next petal.
Photo description: four petals completed on the yellow round
For the other layers, add a round of half double crochet increases to the center before adding the petals.
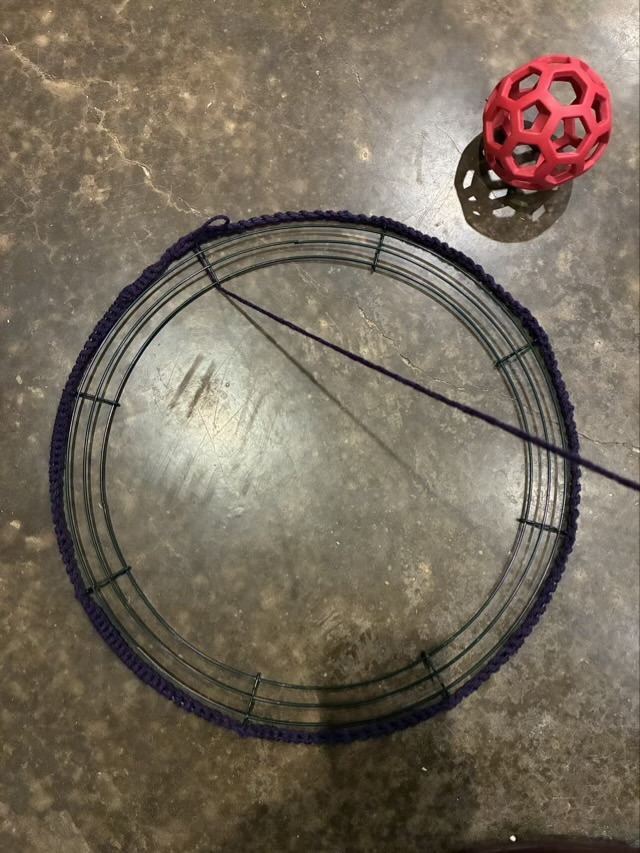
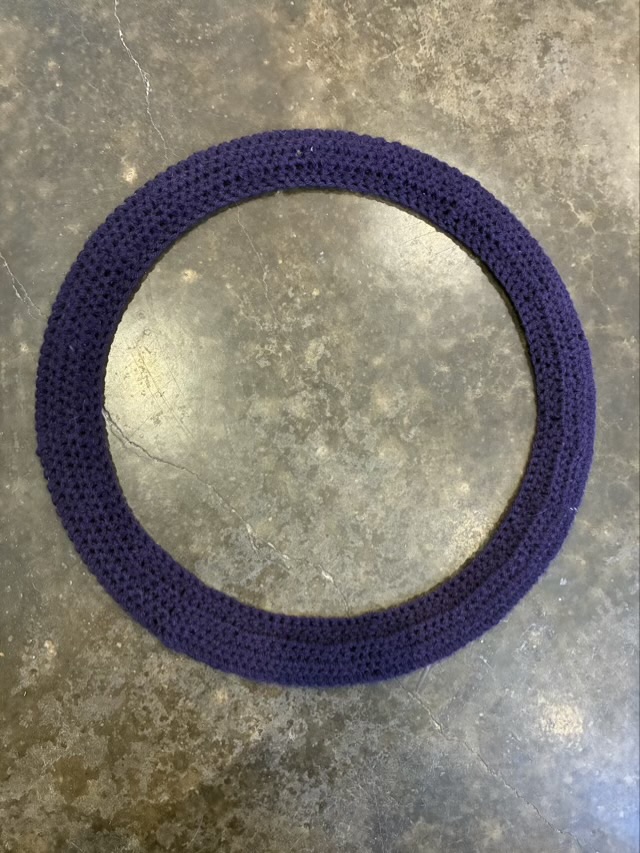
It might be easier to secure the elements of my Spring crochet wreath if I had a solid foundation to sew to, so I crocheted a cover onto a wire wreath frame. I started with a single crochet all along the outer edge.
Photo description: wire wreath frame with single crochet around the edge with dark purple acrylic yarn, red holey-roller bag ball upper right waiting to be thrown
I added rows of double crochet around the frame, using decreases every fifth or sixth stitch to adjust the fit. To finish, I did another row of single crochet to the inside wire. Here is a video short demonstrating the technique.
Photo description: back of a wire wreath showing that the crochet is connected to the frame on the outside and inside wire onlyPhoto description: front of the wreath frame covered with crochet using dark purple acrylic yarn
Now I will have more options when securing my botanical elements to the frame.
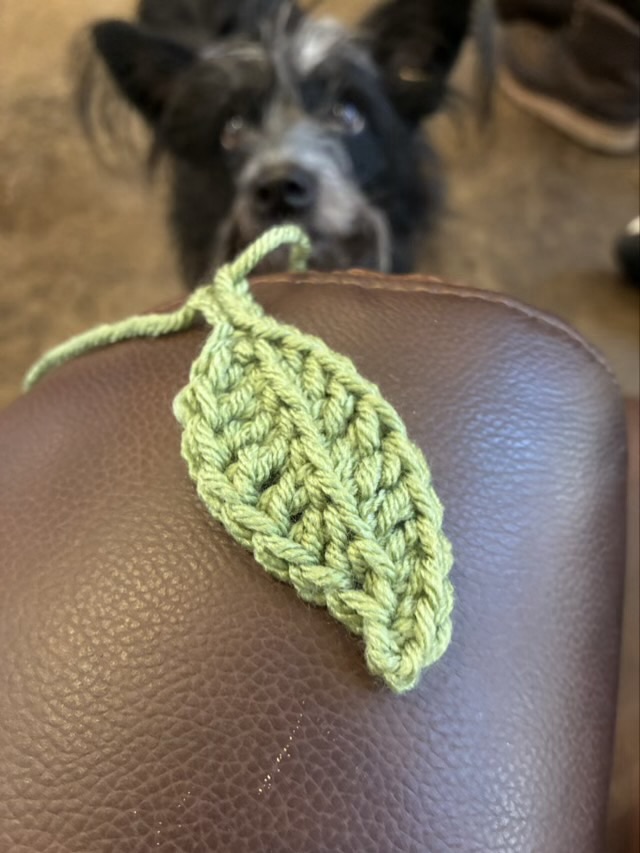
To crochet a simple leaf, my favorite method is to make a foundation row, then crochet in the back loop back down from tip to stem. The foundation row is regular crochet stitches with a single chain added in the middle of working the stitch. This gives a chain-like structure on both sides.
Photo description: crocheted leaf made in two “rows”
First Foundation Half Double Crochet (ffhdc): yarn over (yo), insert hook in second chain from the hook, yo, pull up loop, ch 1, yo, pull through three loops.
Foundation Double Crochet (fdc): yo, insert hook through two side loops, yo, pull up loop, ch 1, yo, pull through two loops, yo, pull through two loops.
Fdc again.
Foundation Triple Crochet (ftc): yo, insert hook through two side loops, yo, pull up loop, ch 1, yo, pull through two loops, yo, pull through two loops, yo, pull through two loops.
Ftc again.
Two fdc.
Foundation Half Double Crochet (fhdc): yo, insert hook through two side loops, yo, pull up loop, ch 1, yo, pull through three loops.
Foundation Single Crochet (fsc): insert hook through two side loops, ch 1, yo, pull through two loops.
Ch 3.
Single crochet in back loop (scbl).
Double crochet in back loop (dcbl).
Dcbl.
Triple crochet in back loop (tcbl).
Tcbl.
Dcbl twice.
Half Double Crochet in back loop (hdcbl).
Slip stitch down the initial chain.
To make a sharper leaf tip, slip stitch the ch 3 together. To make different shapes, combine different numbers of stitches. You don’t necessarily need to match fdc with a dcbl.
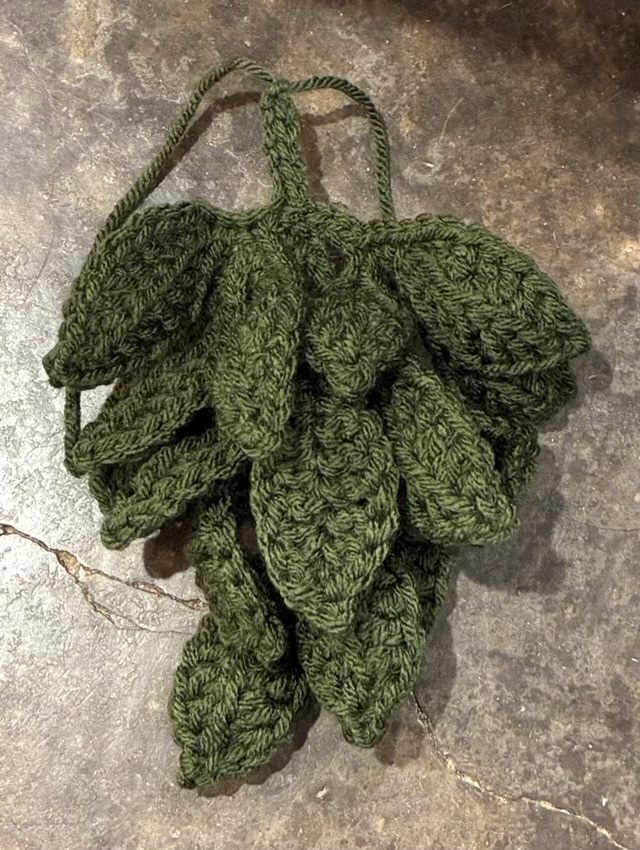
To make a cluster, finish a leaf, then chain again without tying off. Vary stem lengths. clusters of three work well.
It is amazing what can be made with just chains and slip stitches in different combinations. The foliage below is made by chaining, then folding the chain back on its self and securing with a slip stitch to make a loop. Combine several loops into clusters and make stems by slip stitching along a chain, and it makes an interesting botanical shape.
Photo description: crocheted botanical element with eleven branches with clusters of looped chain
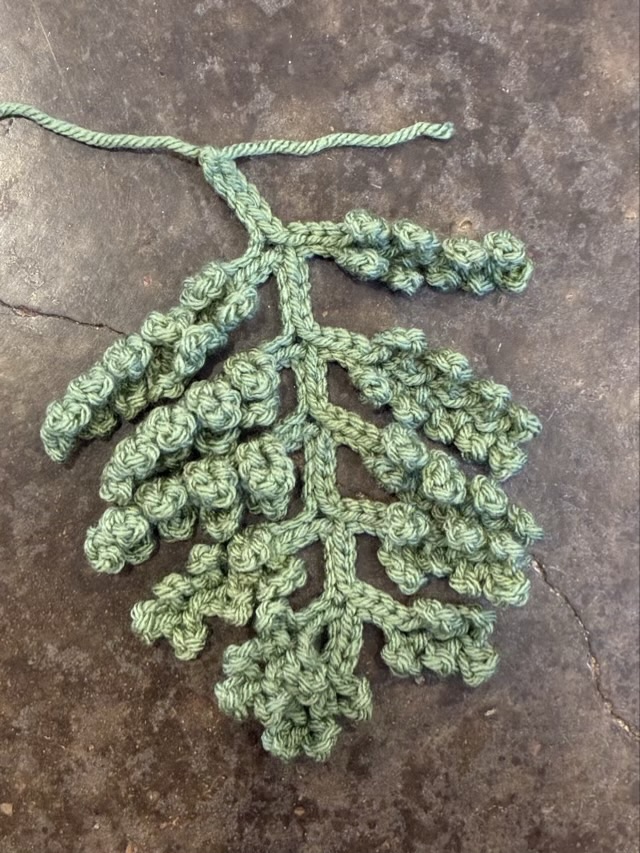
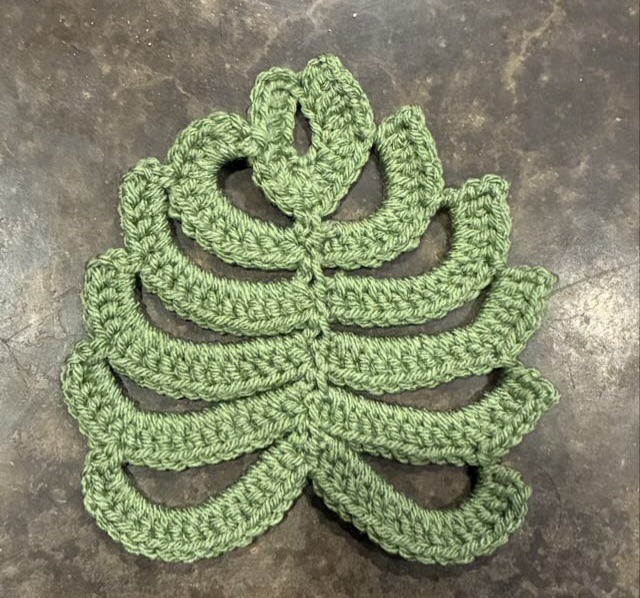
Photo description: crocheted green Monstera leaf, or maybe moldy ribs
I followed a chart for a Monstera leaf that uses crocheted chains, slip stitches, and double crochet. The leaf looks complicated, but it is a simple concept: make a chain, slip stitch into the center, make another chain, slip stitch into the previous rib, then turn and double crochet back to the start.
I don’t really like that there isn’t much to the center of the leaf. I’ll have to come up with my own pattern.