I saw a Josephine knot based basket as I scrolled Pinterest and was immediately captivated. The construction made sense and I loved the look of the starting knot. I still had #2 reed, so I gave it a go.
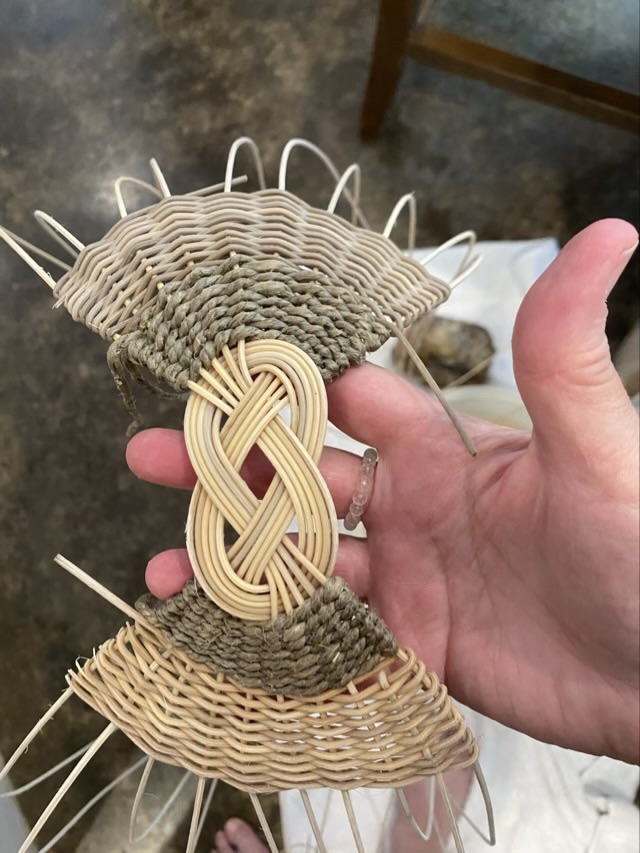
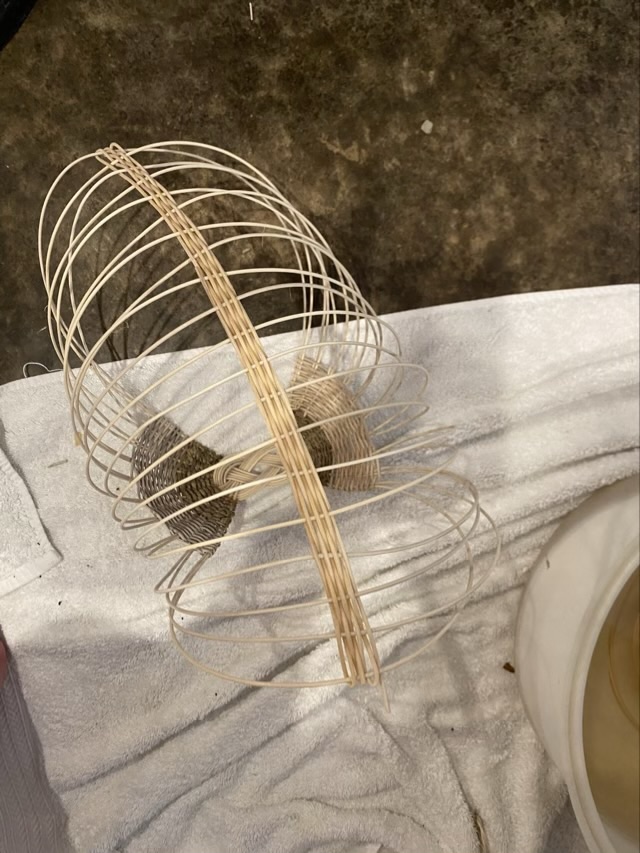
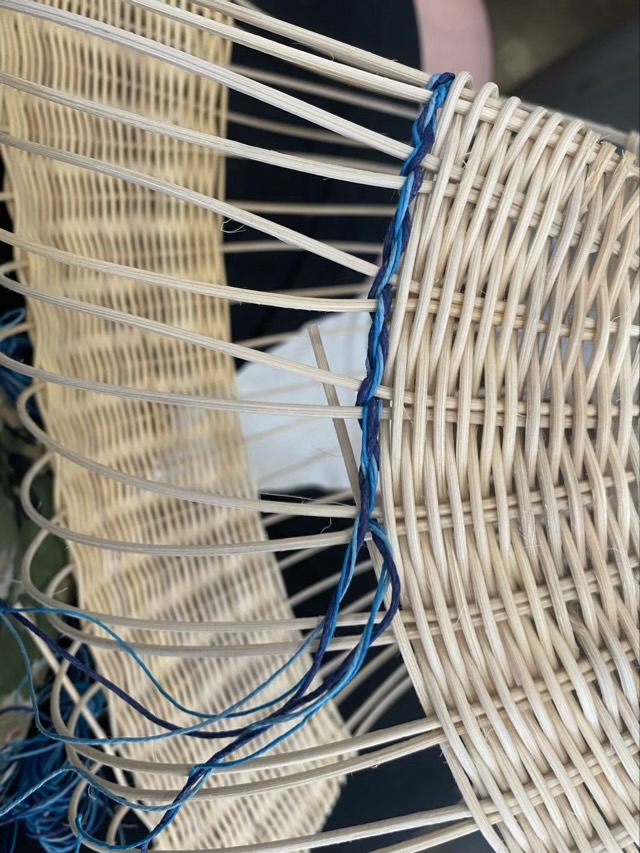
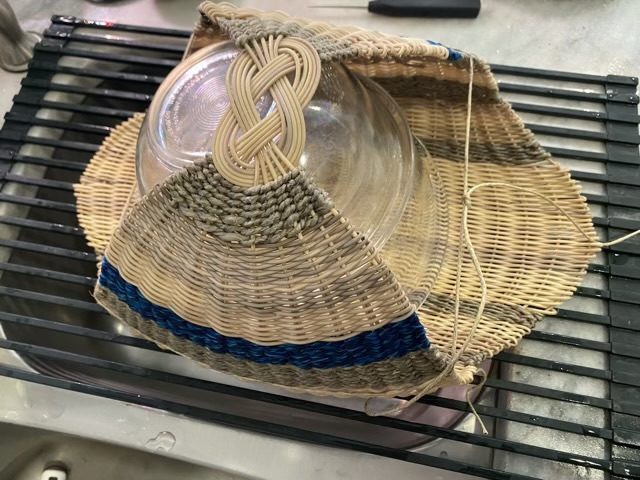
My Josephine knot basket starts with ten reeds divided into two groups and woven together in a figure 8, then the stakes are woven with hemp rope and more reed.I took the reed from each side and tucked them into the woven sections on the opposite side. I used a rolled mat as a form to get the cylinder even. I still had to adjust the staves as I wove.Once the staves were set, I started weaving from the bottom of the basket to get the spacing set.When the bottom section of the basket base woven, I then switched back to weaving down from the sides, which I wouldn’t do again. I think the edge of the basket would arch nicer if I had continued to work from the base up.I added some blue colored hemp cord. The cord was thin, so I combined three shades and twisted them together as I twined the two halves around the basket staves.Where the bottom weaving met the side weaving was a little tricky because there wasn’t much space. I used more hemp rope because it was flexible enough to take tight turns and fill in the gaps.I soaked the completed basket in water, weighed down with a bowl to keep it submerged.I used bowls and twine to shape the basket as it dried.The finished, dried basket maintained the shape, and had a flat bottom which makes it stable on a table. I was pleasantly surprised that I could block the basket as I do with cloth.
When I do another of these baskets, I want to use a larger reed for the knot and staves, but still do a combination of #2 reed and cord for weaving the sides. Once I have the knot secure, I would weave from the bottom up. This basket took me a few days of interrupted time to complete.
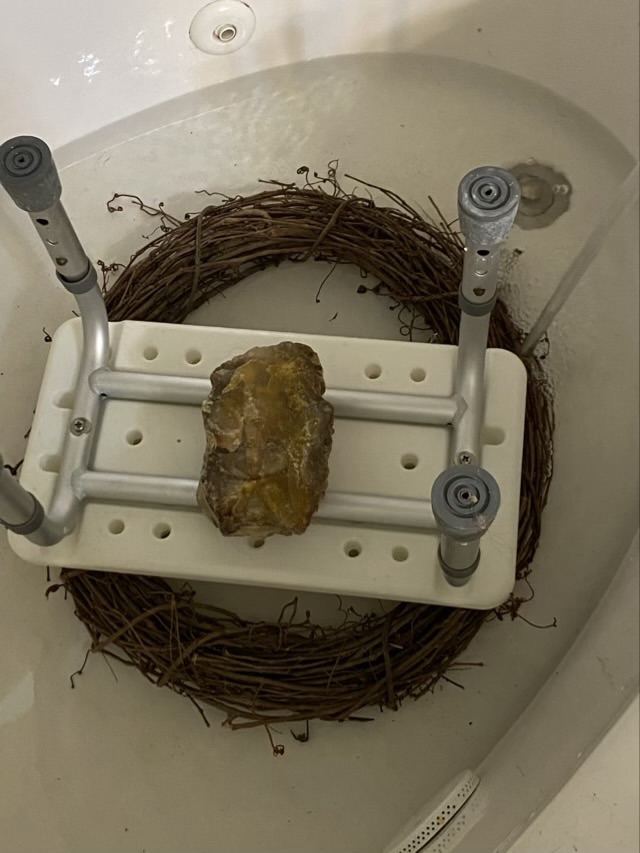
I really like random weave objects that are well done, so it is on my craft bucket list to practice random weaving. I realized I had a source of dried grapevine readily available in the wreath blank hanging on the front door. I filled the bathtub with water, weighted down the wreath, and let it soak for two days.
Photo description: grapevine wreath soaking in a tub with an upside down shower stool and a rock weighing it down
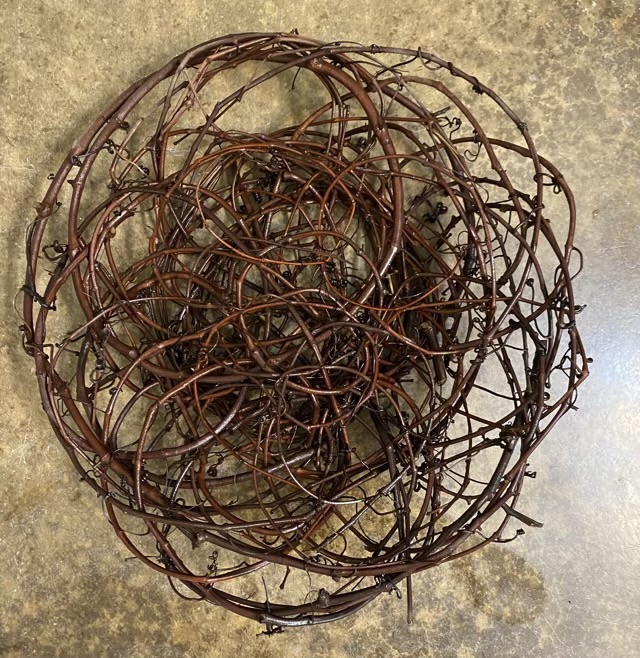
The random weave started out fine; I used loops and interlocked them as I circled around. The problem came when I tried to make the sides curve to make a basket. It stubbornly kept returning to a flat state. Hm. I kept at it for while, then acquiesced to the material’s demands. I finished weaving in all the vines that would weave (a portion was too thick, some were too short, and some were too brittle.) I then took all the little tendrils and wrapped them around nearby vines to lock the weave in.
Photo description: flat random weave still wet on the floor
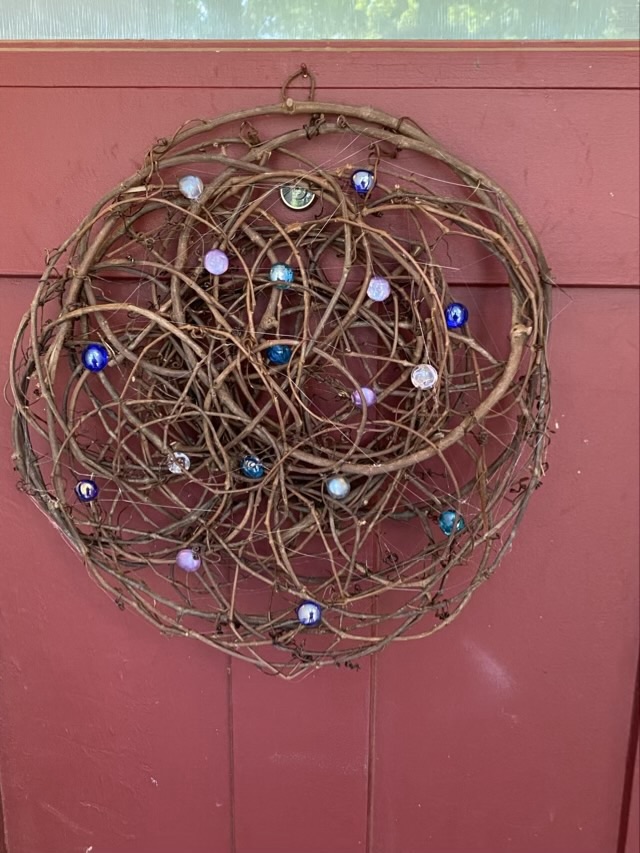
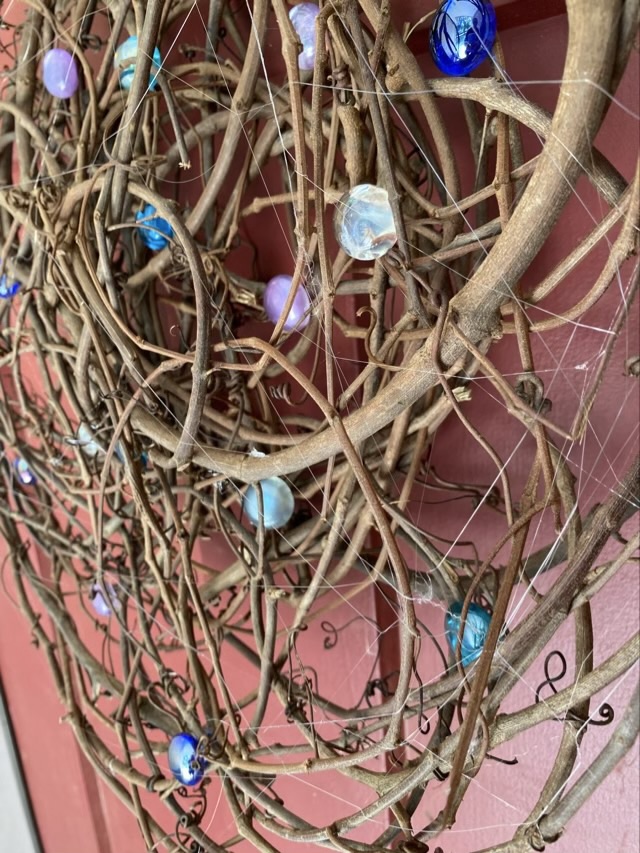
I decided to hang the … object… back on the door. When it was dry I added some colored glass drops using some hot glue, then added fake spider silk by stretching out hot glue strands to give the disc even more of a tangle feel.
Photo description: grapevine tangle with glass drops hanging on a red doorPhoto description: closeup side view of the grapevine tangle showing the hot glue strands
I think my issue was trying to make a medium sized basket with larger sized vines. And next time I think I should work on a form that has the shape I want.
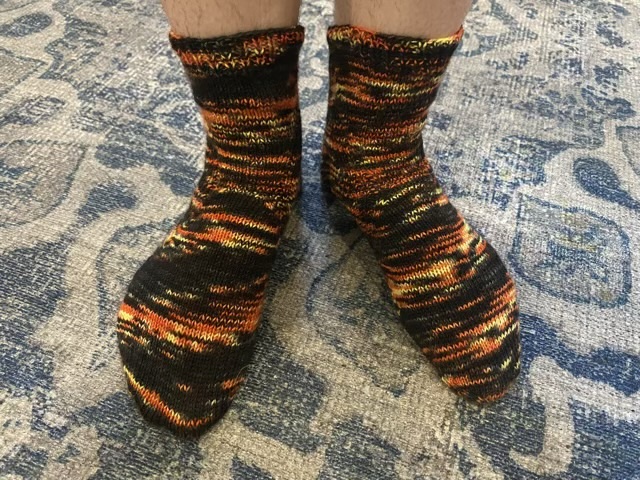
I cast these socks on in April, 2024. I called them finished 13 months later. My eldest graciously said they could end below the calf (phew).
Photo description: crew length black, orange, and yellow hand knit socks shown on feet
The Singularity pattern by Jeny Staiman is amazing. The instructions laid out in a spreadsheet format are so much easier to follow and mark off than traditional written instructions. The pattern itself is elegant. My issue was personal: I chose mostly black yarn, knitted with black needles, and am not a fan of following a pattern line by line. I would rather have a general idea and knit for many rows, or maybe have a repeating pattern that I can memorize. It is a shame that the yarn also doesn’t show off the pattern. You can’t see the beautiful sweep and contours created by all those paired increases and decreases.
I have cast on a new pair of socks using a different sock method. This set shouldn’t take me over a year to finish (fingers crossed, but not while knitting.)
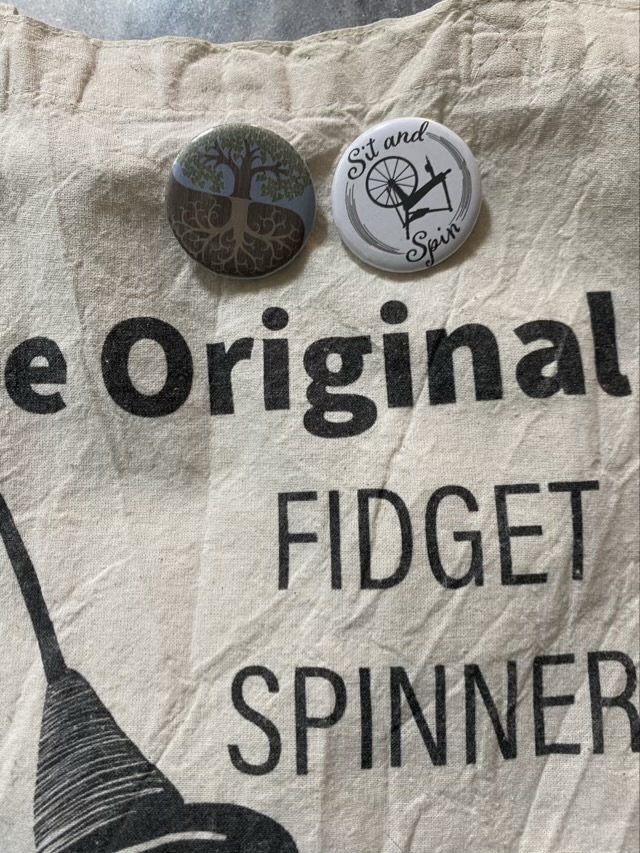
My eldest gave me a button maker for Mother’s Day. I can now make cute little pins and magnets and other pressed together items with my chosen image.
Photo description: two button pins on a canvas bag, one with a Caryn’s Creations logo, the other with a “Sit and Spin” logo. Bag and pins designed by me.
The word “button” is used for so many things. I’ve been on a whole rabbit-hole excursion on the definition and etymology of the word because it bothers me that a button can be something used to fasten a garment, or as a pin with a slogan, or something you push. Knowing that word comes from a number of sources helps, somewhat. Ah, English.
In September 2014 I made a button art tree by sewing colored buttons to a stretched canvas.
Photo description: tree on canvas made entirely with sewn on buttons
My button grandma had a high distain for anything that destroyed buttons, such as glue or cutting off the shank, since that makes them unsuitable for button collectors. So all the buttons are recoverable from this art, should they need to be. I do like how I used the lighter colors to indicate light direction.