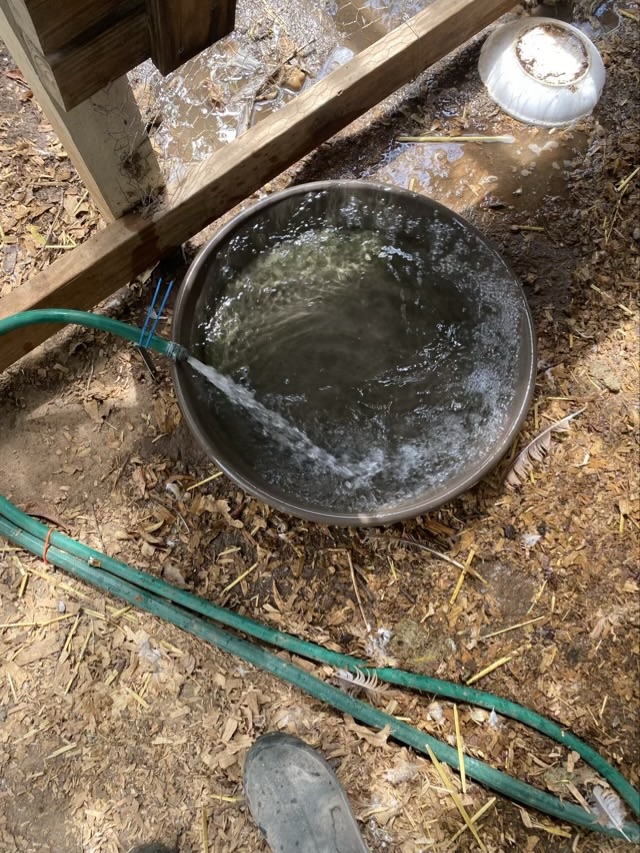
Concave double walled basket

This is my third double walled basket and I can definitely see my skill improvement. I wanted a larger, concave shape, and I was able to achieve the shape I wanted.

Photo description: starting the inner wall of the basket with added stakes, my next weavers soaking in a bin of water at my feet
Photo description; the stakes turned and weaving the second wall, again I chose to take the spokes at an angle
Photo description: finished double walled #2 round reed basket
Photo description: bottom edge with each stake woven behind, over, behind in a continuous braid, my best finish yet

I love these baskets. Now I want to experiment with different materials.

Convex double walled basket

I’ve made my second double walled basket, this time on my own. I had most of the tools necessary, except clothes pins. I was rather shocked that I didn’t have any clothes pins squirreled away. (I have them now.)

Photo description: soaking a round reed basket mid-weave, I like the way the spokes spiral

I wanted to make a larger basket, so added in more stakes, but the base was curving up too fast, so I switched to weaving from the inside, letting the spokes flair out, and it gave me a lovely convex curve on the sides of the basket.

Photo description: weaving the outer wall close to the inner wall
Photo description: finished basket made of #2 round reed (rattan palm)

This time around I followed the curve of the reed on the outer wall, rather than adhering to the grooves of the inner wall, which resulted in a spiral effect on the outside that I quite like. These baskets take me a full day to make, and once I start I don’t want to stop, so I have to plan my time carefully.

Throwback Thursday: crocheted basket

In May of 2014 I crocheted a rather large owl basket for my Mom.

Photo description: gray and white crocheted basket with owl eyes sitting on a table

It stands up well when it is filled with towels. I like the spiral eyes as a choice. I believe I used a wool yarn that I had in my stash at the time.

Small twined bag

For my North Carolina grown cotton fiber page I had enough hand spun crepe yarn to twine a small pouch. I used a square of sanded eighth inch plywood as my form and twined until I was about square. To finish the bottom, I ran the warp threads up the opposite side of the bag.

Photo description: half the warp threads woven back through about seven rows of twined weaving with the bag wrong side out
Photo description: all the warp threads woven in and the needle used shown
Photo description: pouch right side out after trimming the warp threads

After I wove in all the warp threads, I realized a probably should have knotted them, then wove them in. Since this bag will only be on display in a book, it won’t see heavy use, but it is something I need to remember for next time I twine a bag. The picture of the pouch looks skewed because there is a bias twist in the fabric. I noticed when I started twining that I was actually untwisting the ply, so I switched my twine direction, which reinforced the ply, but gave it extra twist energy. It should even out after blocking.

Reed coaster

I was so excited about learning to weave baskets that I bought a pound of #2 round reed made from rattan palm. As I prepped stakes and weavers from the coiled bundle, I had shorter lengths left over. My weaver friend told me how to make coasters, so I saved the “waste” reed and used it as the stakes for a small weaving.

Photo description: coaster woven from #2 round reed
Photo description: coaster in use, with a coffee cup sitting on top

These coasters use shorter lengths of reed for the stakes or spokes, and one long weaver that weaves around the middle. It starts the same was as a double walled basket, but stays flat. They don’t take as long to weave as a full basket, and they seem to make excellent little mats for coffee or tea.