Tatted bracelet

I saw a picture on Pinterest of a tatted bracelet that I recognized most of the elements used for construction. I’m having trouble interpreting written tatting instructions, but a picture is almost as good as a chart, and much easier for me to follow. I loaded up my tatting shuttle with #10 cotton, left it attached to the ball, and started with the ring part of the clasp. It took me a few hours to complete, and I carried it around in my purse for a while to work on when I was waiting. The bracelet is worked with the same series of a closed loop and a chain on both sides, and each connection used a picot.
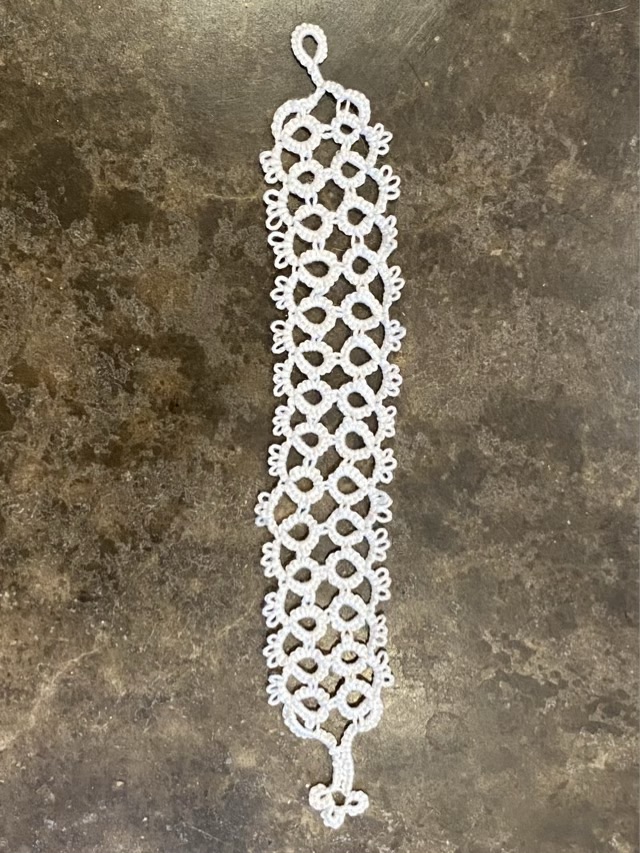
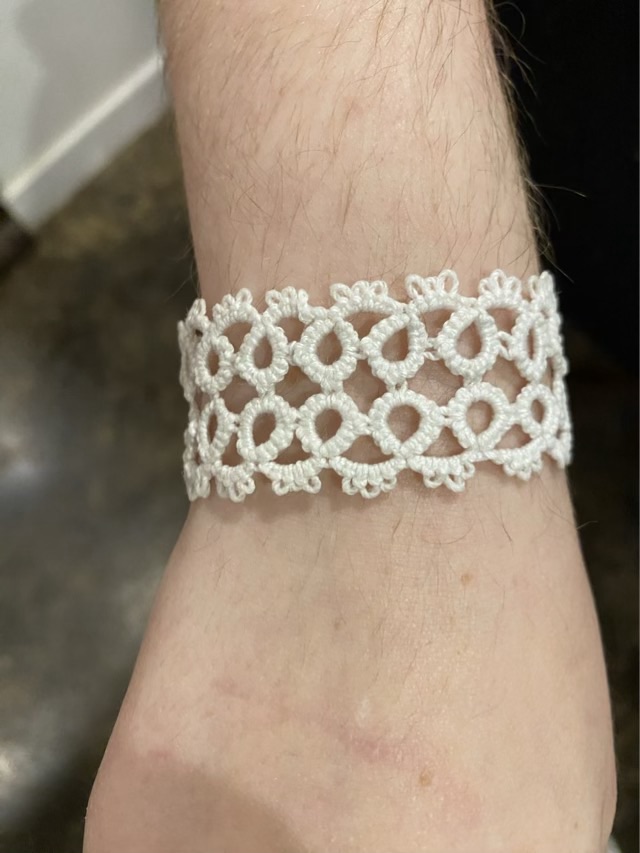
Photo description: Tatted bracelet made of closed loops and chains with three picots. The clasp is made with a ring on one side and a cluster of closed rings on the other side.

I did have to join in more bobbin yarn, but the ends were easy to weave in with a needle. I joined the last chain to the opposite side with a square knot and wove in the ends. To block it, I soaked it in a solution of white glue and water, to give it some stiffness and protect it from staining. I need to experiment with the ratio of glue to water. The bracelet turned out stiff and itchy, and didn’t resist a tea stain when tea accidentally spilled across the counter.

Photo description: Blocking the bracelet on wax paper after soaking in a white glue and water solution.

The clasp works reasonably well, although it takes a different set of hands to close.
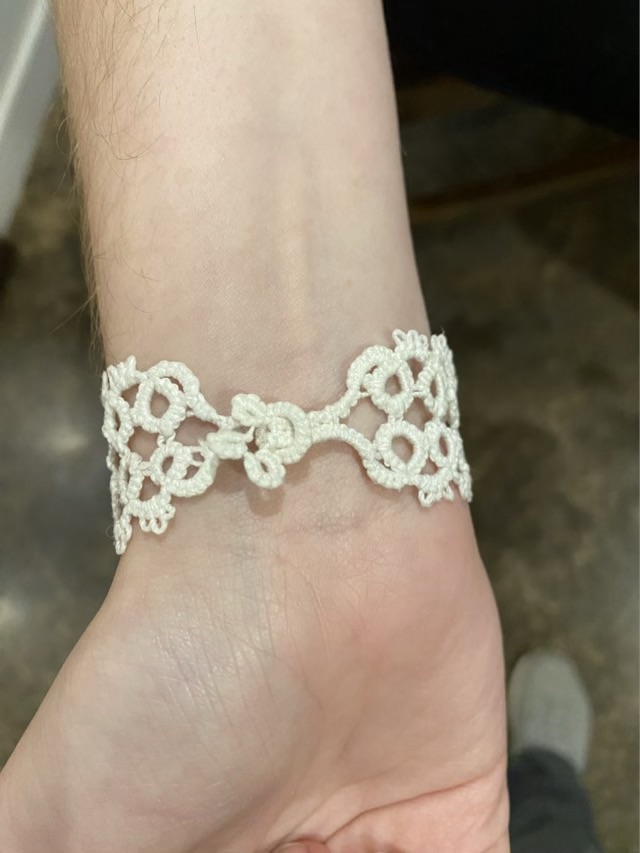
Photo description: Bracelet clasp shown closed with the loop cluster pulled through the opposite loop.
Photo description: Finished bracelet on my daughter’s wrist.

I need to work on the tension of my knots, the consistency of picot size, and the consistency of the closed loop size. I may try another bracelet to get the basics down. The tatted lace is sturdier than crocheted lace, but the counting slows me down, and I need a different way to hold the shuttle so it doesn’t hurt my thumb. So, not my favorite craft, but could be useful in a future project on a small scale.
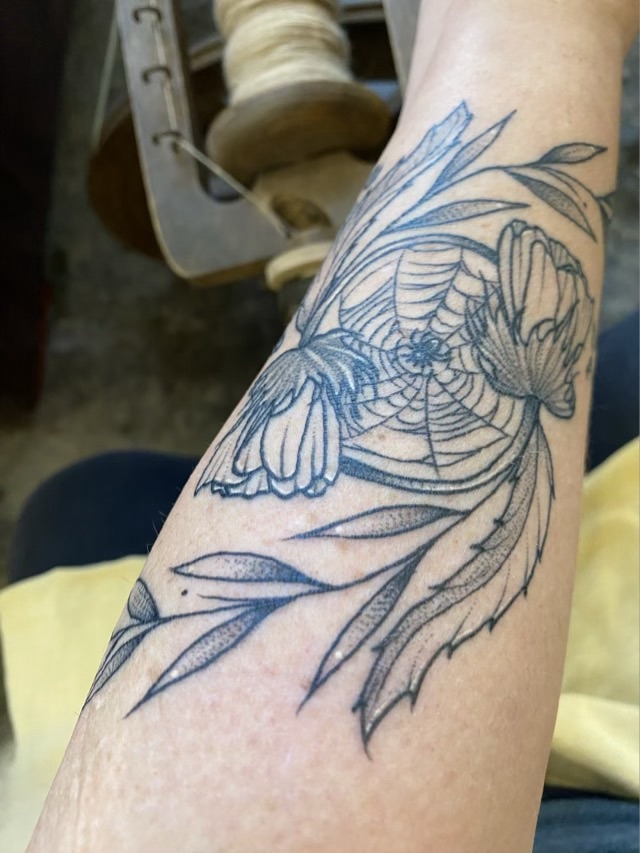
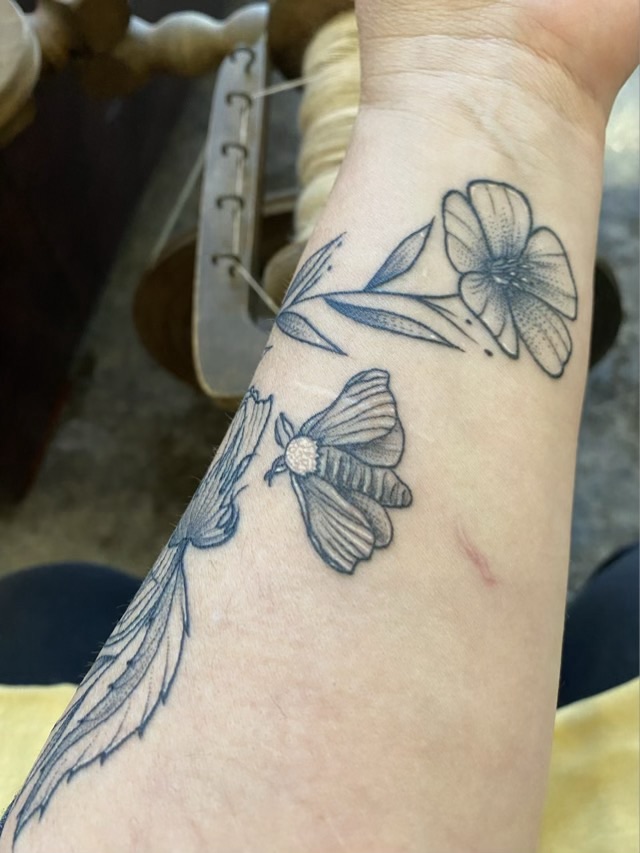
Fiber art tattoo

I’ve been wanting a tattoo wrapped around my forearm for a while, and I made the plunge! I worked on ideas for over a year, found a tattoo artist locally that does phenomenal floral work, and took my rough sketches to her. I’m very pleased with the outcome! In the tattoo are flax flowers (flax is the fiber used to make linen), cotton flowers (which occur before the formation of the iconic cotton boles), hemp (used to make rope and nets historically), a silk moth (the modern kind that has been bred for silk production), and a footprint each of several fiber producing animals: sheep, rabbit, bison, alpaca, goat. Then in the middle, in homage to the original spinner and weaver, a spider in a web.

Photo description: The central part of the design with the spider web and cotton blooms.
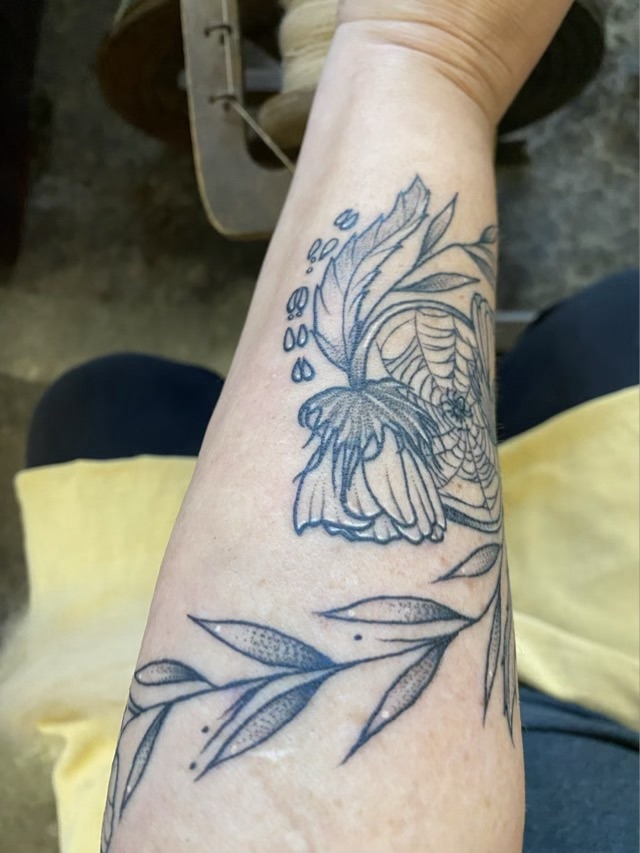
Photo description: Inside my forearm showing the flax bloom and silk moth.
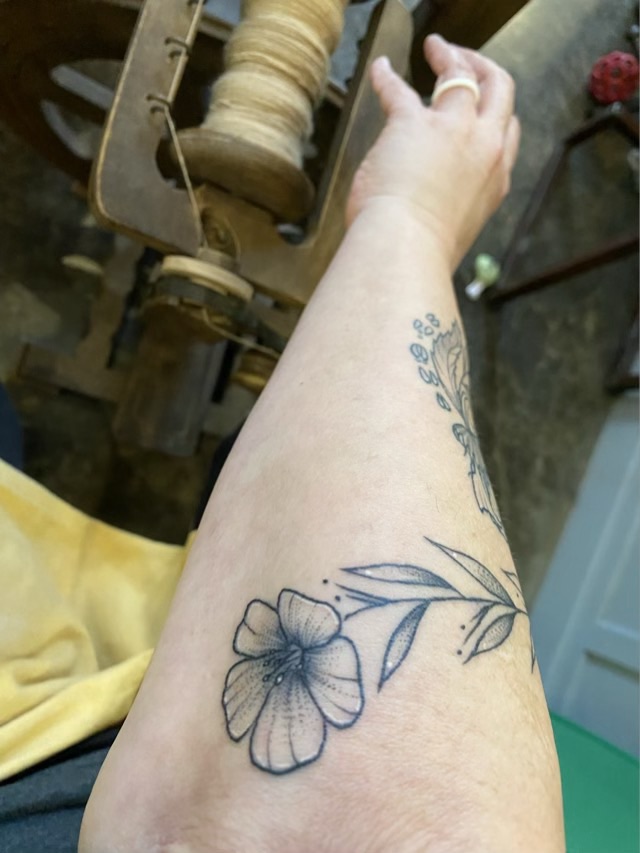
Photo description: Outside of my forearm showing the animal prints.
Photo description: My elbow with the second flax flower.

The tattoo artist is Paige Parman at Old Souls Ink in Weatherford, TX. I waited to take pictures until the tattoo was fully healed, and took them while I was spinning alpaca fiber on my Befra Willy spinning wheel (in the background of all the pictures).

Random but not surprising

In the drawers of the Singer Model 66, that just recently came from my husband’s aunt’s house 206 miles away, I found wood plug that looked very familiar. I popped it into the open hole in my vintage side table. It fit and is a near color match. I purchased this table at an antique store in Houston TX, but my grandmother had its twin in South Dakota, and that one now resides at my Mom’s house. So it was a popular piece of furniture in the mid-1900s. Wood plugs are also common screw hole covers and furniture manufacturers would use the same size wood plug on various pieces.

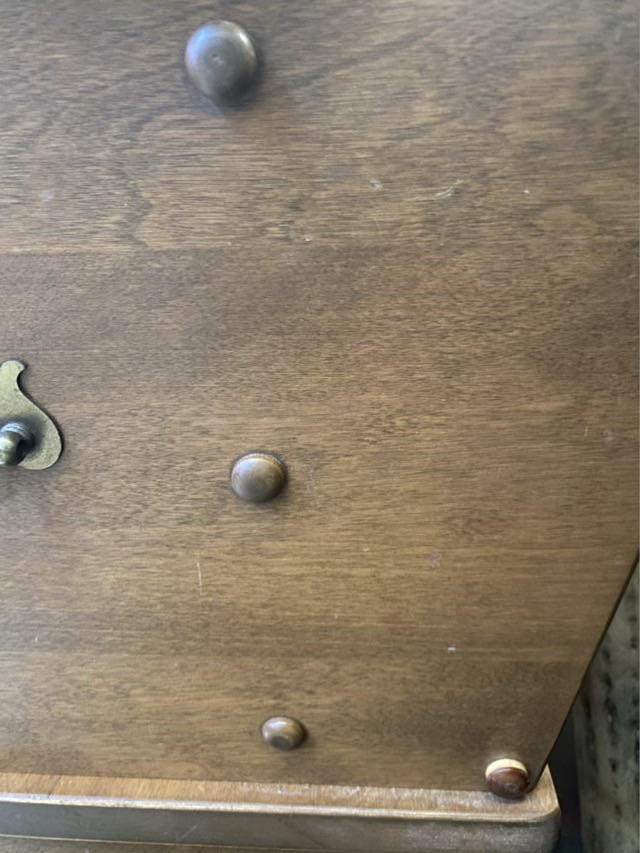
Photo description: The side of a wooden end table showing four wood plugs, the bottom right is the “new” plug, not fully inserted.

So it is random but not surprising to find a plug that fits the hole in a cabinet that was around at the time this furniture was in vogue. It also shows that those devilish fat pegs like to fall out and go a-hiding across the nation. Although this one has found its home. I put it in the hole lightly, but it stuck tight, so the only thing to do was tap it all the way in. Serendipity is the word I’ve been trying to find.

Singer model 66

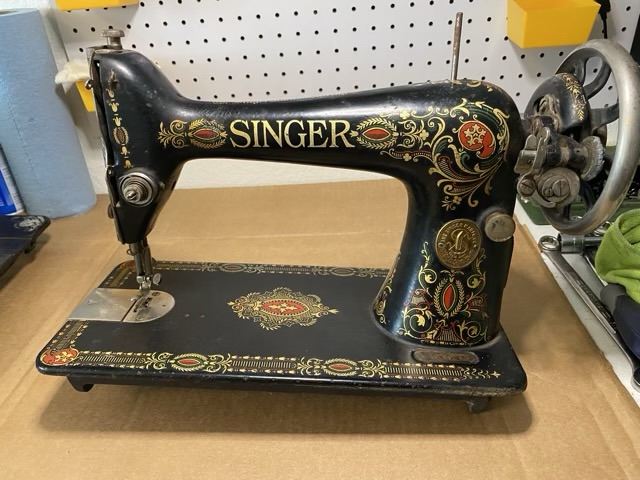
Here is my big news to start off the year: I have another treadle sewing machine! This one is a family heirloom. It was my husband’s great-grandmother’s, a Singer model 66 from 1916 with the “red eye” or “red scroll” decals. The decoration on this machine is in much better condition than my model 27, which is only 9 years older than the model 66, but saw considerable barn time. The 66 only saw some garage time and was mostly in normal household conditions.

Photo description: Singer model 66 “Red Eye” sewing machine head, sitting on cardboard on my work bench.

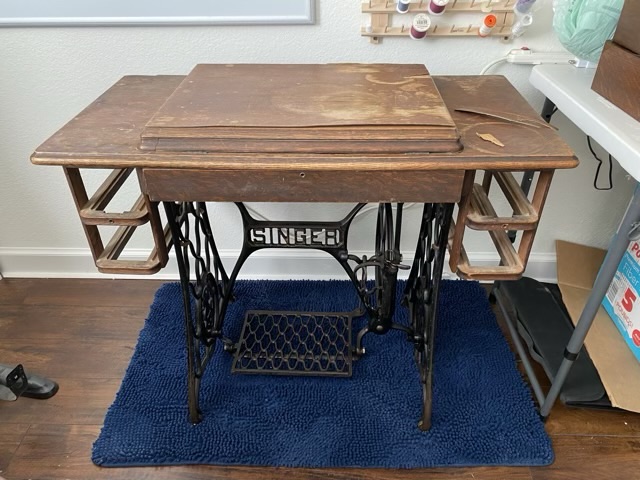
Ironically, the treadle base is almost identical to the other base, except it hasn’t been painted over (thank goodness).

Photo description: Singer treadle base cabinet, the four drawers are on the table just off camera. I had just scrubbed down the cast iron parts with PB Blaster and a wire brush. I have not started on the wood parts, but have taken some broken laminate from the back to use on the surface chips.

My goal is to get it back to working condition. It is pretty, but seized. The model 27 I’ve almost completely disassembled except for the main shaft, but with this model 66 I’m going to only take apart what I need to.

Tension

There are many ways of doing most things. Finding what works best for you is usually a series of trials and errors. I have been knitting with fingering weight yarn the same way I knit with thicker yarn, but have been having trouble keeping even tension because the thinner yarn slips through my fingers more. I tried wrapping it three times around my pinkie, but it had more tendency to bind. I recently tried a new finger wrapping method, going clockwise around my pinkie, the counterclockwise around my ring finger. Bingo. I have more control of the yarn without binding or excessive yarn drop.

Photo description: In process knitting photo showing the working yarn wrapped around the fingers of my left hand.
Photo description: view of yarn wrapping from the top of my hand.

This little change helped increase my knitting speed as well as reduced frustration with what seemed to be uncooperative yarn.