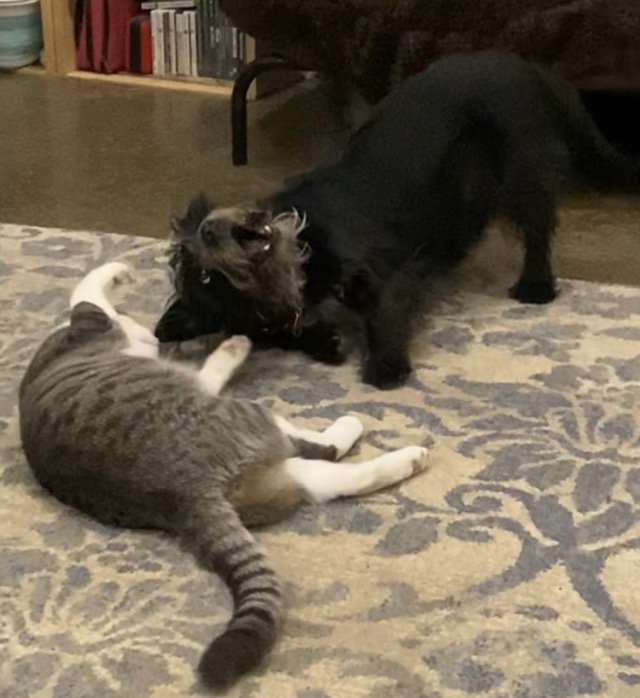
Thor the technical kitten (seven months old) and Missy the dog still play on the living room rug. Here is the most recent video. Here is one where Thor was much smaller. He has grown a bit.
Photo description: Video still of Gray Tabby cat and Black dog laying on a gray and blue rug together.
As long as Thor maintains a healthy weight, he shouldn’t ever outweigh Missy who weighs 20 pounds, but visually he is getting closer in size.
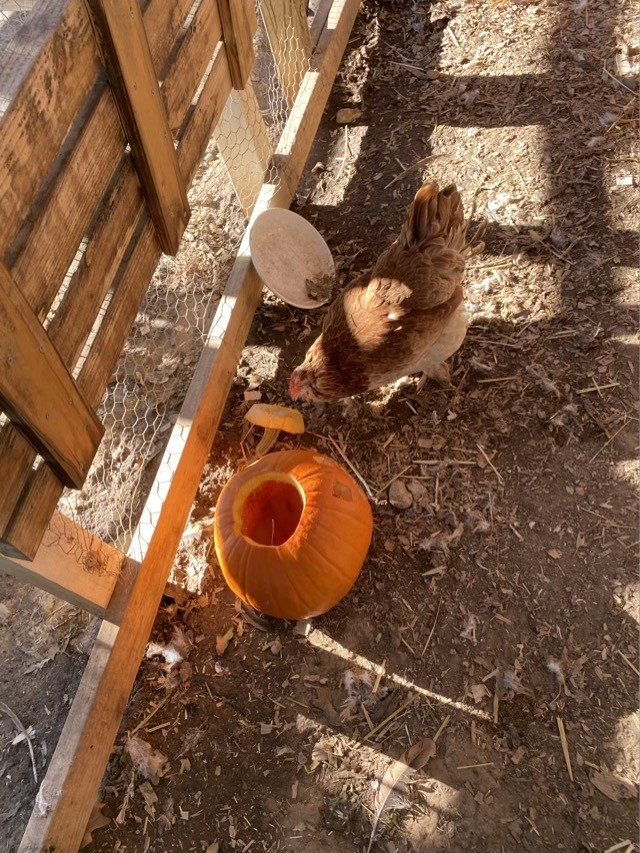
We get our pumpkins to carve jack-o-lanterns the day before Halloween, then the day after, put them out for the chickens. This is to limit mold growth and decay. I will leave the pumpkins in the runs until the chickens have pecked away what they want, then they go to the compost bin.
Photo description: Natural white pumpkin carved as a happy skull sitting on the dirt with a hen investigating.Photo description: Carved orange pumpkin with the lid removed sitting on the ground with a hen pecking at the inside of the lid.
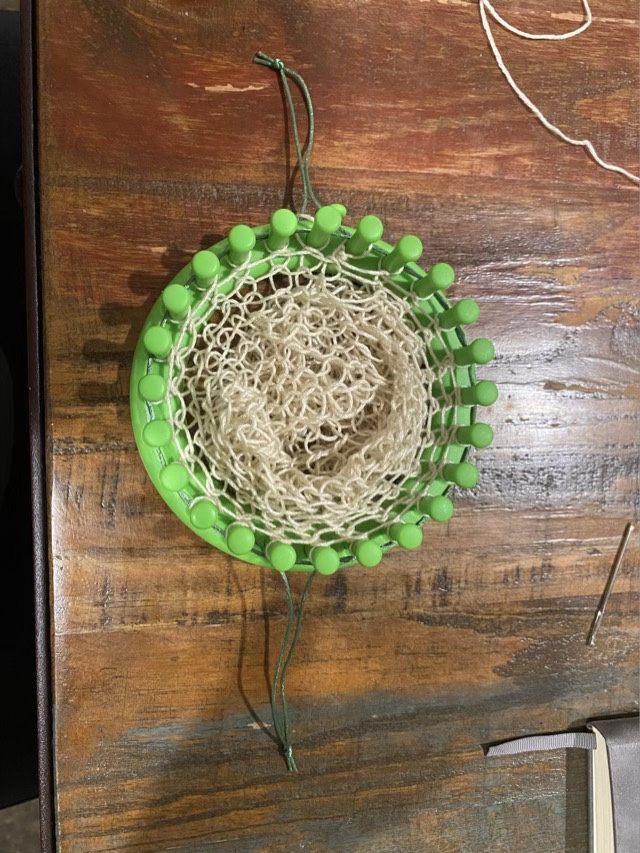
I have found a use for my knitting looms: string bags. I had some acrylic Luster Sheen yarn by Coats and Clark in my stash, and I probably inherited it since the price tag is from Woolworth for $1.49! It is strong and thin, which is great for string bags. I follow the included instructions to start knitting. These looms recommend a twisted stitch, which also works better for bags as they retain their spacing better. After the first pass, I run the tail through the first round to close off the bag. The end won’t completely close until the fifth round or so, but it is easiest to find the loops after that first yarn over. I then continue to knit until I have about 12 inches of fabric, pulled straight. To finish the bag, I run two lengths of satin cord through the last round to make drawstrings.
Photo description: Small round plastic knitting loom with string bag attached and satin cord hooked through each loop on the pegs.Photo description: Same loom shown from the top, with two knotted loops coming off opposite sides of the bag.Photo description: Finished empty string bag with drawstrings closed sitting on a table.Photo description: String bag filled with four large apples, showing how the twisted loop structure stretches.
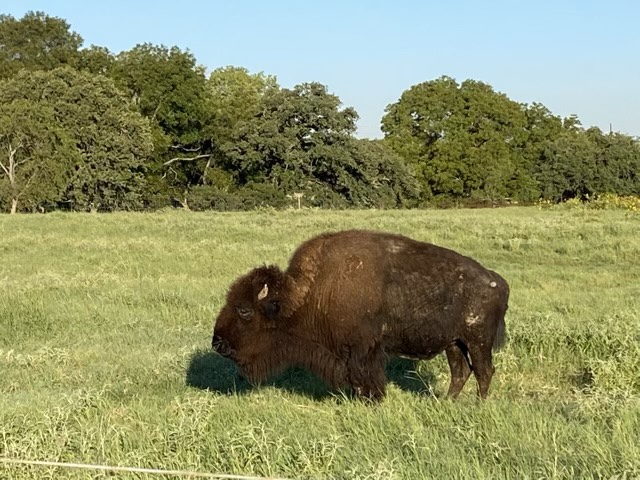
Happy National Bison Day! As an absolutely shameless plug, here is a link to the Buffalo Wool Company, and their list of ranchers and conservators to help you support the growing bison population and local economies!
Photo description: American Bison in a green pasture with a line of green trees in the background and blue skies. Photo taken by me last year at Fossil Rim Wildlife Center
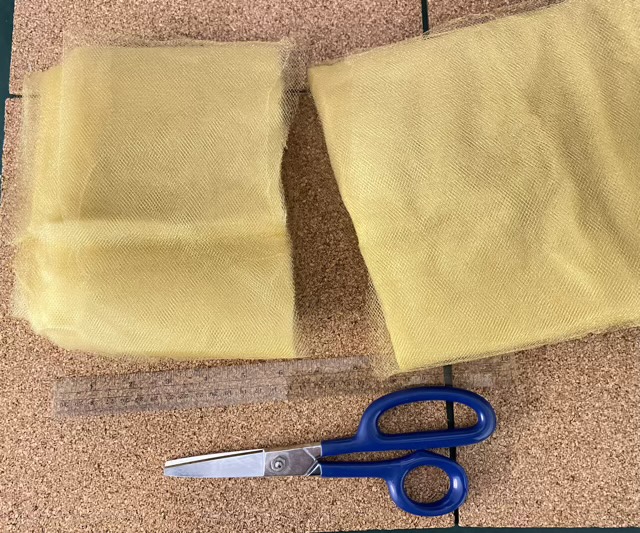
I have been experimenting with nylon tulle fabric (fine mesh fabric, usually in the bridal section). My sewing machine cleaning instructions include using this kind of fabric to gently clean screw threads. If it can handle that kind of work, scrubbing dishes without scratching should be a breeze. I ordered 15 yards, and chose the gold color. I tried cutting narrow strips, but found that sections about 6-7” inches wide worked well to crochet bulky scrubbies. I used leather shears to cut off a section of the bolt. (I’ve since found out that tulle comes in 6” widths in the ribbon section, so we’re going to store that info away for later.)
Photo description: Gold colored nylon tulle fabric folded in bolt form, with 7” cut off one end with leather shears, ruler in front for scale.
The cut strip was double layered, because that is the way fabric is laid in a bolt. To make the material manageable, I wound it nostepinne style on a dowel.
Photo description: Two balls made by wrapping nylon tulle strips around a dowel at a 45 degree angle.
I tried various methods to make the scrubbies, but came back to the basic crochet half-double stitch round. For my skill set, that is the neatest (as in tidy and well formed).
Photo description: Stack of 9 circular crocheted scrubbies, sitting on a table.
To make these, I use a size M hook and start with a magic circle, crochet 8 Half-Double Crochet (hdc) stitches, pull the end tight and slip stitch (sl st) into the first hdc. The second row starts with two chain (ch) stitches, then has two hdc in each hdc from row 1. I crochet the end in as I go. Sl st to beginning the of the row. The last row (yup, just three rounds) starts with 2ch, then 1hdc in the previous hdc, 2hdc in the next, repeat around. Cut material, pull through last stitch, join to first stitch and weave in the end. Easy peasy and fast.