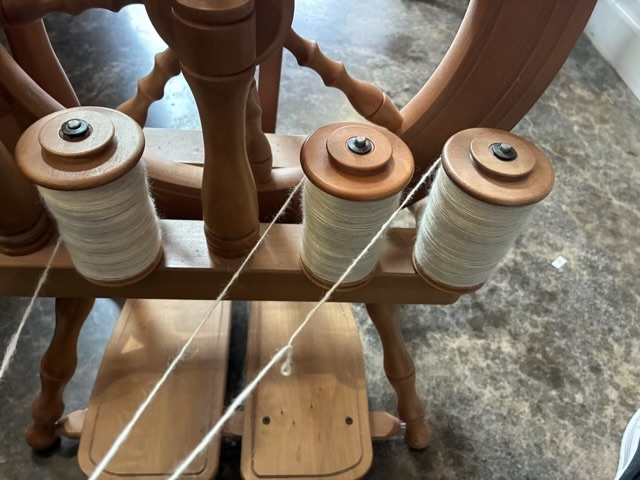
I spun up three more bobbins of single spun Teeswater wool and plied them into a three ply yarn.
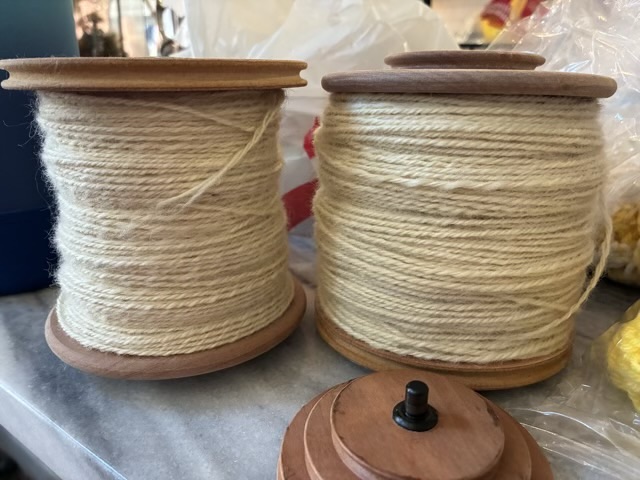
Photo description: three full bobbins on the bobbin storage shafts built into the Ashford Traveller wheelPhoto description: small bobbins depleted, one empty, two partially depleted Photo description: three ply yarn on two jumbo bobbins, the left was done previously, the right recently plied
I think I have enough Teeswater roving to do one more jumbo bobbin of three-ply yarn, which means I will have to transfer yarn off a jumbo bobbin as I only have two. It will take me a while to spin though, so I don’t have to transfer yet.
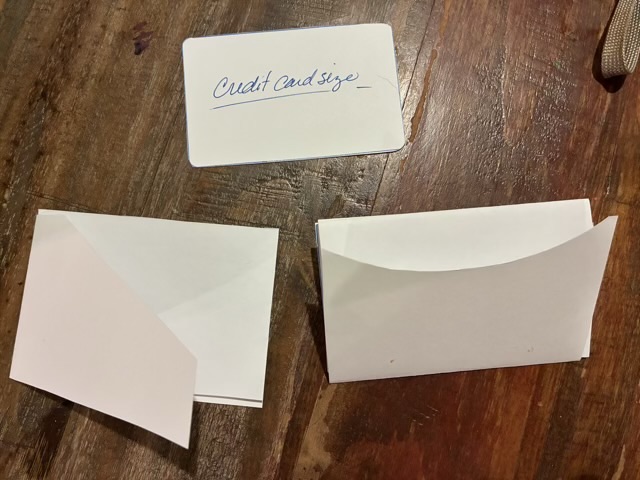
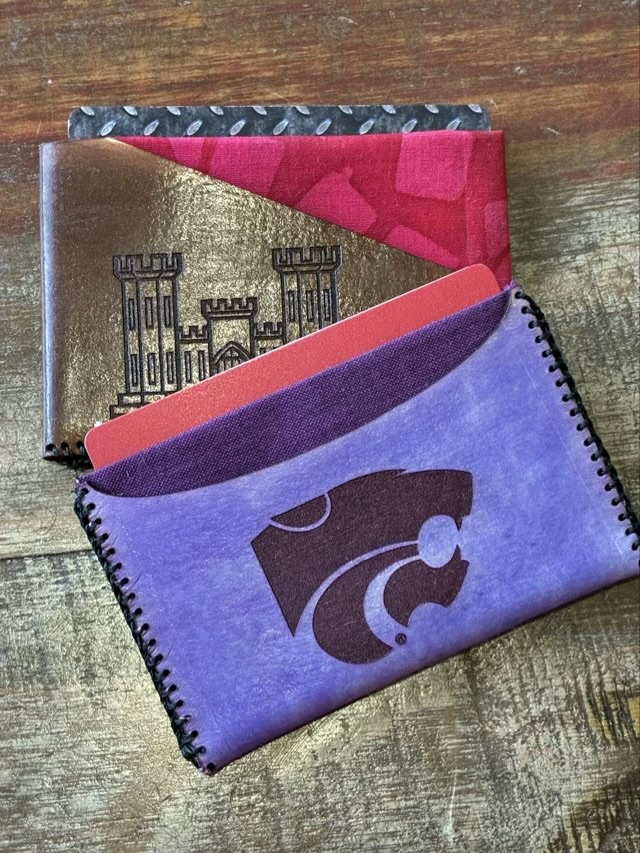
I designed a couple variations of minimal wallets by starting with paper mock ups.
Photo description: paper mock ups for two wallet designs, the bottom left has an angle access and a traditional quarter fold insert, the bottom right has a scoop access and an accordion fold insert, top middle is a credit card mock up
After getting my dimensions figured out with paper, I designed the leather cut out in Adobe Illustrator, and used a blue diode laser cutter to cut and emboss vegetable tanned tooling leather.
Photo description: leather with embossed design after cutting with a laser and rinsing with water, the folding
I stained the leather and let it dry, then applied a coat of resolene, which will make it water resistant.
I wanted the insert to have RFID blocking capabilities, so I used spray glue to adhere cotton quilting fabric to faraday fabric.
Photo description: cut cotton fabric glued to faraday fabric using spray glue on the back of the cotton
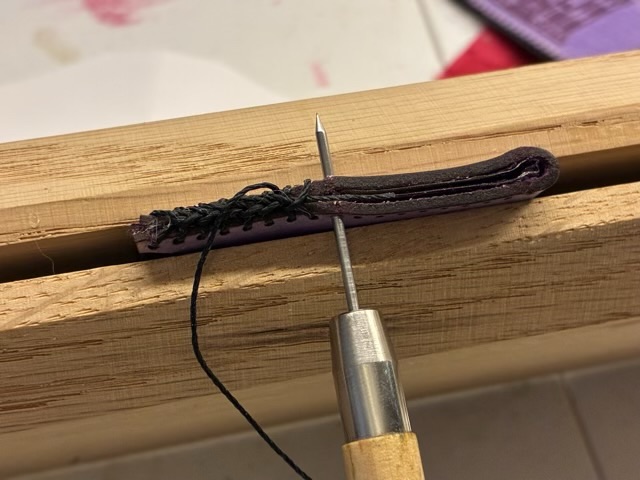
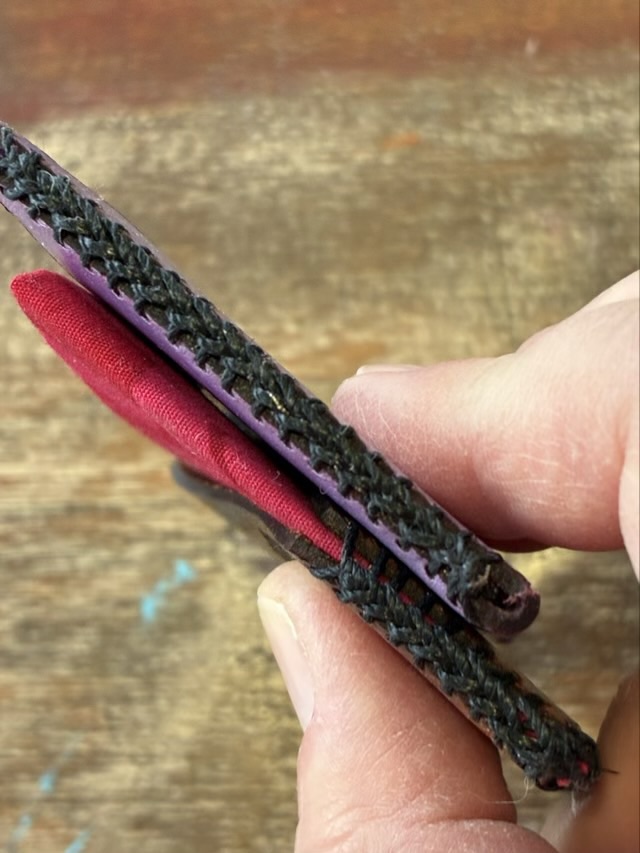
My favorite part of this project was learning a new-to-me edge stitch: triple loop lacing. It took a few tries on scrap leather to get the hang of it, but it was worth it. I love the braided edge look with the heavy waxed thread.
Photo description: using an awl to poke through the fabric using the precut leather holes as guides, the leather is secured in a book clampPhoto description: close up of the edge stitching on two leather and cloth minimalist walletsPhoto description: finished wallets with gift cards in the center pocket. Each wallet has three pockets: front, middle, back
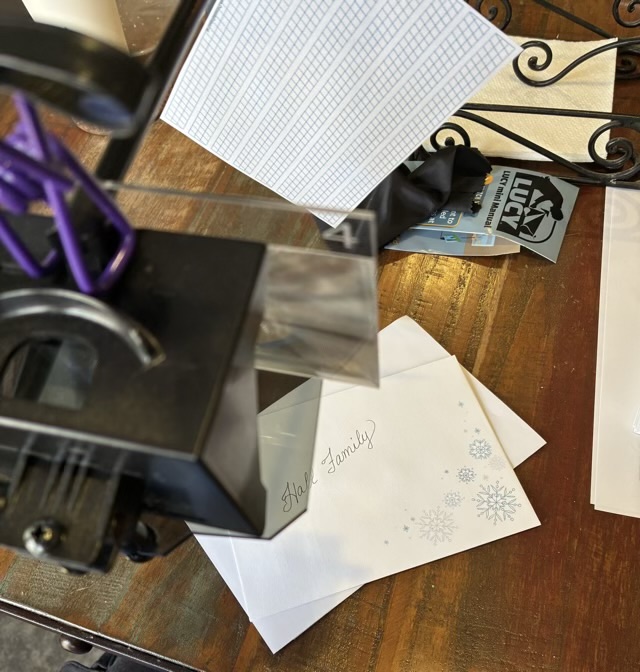
I had an idea that my daughter’s camera lucida could help me address my holiday cards by providing invisible lines. I printed a small version of calligraphy paper and put it on the enlarger attachment for the Lucy drawing tool. The clever arrangement of clear panes and mirrors gives a ghostly image when looking through the eye hole, an image you can trace or use as a guide. There is a learning curve, though, and the image moves relative to the paper depending on head angle. Despite using the edges of the envelope, and even trying to use a lined index card to get the envelope parallel with the reference lines, I couldn’t quite get everything square. The three address lines were parallel, but were mostly slightly off from the envelope, so I embraced the angle and made it obvious. Writing the “to” address at almost a 45 degree angle also went nicer with the snowflake decoration on the envelope.
Photo description: Lucy drawing tool set up as a calligraphy guide, with graph paper taped to the enlargement attachement
We’ll see if any of the cards make it to their recipients. My card list has dwindled over the years; when I get a returned card I take that name off the list, figuring I don’t have the right address. But maybe the machine can’t read the handwriting and no one bothers to have a human read it. Hm.
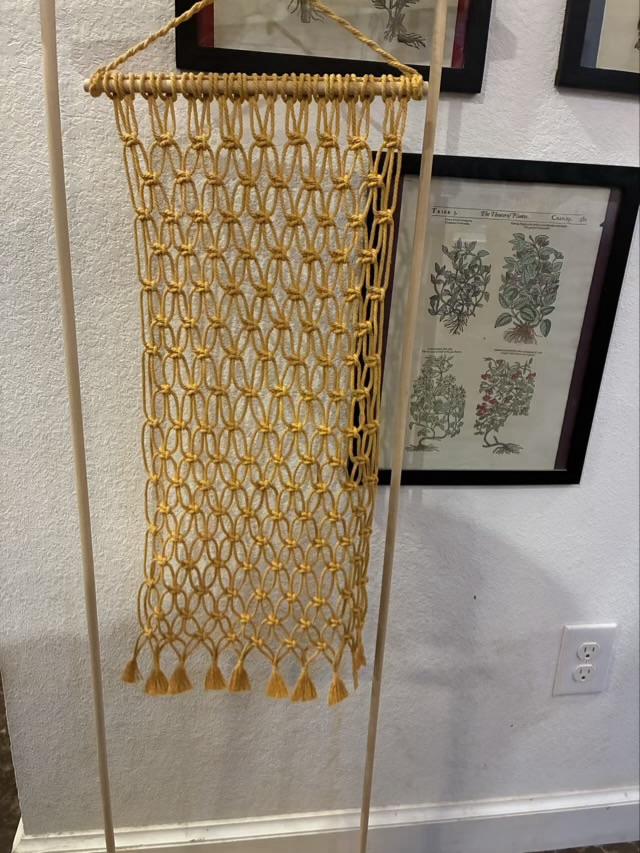
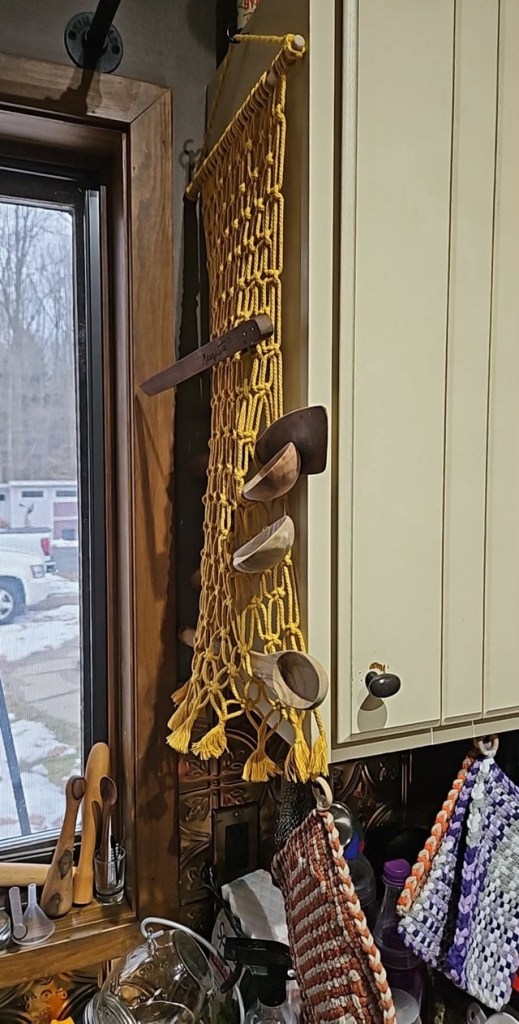
At my Dad’s request, I knotted a macrame utensil holder for his handmade spoons. I used yellow recycled cotton cord from RockMountainCo, and a dowel. I like the geometric pattern made by the alternating rows of square knots.
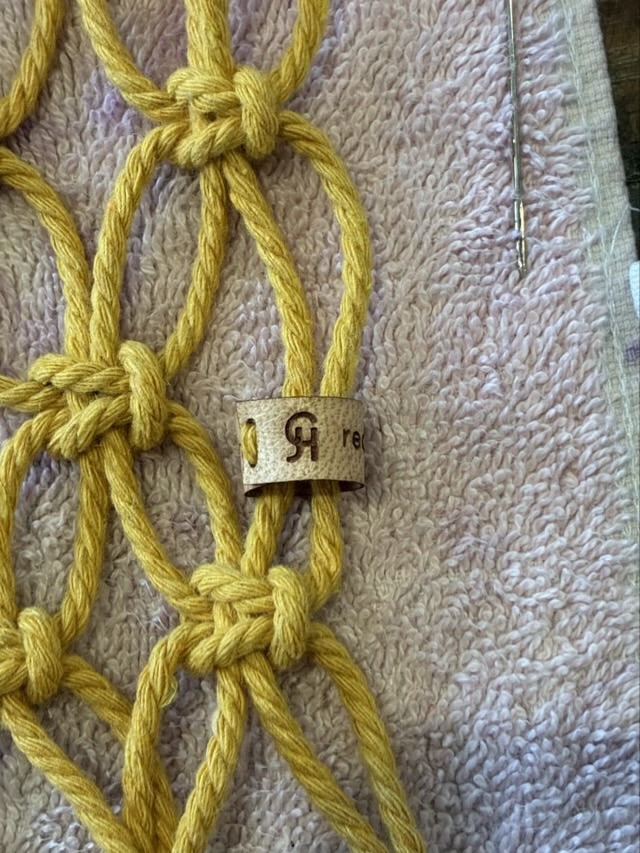
Photo description: simple yellow macrame wall hanging hanging on a twining loomPhoto description: same wall hanging with spoons inserted into the holes between the knots, showing horizontal and vertical storage optionsPhoto description: leather tag sewn into a circle around a pair of cords on the wall hanging showing my mark, the other side says “recycled cotton”
Technical details: 4mm recycled cotton cord cut into 18 pieces, 90 inches in length, attached to a 1/4 inch dowel with lark’s head knots, then tied with square knots over two core cords in alternating rows. The ends were lashed together in groups of four, then untwisted and combed into tassels.
Photo description: wall hanging installed, holding three spoons, a spatula, and wood tongs
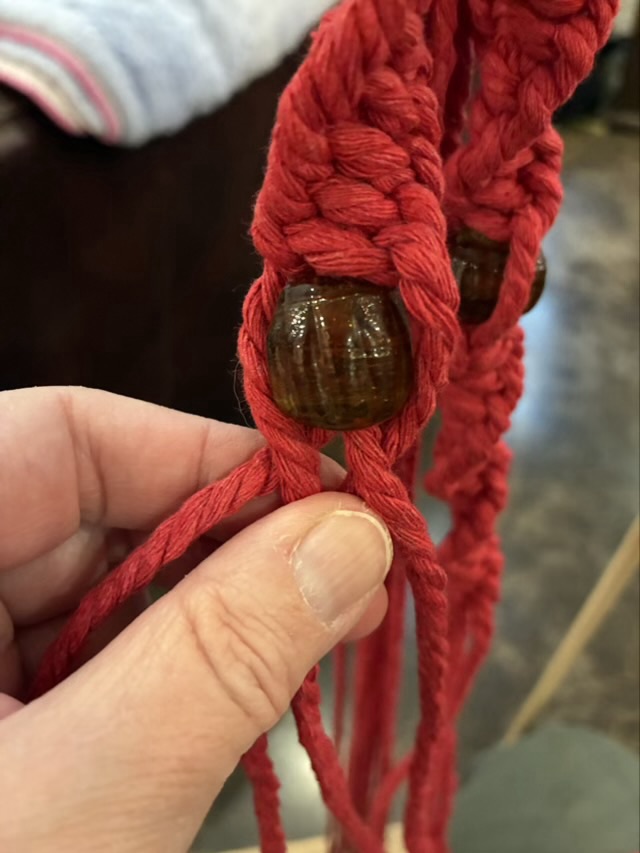
I found a source of recycled cotton macrame cord from RockMountainCo, based out of Colorado, and some recycled glass beads from our local vintage store, The Haps. The combination of recycled/upcycled materials seemed very appropriate to make macrame hanging plant holders requested by my sister.
Photo description: close-up of the macrame in progress, adding a bead to the center two strands of a half knot twist
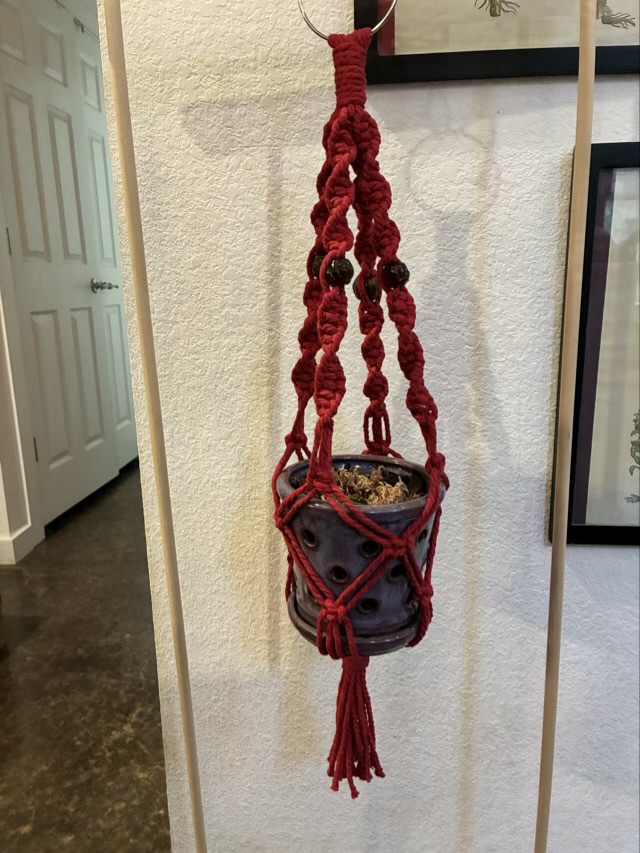
I found that my bag twining loom works well to hold macrame in progress, and to display the finished piece.
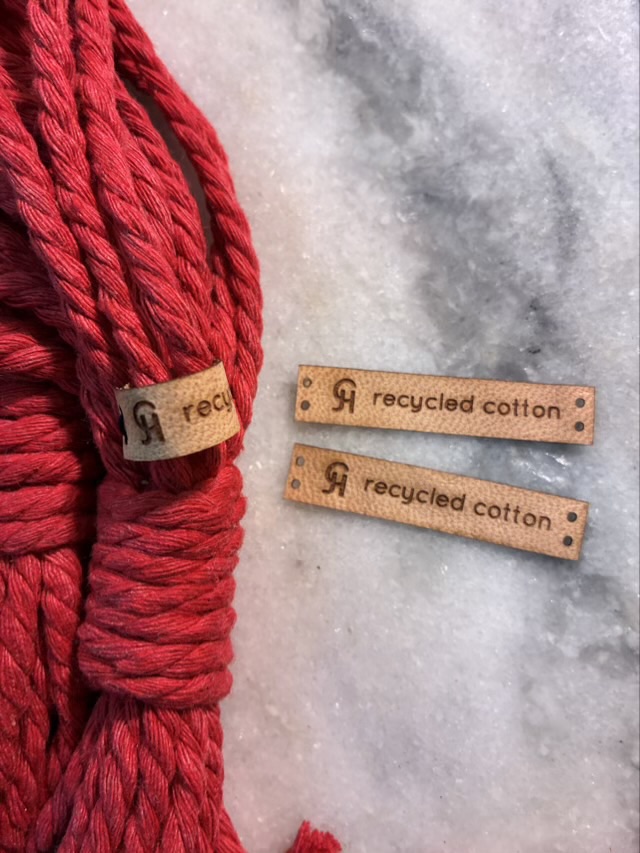
Photo description: hanging macrame pot holder made from red recycled cotton cord and recycled glass beads hanging from a bag twining loomPhoto description: leather tags marked with my signature and “recycled cotton”, one sewn into a circle on the macrame hanging
Technical details: I cut 8 lengths of 4mm cord 99 inches long, folded them in half through a welded metal ring, lashed the strands together with 30 inches of cord, made four half-knot twisted sections with 15 knots on either side of the bead, then three sets of offset square knots to make the body of the holder, finishing with another 30 inches of cord to lash the strands together at the bottom.
In macrame, when making a half-square knot twist, the two center cords function as a core, and don’t get knotted, so the outer knotted cords get short and the middle don’t. To balance this and make the most of the cordage, I used a bead to interrupt the pattern and switch the outer and inner cords. By making the same number of knots above and below the bead, the cords end up the same length. A little macrame trick for those that read this far.