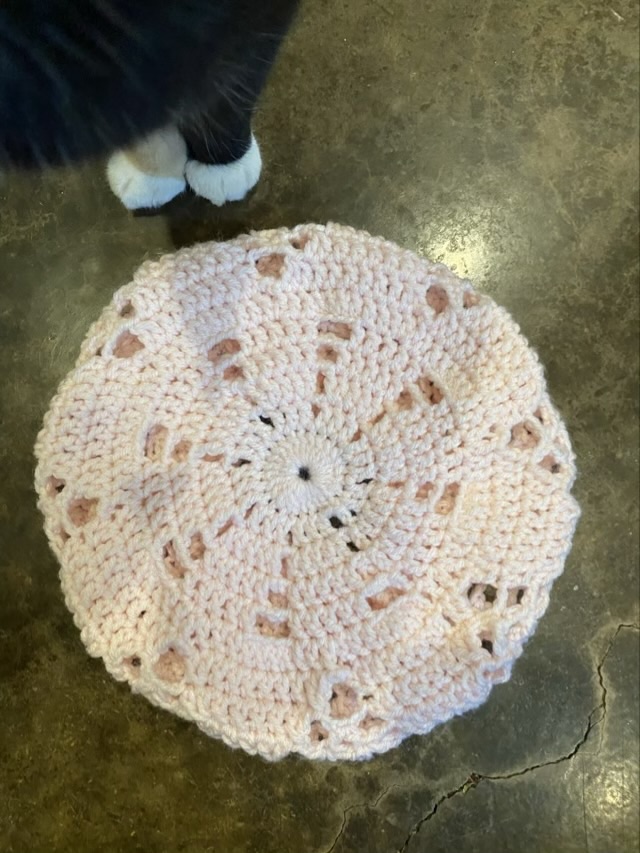
So doilies are round and flat, and berets start out round and flat, so if I find a pretty doily pattern that might work for a beret, right? Um, depends. I found a pattern with a flower center that was quite attractive as a doily. When translated to larger yarn, I had the necessary width before the center flower was done, resulting in a beret with symmetrical holes, rather than a lovely lace.
Photo description: light pink beret top with deliberate holes, sort of in a star pattern, cat feets for the photo bombPhoto description: brim side of the beret with single crochet ribbing
Back to the drawing board. I’m starting to see the end of the bag of gifted acrylic yarn though!
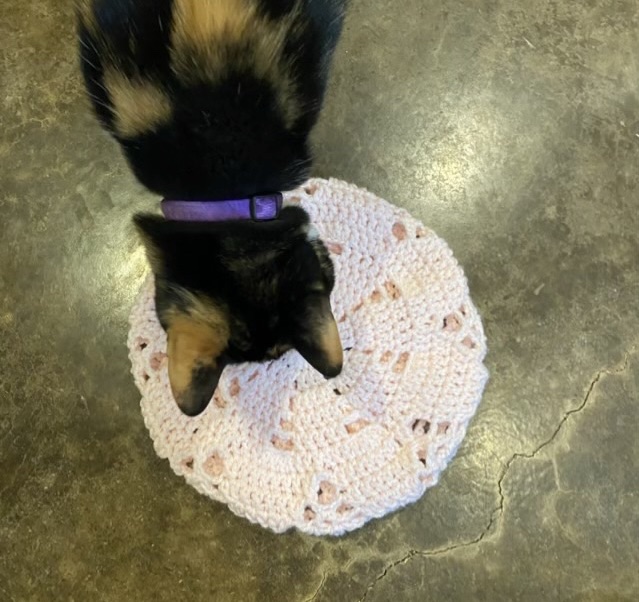
Photo description: cat photo bomb of the light pink beret, she went to sniff the hat when I put it down. Must have been close to feeding time.
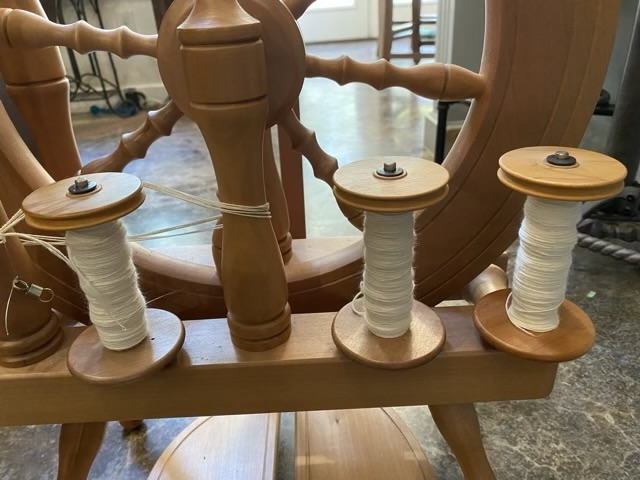
I finished spinning Egyptian cotton single spun yarn onto three bobbins on an Ashford Traveller spinning wheel (Yes! I spun cotton on a wheel using a high speed whorl.) I found the largest diameter on the high speed whorl, the one that matches the bobbin end diameter, worked best for me. The smaller diameter gears went too fast and I over spun. I also had the wheel set up with Scottish tension with a very light take up on the bobbin. I prefer to dictate the amount of spin in my yarn rather than have it controlled by the wheel.
Photo description: three wood bobbins with cotton singles on the lazy Kate built in to the Ashford Traveller
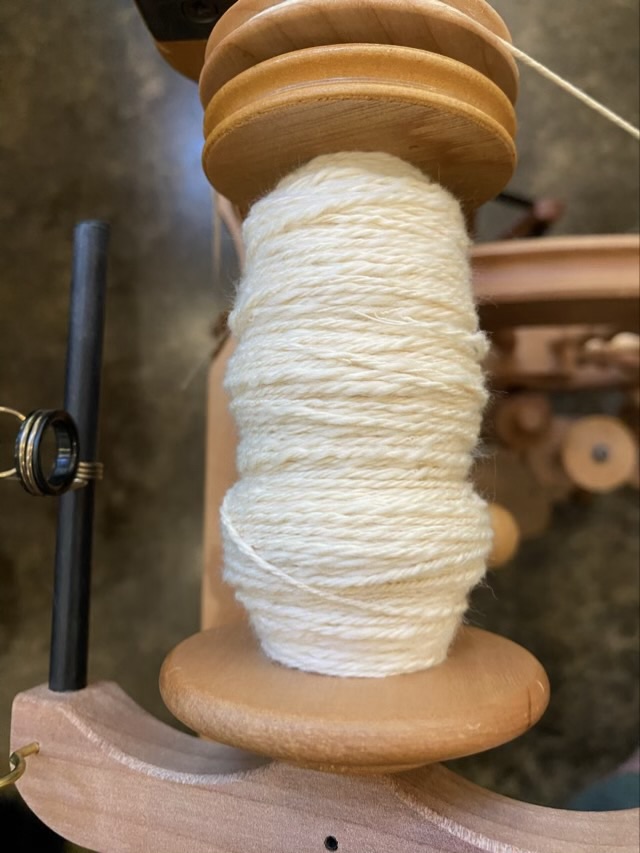
The next task was to ply the cotton. I was nervous about this because the singles had a high degree of twist, and liked to kink up. If a strand broke I would also be dealing with the rapid unwinding of the single, which results in a whole sale unbinding of a large section of yarn (ask me how I know). I did let the singles sit on the bobbin for a few days to set the twist a little. Remarkably, I was able to ply the yarn from the three bobbins with no breakage and only a few missed kinked knots.
Photo description: three ply Egyptian cotton yarn on a wood bobbin of an Ashford Traveller spinning wheel
My spinning definitely looks like homespun, but as I practiced, my technique improved and there were some sections of smooth and even spun yarn.
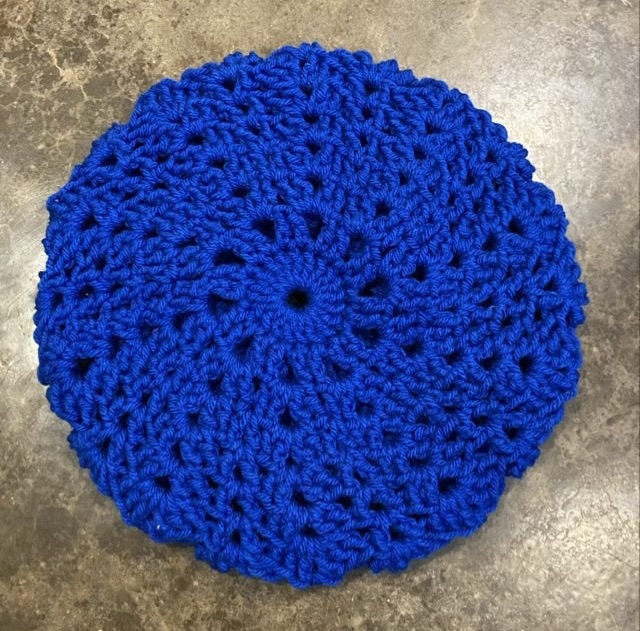
I’ve intentionally made a beret this time, rather than another beanie mishap. The idea was a lace beret with a solid band, like a head band with a lace topper. It is Texas and it just doesn’t stay cold for long, so this would be something to stylishly keep the ears warm. I started with my favorite crocheted lace coaster pattern, then instead of finishing it off with shell stitches, increased it using a mix of V stitches.
Photo description: top of the blue beret showing the radial lace pattern
I finished the beret with a single crochet ribbed band.
Photo description: underside of the same beret showing the open lace against the solid ribbed band
This was a try-as-you-fly kind of project, so I’ll work on a written pattern with another go. I really am pleased with how it came out.
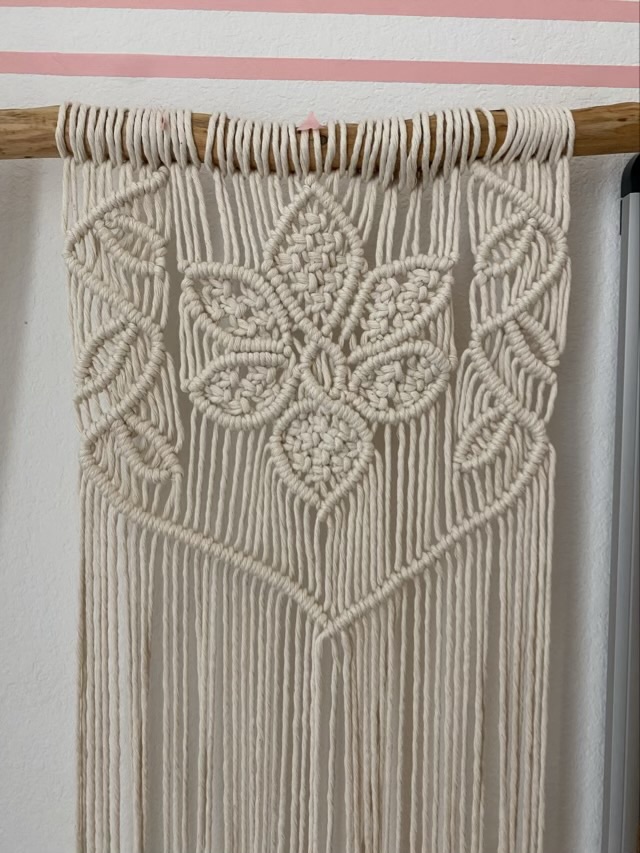
I’m slowly progressing on my macrame wall hanging. I finished the central design, now everything else will be storage pockets. The central design was my first attempt at making shapes with half hitch knots. The petals of the flower aren’t as even as the pictures in the tutorial (beware, the site is chock full of ads), but I was learning. Next time I’ll put a sketch behind the work to help keep the balance, rather than just eyeballing it.
Photo description: macrame wall hanging in progress with a six petal flower and leafed vines on each side made with cotton macrame cord
The side vines were an add-on from seeing variations of leafed vines, and I wanted to attempt them. I’m still having some left/right issues on my half hitches, and sometimes I get a full hitch and have to take it out. Here’s my tip: if you have a line of knots that need undoing, pull out the core cord so all the half hitches fall open. Much easier than untying each one.
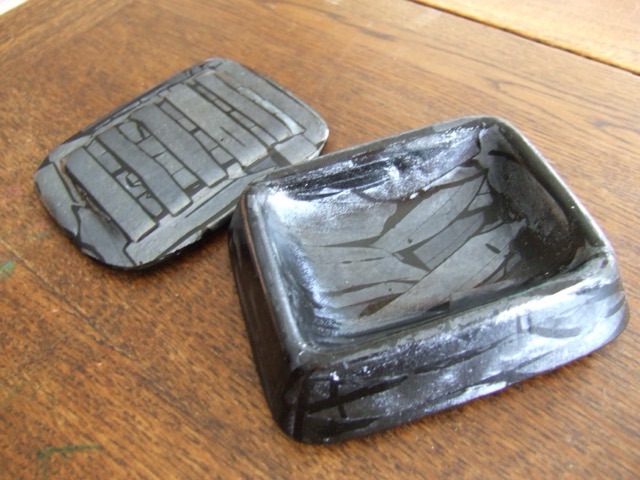
Sliding back to June of 2010, here is a fused glass box with lid that I did in my small Paragon kiln. The lid and base are made with separate molds, so I put strips of glass in the mold, put them in the kiln, and let it fuse together.
Photo description: fused glass box showing the outlines of the shards used to fill the mold
It is a cute little box, but I didn’t make many. (This is the first and might have been the last.) It took a large amount of shards.