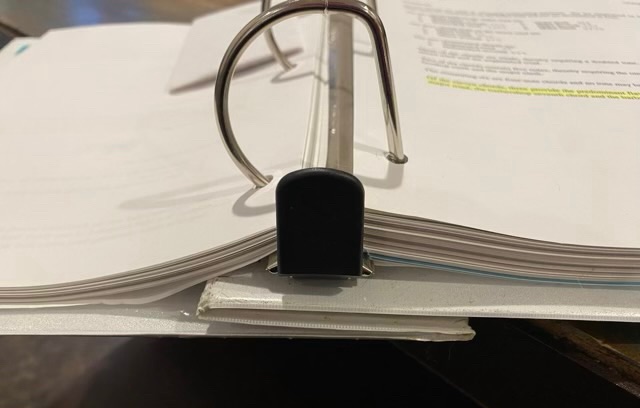
I wrote that title and realized that it could be applied to almost every day. I do love learning, but today’s post is one of those “I was today years old when I learned that…” type posts. I flipped open a large binder to reference a chart, fumbled the cover, and it folded neatly back on itself, creating a smaller footprint. I went to fix it, and realized that it was designed to do that. Huh. It is quite irritating on the large binders to have the cover stick out to the left and extra 4 inches or so, especially when you’ve filled the table with reference books. This would have been handy information when I was studying in school, or later working in the lab. I will take it now, though, and pass it on.
Photo description: white 4 inch binder looking from the bottom where the cover has the spine folded back and over lapping the front and back cover.Photo description: red 4 inch binder opened with the cover folded under and showing a moderate amount of overlap on the sidesPhoto description: same red binder with the cover unfolded and sticking out almost half a page worth to the left
As I was investigating which binders had this miraculous design, I discovered that it is only binders where the rings are attached to the back cover. Smaller binders with rings attached to the spine don’t fold this way. Clever.
My chorus is using kazoos as a training device to learn to increase resonance. To keep the kazoo close, I made a lanyard with sliding knots and a Lucet cord.
Photo description: kazoo secured to a sliding knot loop with the rest of the cord braided with a Lucet fork. Antler Lucet fork in the background.
It took me a couple hours to braid and knot the cord, and it is rather fiddly to work. When I stepped away, my brain came up with a much simpler way. Here is a video on how to do a simple, removable wrap on a kazoo using a string necklace (large loop of string).
Sometimes it is good to take a step back, or go do something else for a while, or go for a walk, to let ideas coalesce.
I’m collecting the bone and wood dust from my work to put in my compost. I took a kitty litter jug, cut off the top and inverted it. This allows me to scrape the dust off my work surface into the bin, without it falling immediately down to the bottom and making a new dust cloud. Plus, if I accidentally knock it over (a high probability with me) less will spill.
Photo description: kitty litter jug with inverted top in front of an oscillating drum sander with antler, mask, and drill bits in the background
I’m quite enjoying working antler, now that I’ve overcome my trepidation. Bone meal should be good for my garden as well.
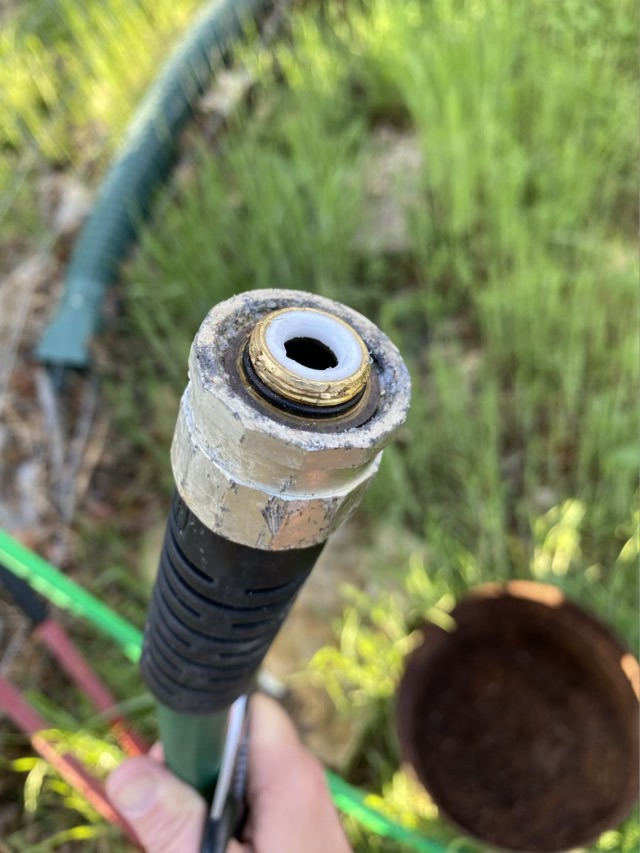
The brass manifold I use to route water to the coop and raised bed garden started to leak. I went to unscrew a hose from the manifold and part of the manifold broke loose, lodged inside the hose. It is not the first time this has happened. The hose on the top of the manifold was also corroded and frozen in tight.
Photo description: garden hose with the end ruined by a broken off manifold junction.
This time I ordered new hose ends, solid brass with a metal band clamp. I cut off the offending ends of hose with kitchen shears so I could replace the connectors.
Photo description: heavy duty garden hose cut off above the manifold, since it wouldn’t unscrew.
Pressing the connector against the fence post helped me wedge it into the cutoff hose. The female end was a little tricky with the loose ring, but attaching the male end made it stable enough to use the same technique. It really helps if you remember to put the band clamp on before attaching the new connector. Spoken from experience. I also used silicone tape in the threads this time.
Photo description: new brass manifold with repaired hose connectors.
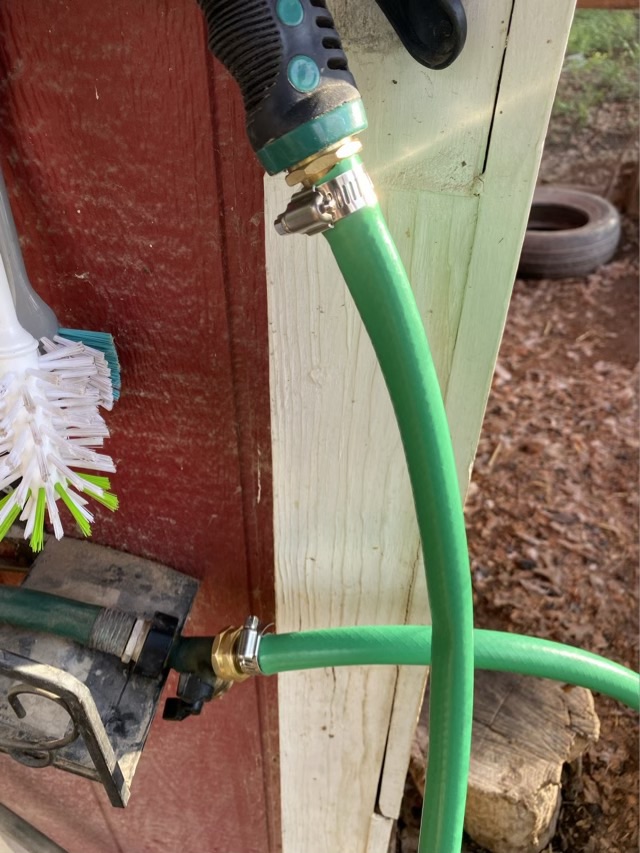
The whole procedure was relatively painless and quick. It was definitely better than replacing the whole hose. I even replaced both ends on the hose in the chicken coop, that never did connect well.
Photo description: new hose connectors on the hose in the coop.
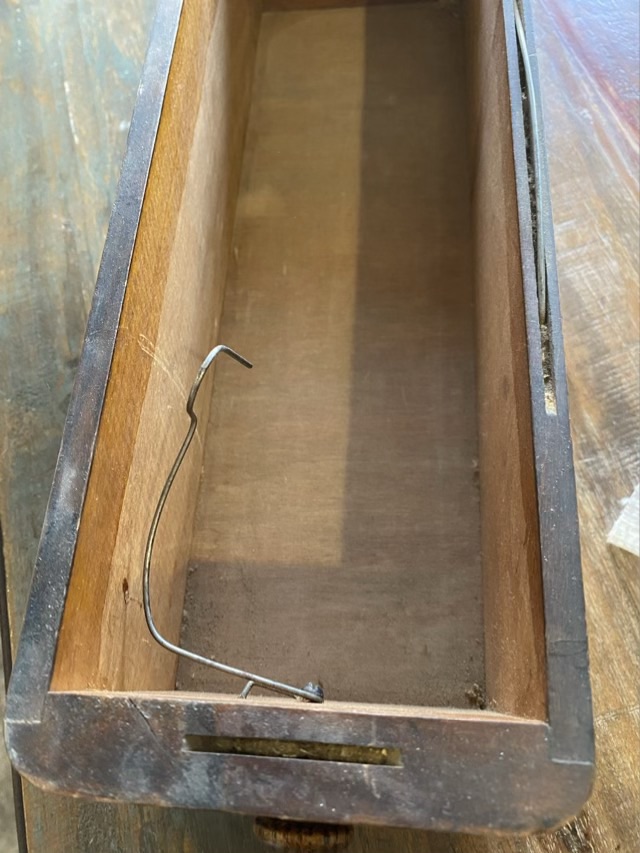
In one of the drawers of the Singer model 66 cabinet, there was a metal wire hook. Very strange.
Photo description: Inside of a wood drawer from a Singer treadle cabinet, with a wire hook attached to the screw for the wood knob.
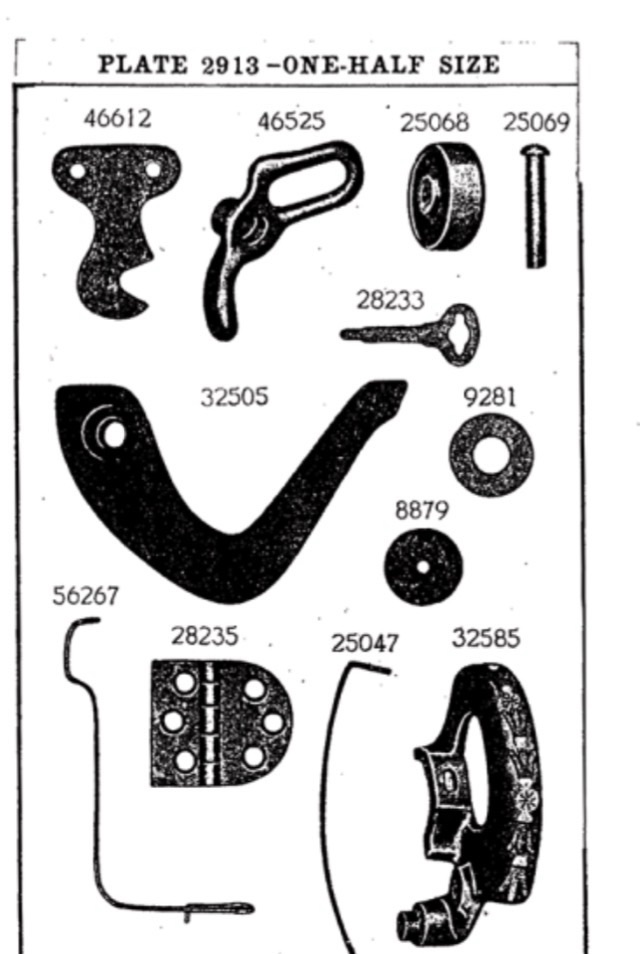
I asked on a couple FaceBook groups what the purpose of this hook was, and had many guesses, but no firm knowledge. I also signed up for the email list for TreadleOn.net, which talks exclusively about people powered sewing machines. It took a few days, but then a couple people chimed in with their informed guesses. From what I can piece together, this was intended to hold bobbins, and was an original Singer part 56267, as pictured in an illustrated plate (shown below) from MillardSewing.com.
Photo description: Illustrated plate of Singer sewing machine parts.
From what we could gather, this part was only produced for a short time. Users found it annoying and often removed it. Many people answered my question with better solutions for bobbin storage.
My hypothesis, as a long time crafter and person who sews, is that the hook was intended for bobbins, but not for storage. It is mentioned in the Singer manuals, frequently and with urgency, that bobbins should not be wound with additional thread. The old thread should be removed before winding on a new color. I have personally seen evidence that the sewing machine users blithely ignored this advice, because ALL (yes, all) of the bobbins from my model 27 and model 66 had multiple colors of thread. I believe the Singer engineers fashioned this hook to make unwinding the bobbin easier. I tested with this in mind, and it works beautifully for that purpose. A single bobbin can be threaded on to the hook, it holds the bobbin securely while letting it spin, and while unwinding the thread, the bobbin does not jump across the room and hide under the dresser, as happens every time I have unwound a bobbin previously. Maybe users found the need to not waste thread more urgent than the smooth operation of the machine. I don’t know. The modern solution is to have a plethora of bobbins, minimizing the need to unwind. I will be keeping the wire as is, and will use it for unwinding. I do appreciate good engineering.