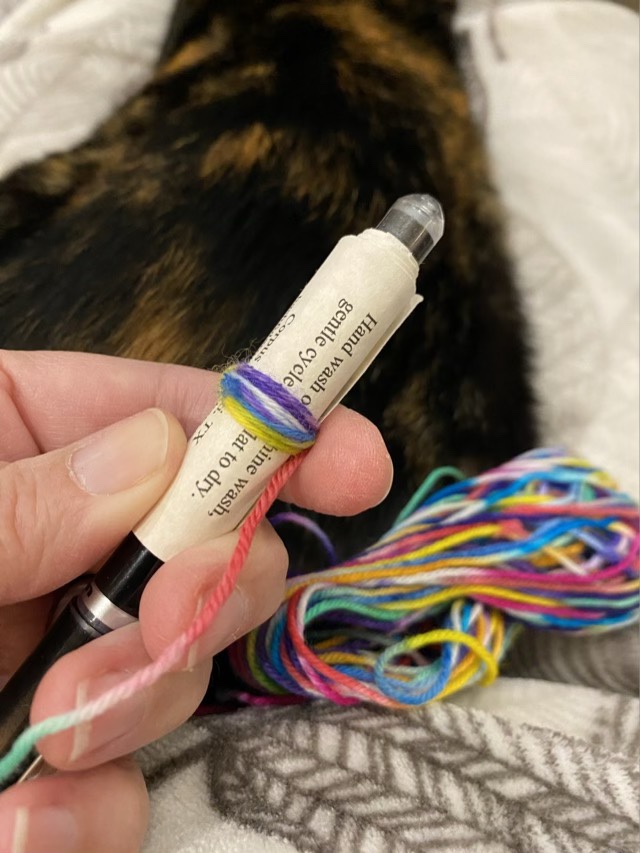
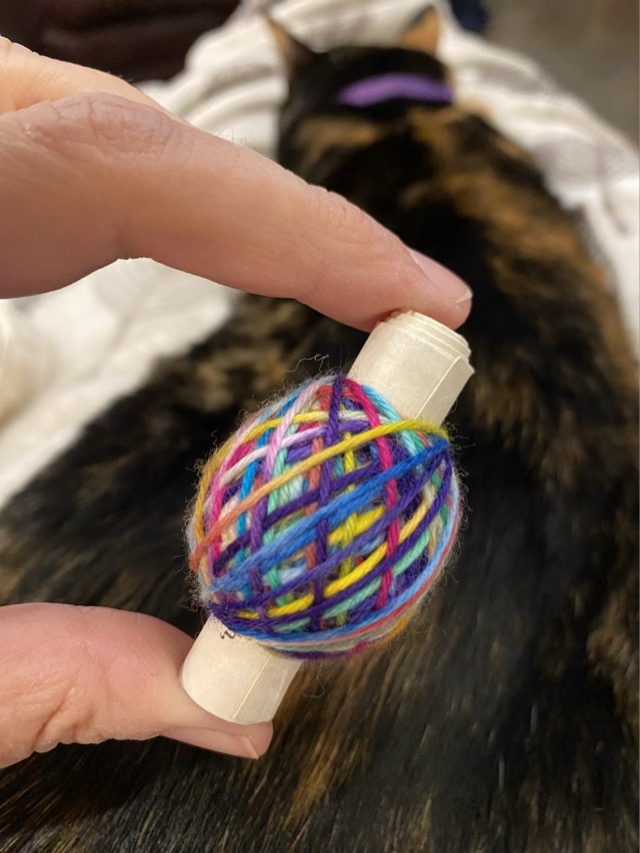
When I tried to assemble gingerbread houses last year for my kids, it was a struggle to get the sides and roof to stay up until the frosting set. This year, they went together much easier. I did actually get out the big knife and trimmed the side walls square, this time. My youngest also helped stabilize as we built. Life lessons: live and learn, follow directions, and accept help.
Gingerbread houses assembled and drying before decorating
Our family exchanges many Amazon wrapped gifts. The bags are fantastic for reuse, and to make it even easier, the tag loops can be reused as well by removing the old tag and looping a new tag in (here is a short video). Even easier, fold the little tag Amazon sends with the gift, and punch a hole in. The paper is flexible enough to thread through the loop to attach the tag.
Old tag removed, new tag preppedNew tag attached
Yes, you could also glue or tape the preprinted tag onto the old tag. I have also been known to make a hand written new tag, but now I have another option to solve the labeling gifts issue. I like choices.
Here is how to make a smaller box from a big box. We get a regular supply of cardboard delivered to the house, but they are usually too big to use to wrap gifts directly. So I use them make smaller boxes.
What you need:
Large cardboard box (or sheets of cardboard)
Heavy scissors (I use kitchen shears)
Ruler
Pencil
Length, width, and height for the new box
Start by deconstructing the old box. Most cardboard boxes have a single glued seam along a side edge that can be pulled apart. Lay the box flat and layout the cut and fold lines for the new box.
Cut and fold lines laid out on cardboard
I recommend using existing fold lines if possible. Measuring out from the center, mark the width of the new box with dotted lines (for folds). My box is 6x6x5, so the sides are all the same width. If you need different width and length, alternate the values as shown in pencil in the picture above. Mark the height of the box across the sides also with a dotted fold line. Make a one inch tab on the end (mine is on the right). Above and below each side, measure out flaps that have a height equal to 1/2 the width. Then using heavy scissors, cut out along the outside lines.
Box pattern cut from larger box
Cut the flaps free by making two cuts on either side of the line. This makes gives room in the corners when the box is assembled.
Box flaps cut free
Before folding the sides, tab, and flaps, gently score the lines using a ruler and a pointy, but not sharp implement (such as the outside tip of the scissors, or a dull pencil). Then gently fold the cardboard along the line. If the cardboard buckles instead of folding neatly, score again a little harder, and work the fold with your fingers close to the line.
Flaps, sides, and tab prefolded
Check the box by folding it together with the flap inside the opposite edge. If it looks serviceable, use hot glue to secure the tab in place. The box can be store flat, or assembled with packing tape.
It drives me crazy trying to find the end caps for my knitting needles. I take them off to knit, and when I set them down inevitably one slinks off to hide somewhere. So I tethered them. I pushed safety pins through the flared edge of the end cap, then clipped the pin to a hair band. When I’m ready to knit, I slide the hair band on my wrist. When I’m done, the little rascals are right there.
End caps tamed with safety pins and a hair band
My safety pins are a little different; they came with a knitting kit, so may actually be stitch markers. They have a nice sharp point and will go through the end cap material. A standard safety pin would work as well. I do recommend using a stretchy bracelet type object, so there are no clasps to undo. I don’t recommend using one of those silicone bracelets with the friction clasp, because the clasp is likely to pop open as the bracelet is pulled off and send the end caps on a merry flying trajectory across the room. (Yup, experience.)
With updated rabies vaccines, our dogs received new tags as well. I stopped getting name tags made several years ago. The jingle of the two metal tags drives me up a wall. I’ve tried a number of methods to reduce the jingle: muffling with a layer of leather, riveting the name tag onto the collar, writing on the collar in sharpie, engraving the back of the rabies tag. The leather picked up a funk, the riveted name tags are difficult to put on the madrigal type collars I prefer, the Sharpie fades, and the hand engraving is not as neat as I would like (it is on my bucket list to learn to hand engrave neatly). This year, I’m trying the label maker. I’m not sure how long the stickers will stick, but they are easy to read, easy to apply, and don’t amplify the jingle. I used my label maker with the smallest type set, trimmed the excess, and stuck them on the back of the rabies tag. I added my phone number as well, but am not about to put that image out in the web.
Rabies tags with dog names printed on a label maker
Both dogs are chipped, but if they escape the back yard, it is easier for a neighbor to call the number than to have to get the dog scanned.
There is still a tiny jingle, but it doesn’t wake me at night when they give themselves a scratch.