Dividing the last

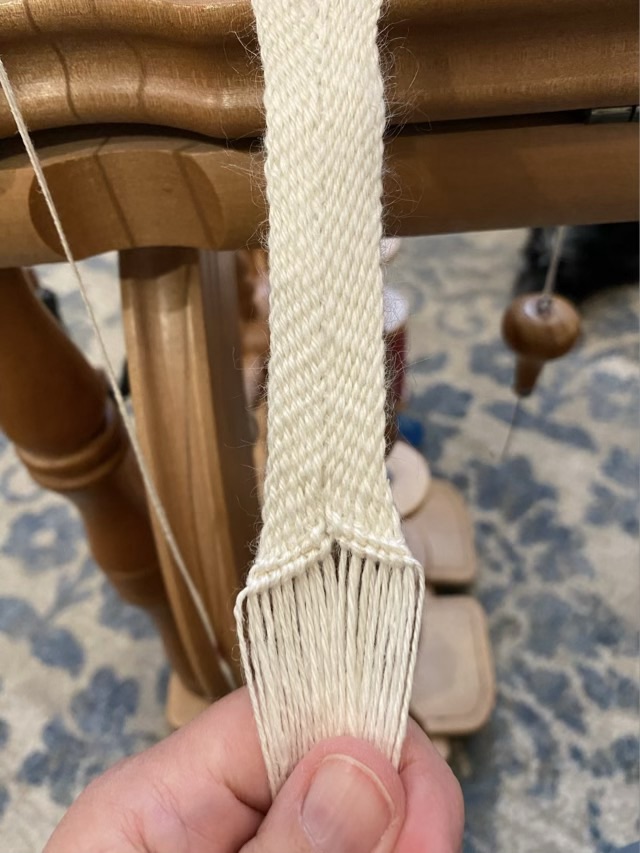
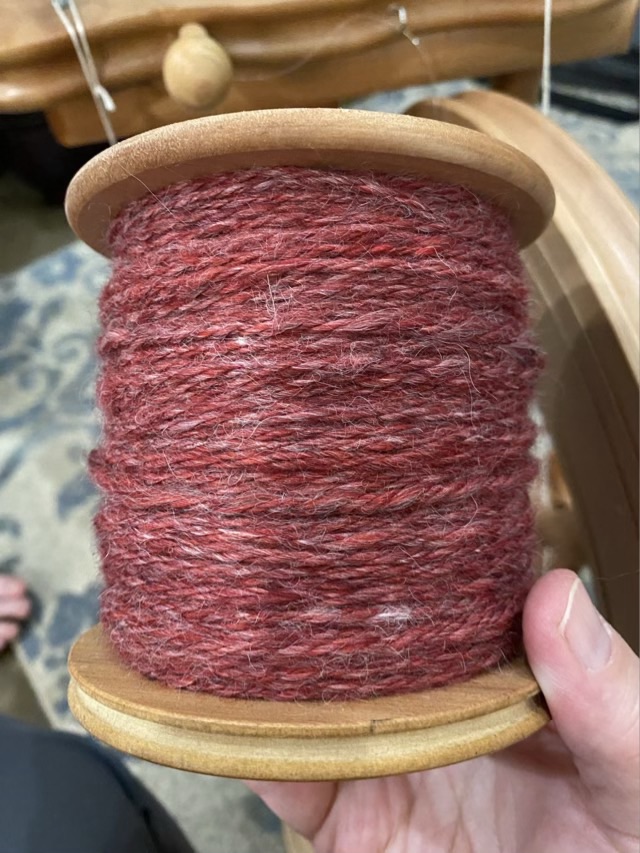
I spun up nearly a whole bag of alpaca/merino roving, filled up six small bobbins of singles, and two large bobbins of three ply yarn. The roving that remained was not enough to fill three more small bobbins, so I weighed it and divided by three.

Photo description: “rose hip” dyed alpaca and merino roving divided up into three roughly equal parts and put back in the bag, separated by clips. Ashford Traveller spinning wheel in the background with left over single spun yarn on the bobbins.

Dividing the roving worked well, but I still had one bobbin run out of single spun before the other two when I was plying. To use up all the singles, I chain plied the last bits. Since chain plying creates a slightly different yarn than plying from three bobbins (there are U bends in the yarn, but it is still three ply), I knit up my swatch with this last bit of yarn. So I didn’t loose track of which part was chain plied, I knit straight off the spinning wheel. The yarn was nicely balanced, so this wasn’t difficult.

Photo description: knitting a moss stitch swatch straight off the spinning wheel

My spinning and plying created a “bulky” yarn, about 8 wraps per inch (wpi), so I knit with size 11 needles by Prym.

Finger weaving

I’ve wanted to try finger weaving since I heard about it on a Sprang group (it was misidentified as Sprang). In Sprang, there are no weft threads, the vertical warp threads are overlapped consecutively. In finger weaving the warp threads become the weft threads, similar to braiding, but with more threads. I watched video after video before I found this video showing the weaving going out from the center, which made sense to me, and seemed balanced.

Photo description: start of a finger woven band made from hand spun Ramie four ply yarn, anchored on a bamboo skewer resting on a spinning wheel
Photo description: weaving continues, the characteristic chevron pattern emerging
Photo description: the end of the weaving secured with two rows of macrame knots

I wasn’t sure how to end the weaving, I’ve seen some bands just knotted at the end, but I want to put it in my fiber book, so the finish needed to be relatively flat. I opted to run two rows of double half hitch knots along the angles of the weave, which I think came out complimentary.

Photo description: back of the weave, showing the back of the knots and the sewn hem at the top

This was an interesting exercise, and finger weaving is a nice addition to my craft repertoire. It is nice that it can be done by anchoring one end, rather than needing a loom, and it comes out thinner and more flexible than macrame. It is more interesting with multiple colors.

Throwback Thursday: glass frames

Back in February of 2009 I was doing glass fusing in a small Paragon kiln. I was experimenting with fusible glass paint, which is applied with a bottle fitted with a thin steel tube. Colored ground glass is suspended in a liquid medium and placed on the glass, rather than painted with a brush. It is an interesting technique and one that requires a steady hand, a pin to clear the nozzles, and a wipe to clear up the mistakes. I like that these pieces reflect my preference for the Art Nouveau style. After I fused the paint to the clear glass in the kiln, I mounted the glass on acrylic photo frames. (I don’t know why I went this direction, it seems counterintuitive to glue glass to plastic rather than just use a frame. I’m sure there was a reason.)

Photo description: two clear fused glass panels with red, orange, and white designs done with fusible glass paint

Examining Chain-plied yarn

Chain-plying yarn takes a single spun yarn and makes a three ply yarn from one bobbin or ball. The spinner makes long chain links, like in crochet, but each chain can be the length of an arm. There is no waste as the yarn is always tripled to the end of the length. It is a very useful technique especially if the spinner wants to preserve a color gradient, or doesn’t want to waste any precious material dividing the ball into three and risking running out of one ball before the other two. It does leave its mark, though. Each chain has a bend of yarn, a hiccup in the twist of the ply. This is difficult to see in a finished piece, but in a half-woven swatch, the chain loop ends are more obvious in the warp.

Photo description: Ramie chain-plied yarn warped onto a Clover mini loom and done halfway in plain weave
Photo description: same picture, but with the visible chain bumps circled in blue, and one weaving error circled in red

These chain bumps are more of a concern if the weaver wants to leave a fringe. I wove in the ends and trimmed them. To fix the missed warp in the weave, I took a small piece of yarn and sewed it over the warp and tied it in the back.

Photo description: back of finished swatch showing trimmed ends and fixed warp
Photo description: front of swatch

The chain bumps are not readily visible in the end piece, but the edges are uneven, and I pushed the weft into the loops left by the loom, arcing the bottom of the swatch. Which is why I swatch, I learn so much from each piece.

Jumbo flyer

The new-to-me Ashford Traveller spinning wheel came with a jumbo flyer that hadn’t been assembled. I finished all the wood parts with Howard’s Feed-n-Wax. (See? I love this stuff.) Ashford wood products typically come unfinished.

Photo description: Ashford jumbo flyer with sliding hooks and two bobbins, the whorl (bottom right) has had an application of Feed-n-Wax

After a few applications and some drying time, I finished the assembly by screwing in hooks and tried it out on the spinning wheel to ply my three singles. It occurred to me that three full bobbins will not all fit on a single bobbin of the same size, but a jumbo bobbin could hold it all. The flyer came with a new end bracket to fit the larger end of the flyer, but it also came with grommets to fit the original flyer so I don’t have to change the bracket to switch back and forth. Nice.

Photo description: jumbo bobbin and flyer mounted on an Ashford Traveller, bobbin is half full of three plied yarn
Photo description: to ply, I hold the single spun yarn leading from the lazy kate bobbins between my fingers to keep tension between my hand and the flyer orifice. This keeps the pigtails of twisted yarn from catching in the ply.
Photo description: jumbo bobbin full of three ply alpaca merino yarn

The jumbo flyer is marketed as an aid to make bulky art yarn, but I think it does a lovely job of plying as well.