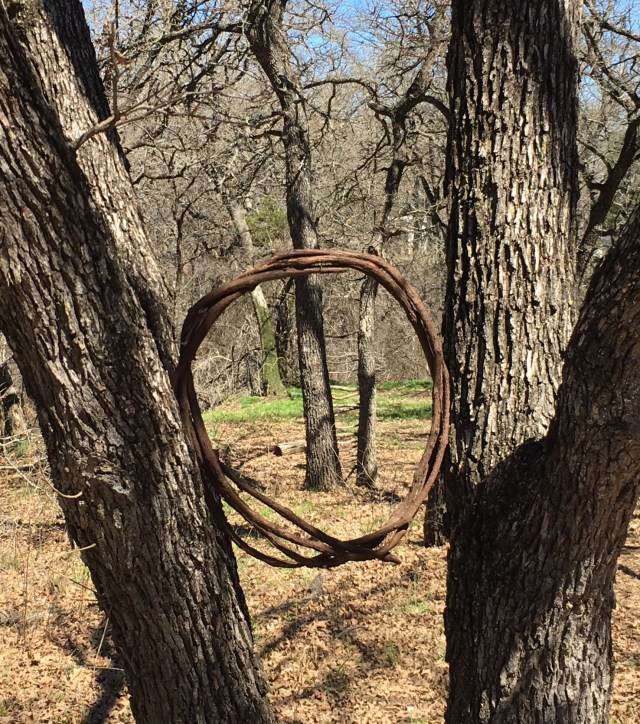
My eldest and I started a new land art project. We took a length of grapevine and twisted it into a wreath and wedged it between two trees. After I took the picture we started to weave bits of twigs and grasses into the wreath. We’ll take more pictures as the art develops.
First land art as seen through the second land art
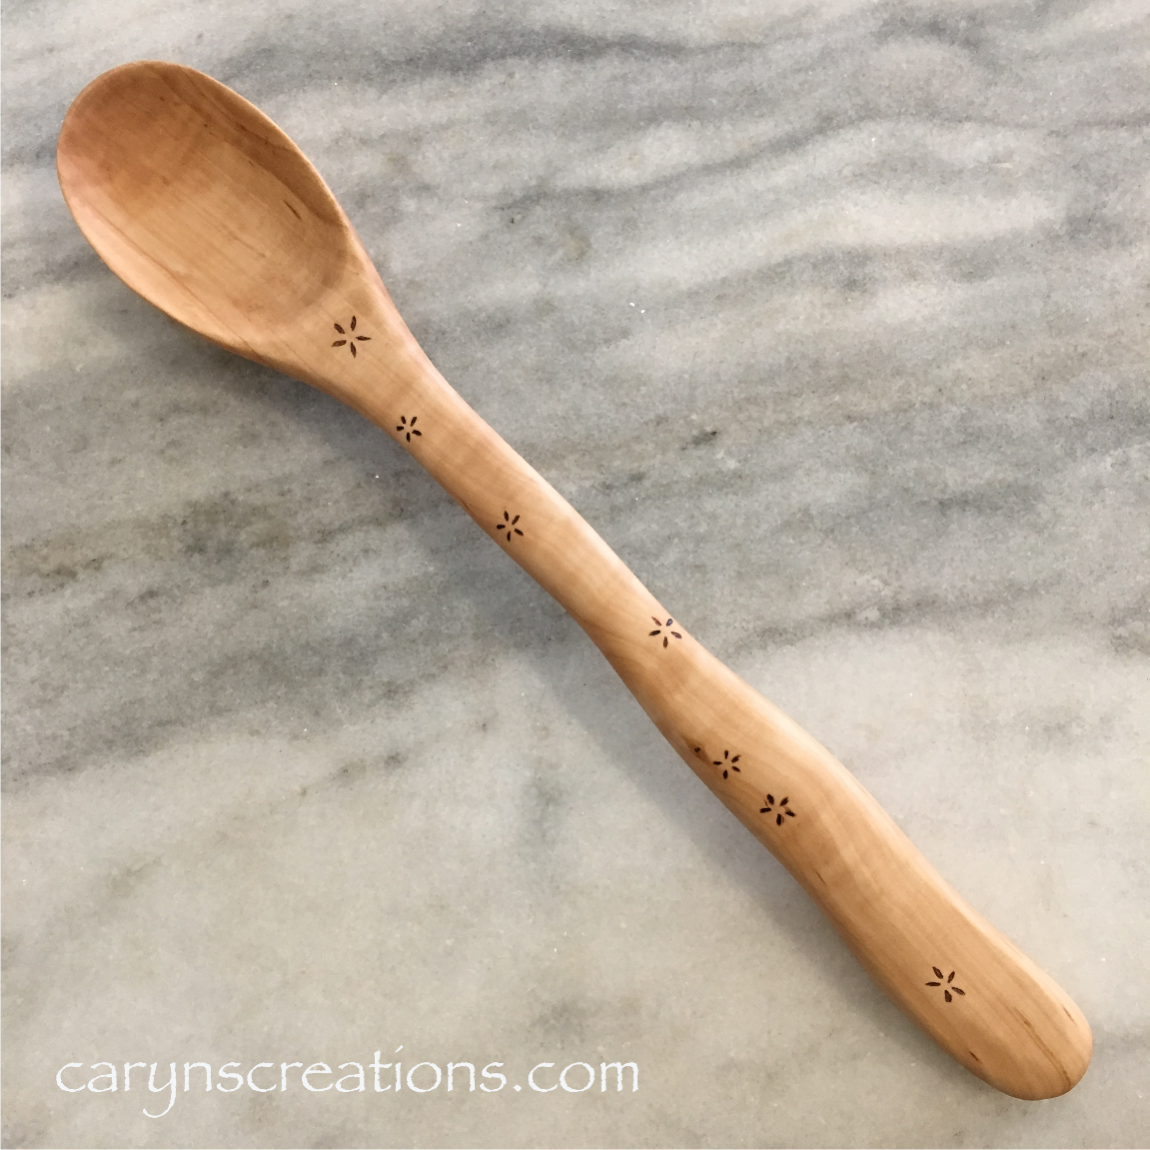
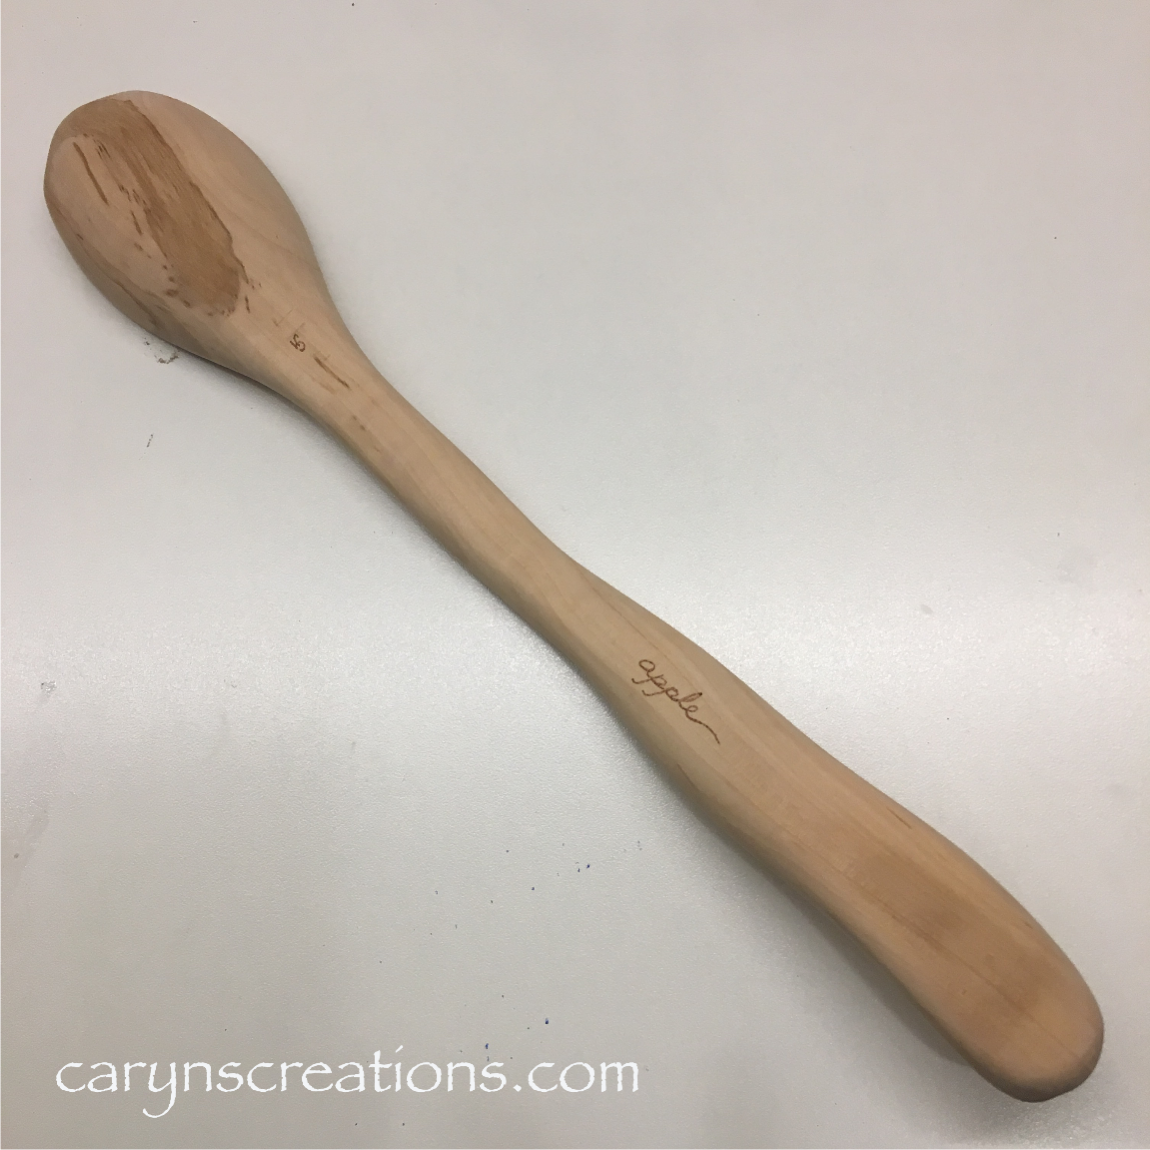
My Dad recently had a birthday, and as he has suggested that I get back into wood working, I decided to make him a spoon.
Hand carved apple wood spoon
When I was younger I really enjoyed wood working and carving. Then kids came along and when they were young I needed to keep an eye on them, so I couldn’t disappear into the garage for hours. And bringing sharp objects into the house was a safety hazard (not to mention that the idea of having to clean up saw dust and wood chips inside unthinkable.) So I turned to more child-watching friendly options for creativity: crochet, jewelry making, and other things that could easily and quickly be put down to figure out why it was suddenly quiet upstairs.
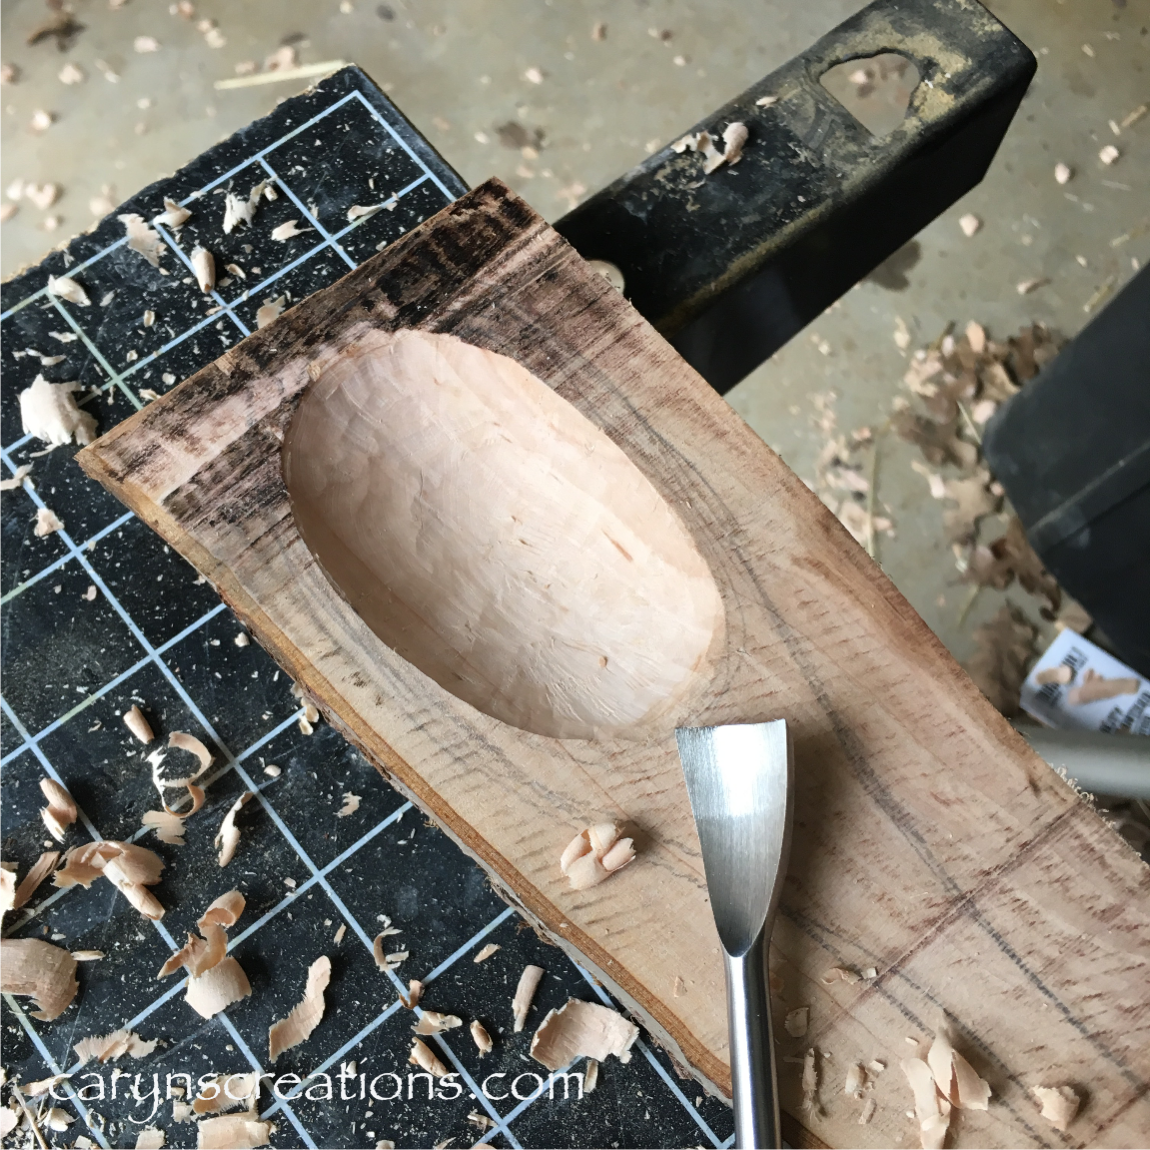
The kids have been in school for many years now, but somehow I didn’t really get back into wood working. Turns out I missed it. Picking out a piece of wood and taking chisel and bandsaw and sander to it to turn it into something functional and beautiful is incredibly satisfying. I haven’t tried spoons before, but I will again! I took progress photos to share:
I cut a piece of applewood and used a fishtail gouge to shape the bowl of the spoon
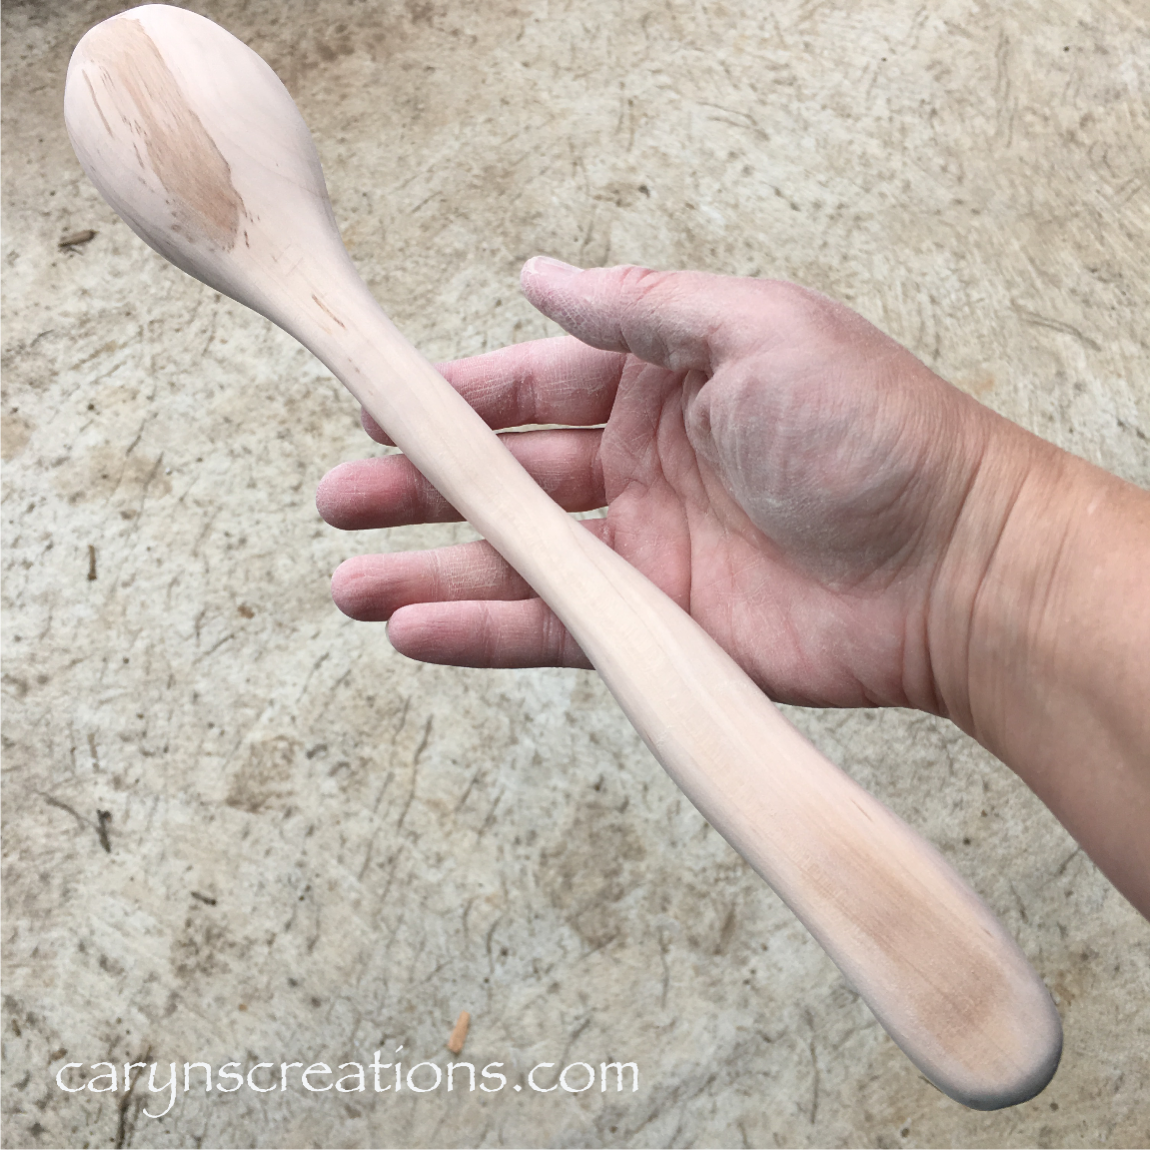
This is after I used the bandsaw to cut away most of the excess. I wanted a flowing wavy shape to the spoon.
The back of the spoon after some time (and a few belts) on the belt sander.
Front of spoon after using the belt sander and following up with hand sanding.
After sanding down with progressively finer grit sand paper, I wet the spoon with water. The water helps raise the tiny splinters in the wood, and also gives you a good idea of what the final color will be.
After the spoon dried, I sanded again with 320 grit, I used a wood burner to make apple seed designs.
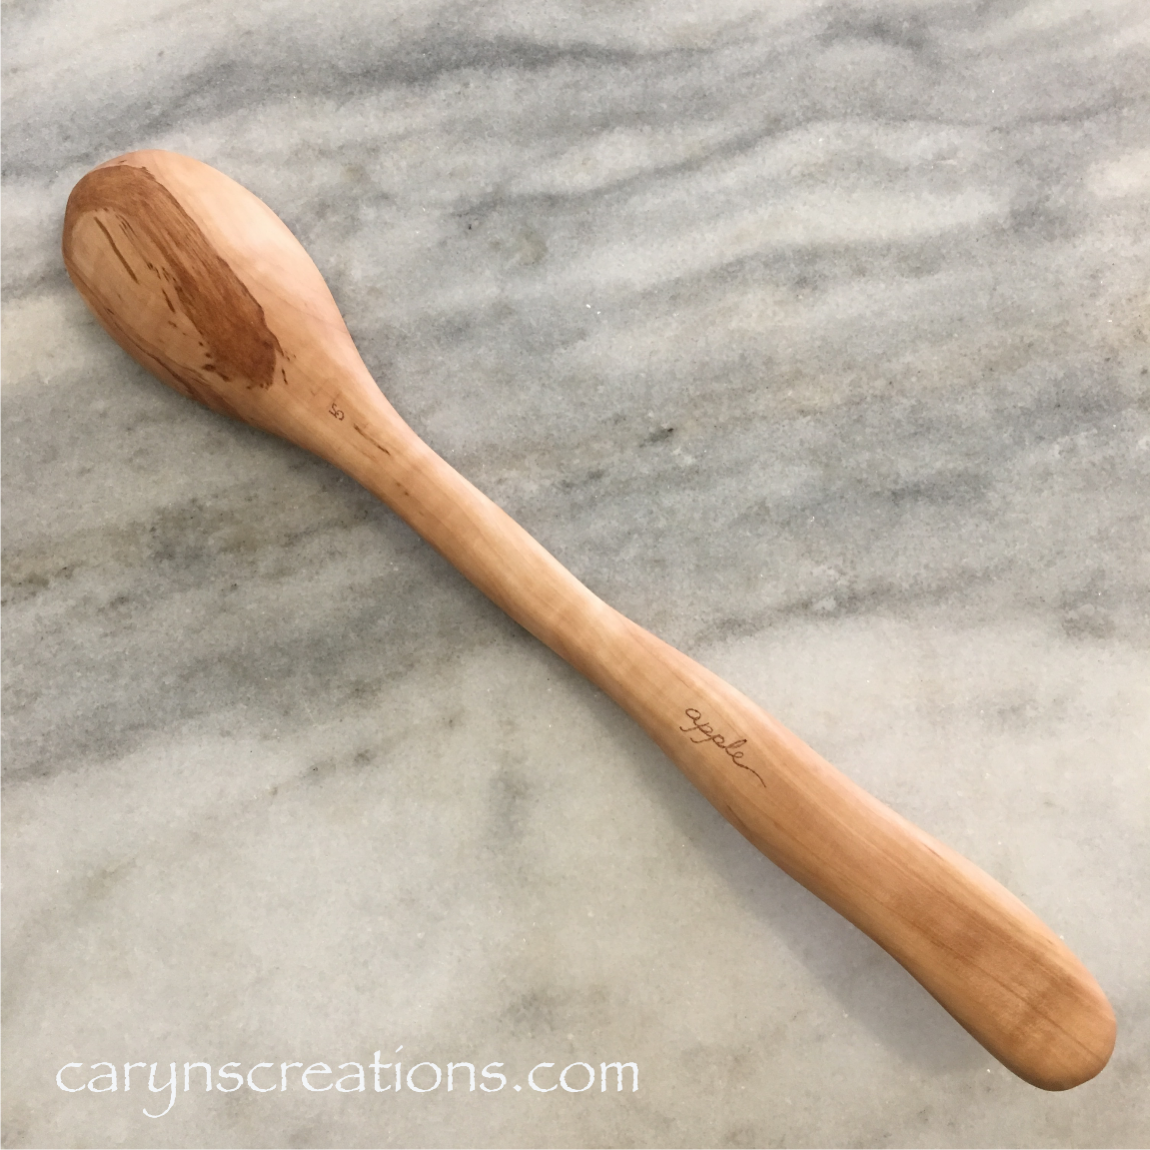
Back of the spoon with wood burned “apple” and my mark.
To finish the spoon I rubbed it with olive oil once each day for three days. I love the swirl of color in the wood on the back of the spoon bowl!
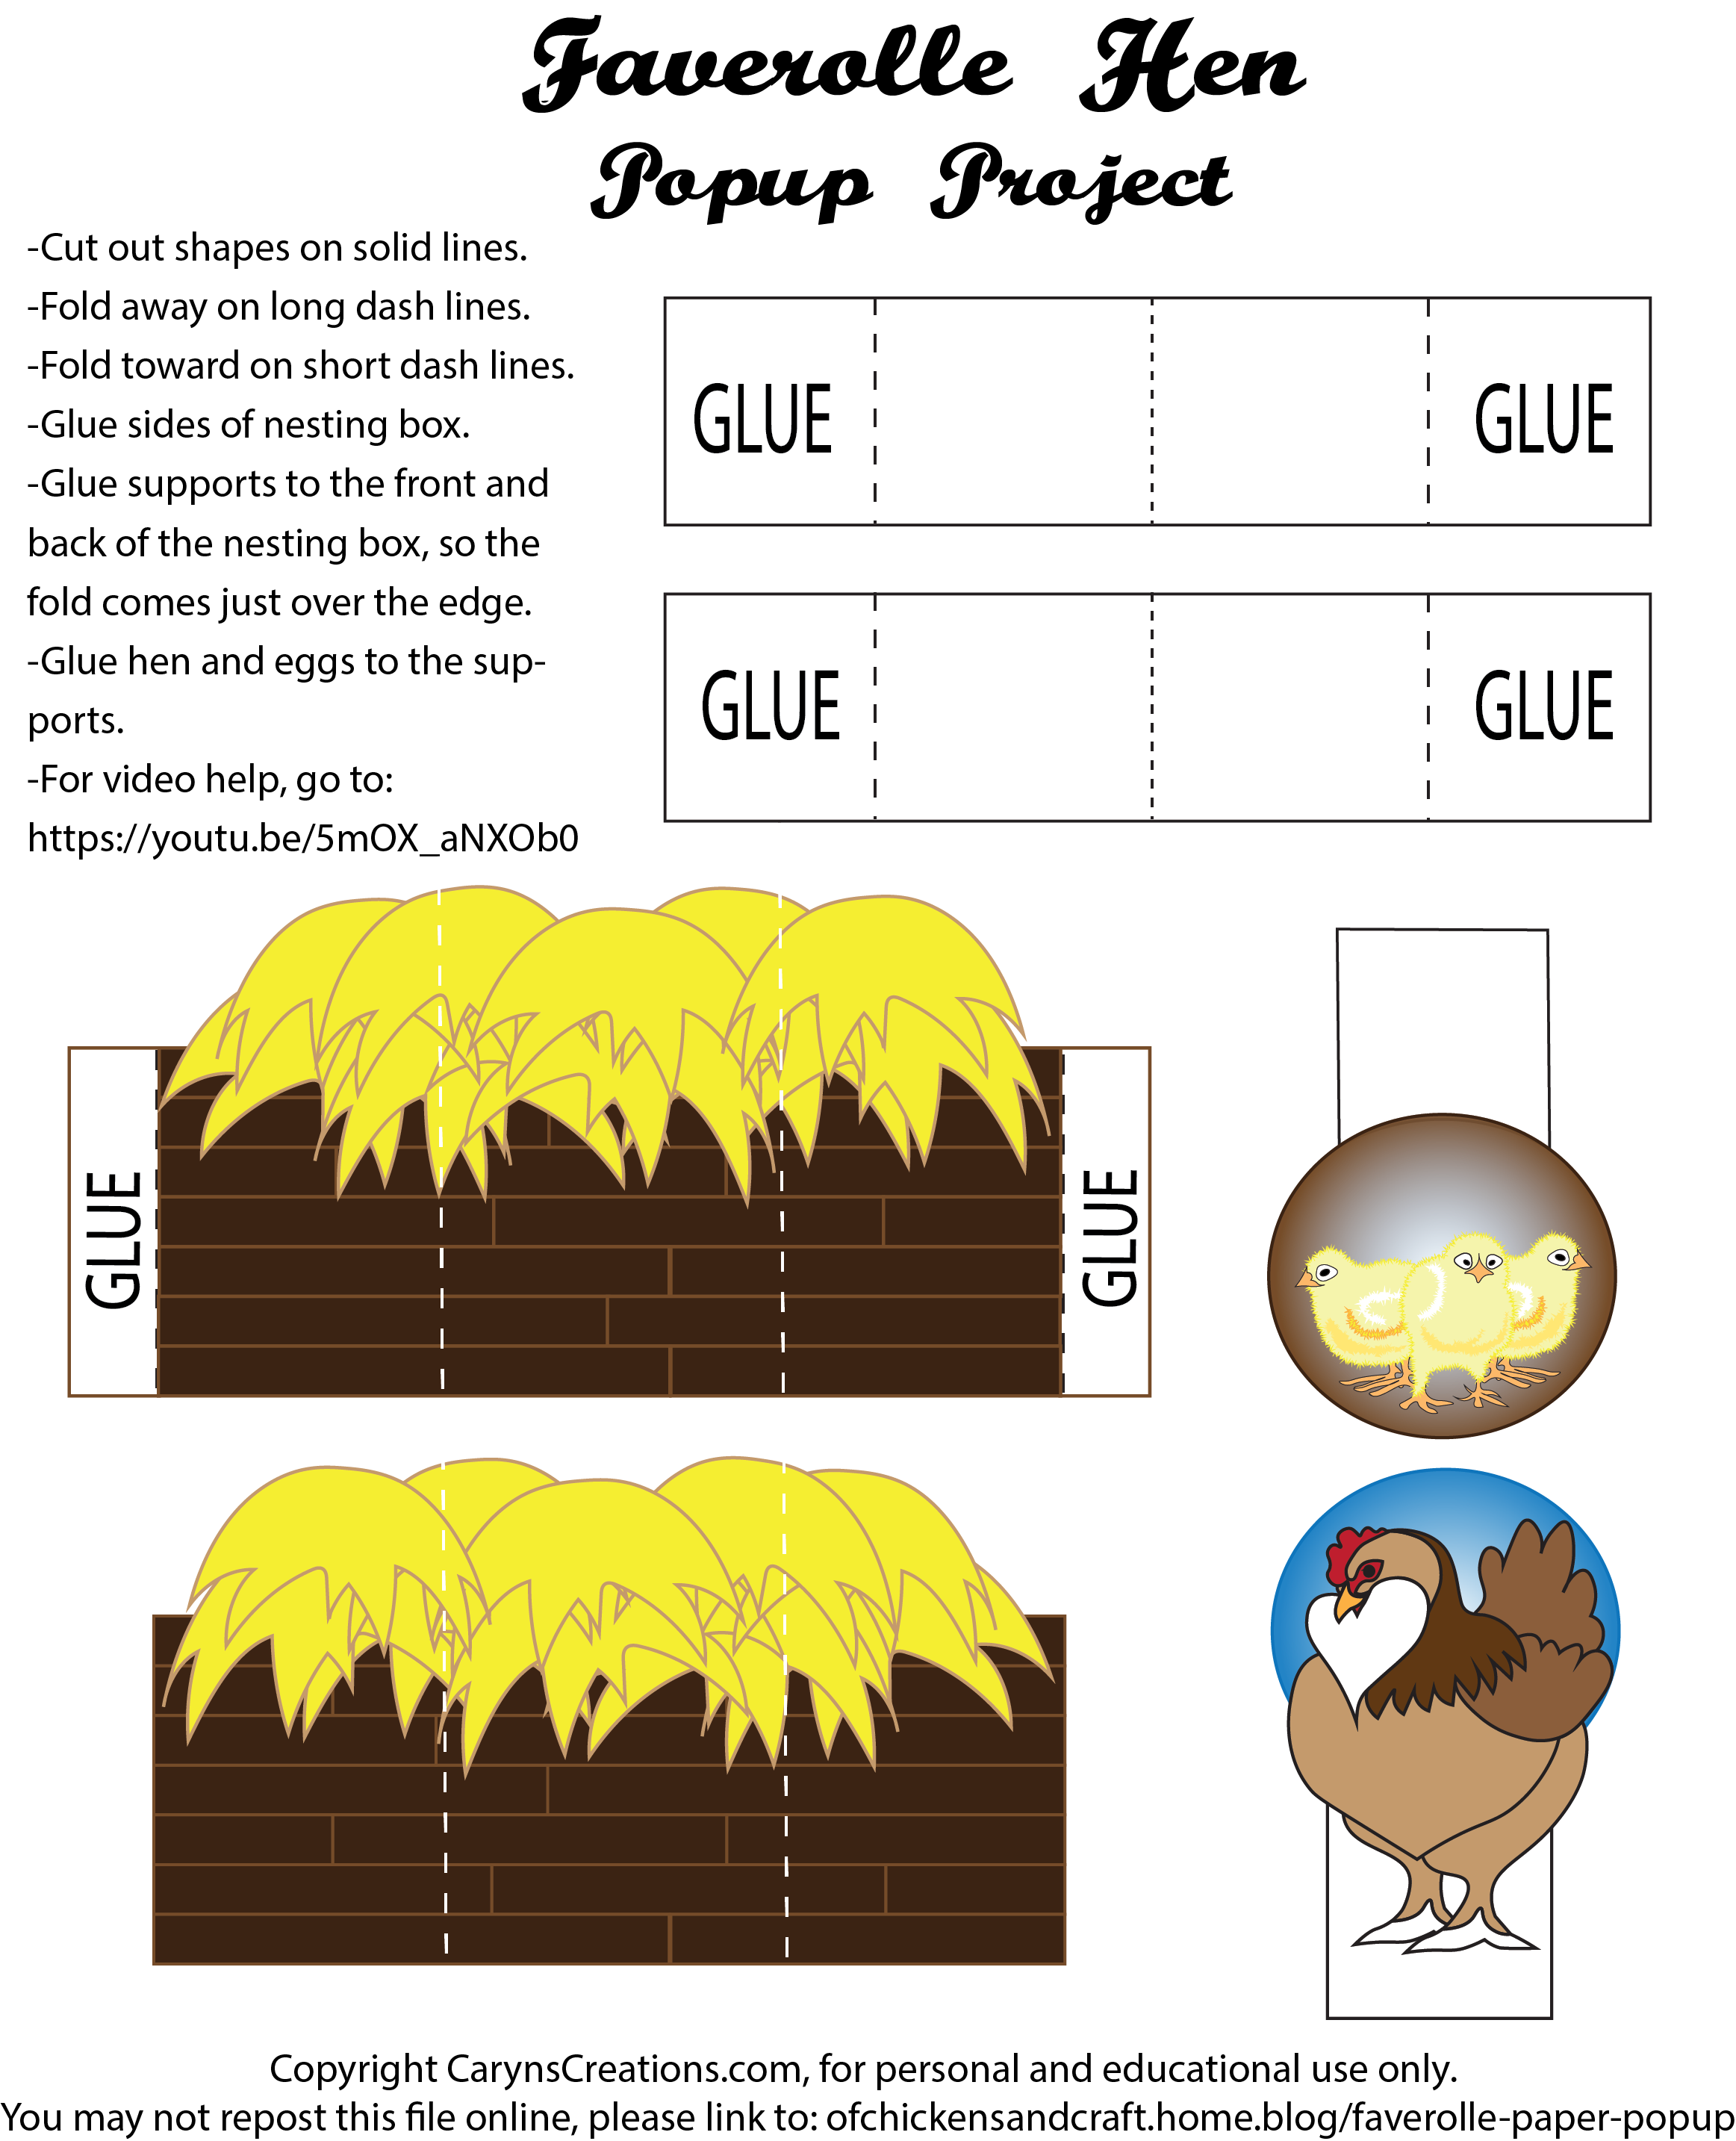
It has been cold again. So cold that it is not nice working outside. Being stuck inside all weekend is frustrating; paper craft to the rescue! A nice spring theme activity was in order.
Faverolle hen and chicks paper pop up project
I have shared how much I like paper crafts, so when I saw a new (to me) way to make a popup, I had to make one with chickens! Since we are getting Faverolles, I needed a Faverolle hen and chicks. I made pencil sketches to get started on forms, then used Adobe Illustrator to refine the shapes. I’m quite pleased with the hen, she is a cutie with her beard and feathered feet! I will probably use her in other projects.
I made a video on how to assemble the popup:
And here is the image file. It works best printed on cardstock. Free for personal and educational use. Please link back to this post to share.
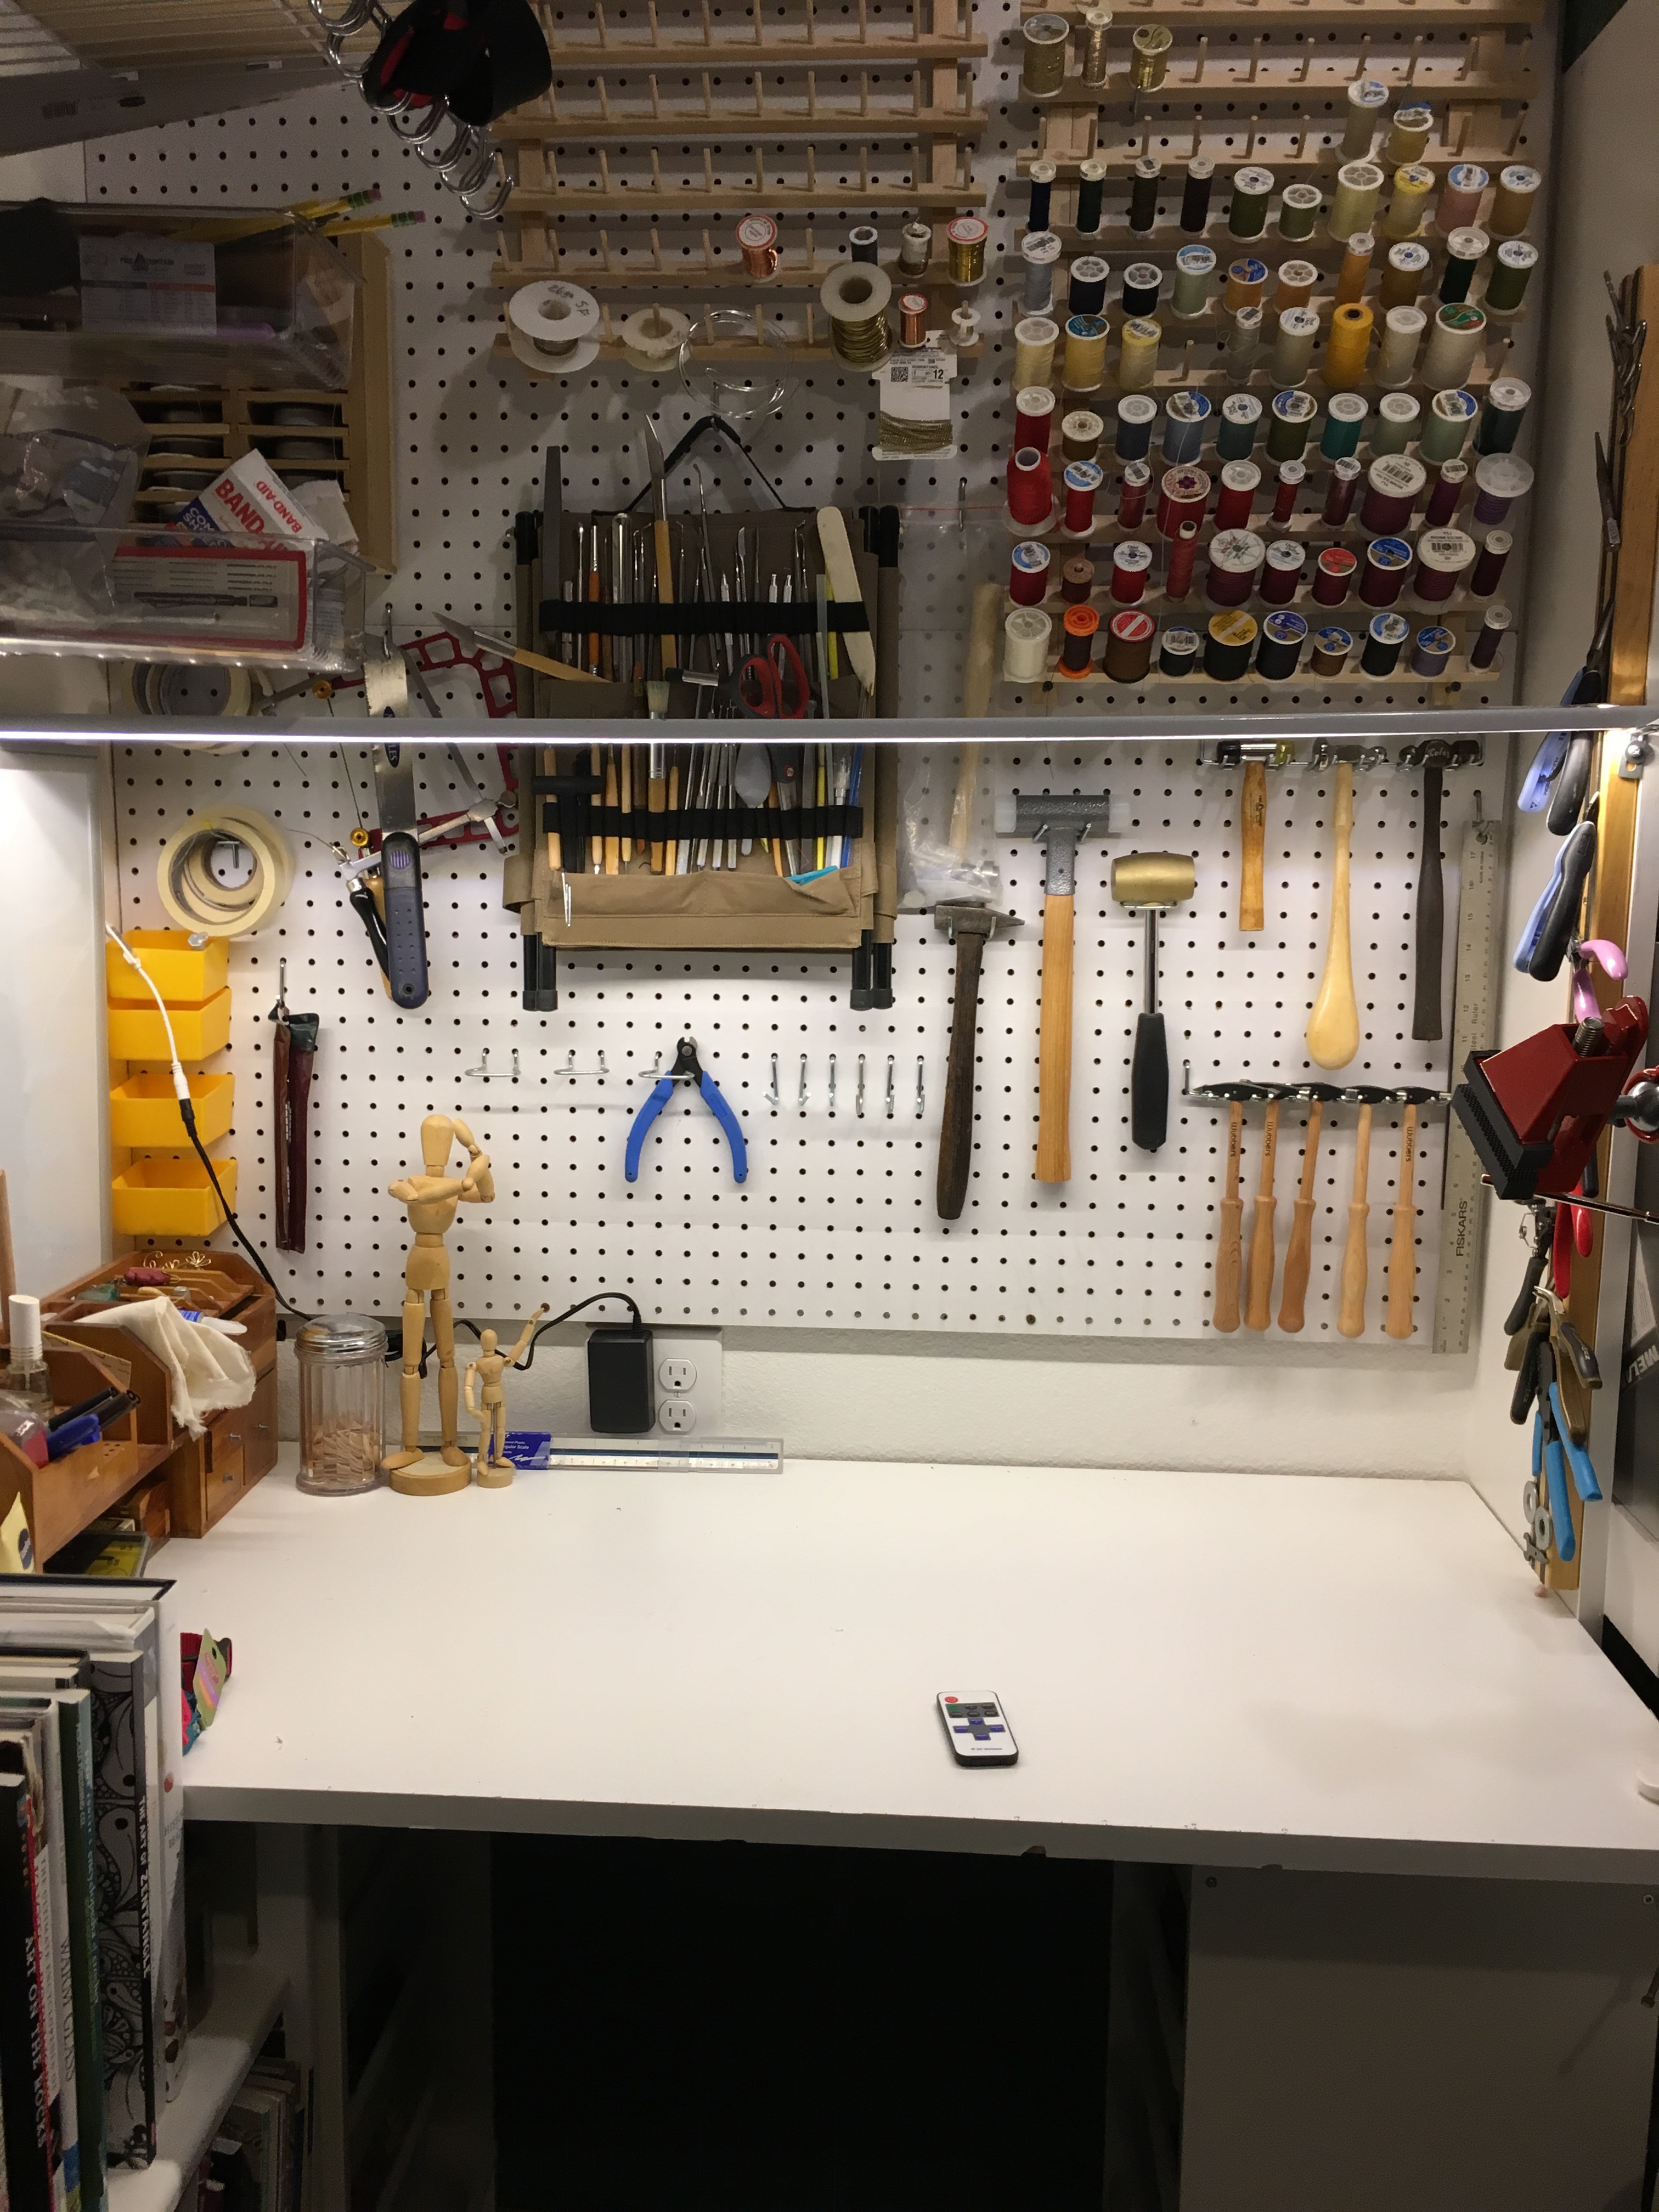
No outside work today; the forecast said rain all day and it was right this time. So I broke down and cleaned up my craft space. It was better than cleaning the rest of the house! (Or folding laundry, ugh.)
I think I mentioned that I am easily distracted? Cleaning the craft area involved quite a bit of “I forgot I started this!” And “How can I fix this?” The wooden model now has a functioning hand again, I rearranged several boxes of supplies so I could get one more box on the shelves, and I found enough bits and bobs to make a new light for the space.
It is this last one that particularly pleases me. I had a shelf standard leftover from the last house (a poor single standard all by its lonesome, aw), and I had leftover LED strip lights and (amazingly) all the parts to make it work, so I lined the inside of the standard with the sticky LED tape, screwed in a bracket for it to sit on, and now I have lovely light all across my standing bench! Hurray! I love LED lighting.
LED strip lighting lining the inside of a shelf standard
Craft area ready with new light!
P.S. Though I love the sticky LED strips, they don’t stick as well as I think they should. After having the tape snake down three times, I finally took some hot glue to the sucker. Love hot glue.
I’ve been reading up on how to feed and water chicks, and all the many different methods available! I’ve read that keeping the feeder at the chick back height is important, and one of my favorite suggestions was to use hanging feeders so the chicks can’t knock them over. Most hanging feeders are designed for wild birds and can get quite expensive (especially if you need 4!) So I came up with my own design for hanging regular, inexpensive chick feeders and waterers using the bases designed to screw onto quart Mason jars. I’m planning on using an old wire dog crate as my brooder, so hanging things from the top of the crate will be quite easy.
I was not able to find the exact instructions I wanted, so I combined a few different techniques. I used a steel ring so the jar could not slip through, made a wrap for the steel ring to protect the jar from bumps, a net around the jar, and “ladder” straps so I could easily adjust the height at which the feeder would hang.
I have written up instructions below, and have also done a “speedy” video for the curious with short attention spans. (My eldest said the video should be 30 seconds. I couldn’t quite get it that short, but I managed to get it down to 5 minutes. It goes fast, but is kind of neat to watch at super speed.)
Here is the materials list: Metal Chick Feeder Base (usually available at the local feed store) Quart Mason Jar (also available at the feed store, or at the grocery store) 4 inch Steel ring (you can pick these up in the macrame section of the craft store) 40 feet of craft rope (the kind used for macrame, also available at the craft store, usually for about $5 for 100 yards) S-hook or carabiner to use to hang the feeder
Instructions: Cut 20 feet of craft rope and seal the ends by melting them (I use a lighted match, but lighters work as well). Cut four 5 foot sections of rope and seal the ends.
Covering the ring: Wrap the 20′ section of rope into a center pull bundle by leaving about 12″ hanging and wrapping the rest around three fingers until there is 12″ left. Use the tail to wrap the bundle and tuck the end through the wraps. Use an overhand knot to tie the rope onto the ring, leaving about 4″ of tail. Then use half-hitches to cover the ring; remember to go over the tail as well to keep it in place.
Making the net: Using cow hitch knots (also called larks head), make 7 even loops around the ring. Use an odd number of loops to make it easy to go to the next row. When you have completed the base row, continue to make cow hitch knots in each loop, making sure to keep the loop lengths even and pulling the knots tight. When you have reached the bottom of the jar, use a few half hitches to secure the end of the rope.
Making the adjustable straps: (This is similar to making a rope ladder.) Choose two opposite pairs of loops on the bottom of the net, and attach one 5 foot section of rope to each loop by folding the rope in half and using the larks head knot. Take two ropes (four strands) and tie them together with an over hand knot. Take one of the left strands under two strands to the right, over two to the left, under the third on the left, and back across the top of the other three strands to the right. Then take one of the right strings and wrap it around the outside of the rung you just made. Open the loop on the left and tuck the end of the rope through, and pull everything tight. On the next rung, use the two strands that did not get used on the previous rung. This will keep the rungs from being able to scrunch together. When you have done 10-11 rungs, about 1″ apart, tie the four strands together with an overhand knot. Do the same procedure on the ropes on the other side of the net. Cut and seal the excess rope. Use the rungs on the ladder to hang your feeder!