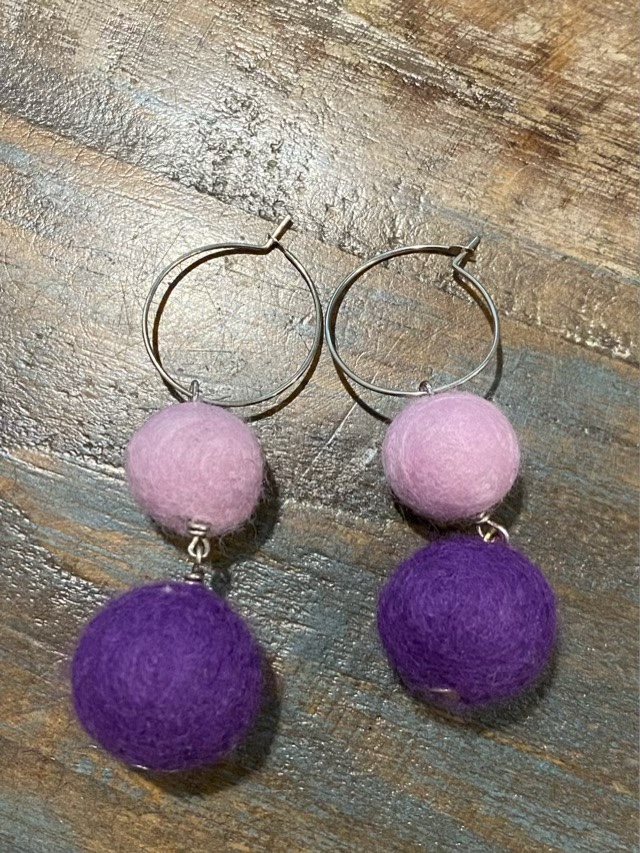
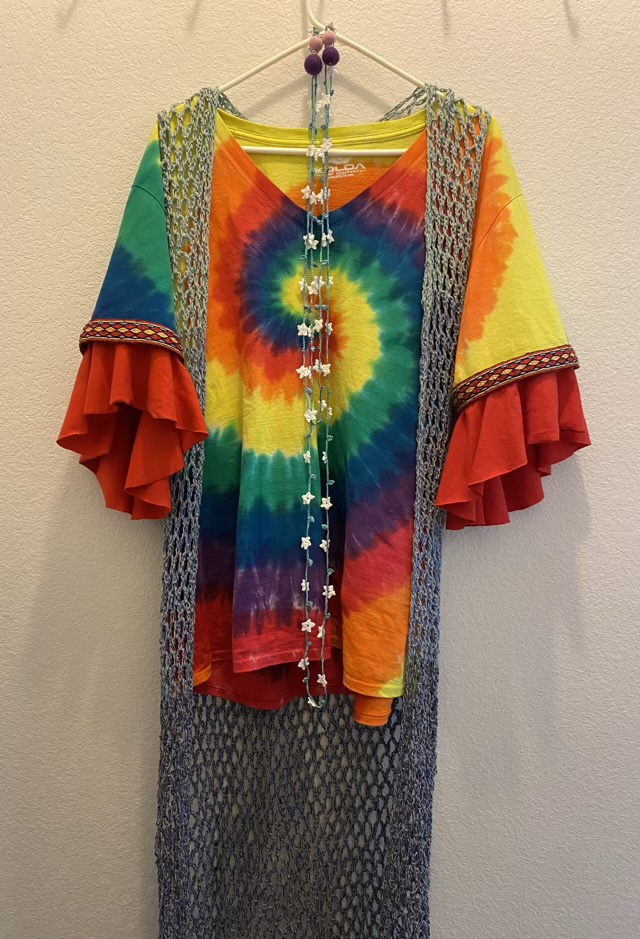
I put together a 60s themed outfit with a nod to the fiber arts. I crocheted a duster vest and flower garland, wove a band and added bell sleeves to a tie-dyed t-shirt (I did not dye the shirt, dye and I are still not on speaking terms), and assembled some felted wool ball earrings! (My mom made and gave me the felted beads.)
Bell sleeves made from t-shirt materialFelted ball earrings60s Outfit (minus bell-bottom jeans)
When I do bell sleeves next, I will make them longer and without the off-set center hole. These look great on the hanger, but were awkward when worn, except when doing jazz hands, then they worked. Since I can’t do jazz hands all the time (although that would be quite the arm workout), I picked out the seams for the added sleeves after the debut. I can see peasant blouses with woven trim and bell sleeves on my crafting horizon.
I still haven’t found my weaving shuttle. Hm. So I made one. I’d seen some trapezoidal shuttles on Pinterest, so grabbed a small thin wood sheet and cut a shape using a coping saw. The shape isn’t sellable perfect, but it works quite well, once I sanded it down.
Handmade yarn shuttle
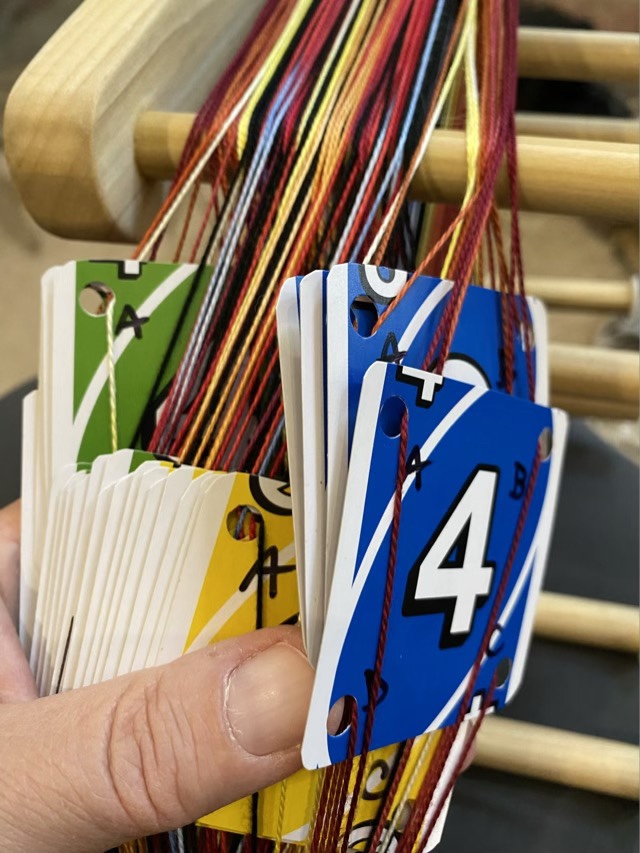
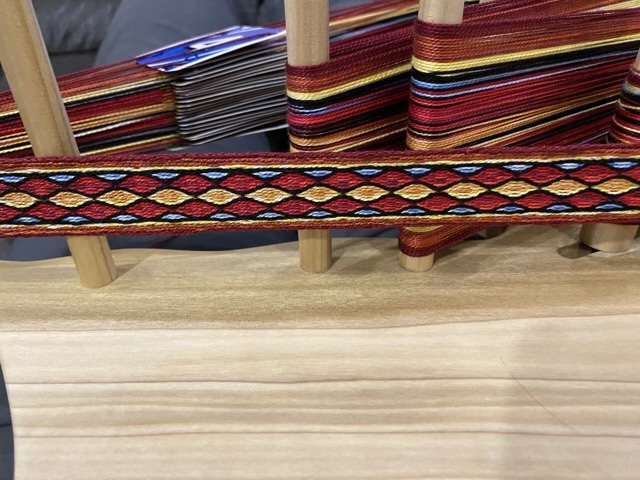
I was then able to weave my new band pattern. It was quite cool to see the muddy mess of warp threads focus into a distinct pattern as I wove. The main experiment in this round was to see if staggering the turnarounds on the edges made the transitions smoother. They do, but it still isn’t as nice as having the edges a consistent direction, but I didn’t have to deal with warp twist. I did discover that I could tell where I was in my pattern by when the “A”s lined up. Every fourth turn, the cards line up, and since the pattern is based in 4, it meant I only had to move my pattern marker every fourth line. I need multiple cues to remember where I am in a pattern; sometimes I forget to move my marker.
“A”s lined up at the end of a set of turns (note there is also no twist in the warp)Pattern emerging from the warp threadsFinished bandCorrected pattern
I did discover my original pattern had errors, which I fixed as I wove. I went back to the pattern editor and updated it as shown above. I also really like weaving with variegated yarn, it gives added depth to the pattern.
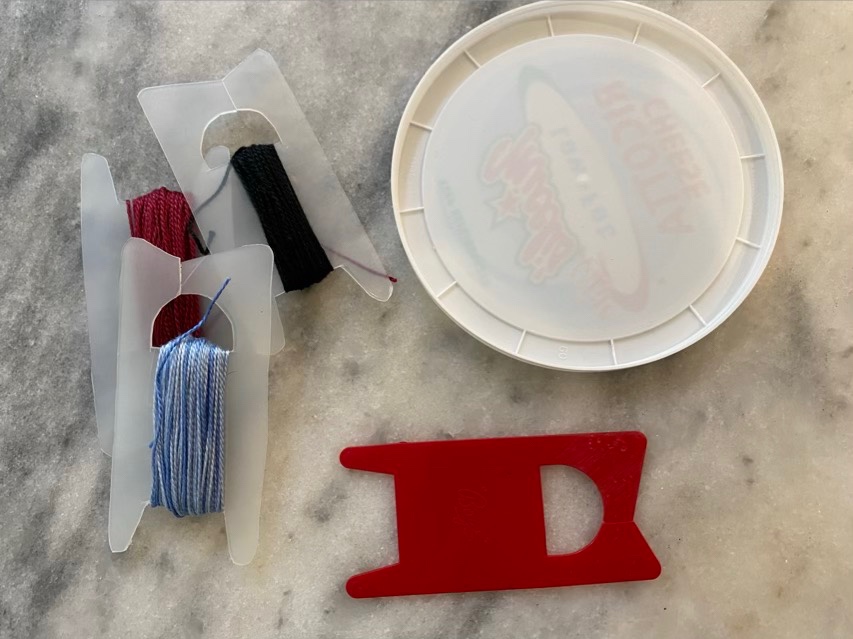
In my Grandma’s stash of knitting supplies, there is a stack of bobbins she made from plastic containers. I decided to follow suit, and make more bobbins from my used plastic lids.
Grandma’s bobbins (left), commercial bobbin (bottom), ricotta cheese lid (right)
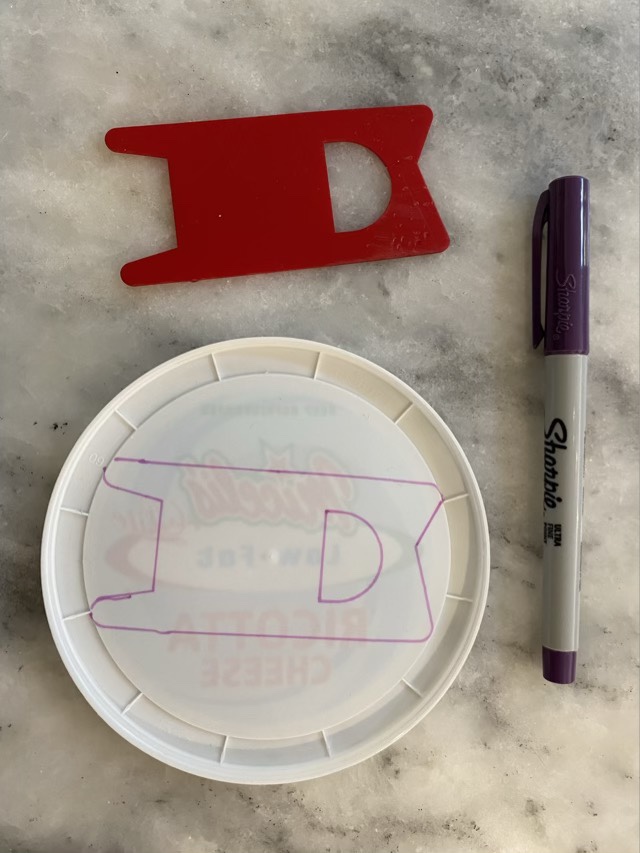
There are no signs of tracing on Grandma’s bobbins, I’m not sure if she wiped them off, they wore off, or she made so many she didn’t need to trace them. I need trace lines, so I used a thin sharpie to outline the commercial bobbin.
Tracing the bobbin onto the lid
I cut out the traced design with kitchen scissors.
Cut out bobbin
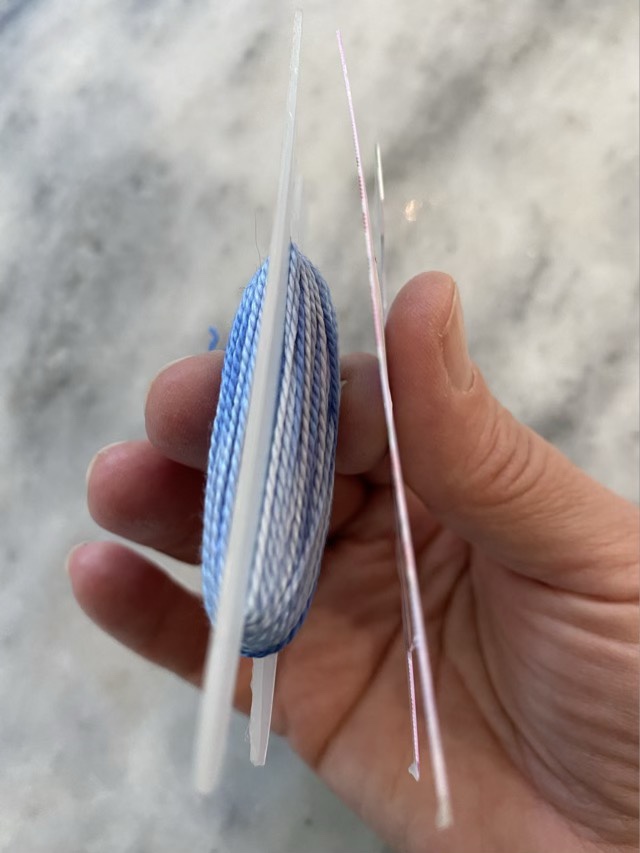
I think cutting was a harder task for Grandma; the plastic she used was much thicker than mine. It is a visible reminder that plastics manufacture has changed, and products are using less plastic per item now.
Grandma’s plastic (left), modern plastic (right)
Despite the thinner material, my new bobbin works great to organize the extra bits of thread I’m accumulating as I warp my Inkle loom.
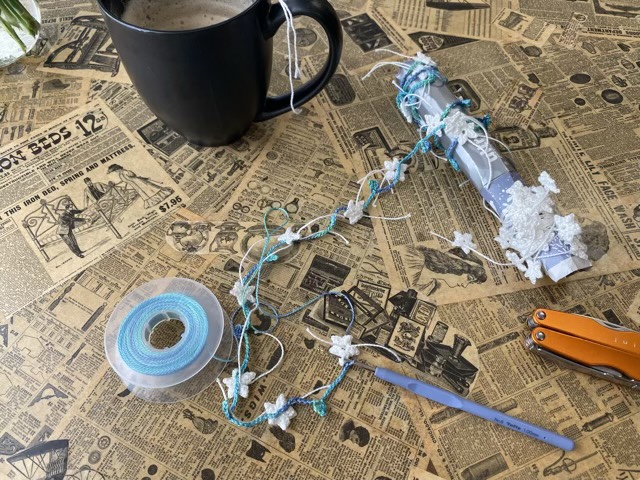
I’ve had this as a purse project for a couple weeks. I wanted to make a flower garland, and I wanted to use crochet (which is still my top choice for an easy-to-pick-up, easy-to-set-down project). I chose pearlized cotton from my stash. I was sad, but not surprised, that all the green is gone, but the multicolored blue did a fine job for the leaves.
Crochet flower garland in process at my favorite coffee shop
I started by making the flowers with white thread. These are made with five petals crocheted into a magic circle, each petal is a chain 2, double crochet into the circle, chain 1, slip stitch into the top of the double crochet, chain 2, slip stitch into the circle. I made subsequent flowers along the thread because I didn’t want loose bits floating around my purse. When it came time to crochet the vine and leaves, I would clip off a flower and add between leaves (which are similarly constructed to the flower). I neatened up the white threads ends later by weaving them in and clipping.
Long strands with flower bobs enjoy getting tangled. I didn’t have an extra bobbin, so I tore off a side of a tissue box, rolled it into a tube and tucked in the ends. This allowed me to wrap the ornery lengths around it to keep them neat, and the tube served as a holder for the 1.00 mm crochet hook I was using. Not pretty, but effective.
Finished garland
For the final flower, I joined in the start of the chain to make a continuous loop. Now the garland can be doubled and used as a head band, or looped and worn as a necklace.
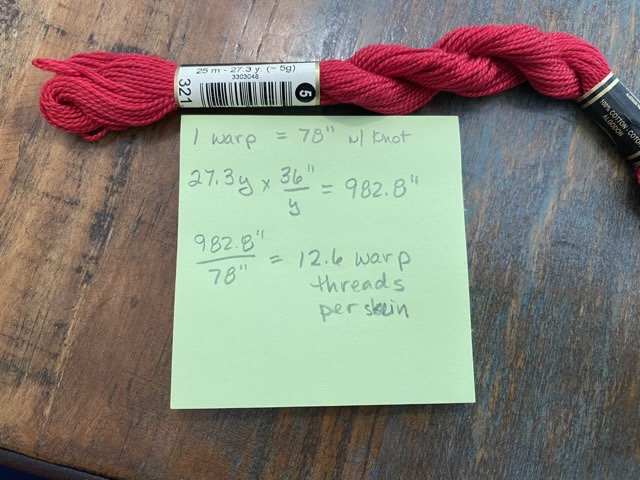
My inkle loom calls out again, and I have a stash of pearlized cotton that needs to be used. My craft supplies are very demanding. I measured the warp space on my loom and did some calculations to see how many warps I could make with one skein.
Length calculations
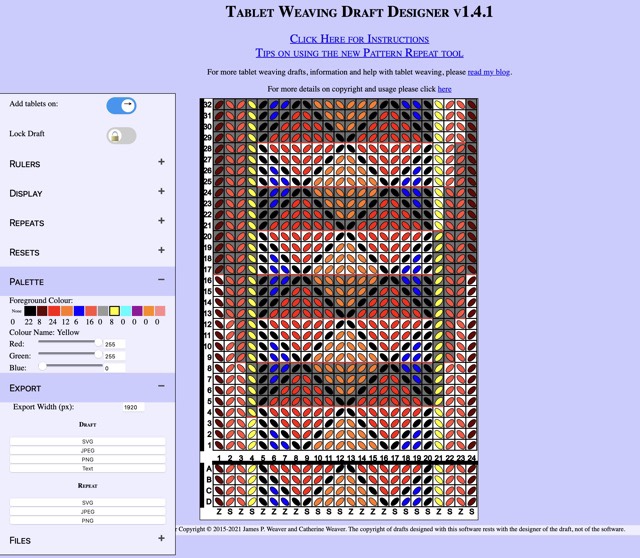
It turns out there are several websites that have apps for designing tablet weave patterns. Neat. I tried the first one on the list, found it intuitive, and designed a pattern that I could make using what was in my stash.
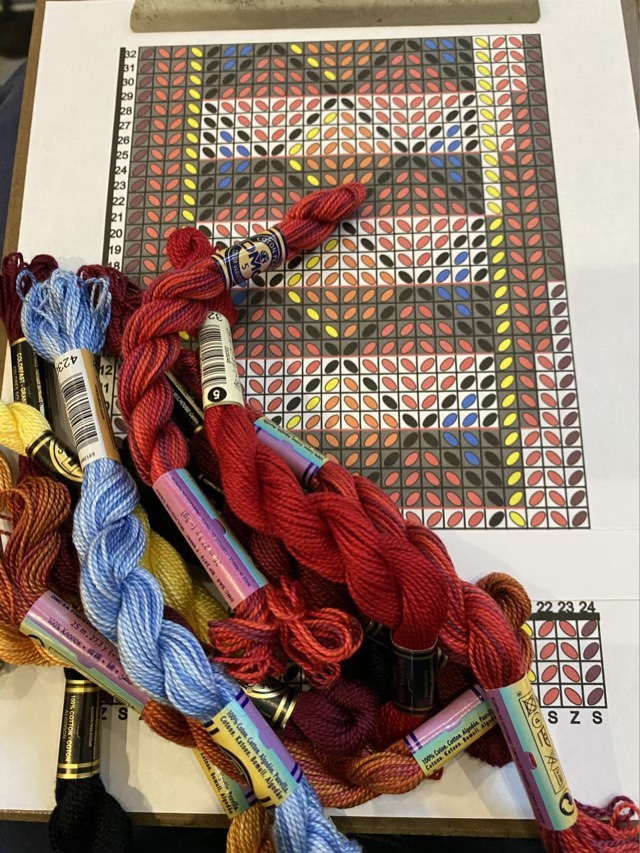
Screen shot of “Tablet Weaving Draft Designer” appPrinted pattern with skein colors
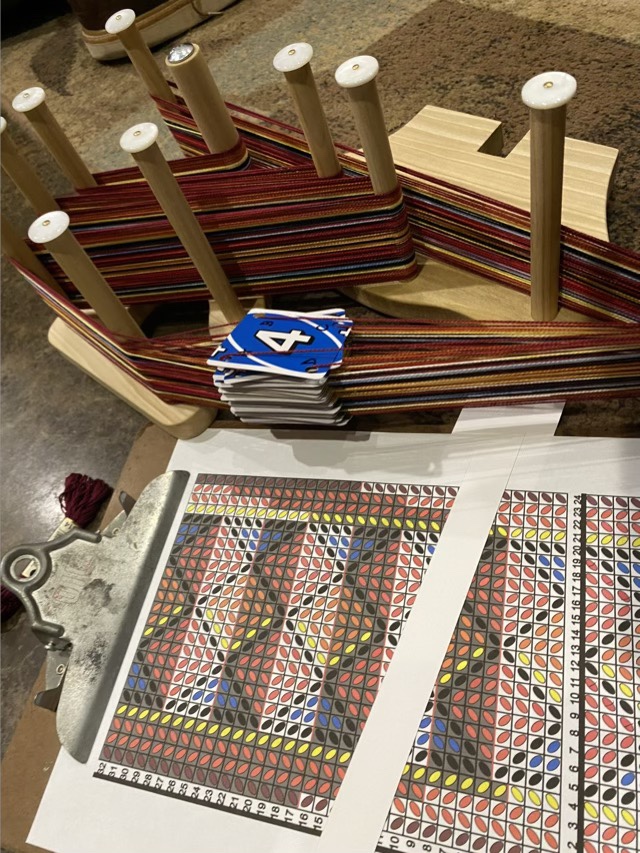
Warping the loom takes a couple hours, but taking time in this step is well worth the effort. The diagram I printed was easy to follow to set up my cards.
Warp completed
I cut a strip of card stock with two long slits that fit over my pattern so I could keep track of my rows. I’m all ready to start weaving! Except, where is my shuttle? No seriously, I can’t find it. I probably put it somewhere safe again. Hm.