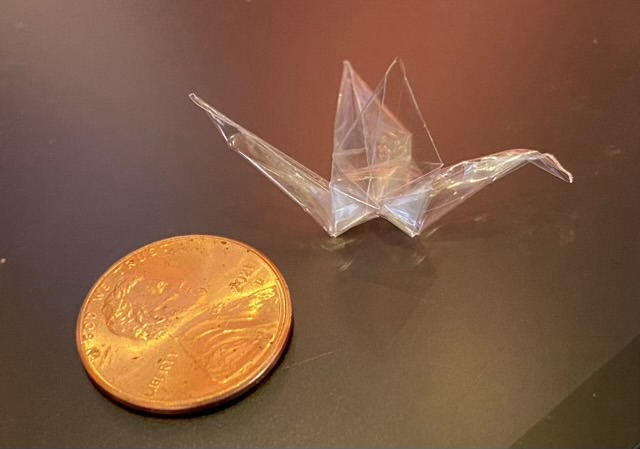
Many years ago I learned how to fold paper cranes. It is my go-to fidget when I’m waiting and there is paper available, mostly a situation I encounter in restaurants. My cranes have become smaller and smaller as my kids grew and the paper available diminished. I went from coloring sheets to sugar packets. My favorite so far has been a minuscule crane folded out of clear plastic.
Photo description: clear origami crane folded out of a plastic wrapper. Penny for scale. Sitting on the surface of an iPad.
I’ve finished spinning the singles for my soybean fiber. It has quite the halo. I think if I had used water to wet it as I spun, as is done with flax, it might have less fly away fibers. I’ll mark that as a future experiment.
Photo description: Soybean fiber before spinning, the fibers really like to expand and float.Photo description: Soybean fiber after spinning, wrapped nostepinne style around a prototype Phase Spindle. Many fuzzy ends visible along the edges of the yarn cop.
Soybean fiber was developed by Henry Ford around 1937 in his push to promote soybeans in the marketplace. He also developed a soybean plastic and produced a limited number of soybean cars, with plastic body parts and soybean fabric door panels. The fiber is now gaining in popularity and obtaining soybean combed top for spinning is easy. It is also referred to as vegetable cashmere, which fits with that soft fuzzy halo I obtained with my yarn.
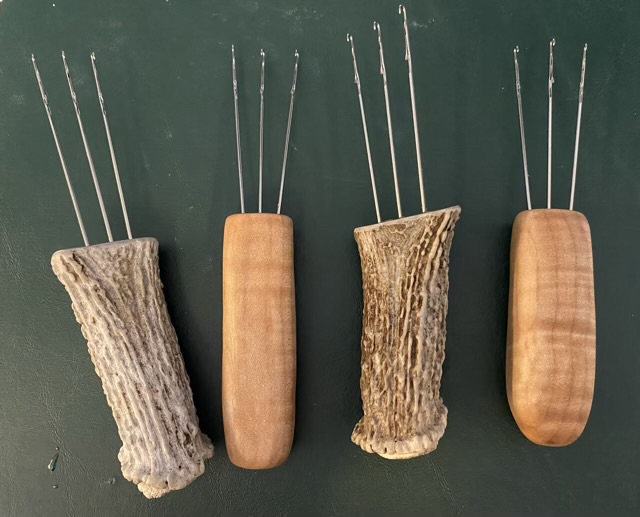
I ordered replacement hooks for a knitting machine, which are essentially latch hooks without a handle. I made handles from flame maple and deer antler horn and mounted three hooks in each handle using epoxy in holes I drilled with a drill press.
Photo description: four 3-hook cord makers, the far left and middle right handles are made of deer antler, the far right and middle left are made of flame maple.
I sealed the flame maple with Howard’s Feed and Wax (I think I’ve mentioned before how much I love this stuff!)
They work! I spread the tines a little more on these, which gives a more flexible i-cord than my first i-cord maker.
I have decided to name my 3D printed spindle design a “Phase Spindle”. It takes on many aspects of traditional spindle and tool design and combines them to increase the functionality. The barrel shape of this whorl-less spindle comes from the Scottish dealgan, and is used to create a center pull ball as you spin. Where the dealgan has a flat base, this has a point so it can be used as a supported spindle as well as a drop spindle. The head of the spindle has grooves to bring the yarn closer to the center of the spin and stabilize the spindle. There are two grooves so they work spinning clockwise or counterclockwise. The center of the spindle is hollow to reduce weight. As a bonus, the cavity is large enough to add beads if the user wishes to add weight to the spindle. The spindle is made of Tough Resin, which resists breakage when dropped, better than wood.
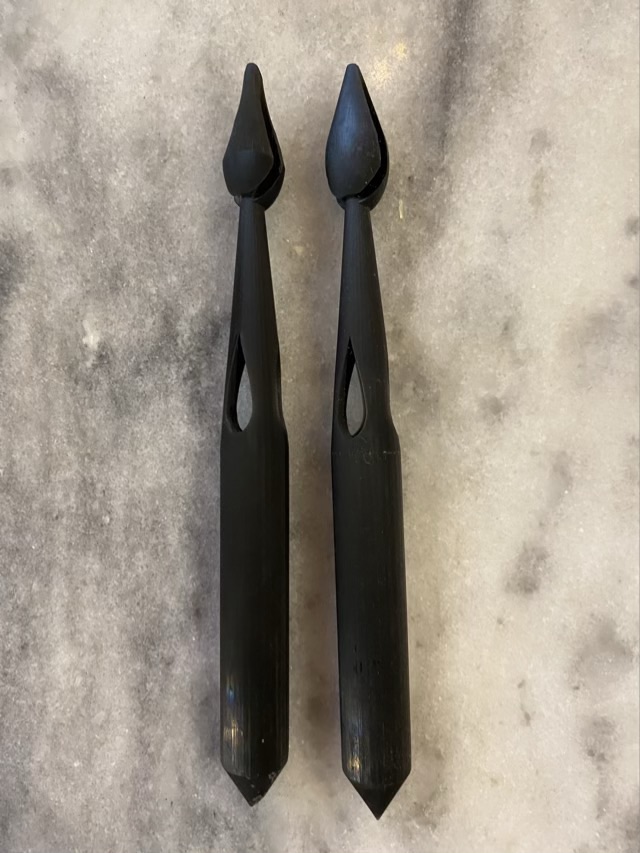
This project has been on the shelf for a while because I needed to reevaluate the head design. The printed spindle had a convex head, which didn’t give enough finger tip contact for flicking the spindle into action. I sanded each head into a straight to slightly convex curve to make spinning it easier.
Photo description: two black Phase Spindles, the one on the left has the head re-contoured with a concave tip, the one on the right shows the convex curve.
One side of the spindle has the lovely chatoyancy created by the precise parallel lines 3D printers make, but the other side had artifacts from the support structures. I sanded these smooth and used a stencil that I designed and cut out of removable vinyl to paint on a moon graphic.
Photo description: removable vinyl stencil applied to the barrel of a small Phase Spindle, my favorite weeding tool to the right.
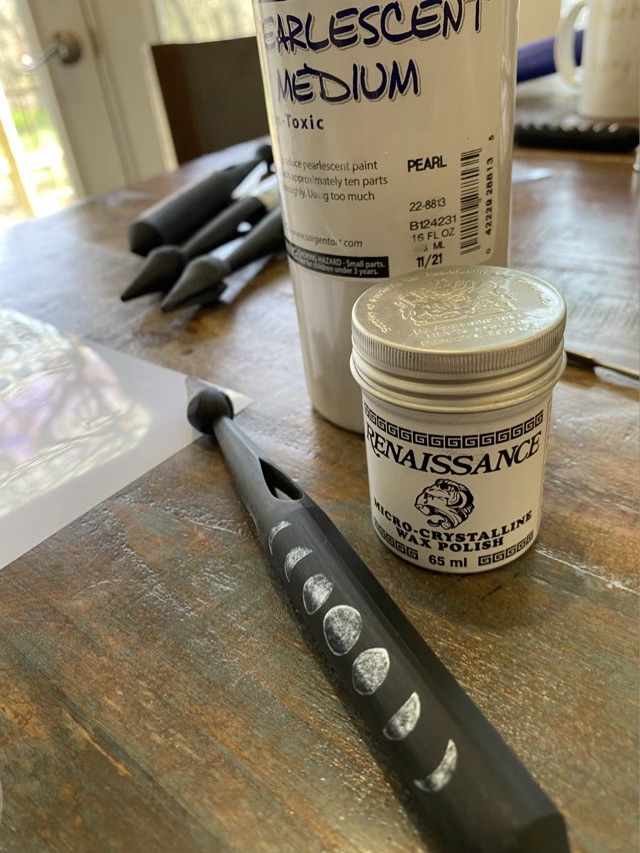
To seal in the paint and protect it, I finished each spindle with a double coat of micro crystalline wax. The wax helps enhance the color of the resin as well.
Photo description: small Phase Spindle with moon graphic in iridescent silver and sealed with microcrystalline wax. Bottles of pearlescent paint and wax in the background.
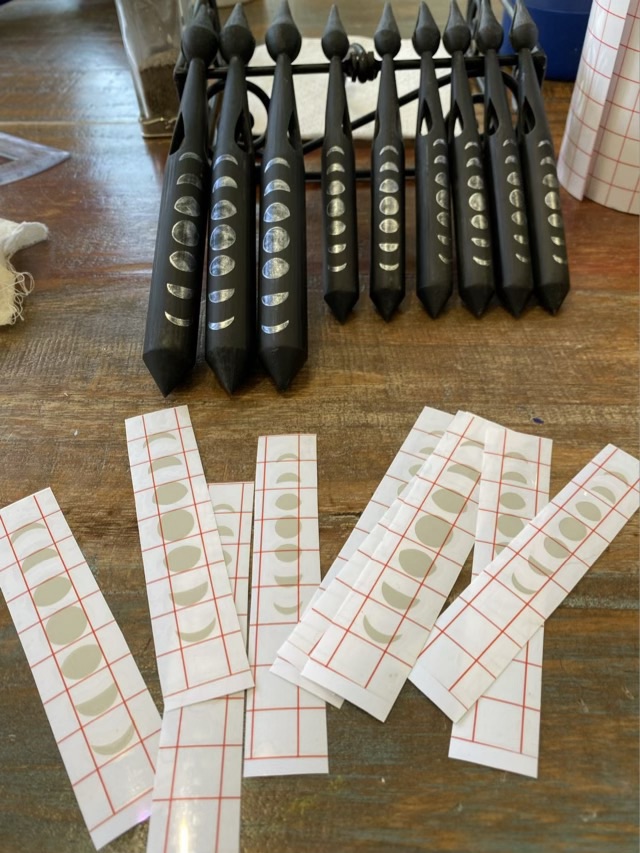
I quite like the way the moon graphic came out. As a bonus, I also have moon phase stickers weeded from the stencil.
Photo description: three large Phase Spindles and six small Phase spindles with moon graphics applied. Bonus moon phase stickers shown in the foreground.
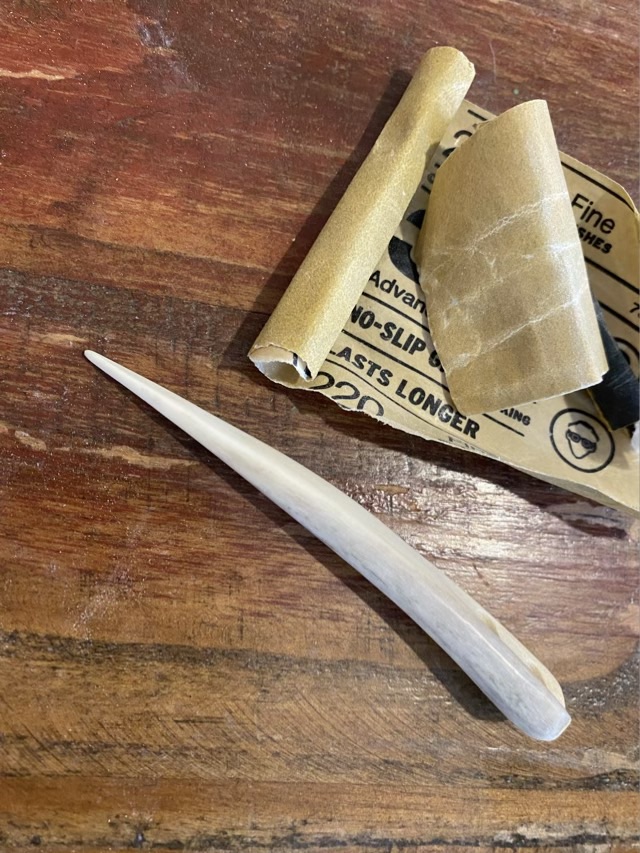
I have made my first nål for nålbinding out of antler bone! I have made several out of wood, and was hesitant about bone, but it turns out it is easy to work. I do wear a dust mask at all times because I don’t want that bone dust in my lungs. I like how well it buffs to a shine without applying a finish coat.
Photo description: thick bone needle with two holes on a table with scraps of sandpaper.Photo description: side view of the same nål, showing the natural curve from the antler tip.
This nål came out a little thicker than I care for, so I’m going to experiment with some other methods of construction. I just sanded this one down to shape; for the next one I’ll try cutting it lengthwise then sanding down, and I will try a different curve.