I have to give a shout out to Target and their favorite day brand gingerbread house kits. They come with clips to help with assembly! Their instructions also recommend decorating prior to assembly, which made it much easier for my youngest. Icing is easier to apply on a horizontal surface.
Photo description: Various gingerbread house kits on a shelf at a Target store, including log cabin, barn, and hot cocoa stand versions.
We bought early this year because I missed the window for the Halloween houses and scrambled through the pantry for substitutions. Graham crackers covered in melted chocolate fitted the horror theme, but was more a Mom project than a youngest’s project. I appreciate a well engineered kit that needs minimal adult intervention.
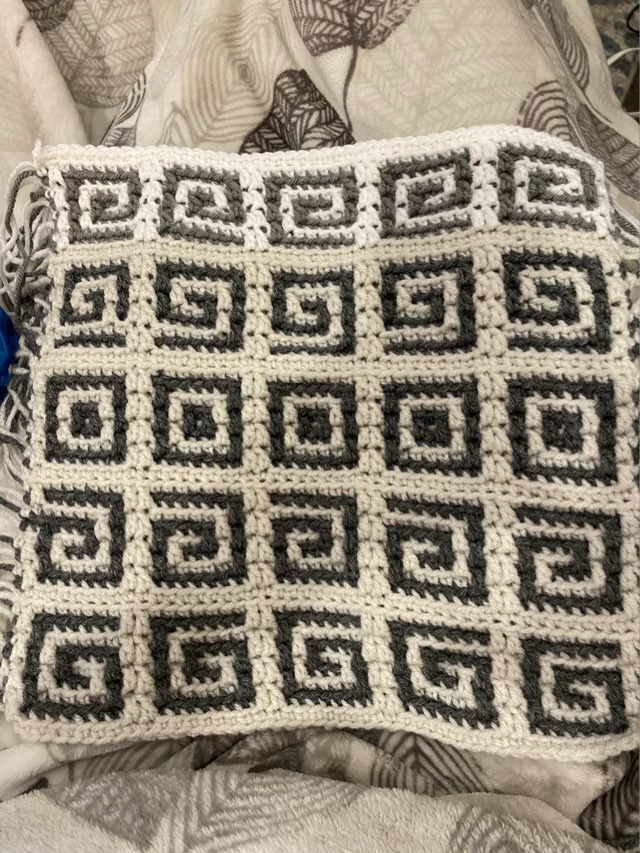
Relatively recently, I discovered the concept of mosaic crochet. Then a few weeks later, actually met someone at a craft fair that does mosaic crochet, and she showed me pictures of the stunning blankets she had made, and explained to me the difference between mosaic and tapestry crochet. Another name for mosaic crochet is overlay crochet, and it consists of alternating rows of color in back loop single crochet, with double crochet stitches that dip down over previous rows to block out color. What fascinated me most? No floats. No loose loops of yarn along the back to catch at fingers and toes. I had to try. (For those interested, tapestry crochet carries threads along the row, hiding them in the stitch until needed. That is a future project.)
Photo description: Gray and cream crochet square with rows of spirals in different orientations and square bullseyes along the center row. There are a couple errors in the execution.
I recently acquired a bag of odds and ends yarn from a fellow crafter. This is the perfect stash to draw from for experimentation! I looked up some basic mosaic crochet instructions, and settled on trying a simple spiral (because I like them). I did the first row of motifs with little problem, so did the next row with a reverse motif. The little problem was a counting and repeat issue, but rather than starting over, I adjusted the pattern to my change. It is an experiment. I left long ends on each side, because I wasn’t sure if I wanted fringe, and it actually made me loose at yarn chicken and I had to slightly switch yarn color for the last row. Ah well. The back of the piece is nearly as exciting as the front, neat lines!
Photo description: Back of same crochet square, showing horizontal lines of alternating color.
One of the other techniques I learned in this project is a standing single crochet. As the mosaic crochet is worked from the front only (I worked from right to left on every row), the first stitch starts with a new strand every time. To make things neat, tidy, and secure, it helps to start each row with a slip knot on the hook, then single crochet into the first space. Very cool technique.
I continue to periodically spray PB Blaster on the 1907 Singer 27 sewing machine I want to rebuild. I recently had a major breakthrough and was able to remove the rod for the pressure foot and the needle bar! These rods, on a clean machine, just slide out. I needed to pick away the crust around the holders, rotate them, pick away more build-up, then I was able to get them to slide upward! Very exciting day.
Photo description: Pressure foot rod covered with dried oil, the Singer 27 in the background.
I have one more internal part with a rusted screw that I want to free up so I can clean it. The main drive through the machine looks OK, so I don’t plan on removing that. Then all the parts that have been soaking in PB Blaster get cleaned. I have decided that the decals are too far gone, and it would be better to not have flaking paint, so I need to decide how to proceed with refinishing the body of the machine as well.
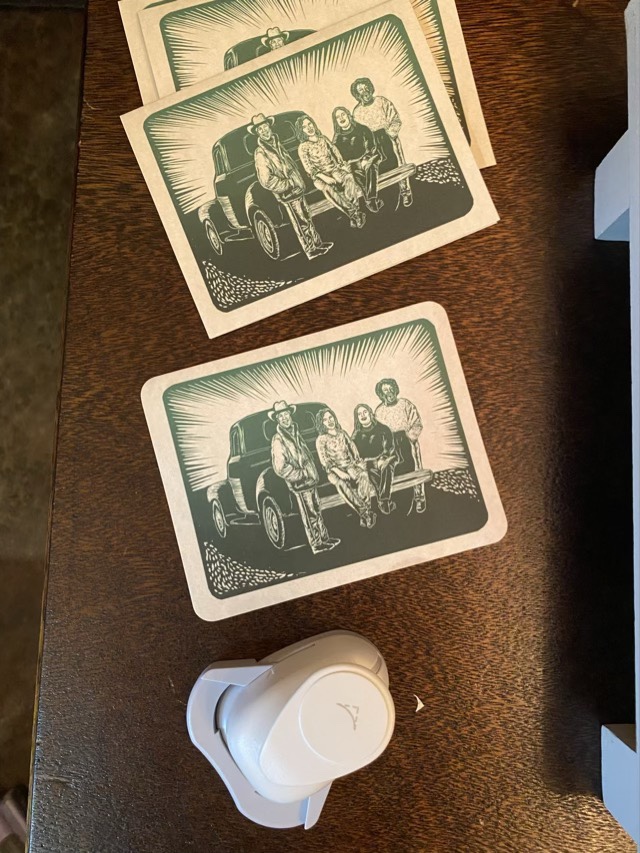
I had fun making a new holiday card design. My intention was to imitate a linocut technique, but in Adobe Illustrator, so instead of building shapes, I erased bits from the shapes. Then I applied a gradient color to the left over parts to imitate hand painting a stamp, and printed on recycled card stock. To finish off the cards, I used a rounded corner punch, and hand-stamped the greeting inside.
Photo description: Linocut-like design showing a quartet casually dressed singing around the tailgate of an old truck, corner punch shown in foreground.Photo description: Two cards, one showing the front, the other open to show “Happy Holidays“ stamped inside, stamp and ink pad on the right.
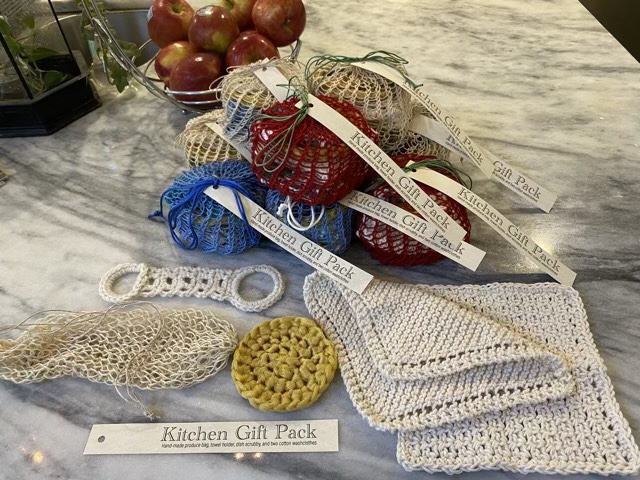
I combined all the kitchen aids I’ve been making into a bundle to sell at a local craft fair. The produce bag is the packaging, and inside are two cotton washcloths, a dish scrubby, and a towel holder. I even did them in a variety of color combinations.
Photo description: Stack of filled and labeled hand-made produce bags, with the contents of one bag displayed in front, all sitting on a kitchen counter with a basket of apples in the background.