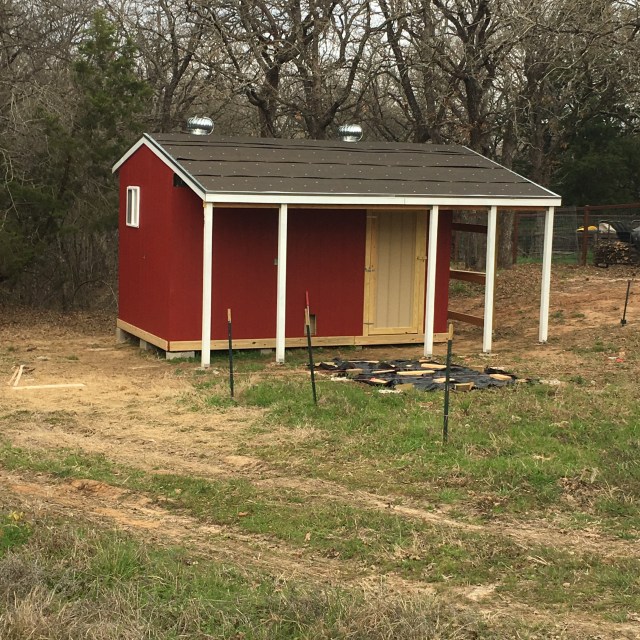
My husband put up the metal roofing last weekend! Hurray! Another tick on the check list. It is pretty and shiny right now, and reflecting the spring green from the budding trees.
I did paint the doors, but still need to get the trim painted. It was not in the cards today.
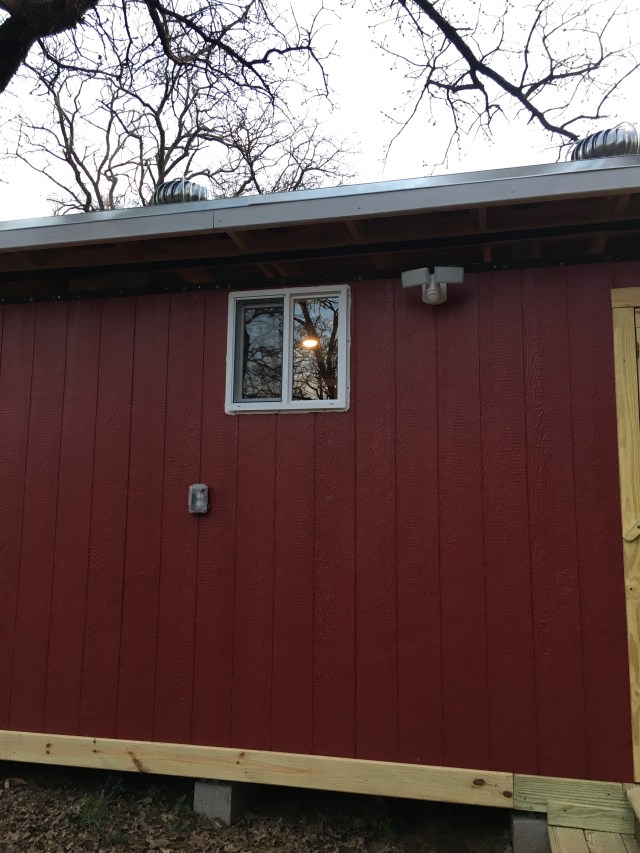
I have had Schoolhouse Rock “Electricity” stuck in my head all day. Why? Because the coop now has power! My husband hooked everything up and it is now live. Yay! We have outlets and lights inside and out.
Now, we are not planning on heating the coop, nor adjusting the light for the hens to increase egg production through the winter. The lights are for safety (inside for counting sleeping chickens, outside to scare away predators). The outlets are so we can brood the chicks in the coop and not in our living space. When the heat of the summer is at its worst, some electric fans may do some good as well. And just in case this whole endeavor goes south, the hen mansion can easily be converted to shop space. Just in case.
By the way, if the song is now stuck in your head too, you’re welcome.
One step at a time. Baby steps. It’s a big step. Stepping stones.
But in this case, it is steps for the back door of the coop! Dad and I made a step and a small porch out of treated lumber, with a rail to keep the door from going open too far (my husband’s good idea). They came out well! And when it started to sprinkle (darn it weather!), we put away the electric tools, got out the hand tools, and kept working under the front overhang. Yay!
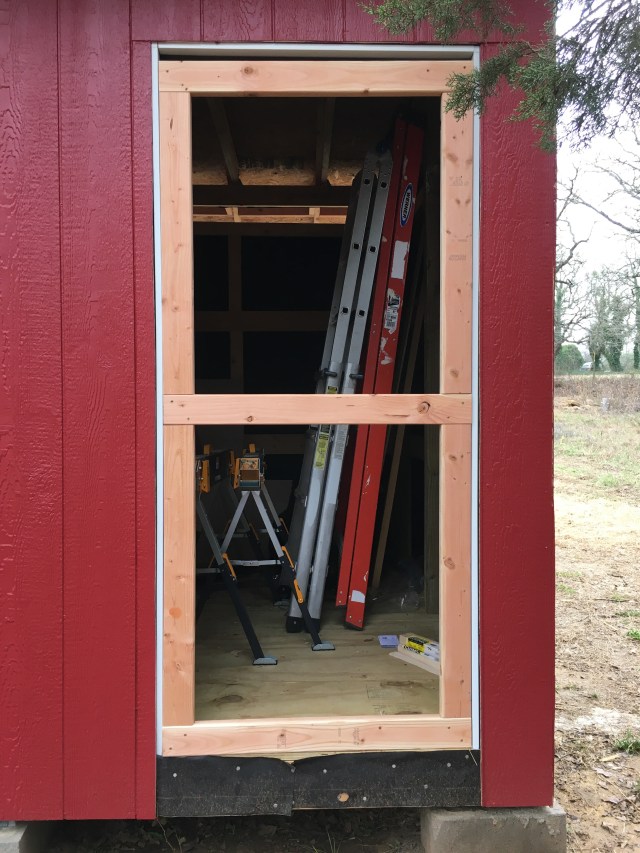
My folks are in town visiting and while the kids have been at school, my Dad and I have been working on the chicken coop. We now have doors! The weather will have to stay nice longer to get the doors and trim painted, but I’m so very exited that we are dried in!
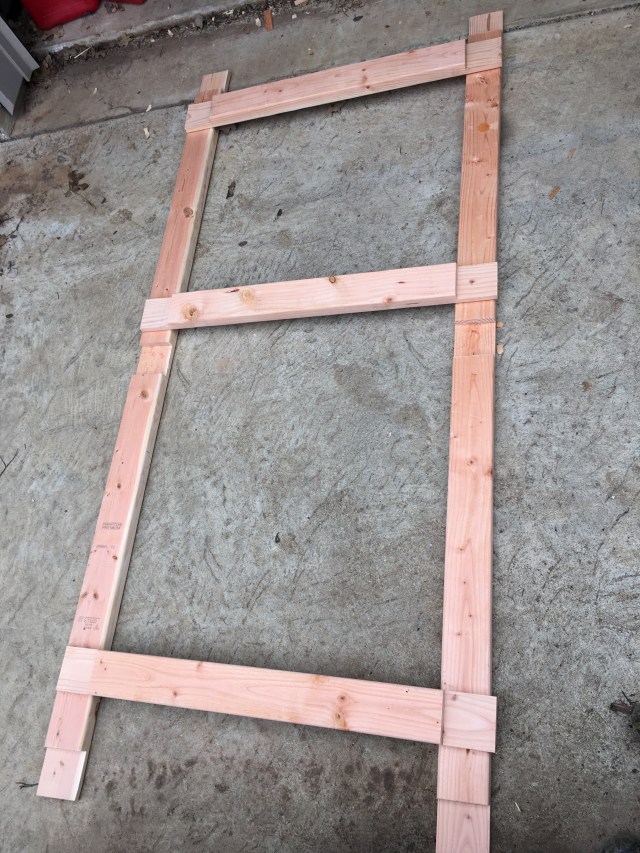
Our weather continues to vacillate between winter and spring. This week I was able to use one of the warmer days to start making the people sized doors for the coop.
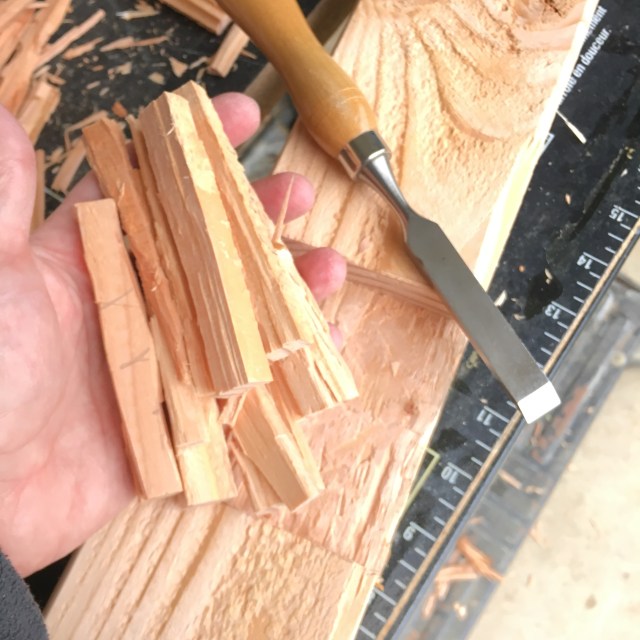
Rabbet joints cut for door
I measured the size of the door frame and subtracted 1/4″ on the width (to allow 1/8″ on each side), and subtracted 1 3/8″ from the height (our threshhold will be 1 1/8″ high plus the 1/8″ easement). I used standard 2×4 lumber and made double rabbet connections at the corners and for the cross brace. My bandsaw worked well to cut the rabbets on the ends of the boards, but for the rabbets in the middle of the board I used a handsaw and chiseled out the material.
Door joints secured with glue and screws
I then glued the joints and used 1 1/4″ screws to secure the frame, making sure that the corners were square.
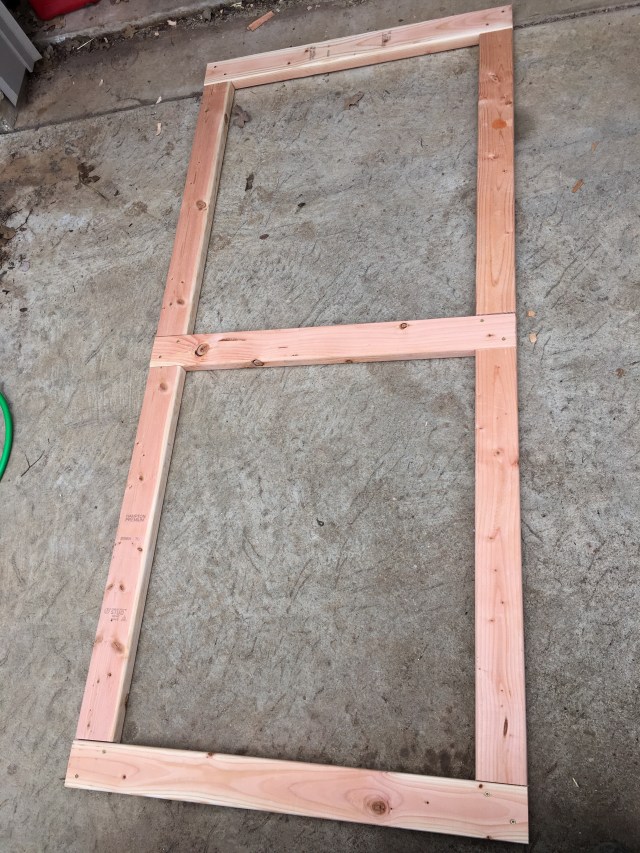
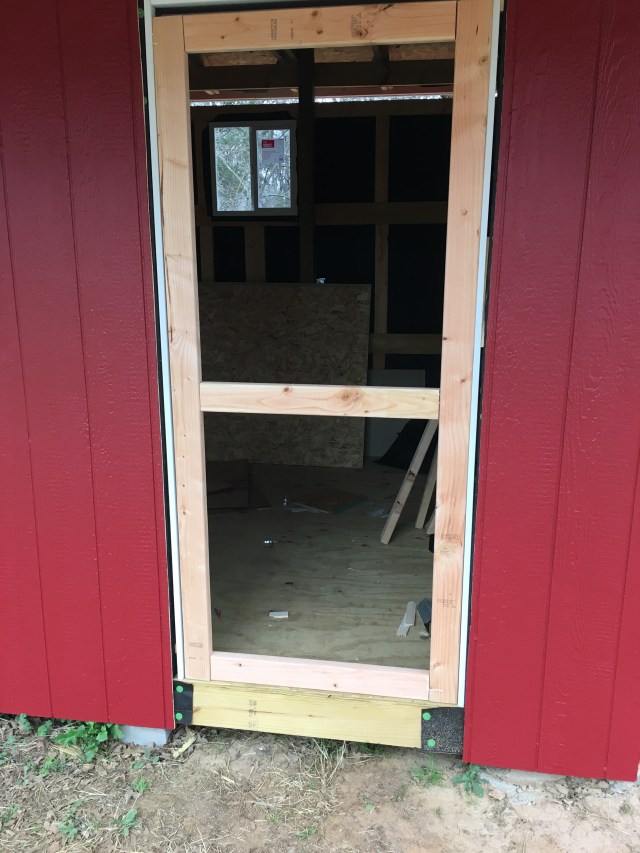
Dry fit for back door of the coop
The door fits well! (The gap on the top will eventually be a gap on the bottom for the threshold.)
And here is the front door:
Front door of the coop
This one was a little more temperamental, but it might be because it was about 33 degrees out when I finished it. I kept the garage door closed as long as possible, but to get enough light to chisel, I needed to open it! Cold! So I probably worked with a little more haste. Still, it is fun when the grain lines up with the dado and a few chisel strikes excise a nice chunk of wood.