I used my professional wood burner setup on hand made paper. Using different tips and heat settings I was able to lighten and darken parts of the image. I’m calling this done while I still like it and before I take it too far. (It happens to me. Often.)
Labrador burned into handmade paper
The paper was not hand made by me, but ordered through Etsy. It was darker than I expected, but it worked out just fine.
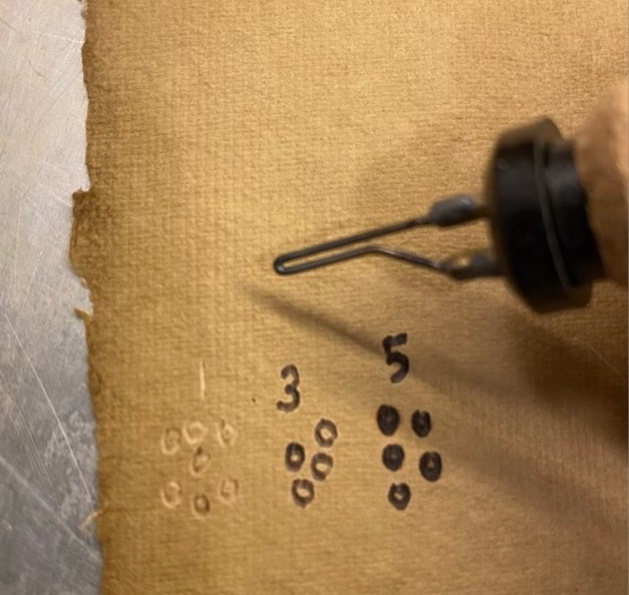
I wanted to try my new professional wood burner setup on some paper. I ordered some handmade paper that looked vintage and setup my wood burner with a small writing tip. Since this was new, I started on a low setting on the control box. I had an unexpected result. The lines on the paper where lighter, not burned. I turned up the dial and then achieved the brown color I was expecting from hot metal applied to paper. I made little circles and wrote down my dial settings.
Different effects at different temperatures of a wood burner with a writing tip on handmade paper
The light color was intriguing. Was it a fluke? Could I reproduce the effect? Being able to add dark and light to a drawing certainly opens up interesting possibilities. I turned the dial back down and was able to get light lines again. Maybe the fibers are being ironed down. Maybe the gentle heat is reacting with what ever was used to age the paper. What if I use a different tip?
Different burn results using a loop tip
Different tips do carry the heat differently. I was almost able to achieve the lightened effect with a slightly larger tip, but only at the lowest setting. Still, so many possibilities.
And Happy Father’s Day to all those that fill the Father’s role!
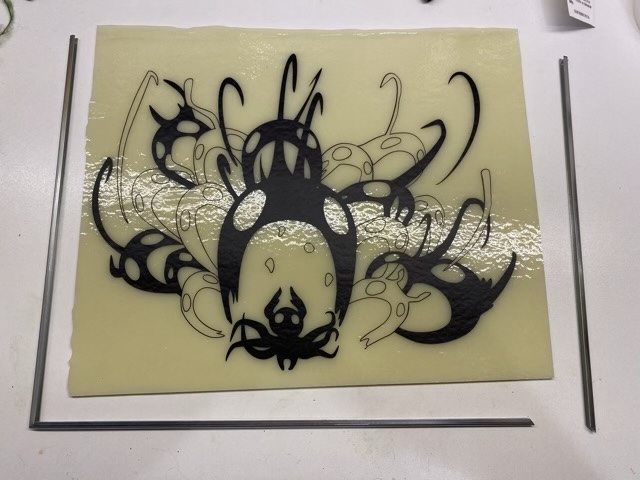
Several months ago my eldest designed a vector graphic of the Abyss Shriek, which is a spell in the game Hollow Knight. (Very very cool graphics in this game; it is a platformer, so I suck at it, but I love the texture and feel of the world.) She used the Cricut to cut out the image in permanent vinyl, then carefully (oh so carefully, so many teeny tiny lines) she weeded out the vinyl. I found a piece of glass in my stash that set off the image nicely and applied the vinyl to the glass. Then it sat. And sat. I had ordered the parts to make a hanging frame for it, the parts had arrived, but it required a bit of soldering. Soldering and I have been historically wary companions. So it sat some more. Finally, when I was avoiding cleaning where the art was sitting, I decided to give the frame a go.
Stain glass came cut to size
The glass had one rolled edge, which both my eldest and I liked, so the idea was to create a frame that left the top open. It was short work with a jeweler’s saw to cut the came to length, even with the angles, and also easy to drill small holes at the top for the chain. Then came the soldering.
Soldering the back first in case everything went pear shaped
I did a test solder first on some scrap came, and was pleasantly surprised when the soldering iron and solder did was it was supposed to do. The tip cleaned well on a bit of brass wool, the came heated up nicely, and the solder flowed well from the tip to the piece. Color me shocked. So I moved onto the actual piece, but the back, in case my usual soldering skills came to fore. They didn’t. I was able to solder the back two joints, then flip the piece and solder the front of the joints. I did use a small file to clean up the sharp edges, but the joints were holding! Huzzah!
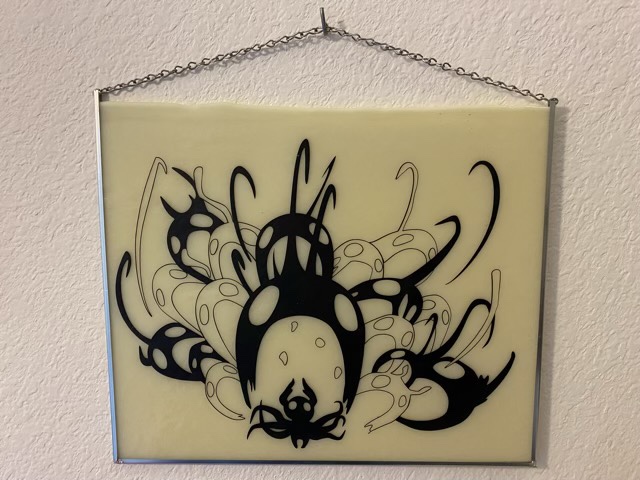
Abyss Shriek hanging (art work by my eldest, frame by me)
I did add a bit of super glue to the top of the frame. The chain holds everything in place nicely when it is hanging, but when it is not under tension there is a risk of separation, so a little insurance helped. It took hardly any time to put the frame together and get the art hung finally. Embarrassing really, that it sat so long, but I’m glad it is now done. And perhaps, perhaps, I may attempt more soldering in the future.
Recently finished up a custom order for a favorite customer. I designed the flamingo graphic first in pencil, then refined it in Adobe Fresco, then cleaned it up in Adobe Illustrator. Using my Cricut, I cut out the pattern on permanent vinyl (I did try removable vinyl, but needed the extra stick for those teeny, tiny eyes). Weeding these 1.75” circles was an exercise in patience, but I think they came out well!
Transferring the design to the inside of the keychain cover, and as an aside, my favorite weeding toolWeeded design and finished keychain
As a bonus, my youngest loved the extras because her basketball team this spring was the “Pink Flamingos”. (I always make extras because there are inevitably errors or scratches on purchased blank keychains. I don’t want those to go to my customers.)
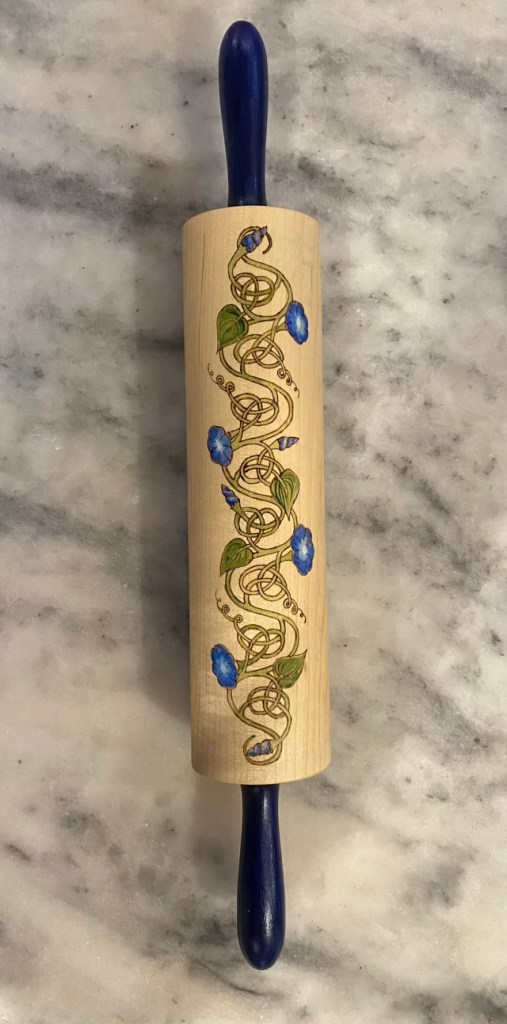
I have a new rolling pin! After several coats of tung oil, my rolling pin is done. I will probably wait about a week to use it to make sure the tung oil is solid, but I’m very excited to get back to making sourdough discard crackers, and maybe some pie crusts.
Finished repaired rolling pin
I hope you enjoyed this series. I did draw it out quite a bit, but decided to run it sequentially, which I don’t normally do, so the thread is easier to follow for those that stumble across it later.