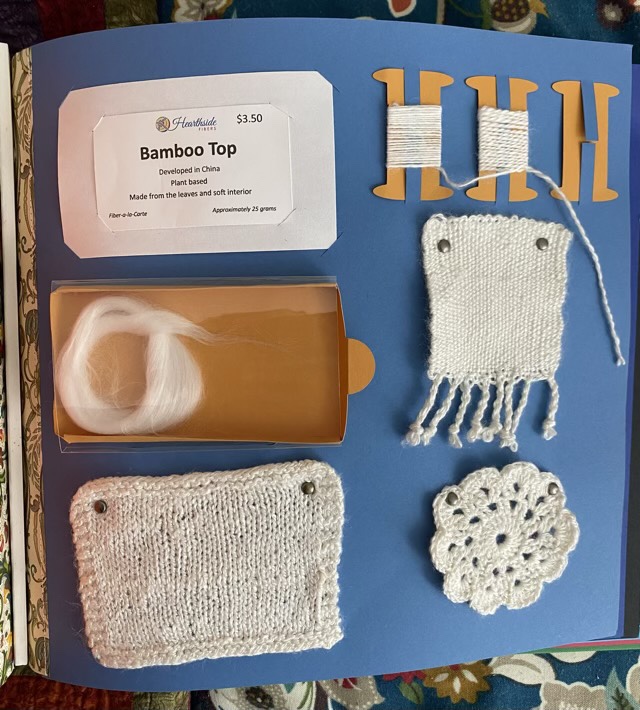
Photo description: Clockwise from top left: “Bamboo Top” card which reads “Developed in China, plant based, made from the leaves and interior”, single spun yarn on a paper bobbin, 2-ply yarn, swatch woven on a Clover mini loom with 3 selvages, crocheted lace round, knitted rectangle, unspun fiber in a paper box.
Spinning my bamboo sample was very enjoyable. The fiber is soft, and the staple is a nice length. I did have some static issues, but those that were resolved with a spritz of water. I spun the singles on a drop spindle, and I kept the fiber and spindle in my purse to spin during waiting times. I made the two ply yarn from a center-pull ball using the same spindle. The fiber has a beautiful luster.
Photo description: A hand holding a single spun bamboo yarn wrapped nostepinne style on a 3D printed spindle.
I still have the trail cam set up to watch the water bowl behind the coop. It turns out that there are at minimum five raccoons washing in the dish. Hm.
Photo description: Night vision photo showing two raccoons in the water bowl, one to the right, one behind, and a fifth on the stair in the background.
I’m not the only one watching. Mr Tom was caught keeping an eye on an opossum coming in for a drink.
Photo description: Night vision photo with the back of a white cat’s head in the foreground, and the glow of an opossum’s eyes in the midground.
I finished recycling my Bernat blanket yarn mermaid tail into cat mats. In total, I made 7 large mats, 3 crate-sized mats, and one round basket liner. The yarn used was taken from the old unused blanket and scraps from other projects.
Photo description: Seven crocheted rectangles
To make the mats, using a 8mm hook or a hook that makes a tight but not difficult stitch, chain 30 for a large mat, or 20 for a crate sized mat. Single crochet each row until the mat measures about 17”. I donated most of the mats to the local no-kill cat shelter.
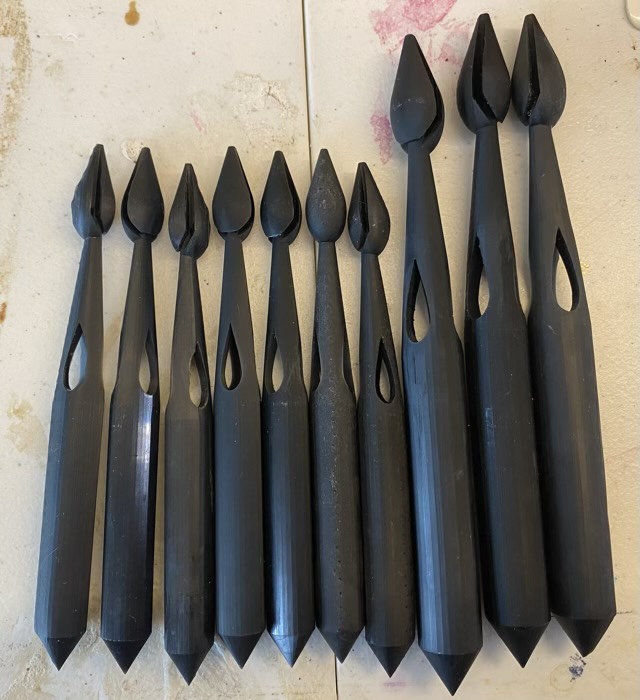
I recently received 3D printed spindles from our first production run! Very exciting. The spindles have passed their drop tests, so the tough resin is holding up well. They aren’t completely indestructible, but it takes a great deal of effort to snap the neck (yes, I should have measured the force, but hindsight is 20/20.) The next step is to sand down the production marks (they take sanding well), and apply some decoration. Then I need to design the packaging. Phew! But I am inching forward!
Photo description: Seven small 3D printed spindles and three large spindles in black tough resin with grooved heads and teardrop holes above a straight shaft and pointed end.
I’m leaning toward calling these “phase” spindles, because they have aspects of other historical designs; the large diameter shaft is similar to a dealgan, it can be used as a supported spindle or a drop spindle, and the weight is adjustable.
I’ve had a little more growth on my cultivated Pearl mushrooms, but no mushroom heads, so I poked some holes into the substrate using bamboo skewers to let the water in. Now we wait. Again. I purchased this kit about eleven months ago. It produced about five small mushrooms, then I accidentally broke off the stems (they really do mean it when they say cut the heads off with a sharp knife, it needs to be seriously sharp to leave the stem cluster intact). No more fruiting bodies since then.
Photo description: round plastic container filled with mycelium with three clumps of tendrils emerging from the top. The center of the top has six bamboo sticks poking out and four open holes.