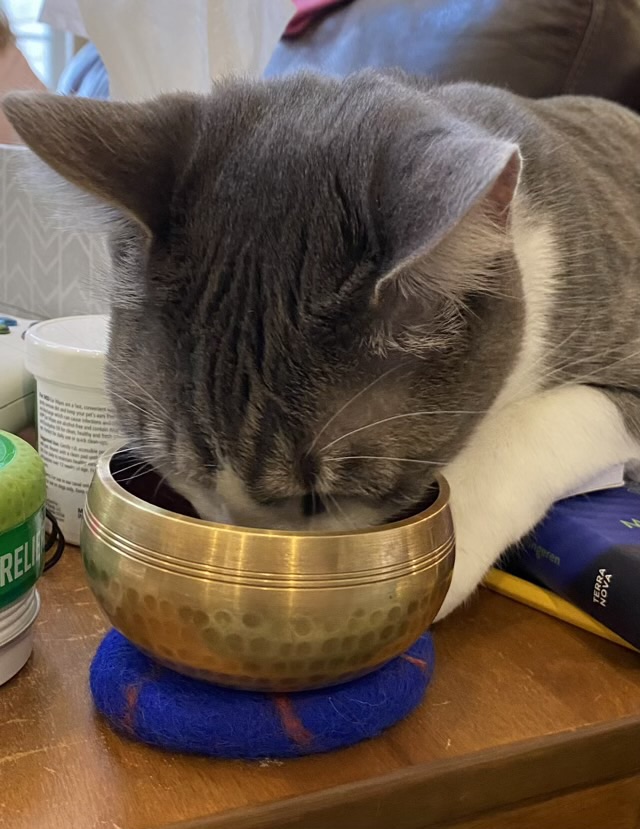
She lives!

I think I mentioned that the family Singer model 66 was seized? It turned out that the bobbin case and hook area was packed with lint. I watched several videos on how to disassemble the hook and bobbin case, including Bob Fowler’s videos, then took my machine apart, cleaning each piece as I went, carefully labeling each bag, and taking pictures often.

Photo description: Mid-cleaning of a Singer Model 66 showing the bobbin case and alignment removed, the hook still in place, and some of the oil soaked lint removed from the area.

Reassembly included putting in a new felt wick for the hook race (I found excellent instructions here), and timing the hook from a Bob Fowler video. Shockingly, I got the timing in one go, which shows that it was quality instruction. I finished up giving the ornamental covers some TLC before putting them back on, found a new needle from the drawers, installed the machine back into the cabinet, and installed the new leather belt drive. And she worked.

I wound a bobbin, read how to thread the machine (thread goes from the left to the right on the needle), did a minimal adjustment on the upper tension, and started sewing some scrap fabric. Joy! My treadle timing and speed skills are still developing (you have to make sure the balance wheel turns toward you, and absolutely not away), but she sews! Here is a video! It makes tiny stitches, so I’m working on loosening up the stitch length regulator knob.

Photo description: Cleaned up and revitalized Singer model 66 treadle sewing machine from 1918.

Getting this machine up and running did not take as long as I thought it would, because it was well looked after. Yes, lint collects in machines, but all the parts were there and no one had forced the machine and broken or bent anything not replaceable. I’m going to regularly use this machine so she keeps working, and hope she is around for another hundred years and can go on to another family member.

Laminate repair

To stabilize the top of the sewing cabinet for the Singer model 66, I did a bit of laminate repair by taking some of the broken wood laminate from the curved back of the cabinet (which is usually against a wall) and putting in in the larger holes on the top. I am not going for a full “like new” restoration, just stabilizing and reinforcing to protect it from further damage.

Photo description: Squared up tear in the wood laminate, with a matching rectangle of reclaimed laminate, craft knife also pictured on the top surface of the cabinet.

A craft knife and some scissors were tools enough to fit the wood laminate pieces, then I used wood glue and a brush to get glue in as far as I could on the lifted areas. I clamped and weighted the glued areas and let it sit overnight.

Photo description: Sewing cabinet with clamps on the edge protected with wax paper, and the top weighed down with craft books and heavy tools.

Some fine grit sandpaper was enough to smooth the edges of the laminate, then I wiped down the wood with Howard Restor-a-finish. This evened out the tone, but was not able to completely blend the water marks, which is OK. I then used Howard Feed and Wax, which is my newest favorite product. I love this stuff and what it does for the wood surface as well as the shellacked sewing machine body.

Photo description: Sewing cabinet before stabilizing, showing lifted laminate and looking dull.
Photo description: Same cabinet after some TLC and lots of Howards Feed and Wax.

A matter of rust

There was some rust on the family Singer model 66, even though it lived mostly indoors with some garage time. The worst area was the back access plate. Good news, the knurled knob unscrewed easily!

Photo description: Back access cover for a Singer model 66, embossed metal coated in spots of rust. Knurled knob laying on the side.

I washed the plate and knob with soap and water, then placed it in Evapo-rust for 24 hours.

Photo description: bottle of Evapo-rust next to a plastic storage container with about a half inch depth of yellow liquid covering the back plate, knob, and spool holder.

I rinsed and dried the plate, but it was still tarnished.

Photo description: back plate and knob after soaking in Evapo-rust showing black tarnish.

I used some Brasso, a tooth brush, 0000 steel wool, and a small rotary wire brush to remove as much of the black as I could (and still retain my sanity). When the rust and tarnish is removed, there are pits in the metal, and the surface is dull and needs to be burnished to regain the metallic shine. When I had enough, I did a final wipe with a silver polishing cloth.

Photo description: same back plate showing the pitting from the rust, but the rust is gone, most of the tarnish is gone, and more of the original design is visible.

Polishing to a high finish and shine is really not my thing. I do appreciate an artful patina, probably because I don’t care for polishing. On this part, at least I have removed the rust and protected it from further deterioration.

Bobbin winder

I took off and cleaned the bobbin winder from the family Singer Model 66. The rubber wheel had rotted, which happens with age, so I ordered new wheels. While I waited for those to ship, I cleaned off what I could without disassembly, since the mechanism works fine.

Photo description: Singer model 66 bobbin winding assembly attached to the balance wheel before cleaning.
Photo description: same machine with a new rubber wheel and assembly cleaned up.

It isn’t super shiny, but my goal is not to restore to like new, but to get things working in reasonable order. I’m not big on polishing (I admit, I get bored and frustrated and it hurts my hands, I’m glad there are other people who enjoy it).

Here is a video of the bobbin winder working!

Mustache gauge

A cat’s tail as a temperature gauge: when the tail becomes a mustache, it is getting cold.

Photo description: Calico cat closeup with the end of her black tail tucked around her nose as she lays on a blanket on my lap.