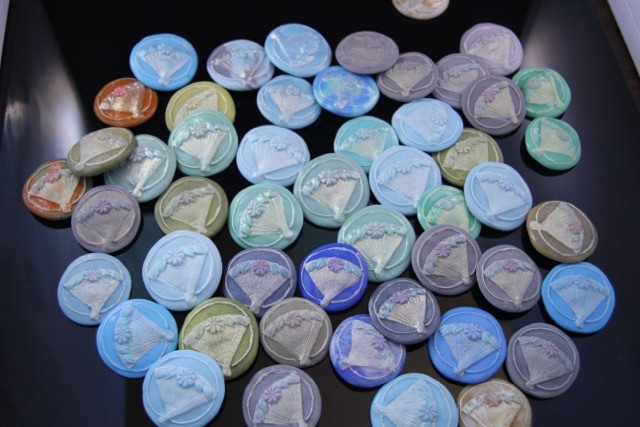
In March 2012 I had a custom order for glass clay buttons for the Kansas State Button Society. I designed the button with input from my grandmother’s button group, made a silicone mold into which I pressed the glass clay, hand built the button shank, hand painted each button, and fired them in batches in my kiln.
Photo description: multiple colors of flower and fan glass clay buttonsPhoto description: close up of the buttons with a ruler showing each button about an inch and three quartersPhoto description: one button mounted on the card that was given out during the Spring 2012 meeting
Making larger batches is a completely different animal than designing a single component. The glass clay was fun to play with, but was brittle, so the buttons were decorative more than functional.
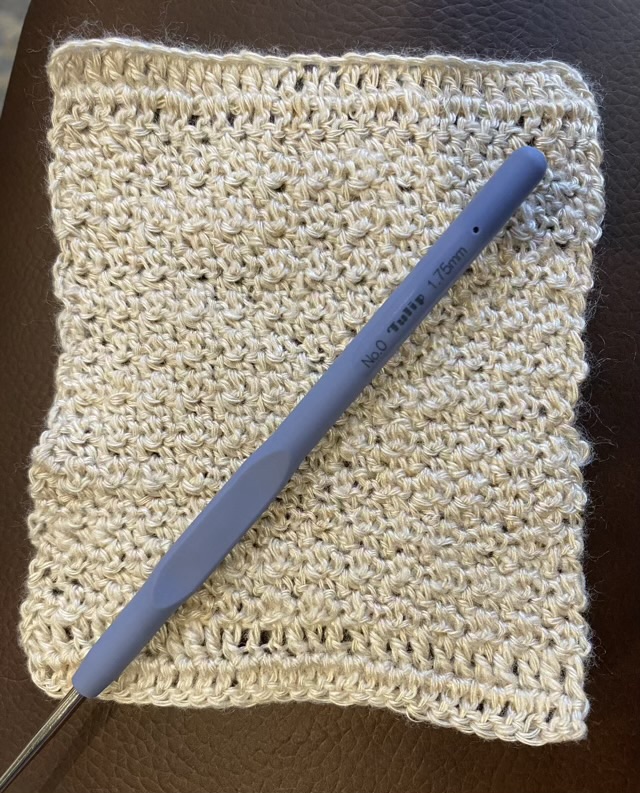
This is one of my favorite crochet textures. I’ve heard it called many names, but orange or lemon peel is what sticks in my head. It is an alternating pattern of single and double crochet stitches across, the on row two the single crochets go in the previous double crochet, and the double crochets go in the previous row’s single crochet. It takes a little time to recognize which stitch is which, but the finished project is very forgiving.
Photo description: swatch of orange peel crochet with double crochet top and bottom edge made with hand-spun mint infused cellulose fiber and a 1.75mm crochet hook
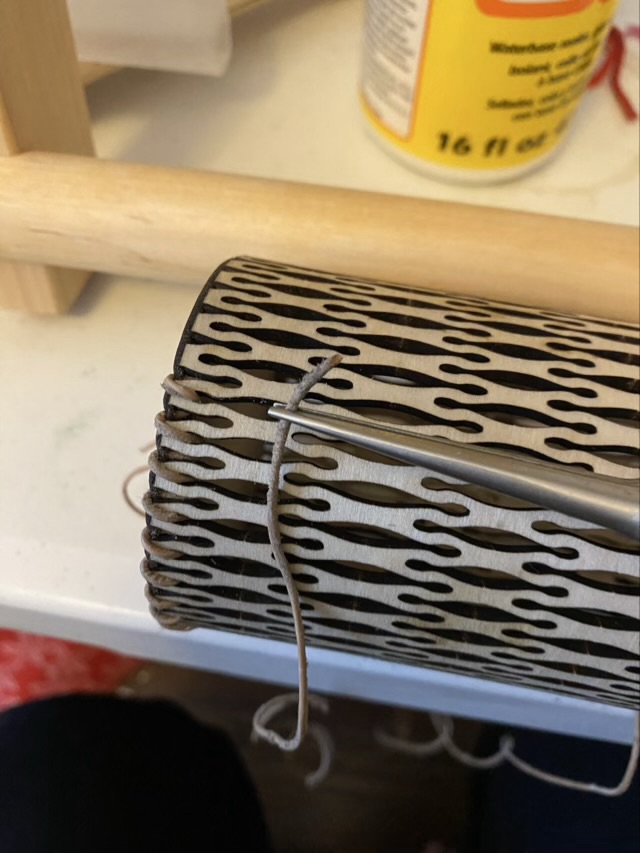
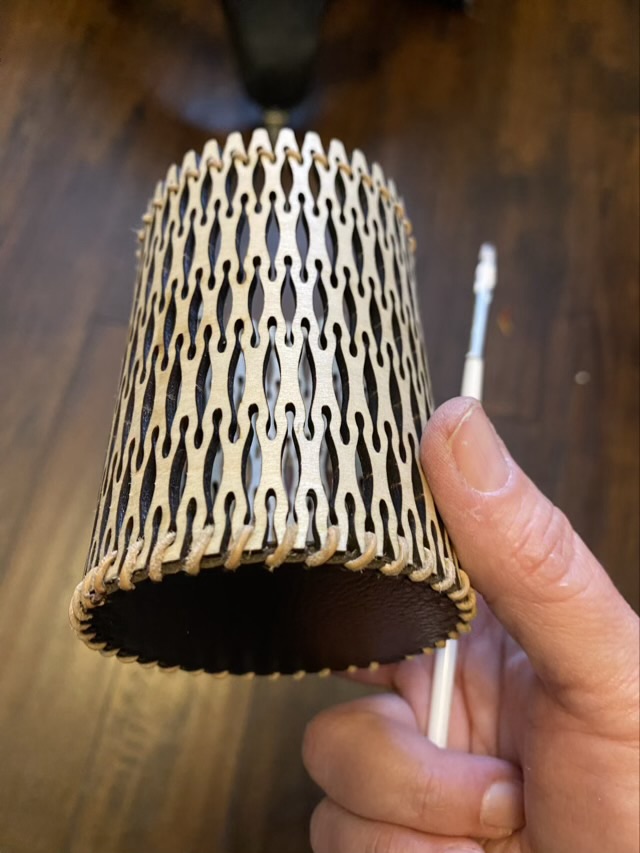
Making kerfs, small straight cuts, in thin plywood allows the wood to bend without breaking. Those kerfs can also be decorative. I found free patterns on an Instructables post, downloaded them, and used the basic building blocks to make an SVG file for a round dice cup. The SVG file was built with sections of the rounded pattern, which resulted in incomplete cuts only a fiber width thick, but enough that many of the cutouts had to be manually ejected (dental tools or long thin carving tools work well for this).
Photo description: cut sides of the dice cup with stuck cutouts, along with the end of the metal tool I used the weed the pattern
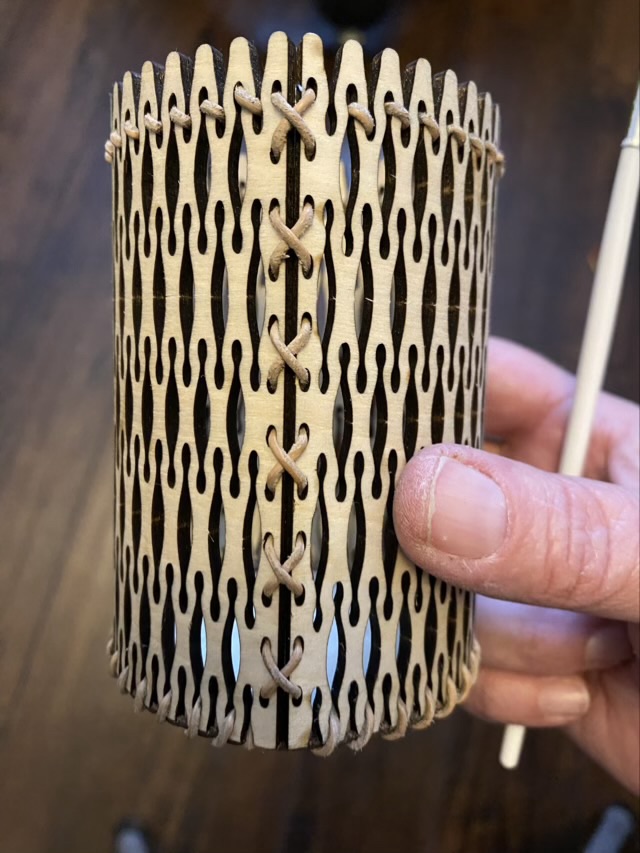
I mentioned that I don’t like butt joints, so I added lace holes along the edge and secured the join by lacing with leather cord. I then measured the diameter of my cup and cut a circle of wood to fit inside the bottom. This is a different kind of butt joint, so I also cut a piece of recycled leather (thank you old recliner) with holes spaced to line up with the gaps in the sides. I glued the leather to the wood and used the same leather lace to sew around the edge of the base.
Photo description: laser cut leather base for the dice cupPhoto description: reinforcing the base with leather lace sewn through the holes using a long nose pliers to reach inside the narrow cupPhoto description: finished cup with leather lace securing the joins and another line of lace as a decorative element at the topPhoto description: dice cup bottom oblique view
I used my go-to finish, Howard’s Feed-N-Wax, which was problematic. The wax became wedged in the small decorative curves and was very difficult to rub into the surface. Some time in the oven on low melted the wax, but I think for the next project I’ll use light coats of a spray finish.
This was an interesting project that resulted in an unusual object, but not one I think I’ll repeat. I will take elements of this piece and apply them to other ideas.
I’ve been cutting yarn bobbins out of waste plastic, as my grandmother did.
Photo description: hand cut plastic yarn bobbins made from waste plastic
I’m not as precise as my grandma, or I don’t take as much time, but I wondered if my new laser cutter could do a precise job for me. I read that the kind of plastic matters. PVC, for example, lets off chorine when heated, which can degrade the laser.
I designed an SVG file of the outline and hole, but left the slit to be cut by hand. The slit needs to be tight to hold the yarn back. I did my first try on a Tide pod container, which is PET (polyethylene terephthalate).
Photo description: three attempted laser cuts in the cut out side of a Tide pod container, with diode laser settings written on the plastic
The plastic melted and cooled, resealing the cut, but not releasing the piece from the base material. The cut the nearly made it through showed bad burn marks on the back where the label was adhered. I attempted to remove the label, but it was firmly attached.
Photo description: back of the cut sample showing the label burned by the laser
The labels on the Tide container have a shiny component, and I wonder if this is why it failed. Hm. Experiments will continue.
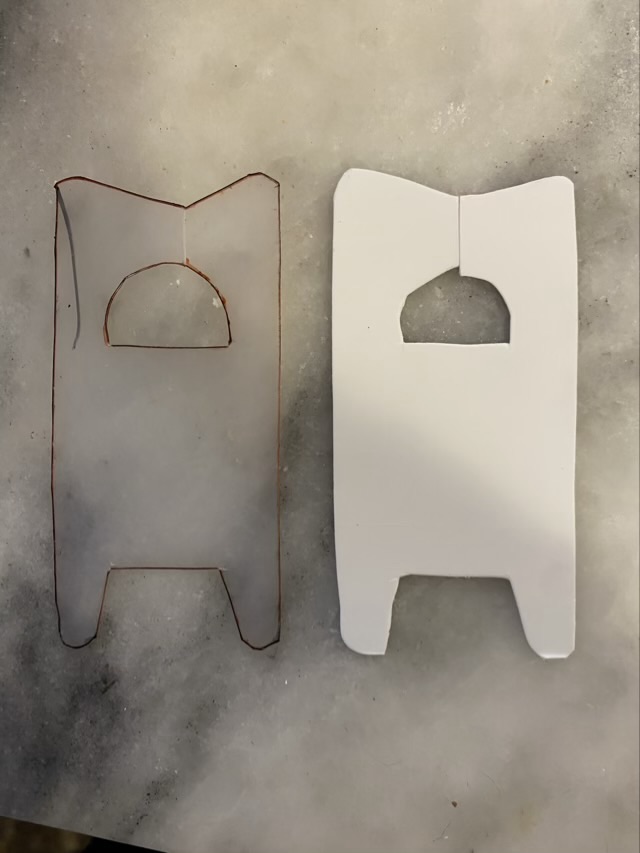
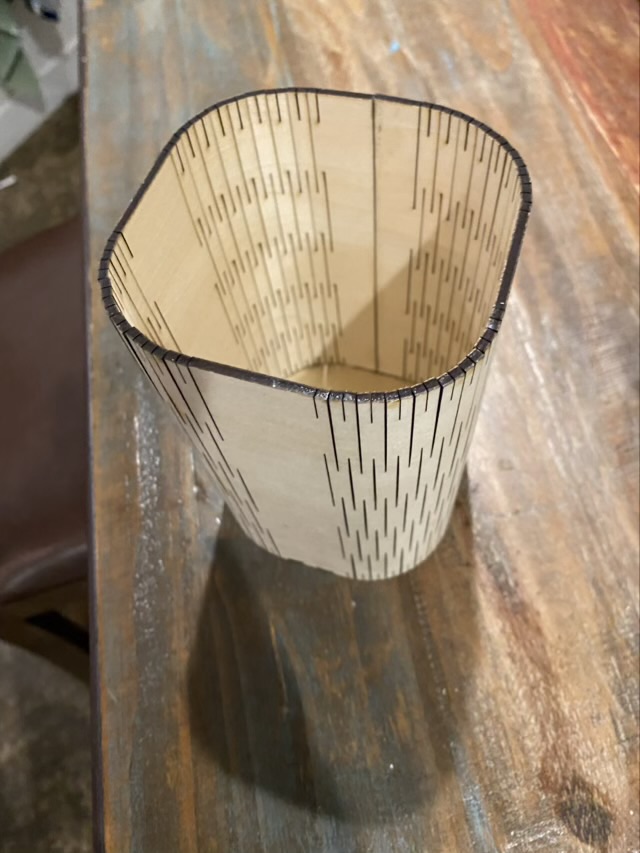
Kerfs are slits cut into wood. The right application of kerfs allows the wood to bend. I’m beyond excited about the possibilities combining laser cut kerfs and thin plywood. I found a box calculator website where you plug in dimensions and it outputs SVG files. I entered a 3” diameter and 6” height and downloaded files that easily went into my laser cutter software. I cut the box from thin plywood and glued it together.
Photo description: open topped container with rounded corners laser cut from thin plywood
The dimensions I entered were not the finished dimensions. It was 6” tall, but had a diameter over 3.5”, which turned out to be an awkward size, too big for pens or a dice cup, but OK for paintbrushes. I finished the wood with Howard’s Feed-N-Wax. I’m not a fan of butt end joints, which is what the seam on this cup is, where the edges of the wood come together without interlocking, but this was a very informative first kerf project.
Photo description: plywood cup and a bottle of Howard’s Feed-N-Wax