Thor the kitten (he is almost seven months old, but he’s huge) would really like to give Izzy the cat (who is 10) snuggles and wrestles. Izzy is having none of it. It is a game for Thor to see how close he can get to her without being attacked.
Photo description: Calico female and Gray Tabby male cats stretched out on a blue and gray carpet, facing each other. The Calico is eye-balling the Tabby. The Tabby is looking at the camera with his ears toward the Calico, looking surprised at his progress.
His latest trick is to climb up underneath the fuzzy blanket at nap time when Izzy is getting lap time. He can get quite close to her without repercussions, but then, as if he just can’t help himself, he has to push it too far and reach out and touch her. Here is a short.
Photo description: Same Calico cat, on a fuzzy blanket on my lap, the Tabby is under the blanket next to her.
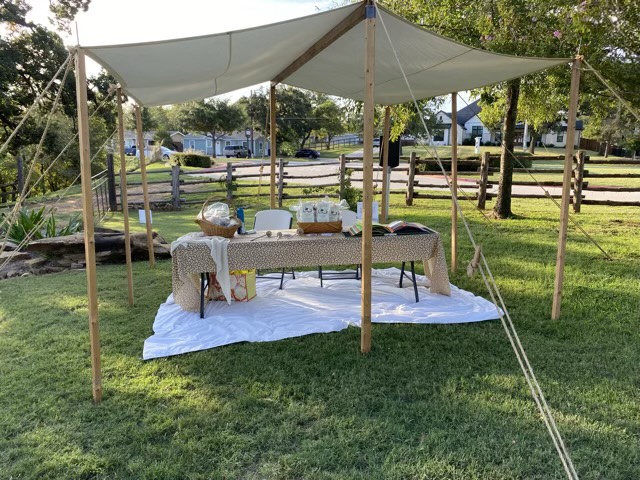
I volunteered at the Mansfield Founder’s Day Festival recently, demonstrating spinning on a drop spindle and helping people try it out for themselves. I even sold a few spinning starter kits! The Man House was setup beautifully, and I was quite spoiled with a tent, table, and chairs already setup for me. The hands-on spinning was popular, and there were wows over the animal-to-wearable knit alpaca shawl I brought, but the biggest hit was my fiber book. I’m glad I set it up consistently with multiple touchable swatches; it made it both visual and tactile friendly. My book held up great for the seven hours of the event!
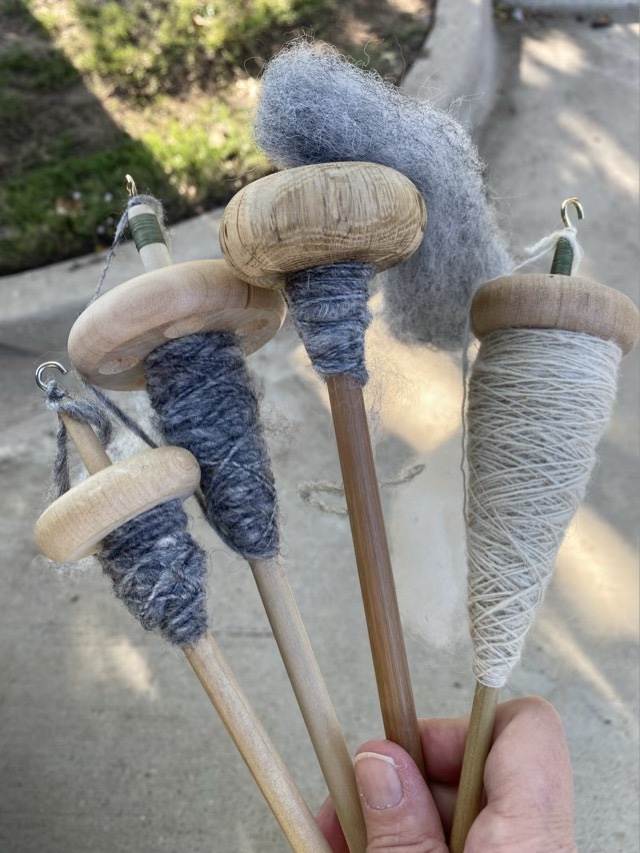
Photo description: Canvas, 2×4, and rope canopy setup in mowed grass with a covered table and chairs setup underneath. On the table I put my alpaca shawl, a basket of wool nests, three practice spindles, a basket of starter kits, and my fiber book.Photo description: Four drop spindles, the three on the left have Corriedale wool spun by many hands, the one on the right has Shetland wool spun by me between helping sessions.
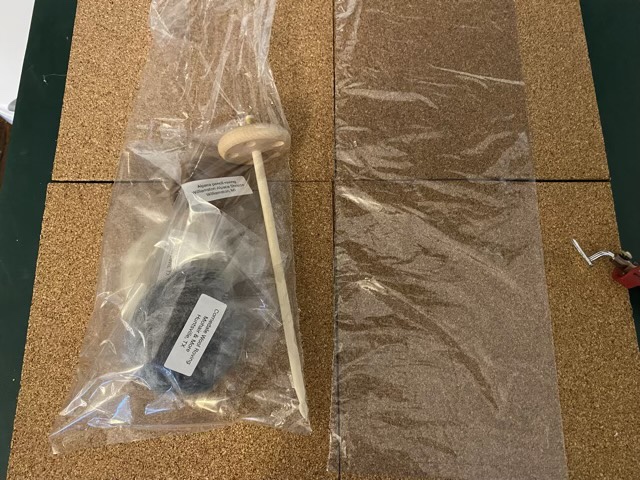
As much as I love cloth bags, sometimes you need packaging you can see through that is inexpensive. For my spinning starter kits I needed a long narrow plastic bag. I have a whole bundle of large clear plastic bags, but they are twice as wide as I needed for this application. I found that if I ran my quilting mini iron, set to high, down the center of the bags, it was enough to melt and separate the bag into two, with a well sealed seam. The iron does come with a blade attachment, but the blade cut the plastic too fast and didn’t heat the plastic up enough to melt it.
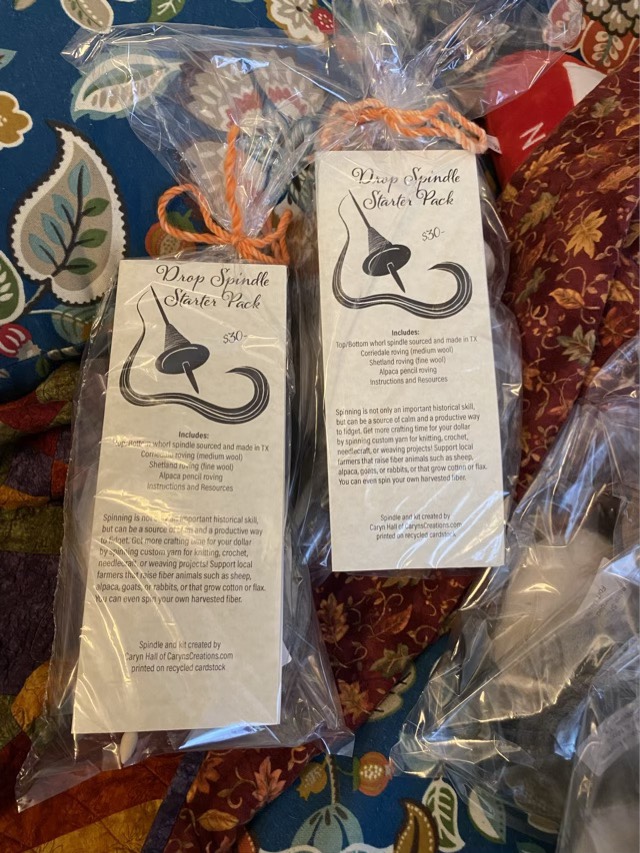
Photo description: Cork squares laid down on the table to protect the surface, two newly created long narrow plastic bags, with a mini iron to the side, blade assembly unused.Photo description: Same table with one bag filled with a spindle and three samples of different animal fibers.Photo description: Two completed Spinning starter packs, with insert containing instructions and resources.
I tied off my bags with some of my old hand-spun yarn oddments. Another good use for left-over yarn!
I started making a baby hat in my preferred manner, with double crochet stitches from the crown, and I realized that I could pick up and knit once I had the circumference the right size, and not have to do any knit increases. I knit for while, then switched to a ribbed pattern to give the hat some more elasticity and holding power.
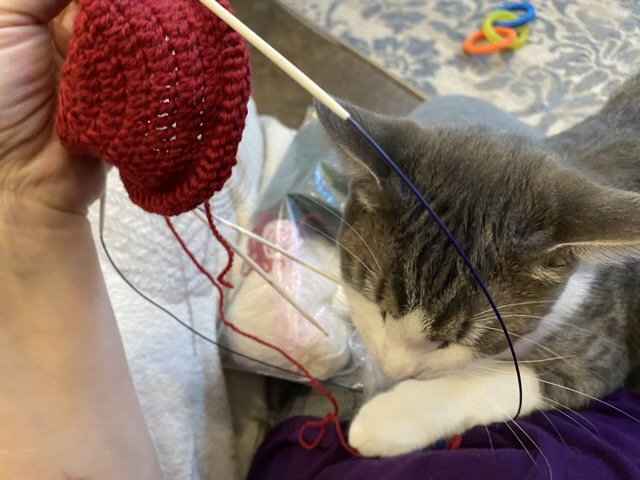
Photo description: Gray tabby kitten biting circular knitting needles. He was removed from my lap after the picture, and is learning that knit time is not play time.
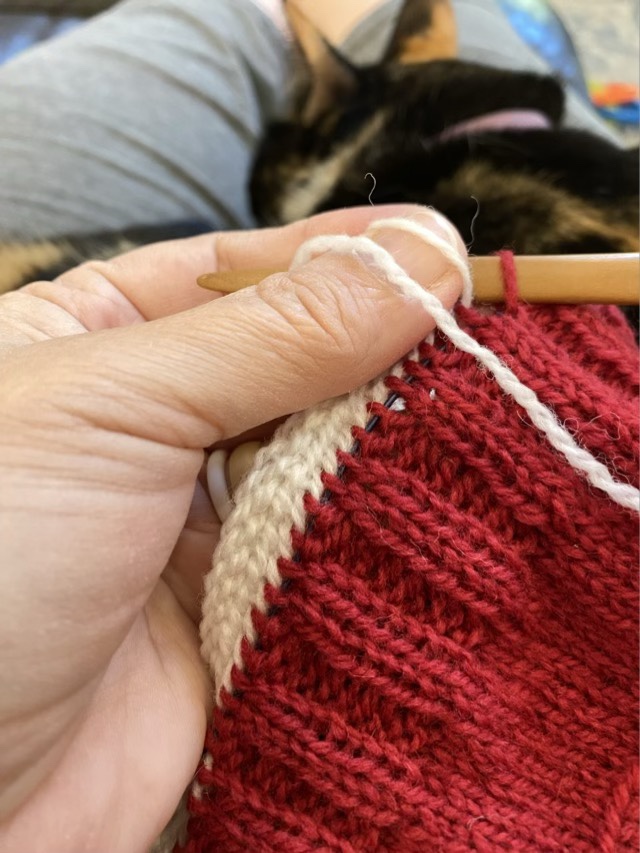
Then came the dreaded bind-off. What if I nålbound the live knit stitches? It works and may be my new favorite bind-off.
Photo description: Using the Telemark nålbinding stitch in white to bind off knitting in red sock weight yarn. Nal in hand, sleepy cat in the background.
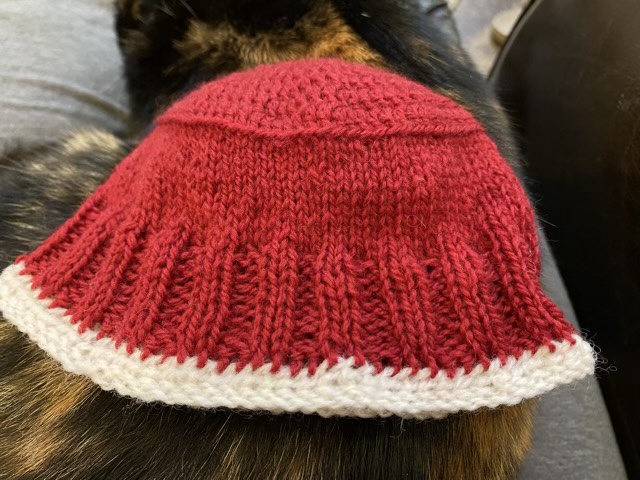
I do need to spend some quality time with the nålbinding join to make it neat, and it would be easier in a less complicated stitch than Telemark, but I like the woven look of the stitch.
Photo description: Rec and white baby hat done with crochet, knitting, and nålbinding. Calico cat as the background.
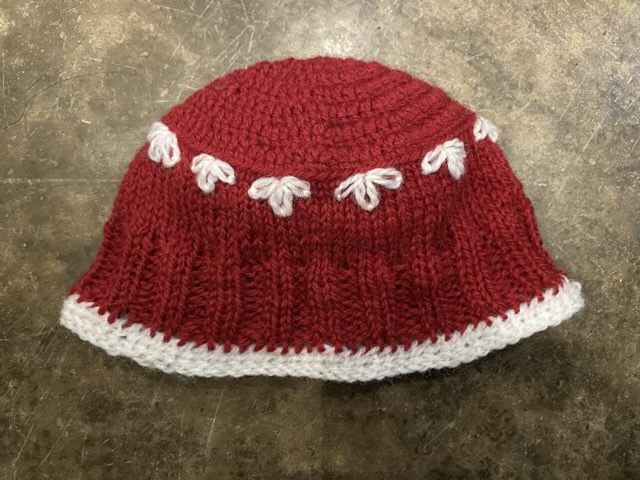
Then, to add a little pizazz, I did some simple lazy daisy stitches around the crown in white.
Photo description: Baby hat in red and white merino super-wash fingering weight yarn with crocheted crown, knit sides, nålbound brim, and embroidery.
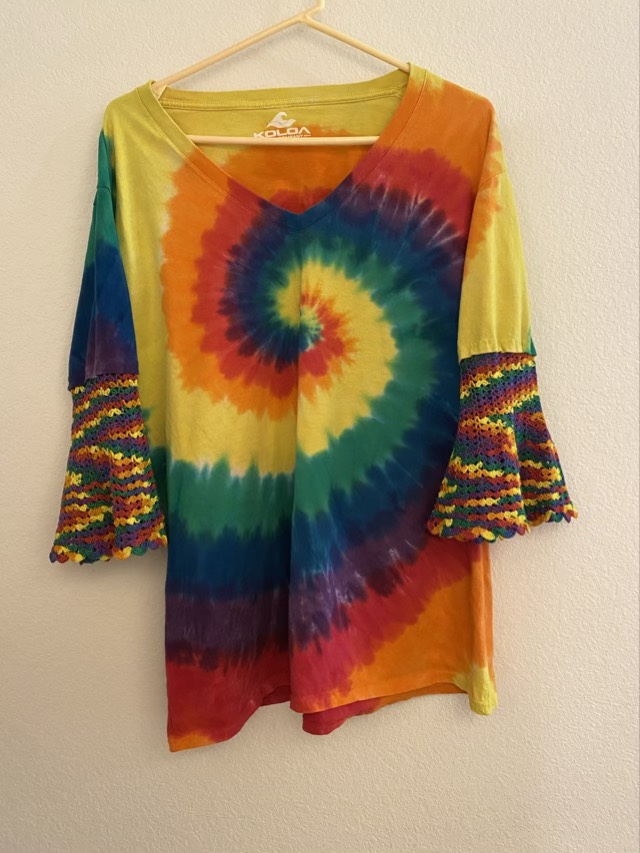
I really wanted bell sleeves on my tie-dyed t-shirt. My first attempt did not please me, so I ripped it out and tried again. I tried some crocheted lace with worsted yarn, but it was too thick and stiff. So I fell back on a crochet standard: number 10 cotton. This cotton is in every craft store, and nearly always comes in at least white, black, and rainbow. It is great for crocheting lace. I sewed a chain stitch to the inside of the sleeve hem, then crocheted in the round a simple alternating shell pattern.
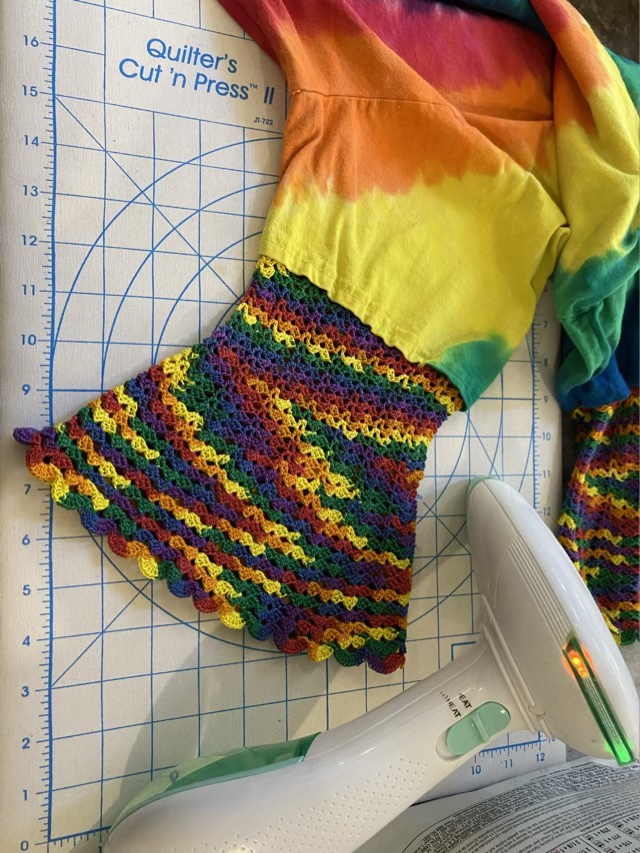
Photo description: Rainbow colored fabric, with a rainbow colored cotton thread sewn as a chain stitch, showing the needle mid-stitch.Photo description: Rainbow colored crocheted lace bell sleeves on an ironing board with steamer at the ready.
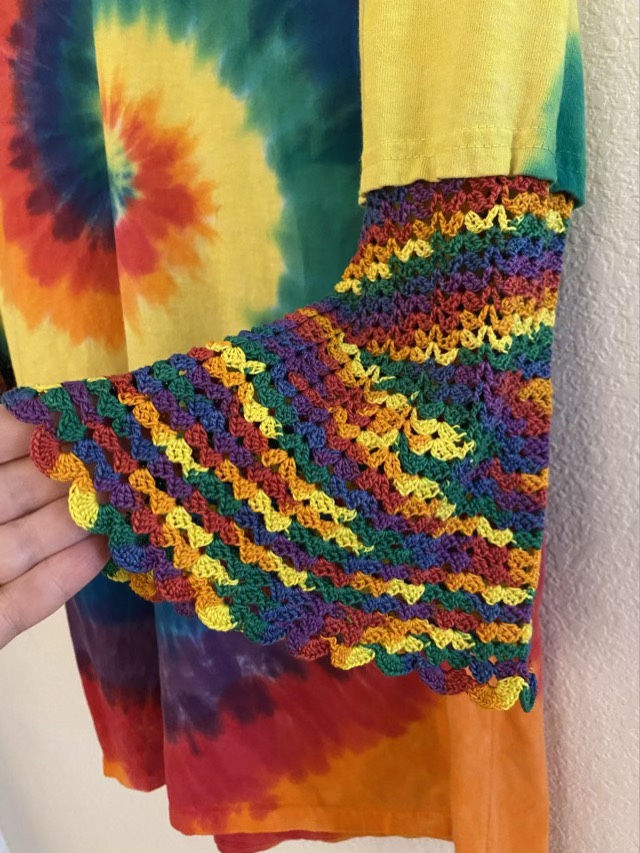
When the sleeves were done, I steamed them, which worked brilliantly to even out the stitches. The rainbow thread made serendipitous color pooling as the stitch pattern changed, which goes along with the tie-dye nicely.
Photo description: Rainbow tie-dyed spiral t-shirt with crocheted lace bell sleeves.Photo description: Close-up of bell sleeve being held open.
So here comes the crochet pattern and math, for those that are interested.
With needle and crochet thread, make an embroidered chain stitch around the inside hem of the sleeve. The size of the stitches should be slightly larger than a crocheted chain done with a size 0 hook.
Row A: With a size 0 crochet hook (2mm), join the thread to the first chain, chain (ch 3), double crochet (dc) into the same chain, ch 2, 2 dc in same chain. Skip 2 chains, (dc, ch 1, dc) in same chain. *Skip 2 chains, (2dc, ch2, 2dc), skip two chains, (dc, ch1, dc). Repeat from * around. At this point you can tell if the work is bunching up the fabric, or ruffling out, depending on how long the embroidered stitches were. If it is not to your liking, rip out and use a different number of skipped chains. This is the only place it will matter, just note how many shell sequences you make, so you can match it on the second sleeve. For instance, if you have 72 chains and 12 shell sets, each shell set will span 6 chains, so you’ll skip two chains between shells. A shell set consists of a shell stitch and a v-stitch.
Row B: Slip stitch (sl st) into the center of the first shell, (ch3, dc, ch2, 2dc) into same shell, (dc, ch1, dc) in next V-stitch, *(2dc, ch2, 2dc) in next shell, (dc, ch1, dc) in next v-stitch. Repeat from * around.
Repeat row B, 8 more times, or until the straight part of the sleeve is the length you want. Now we will start the bell.
Row C: Sl st into the center of the first shell, (ch3, 2dc, ch2, 3dc) into same shell, (dc, ch1, dc) in next V-stitch, *(3dc, ch2, 3dc) in next shell, (dc, ch1, dc) in next v-stitch. Repeat from * around.
Repeat row C, 4 more times.
Row D: Sl st into the center of the first shell, (ch3, 2dc, ch2, 3dc) into same shell, (2dc, ch2, 2dc) in next V-stitch, *(3dc, ch2, 3dc) in next shell, (2dc, ch2, 2dc) in next v-stitch. Repeat from * around.
Repeat row D, 4 more times.
Row E: Sl st into the center of the first shell, (ch3, 2dc, ch2, 3dc) into same shell, (3dc, ch2, 3dc) in each shell all the way around.
Repeat row E, 4 more times.
Row F: Sl st into the center of the first shell, (ch3, 3dc, ch3, 4dc) into same shell, (4dc, ch3, 4dc) in each shell all the way around.
Row G: Sl st into the center of the first shell, (ch3, 12dc) into same shell, (13dc) in each shell all the way around.
Join first shell, weave in ends, steam.
It writes up much more complicated than it works up.