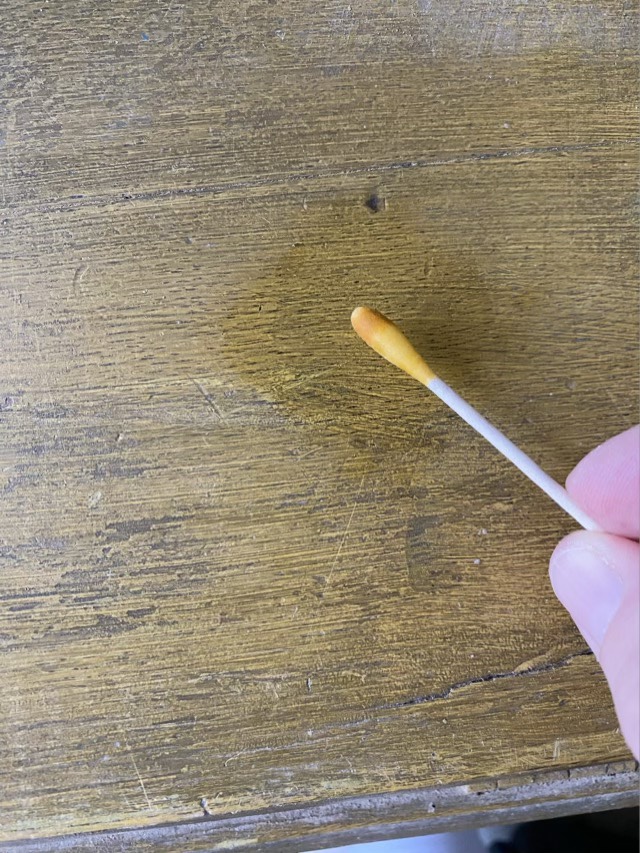
The cabinet of my 1907 model 27 Singer Sewing Machine is yellow. Hm. Pinging online groups, there is a general consensus that they didn’t come in yellow. Prompted, I looked at the hinges, and yes, the hinges and screws also had yellow paint, so someone, during the life of the machine, had thinly painted it yellow. Sigh. The next question, how long ago? Was there lead in the paint? I purchased a lead test kit, followed the directions, and happily, no pink. If the swab or surface turns pink or magenta, it indicates the presence of lead. Since it isn’t lead paint, and it is not original, when the weather cools off here I’ll strip the paint and refinish.
Photo description: Antiqued yellow wood surface showing a wet round area and a yellow swab.
Griffin the dog loves to run and bark in the backyard, and fill his face with burrs. Each time I think that surely he has gathered all the burrs in the yard, but the next day, he comes back with more.
Photo description: Black shaggy dog with twenty plus small cream-colored seed pods on his face.
The best way we’ve found to remove the burrs is to use a small wire pet brush. The burrs stick to the brush and come easily away from the dog fur.
Photo description: In the foreground, a small green brush with wire tines tipped with white, full of black hair and burrs. In the background two black dogs looking at the brush.
He knows what to expect when I grab the brush, and he sits and waits for me to brush out the hitchhikers. These particular seed pods are also known as “sock destroyers” because they easily attach to fabric and are devilishly difficult to remove.
My husband and I removed the sewing machine head from the base (there were two small set screws that were not seized) of my Singer model 27-3 sewing machine so I could start the cleaning process.
Photo Description: Antique, worn, and dirty sewing machine head on cardboard on a work table.
I’m following the advice in the book “Treadle Sewing Machines: Clean and Use an Iron Lady” by Donna Kohler. I have also found digital scans of the owners manual and an adjusters manual for a 127-128, which I’m told by YouTube is close enough to my 27. I’m photo documenting as much as I can along the way. I’m also not in a rush, this is going to take some time, so the machine has a dedicated table in the craft room and I’ll post about interesting observations along the way.
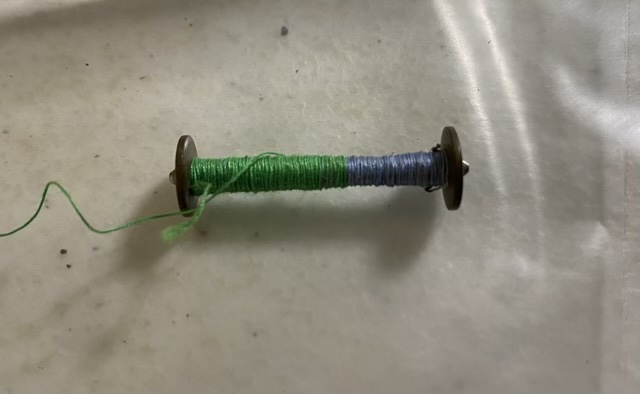
My first discovery was that the previous user of the machine didn’t remove old thread on the bobbins before winding on new thread, which blows my mind. I see how it would save time in the short term, not unwinding, but it reduces the amount of space for new thread, so the bobbin has to be wound more often. An interesting choice for certain. Some of the bobbins had four different colors of thread.
Photo description: Long bobbin wrapped with green thread over blue thread.
To give you an idea of the level of grime I’m dealing with, past the spider webs and mud-dauber nests, below is a photo of the underside of the needle plate. To remove the needle plate I needed to add PB Blaster and let it sit for about five minutes, then the screw backed out smoothly. Underneath was a build up of lint, oil, and dirt.
Photo description: Round area around the feed dogs where the needle plate was removed, with brown dried oil stains and a thick build up of lint.
There are YouTube videos of machines in worse states. I know this one was well used, and I want to keep as much of the patina as I can. The black finish flakes off when it is touched, so I need to be very careful not to remove what decoration is left. This will definitely be an ongoing project, and I’ll post about interesting things as I find them.
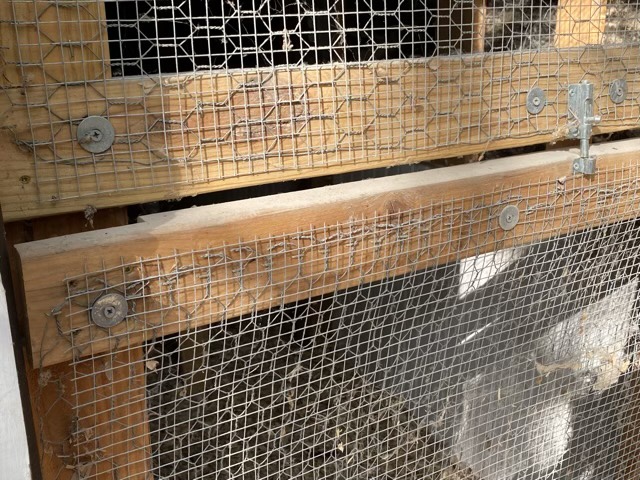
We’ve known that raccoons live in our woods since shortly after we moved in, thanks to our trail cam. They are one of the reasons that my husband built the chicken coop like Fort Knox. It is more effective to design to keep predators out, than to relocate or kill them. More predators will just move back into the area. I regularly check the perimeter for predator incursion and this week found that the back door had been broken.
Photo description: Split screen door made of two layers of wire mesh and 2×4 wood, with the left joint broken open.
I made a screen door from 2x4s a hardware cloth so during our hot summers I could let a breeze from the cooler woods pass through the coop. It really helps. A regular screen door wouldn’t hold up to raccoons, and neither would poultry wire, which is why, when I decided to leave solid door open at night, I added hardware cloth. The door halves are secured with latches and locks, but the raccoons have been pushing at the bottom right corner of the door until the opposite joint gave way. The chickens are fine, the raccoons still couldn’t get in, but I needed to reinforce the door. I fixed the joint with two new screws, added a new latch on the inside top, replaced a couple of the hinge screws with longer screws, and put a big rock inside at the bottom of the door.
Photo description: Sliding latch installed on the inside of the screen door.Photo description: Door hinge with upper right screw replaced.
The raccoons have been hanging around the back of the coop. I have a large water dish back there for the neighborhood cats, and I was perplexed when I would clean and fill the dish, and the next morning it would be nearly empty and filthy.
Photo description: Large blue water bowl with about an inch of brown water sitting on a wood table.
I set up our trail cam and obtained a photo confirming raccoon activity.
Photo description: Gray and white night photo with a raccoon in the foreground on the wooden table with the water dish, and a raccoon on the stairs to the back door with the bottom of the door pushed in.
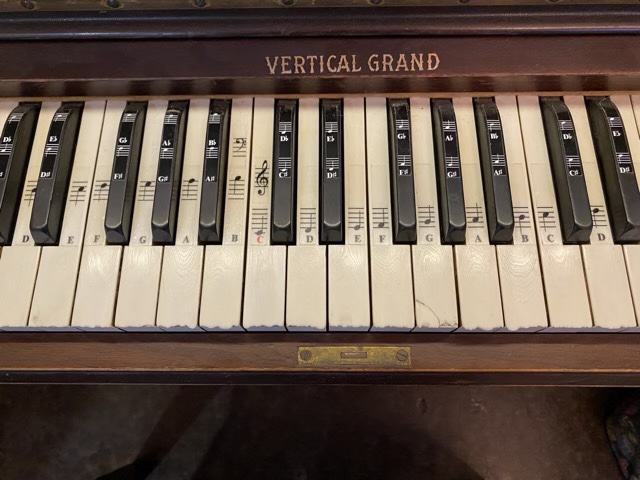
So I recently needed to reference a piano keyboard, and was too lazy to go to the piano, so did an image search. In the provided images was a tutorial on how to draw a piano, which showed that the black keys were not centered between the white keys. What? I took piano lessons starting in second grade, have had pianos around me most of my life (I can pick out a scale, but don’t have a ready repertoire), but when I draw a piano keyboard, I center the black keys between the white keys. Well, until now. I took a picture of my piano, just to verify the internet info. Yup. The space between the white keys does not hit the center of the black key. Except maybe on the G flat, at least on my piano. Now I’m going to be looking more closely at all the pianos I encounter. What a fascinating bit of trivia and insight on the workings of the human brain.
Photo description: Antique piano keys from D3 to D5, with chips in the ivory and note labels on the keys, and “VERTICAL GRAND” in gold.