Inkle Loom part 3

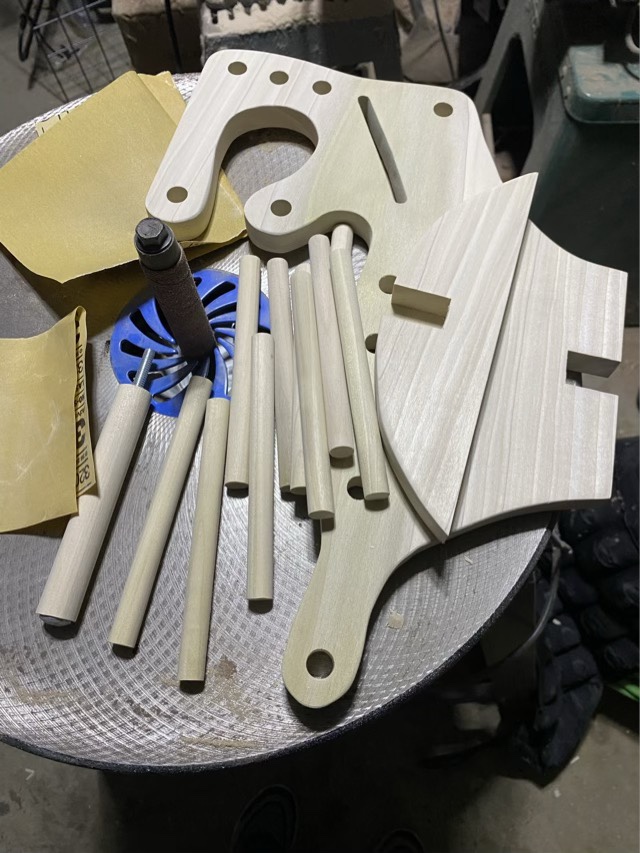
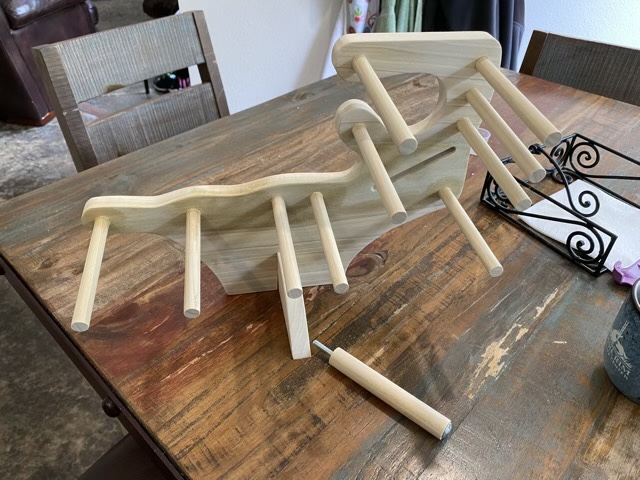
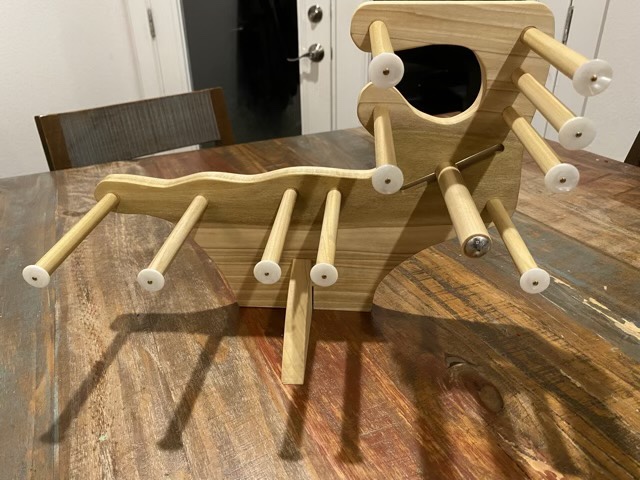
I’ve made the body of the loom, secured the rods, and finished the loom with tung oil, so it is done, right? Well… I saw another loom with knobs turned onto the end of each rod. While I didn’t want to turn each rod on the lathe with this project, I did like the idea of stops on the ends of the dowels.

Clip on buttons

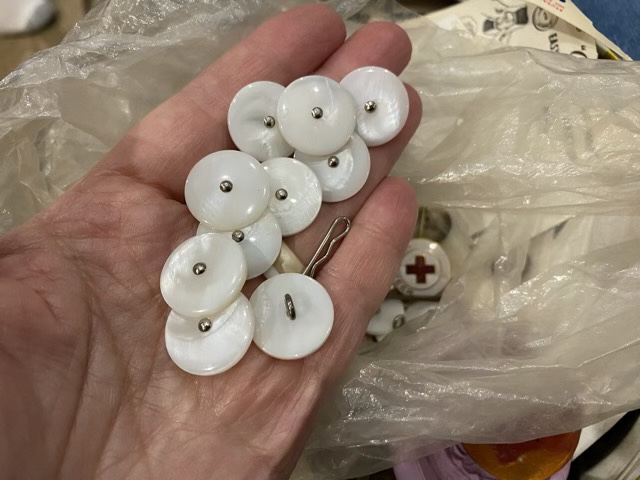
In my stash of buttons (hm, apparently I have four containers full of buttons now), I found my grandmother’s old clip on buttons in a bag with her red cross volunteer name badge and pin. These clip on buttons have a single central hole with a pin through and a loop behind. They clip onto garments with a small steel pin. The buttons are made with a pearlescent material that is quite lovely and they are just over a 1/2” in diameter.

Button to tack conversion

I cut the looped pin off the buttons, and reamed out a few holes that were slightly too small for the small brass nails I had. I drilled tiny starter holes in the end of each dowel and used a tack hammer to attach each button.

Inkle loom with button stops and tension rod installed
Back of finished loom

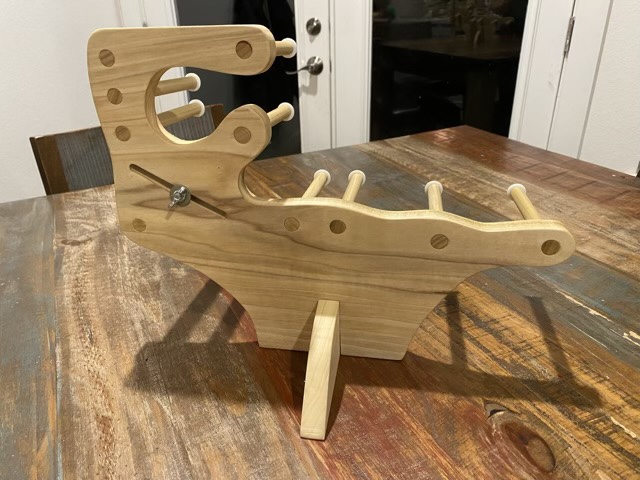
So now I’m ready to test the loom!

Inkle Loom part 2

I’ve broken this post into several sections because of the length of the explanations. Yesterday was part one, laying out and cutting of the body of the loom.

Body of the loom
Parts assembled and sanded

For the posts, my limiting factor was the length of the carriage bolt. I could make the 1/2” posts 6” long, but the 3/4” tension rod needed the carriage bolt to be accessible on the back of the loom. So the rods had to be 5 3/4”. I drilled a quarter inch hole through the 3/4” dowel, and threaded in the carriage bolt, pounding in the last bit to lock it in. All the parts were sanded down successively to 320 grit.

Assembled loom with rods

To secure the rods into the loom body, I applied a thin layer of wood glue at the bottom, and used a rubber mallet to pound the dowels into the holes until they were flush with the back. Before the glue dried, I wiped the whole loom down with a wet cloth to both remove the excess glue, and raise the wood grain. When the water dried, I sanded everything down again with 320 grit.

Finishing with tung oil

To give the loom a light stain-resistant finish, I rubbed in a 50/50 mixture of tung oil and mineral spirits to soak into the wood, then when that was dry, rubbed a light coat of pure tung oil over the surface.

To be continued.

Inkle Loom part 1

I’ve been looking at Inkle looms on the internet since I made my first tablet woven strap. I was certain I could make one, but wasn’t sure if I would have the time. I found myself at the hardware store for sandpaper for a different project, so thought I would look around for Inkle loom parts. I walked out with a 1x12x24” poplar project board, 1/2” and 3/4” poplar dowels, a 6” carriage bolt, washers and wings nuts, oh, and the sandpaper.

Planning the design with pencil and string

I laid out the design by clasping the board between my knees and sketching with a pencil where the outer posts could go. I wanted a lap loom and thought it would be more stable with something to hold onto. I taped string where the warp threads would go to avoid interference between posts. Even though I intend on using it for tablet weaving, I included the heddle post in case I want to weave something that needs it. The outer edge I wanted to be wavy with an organic feel, rather than a straight lumber look.

Loom cut out

I cut the loom out using a bandsaw with a 1/4” blade. I made a base piece so I could stand the loom up on a table if I wished. I sanded all the edges with an orbital spindle sander to smooth out the saw blade cuts.

Holes drilled in the loom body

Using a drill press, I drilled 1/2” holes for the posts, and 1/4” starter holes for the slot for the tension post.

Sanding the tension slot

I cut the slot with a coping saw, but was conservative on the guidelines, and needed to do quite a bit of sanding so the carriage bolt would slide easily along the track. I rounded all the edges by hand with sandpaper as well.

To be continued.

Foxy

Gray fox

I checked the trail cam again and saw the usual complement of possum, raccoon, bird, and cat pictures. The bonus shot was of the resident gray fox. Of the cat pictures, there were two with un-tipped ears. Sigh.

Petals fall

The crossvine flowers are starting to fall away. The profusion of blooms was truly spectacular this Spring. Unlike azaleas, the crossvine will bloom again, several times, before next Winter.

Crossvine flowers fallen to the ground
Crossvine in bloom
Bee visiting the stem after the bloom has fallen