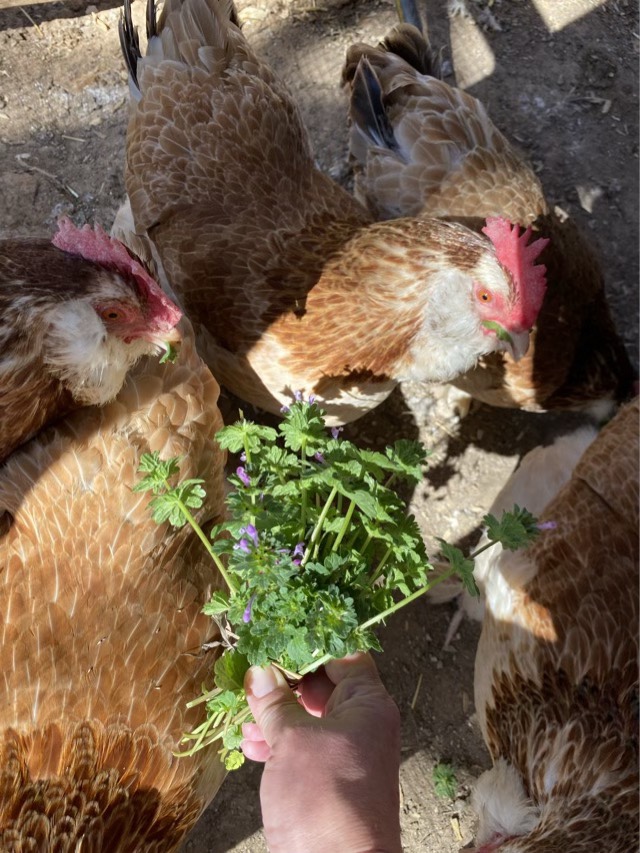
One of our first wild flowers to bloom here is henbit, with their delicate purple flowers. As they grow in the meadow outside the run, the chickens appreciate it when I gather some to share with them. Appreciate might not be quite the right word, as they are hopping before I get in the run, and the bouquet doesn’t last long against the ravenous hoard.
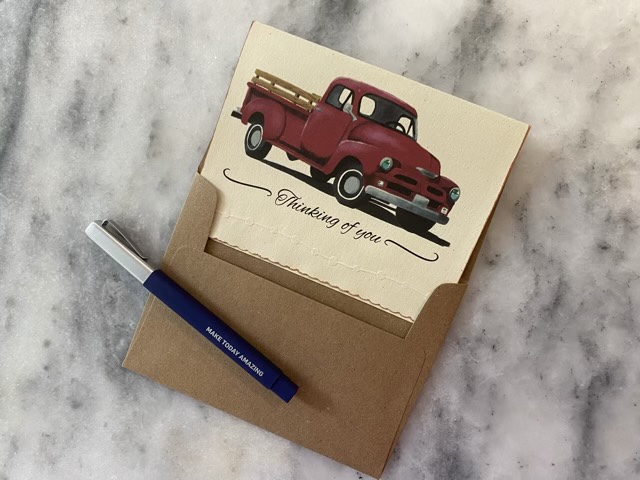
I’ve been having fun designing “little red truck” digital paintings for a friend who needs greeting cards. I’ve posted the technical bits of the digital side on my business site (https://carynscreations.com/blog/), but I thought I would go into the hand finishing here and provide some tips and tricks that I’ve found along the way.
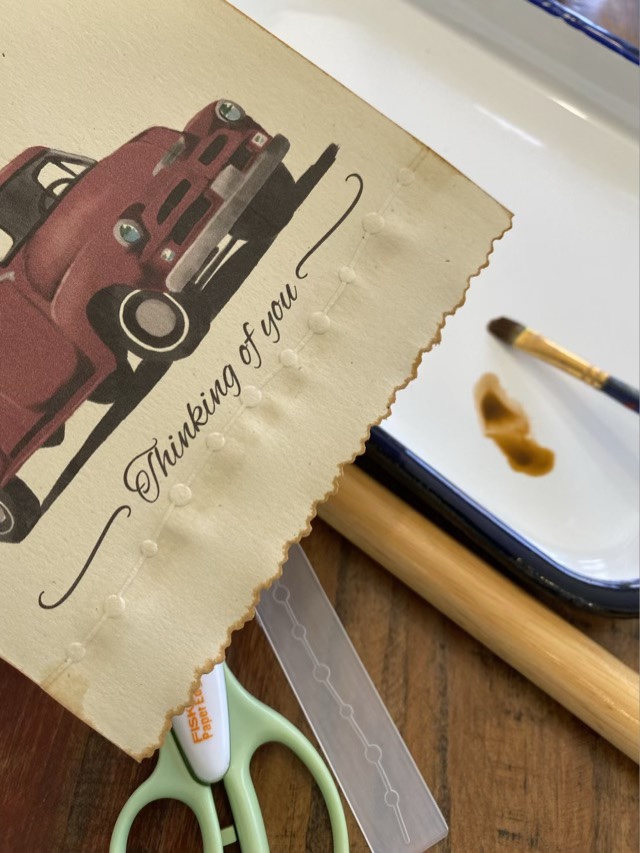
Little Red Truck card
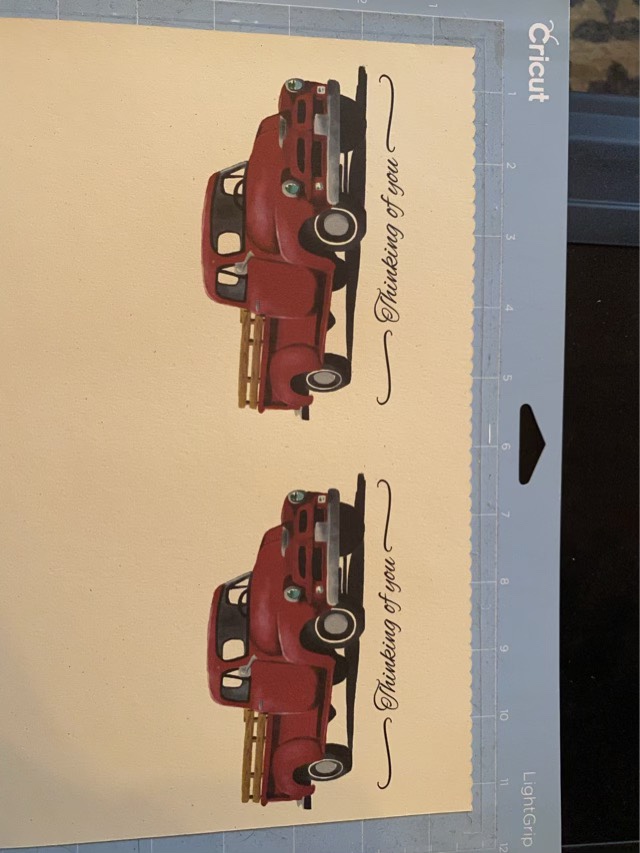
So the first hurdle was getting my image to print properly on my printer. When I would print from the computer, the colors would be faded and streaked. My printer has the capability to print pictures from USB, so I made my image a JPG, transferred it to USB, and printed directly from USB to printer. The print took forever to produce, but when it was done, it was glorious and imperfection free! And I print on 100% recycled card stock, which makes my heart happy.
Using an electronic cutting machine to do fancy edges
The next challenge was making a fancy cut on the front edge of the card. I bought a couple patterned scissors, but they are fiddly and are difficult to line up. So instead I designed some edges and used my Cricut to cut them. So much easier and faster than scissors or an x-acto knife.
Embossing with embossing folders without a machine
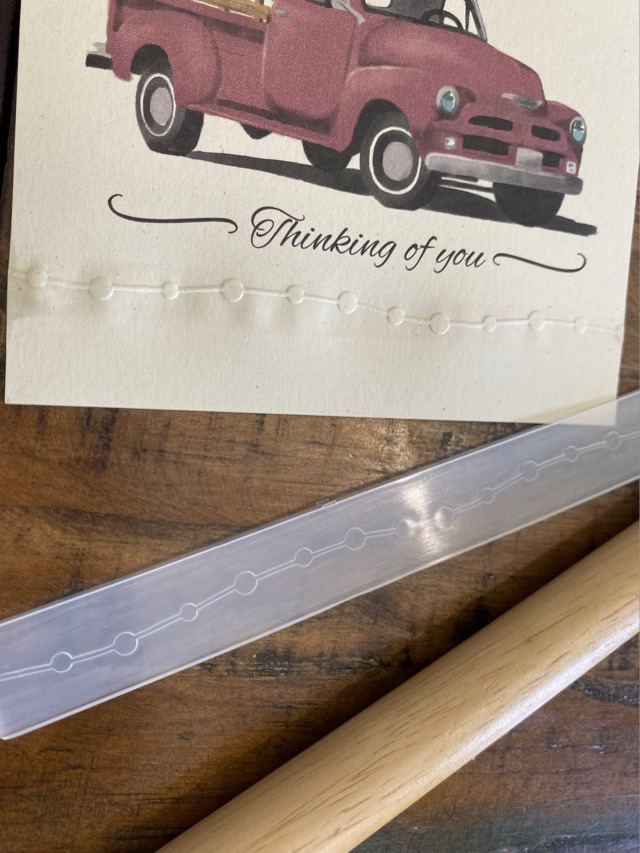
Although I have an electronic cutter, I did not want to buy an embossing machine. I discovered embossing folders and found that if you wet the paper and use a rolling pin or stick to press down on the folder, you can skip the machine. I have a modest set of four embossing folders. I need to figure a way to design and make my own, because that would just be cool.
Aging the edge
The next card improvement was aging the edge to give the card an antique look. I tried brushing the edge with a chalk ink pad, but was not pleased with the results. Instead, I broke out my water colors and used a sepia colored liquid ink. I like the effect best if I pre-wet the card edges, then carefully apply the diluted water color to the edge, so capillary action spreads the color in a pleasing way.
“Ironing” with a hot laminator
Finally, all that wetness added to do embossing and edge aging makes the cards a little warped. I found that it was easy and effective to run the cards through my hot lamination machine (without a lamination folder).
The cards, with a 100% recycled kraft brown envelope, are available for purchase on my Etsy site. If they are gone, I will make more. I do make sure that the pictures are of the actual item, rather than stating “items may vary” because I think it is important to see pictures of exactly what you are buying.
The school district bands had a concert for all their groups and a bake sale. I made up some gluten-free chocolate chip cookies, wrapped them and included the recipe, and decided I needed a box, so wove one using poster board.
Cutting the base with one inch strips
I used black and white poster board to get a checkered effect, and used hot glue to keep things together. I chose to weave because I thought it would make a stronger box, which it did, slightly. I had to add a double layer to the bottom to add rigidity, but it still had some flex. For a single-day event, it worked, but it was a time investment that wasn’t worth the output. A smaller box would probably be more sturdy and be able to be reused. If I were to make one again, I would also skip the two colors, which makes it harder to finish the top without messing up the pattern.
Woven poster board box with GF chocolate chip cookies
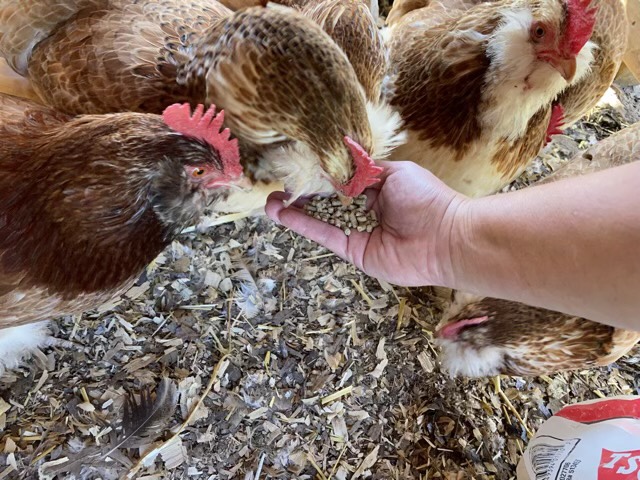
Well, she has done it again. Magic the hen has hurt her right leg to the point that she can’t move around well. We seem to be in a cycle. She hurts her leg, heals enough that the limp goes away, then hurts it again. I think she feels better, then goes and jumps off a high perch. Maybe. Anyway, the first time I isolated her with food and water. That didn’t do much but make her lonely, so now I just make sure I go out twice a day to see that she eats and gets water. We have a routine: I carry her out for distribution of grubblies, then we go over to the food bin, then to the outside water, then back to the waterer inside the coop. She tells me when she is ready for a station change by clucking and looking around. As long as I catch her wings when I pick her up, she is calm and lets me help her gain her balance when I put her down. I am a chicken minion.
Grubbly time, Magic is the one with her tail tucked at about the 9 o’clock position. She tucks her tail when her leg hurts and her balance is off.Holding the feeder open for MagicKeeping the ravenous hoard busy while Magic eats at the feeder
I think she quite likes the pampering. I keep the rest of the chickens away while she eats. She can get around a little on her own, and somehow manages to get up to the perch every night. I did make a ramp of shavings so she doesn’t have to launch herself far, and the perch is only about 18” tall without mulch. I think it might be a tendon thing, or maybe I’m just thinking of my own healing tendon. Since the chickens are in laying mode I should be going out twice a day anyway to gather eggs so I have less of a chance of one going broody, so it really isn’t intensive nursing.
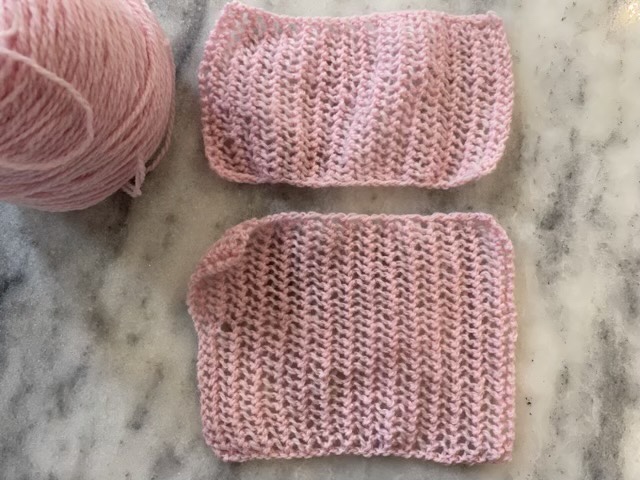
I found a knitting pattern for lace that basically uses two stitches, a yarn over (increase), and a purl two together (decrease). These two alternate and every row is the same. It results in an open weave with dimension and vertical stripes. What? Vertical stripes in knitting? Unusual and intriguing. I made up a couple test swatches with some wool sock yarn with size 4 and size 6 needles. The magic of the lace comes when the pieces are blocked, and the pattern opens up and changes dimension.