
I have been hearing about paint pouring projects for about two years. At the beginning of the summer I purchased some flow agent (Floetrol, but there are others), but didn’t get around to giving it a try until now. I’m sorry I waited, this was fun! My kids really liked it, and it wasn’t nearly as messy as I feared it would be.
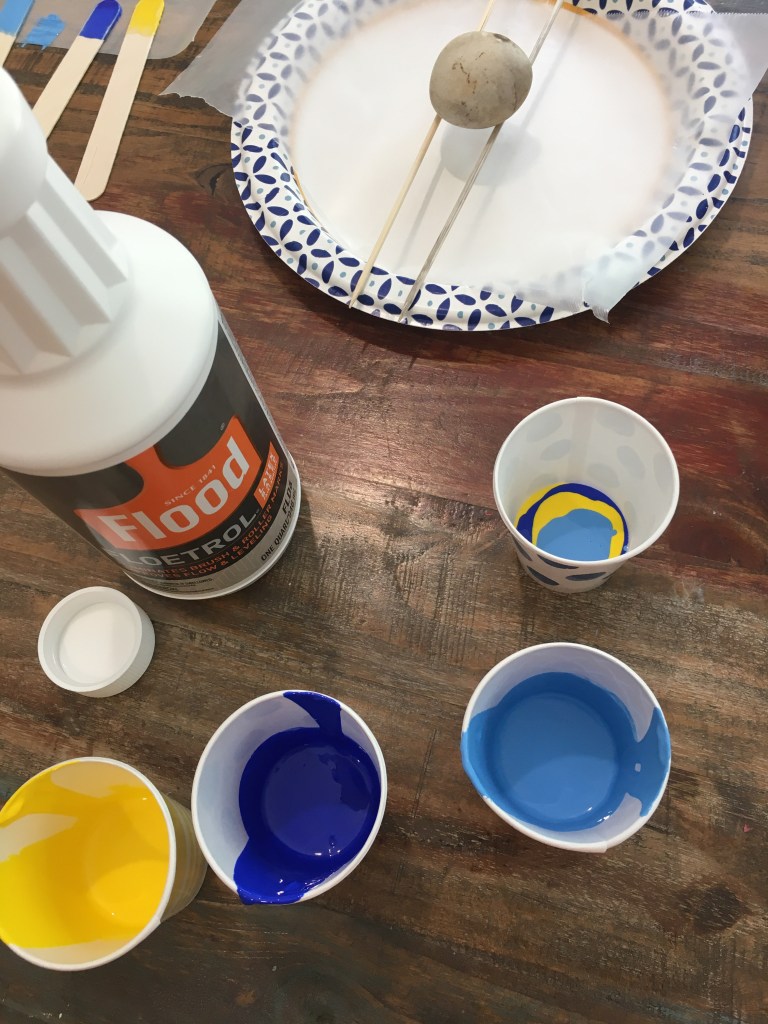
I lined paper plates with wax paper to catch the drippings. (When the paint is dry we will use the drippings for another project.) I put bamboo sticks across the plates to hold the rocks above the plate. I used 5oz paper cups for mixing and pouring. I mixed about twice as much Floetrol as paint, so the consistency was about the same as pancake syrup. When the solid colors were mixed, I poured spots of color into a different cup. Then I handed over the cup and let the kids pour!

After pouring, we let the rocks sit for a bit, then moved them over to another sheet of wax paper so we could pour more.

I don’t feel like we have wasted paint since we caught the drippings and used up all the mixed paint. The stir sticks will dry and can be used again. Some artists use washable cups, which is a good idea if this becomes a frequent craft for us.
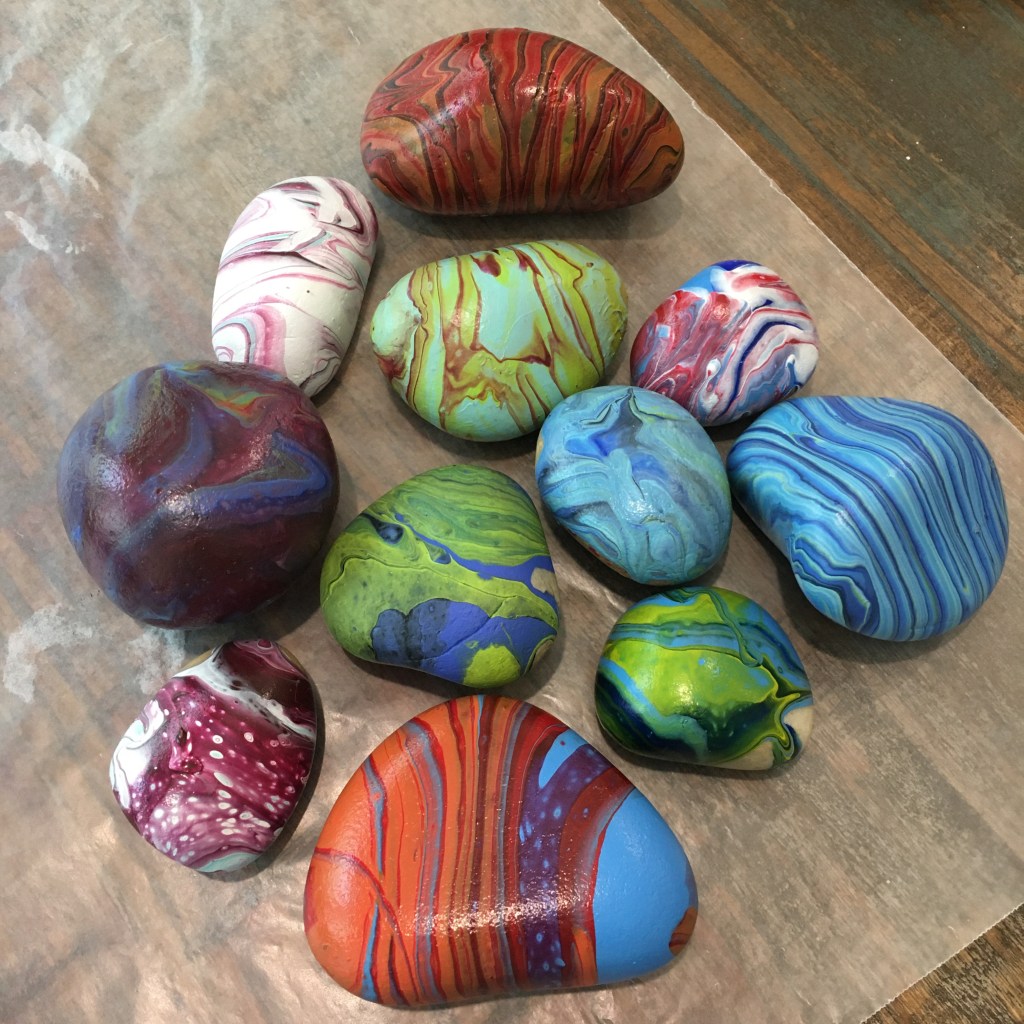
Once these have sat a couple days, I will put on a protective clear coat. These are too pretty to just leave to the elements!
