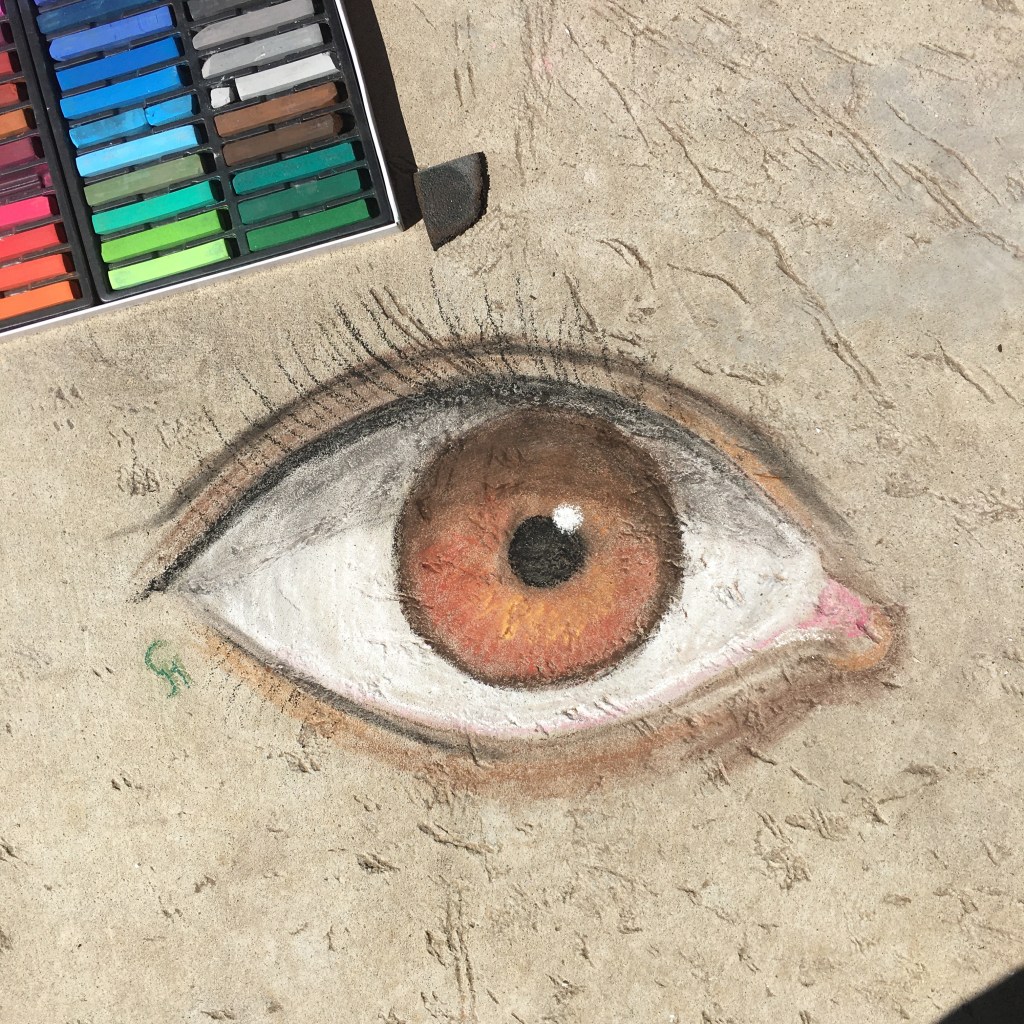
I am loving soft pastels as sidewalk chalk! I didn’t care for them much in school, but for blending and color intensity, they knock the socks off “sidewalk” chalk. We tore little bits of foam off the packing to use for blending, which is the secret key for art on bumpy concrete.
Yes, I drew an eye. At least it is a right eye this time, as I typically default to left. I’m trying to give equal time and effort. I’d hate for an eye to feel left out. That just wouldn’t be right. Left on their own, they save face and stay right together anyway.
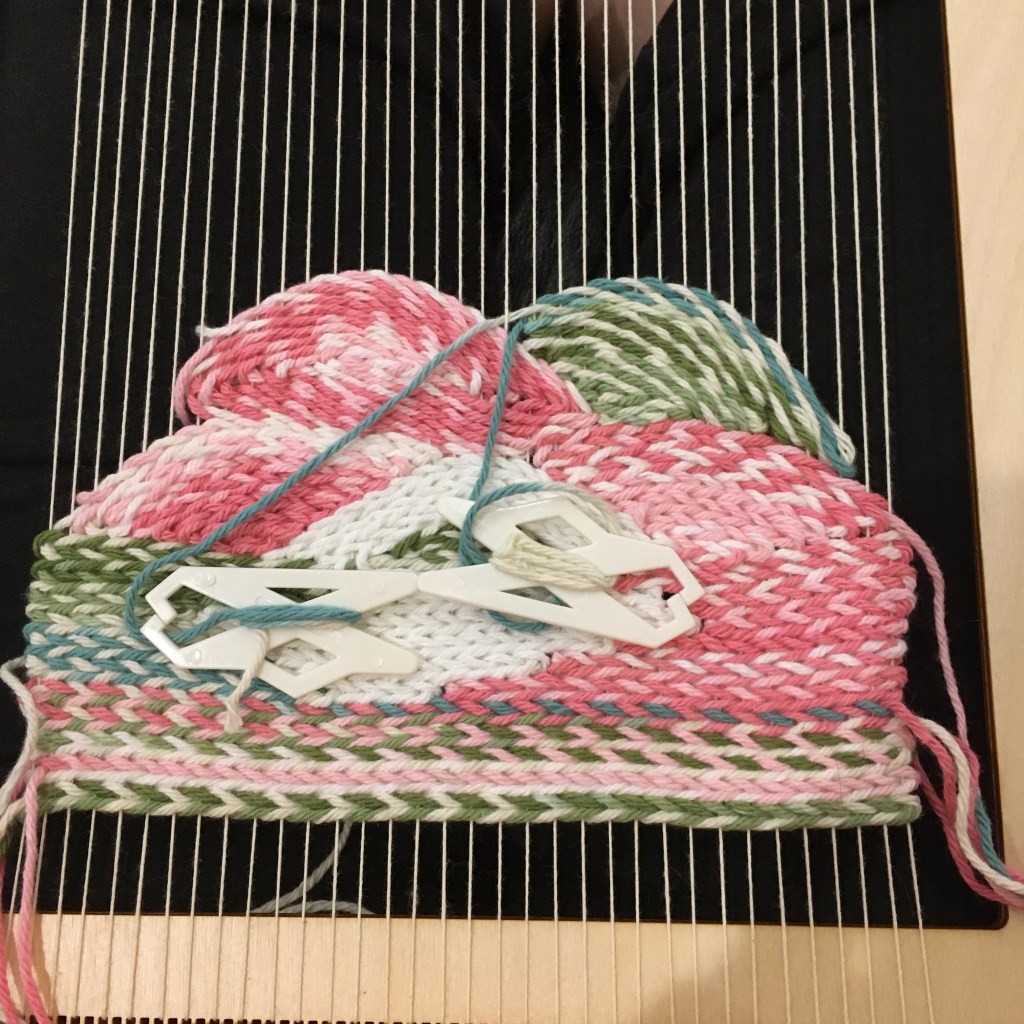
I saw some pins on Pinterest on twining yarn around the warp threads and the string was sitting there, and the frame was sitting there, and shouldn’t I just try it? I started out going back and forth, then decided to try some random blocks of color, then since it is a washcloth anyway, tried some spirals and arcs.
Twining while weaving
I liked doing the arcs the best, especially the top white central arc, as the S twist of the twining went well with the S twist on the yarn. I don’t care for the knit look (that results from doing a S twist on one row, and a Z twist on the next), not only does it look knit, it is very stretchy in an unpleasing way for a wash cloth. The warp threads were very easy to pull through, though.
Finished twining experiment
I do like that the twining covers the weft threads on the back of the work as well as the front. I also like weaving in the ends in the middle and of the work, rather than the edges. On this piece, I only wove the ends in one way, rather than going back and forth three times as I’ve done previously, so it will be interesting to see if the ends work loose.
We hid all our painted rocks at a local park, so we came home and painted some more. I’d seen some face rocks on Pinterest that were painted with just shades of black and white, using the natural rock as the skin tone. I tried one, but I like painting eyes better. I may try the whole face again if the right rock rolls in. I will coat these in Helmsman before we hide them.
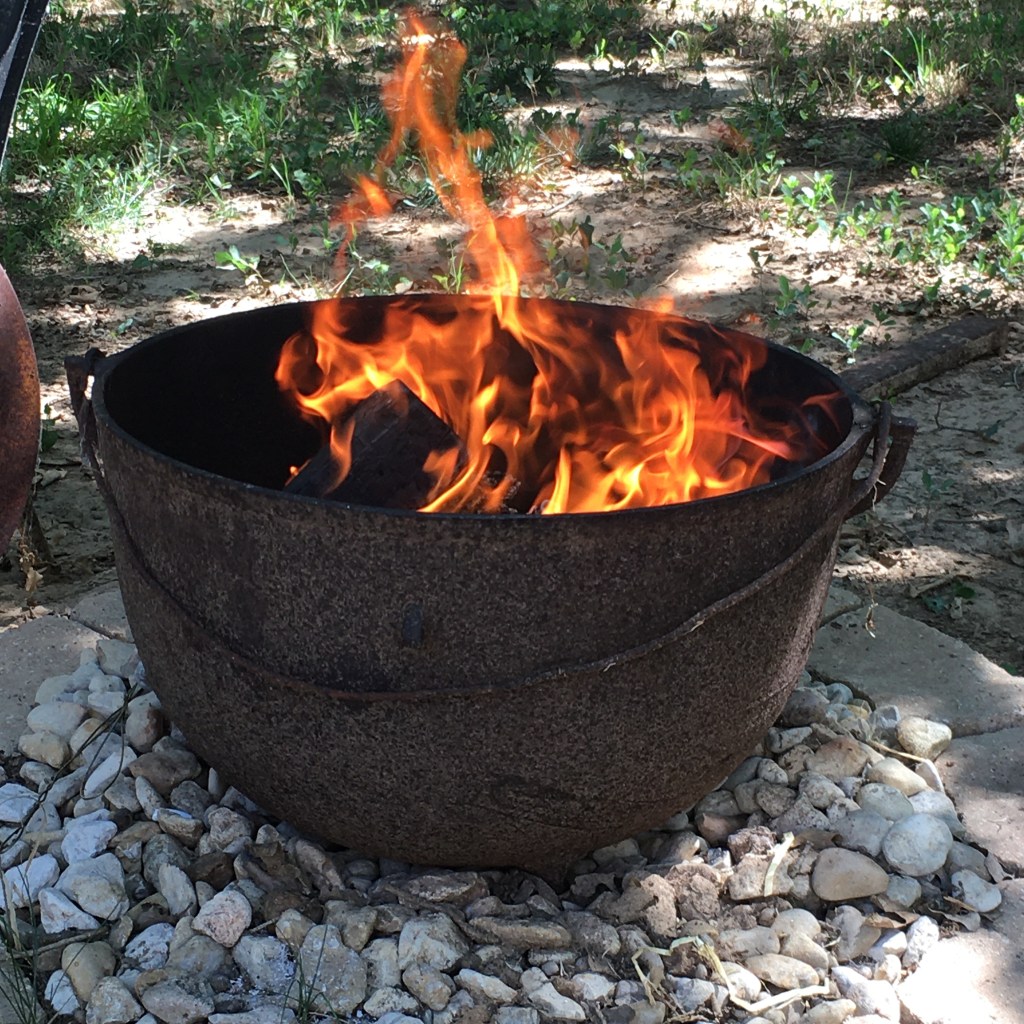
Navi the hen has slipped this mortal coil. She has been struggling with impacted crop probably since last August. She was fine over the winter, crop heavy, but behaviorally fine, but the heat of summer caused her crop to expand until she was laying down more than walking. It came to two choices, put her down or try crop surgery. Turns out it wasn’t either/or. My eldest and I performed the crop surgery as described in Gail Damerow’s “Chicken Health Handbook”. We worked for 30 minutes before we couldn’t take the smell anymore and I couldn’t get anymore of the impacted material out. We cleaned her up and put her in the isolation ward. At first she seemed much better and was alert and more active. As time progressed, however, she was laying down again. Her crop was still full of matter, about the size of a billiard ball (this after we cleaned at least that much out). We made the decision to end her suffering. I followed Gail Damerow’s advice again this time from the book “Raising Chickens” and used the “suitable time-honored method” of dislocating her neck. It was not easy for me, but it was easy for Navi. I attempted a necropsy, enough to see that her crop was indeed still completely impacted with decaying grass and she would not have improved. My eldest joined me for the necropsy, and we even used masks infused with peppermint oil to mask the scent. It didn’t. I could not bring myself to do a complete autopsy. She was nothing but skin and bones and had been starving for a very long time. We built her a funeral pyre in the fire pit. We even added some twig boats to speed her journey. My youngest decided we needed a eulogy, so we shared some nice things about Navi the chicken, and my youngest is also working on gravestone designs. It is going to take me awhile to stop counting to 12.
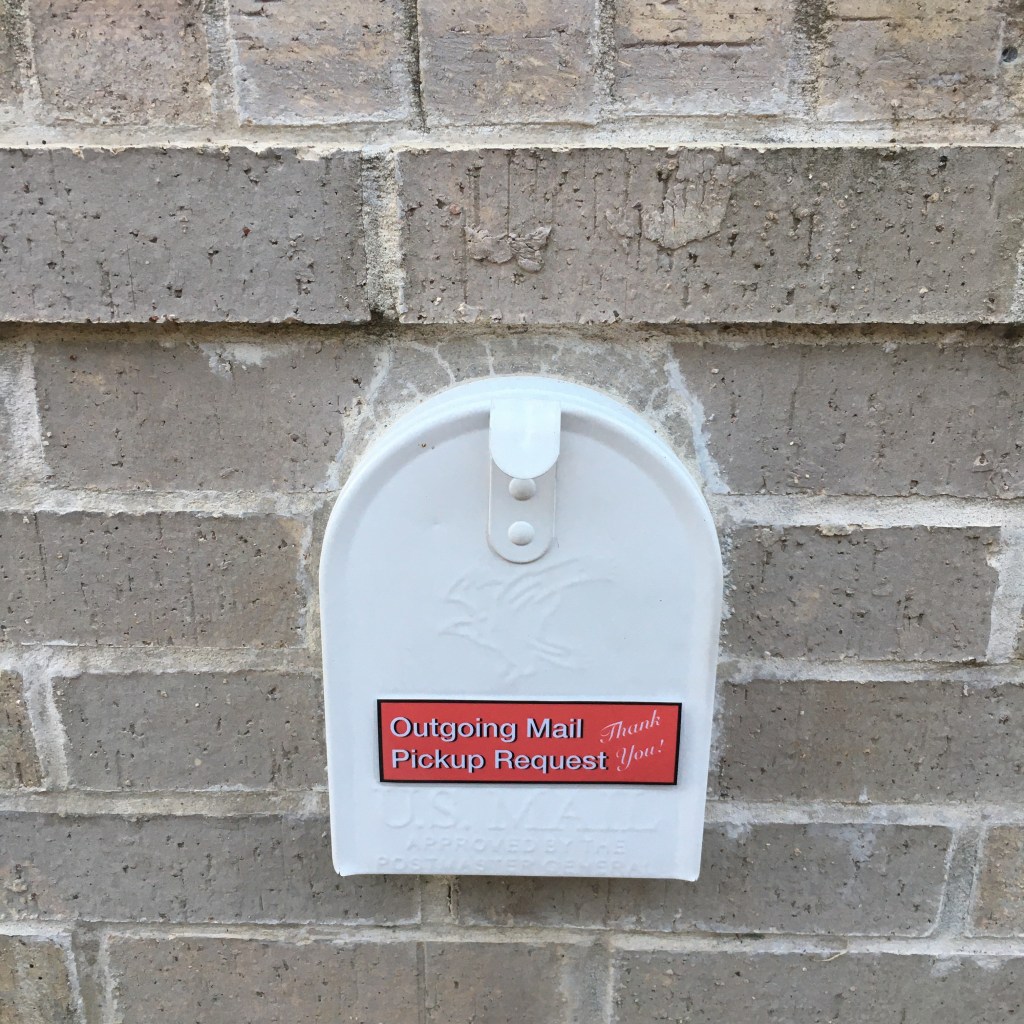
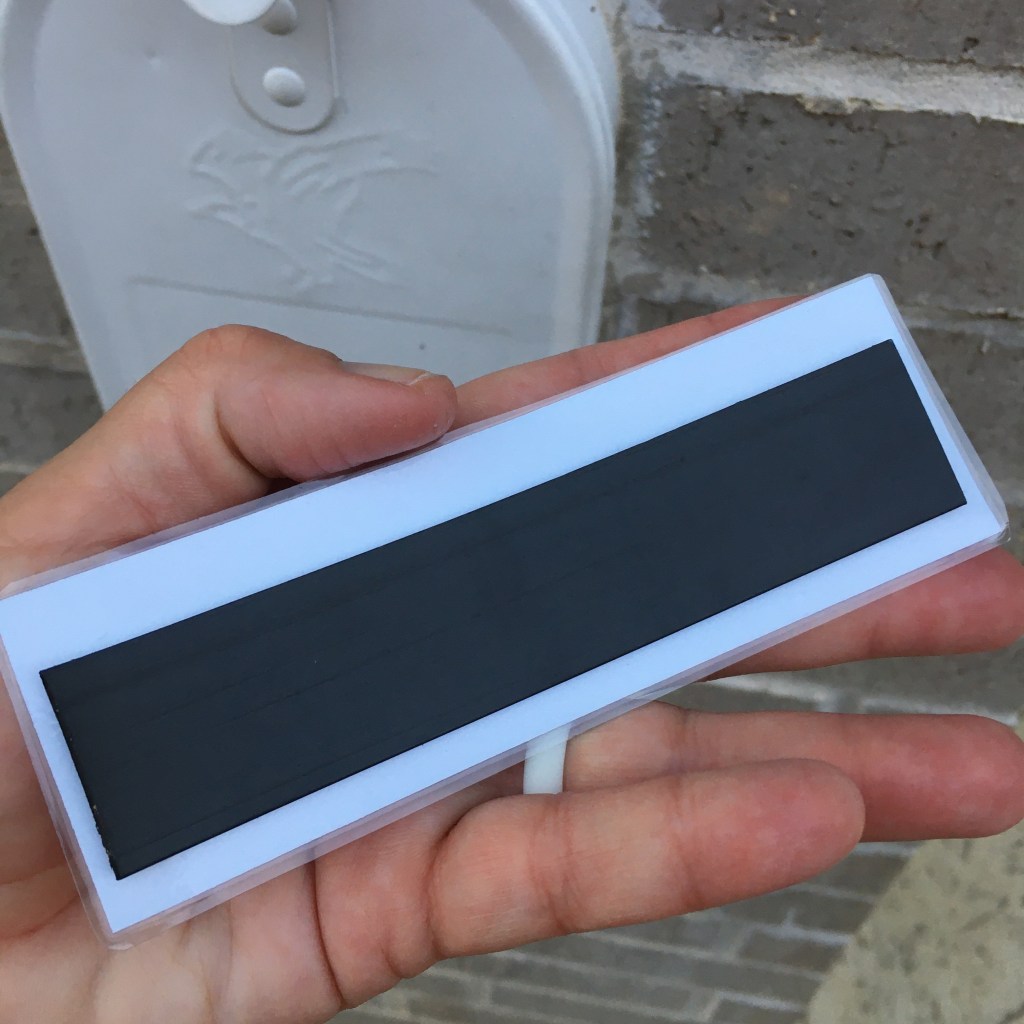
We have a nice brick mail box, with no mail pick up flag. I tried attaching one of those plastic retrofit flags, but refused to fix it again the second time it broke. While looking for possibilities, I saw a magnet that attaches to the front of the box. I can make that. I whipped up a simple graphic, laminated it, and used a section of self adhesive magnet tape on the back.
Mail flag magnetMagnet stuck on back
I was a little apprehensive to see how the mail person reacted, but when I went to check, there was the magnet, set neatly with my incoming mail, and the letter to go out was gone. Phew! And if it ever does go missing, it is easy and cheap to remake. If you want to make your own, print the graphic below on card stock (I printed mine 5” wide), laminate it (I used a heat laminator, but two pieces of clear shipping tape would work), and attach a self adhesive magnet to the back (available at craft or hobby stores).