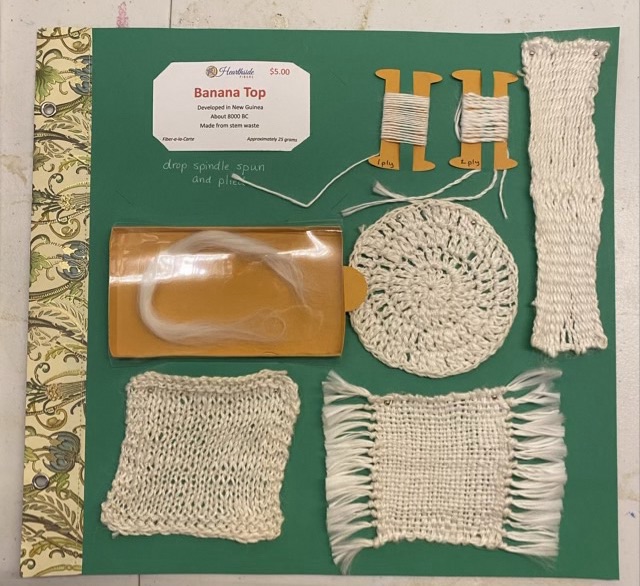
I assembled my banana fiber study page with yarn made from the stems of banana plants and purchased as combed top from Hearthside fibers.
Photo description: counterclockwise from top left: card from Hearthside fibers that reads “Banana top, Developed in New Guinea, about 8,000 BC, made from stem waste”, unspun fiber, knit swatch, woven swatch, crocheted swatch, sprang swatch, two ply yarn, and single ply yarn
Bananas are believed to have been first cultivated in New Guinea around 8,000 years ago and used for both fruit and fiber. The staple length of the combed top is long, about 8 inches, and the fiber is strong.
Photo description: banana combed top next to a ruler showing around an eight inch length
The fiber was pleasant to spin. I did challenge myself to spin thicker than my default spin, which resulted in more thickness variation, and also subsequently less length. I used up all my two ply yarn in my swatches, and had to piece together bits for my bobbin on the page because I forgot to set aside some at the beginning.
Photo description: same fiber page with the swatches flipped up to show the hand written descriptions
I made unadorned swatches to show the texture in the yarn that was also a result of the variations in thickness. My sprang swatch blocked well and has a lovely horizontal stretch.
Photo description: sprang swatch held expanded with my fingers to show the interlinking between the strands
I would absolutely spin banana fiber again, but I think next time, I would spin thin.
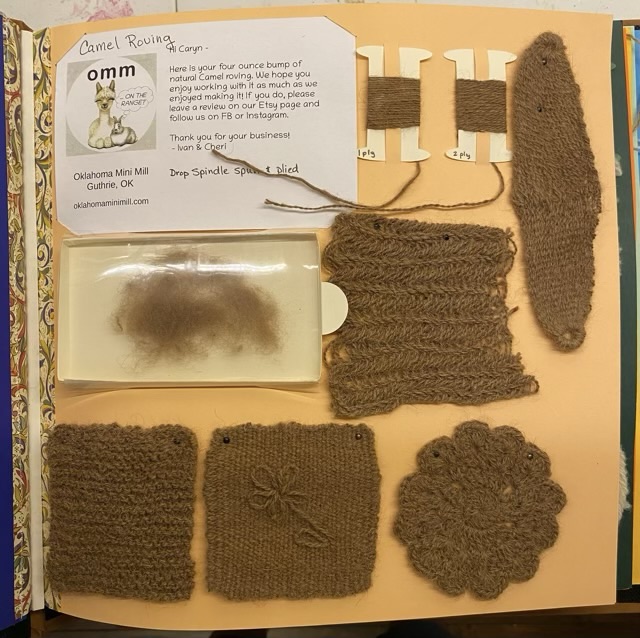
Photo description: fiber study page for camel roving from Oklahoma Mini Mill, (counterclockwise) with a card from the mill, a sample of roving, knit swatch, woven swatch with embroidery, crocheted round swatch, nålbound swatch, sprang swatch, two ply on a paper bobbin, and single ply on a paper bobbin
I assembled my camel roving fiber page! I quite like camel fiber; it is nice to spin, and soft. I would definitely work with the fiber again. In fact, I have two and a half balls of 2-ply yarn with which to plan a project. Exciting. I have also decided to add a synopsis of my blog posts about the fiber to the pages, so I can remember how I felt about the fiber. Now to figure out how to attach the printed pages. I tried some washi tape, which surprisingly doesn’t like card stock much. Hm.
Photo description: same page with the swatches lifted to reveal the hand written descriptions
The roving sample isn’t as perfect as it came from the mill; I liked spinning so much I forgot to leave a bit unspun. The fiber in the box was spun, and then I brushed it back open. Oops.
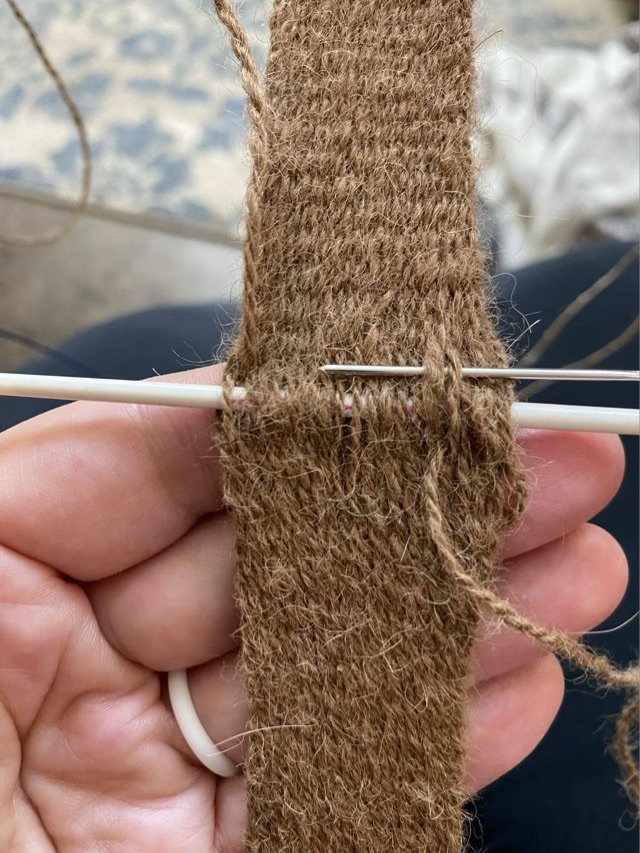
I used my small sprang loom to make a swatch with hand spun camel yarn.
Photo description: bent branch Sprang loom with interlinked 2 ply camel yarn nearly completed
To finish the middle, I tried a method I saw in a Sprang group that uses an Kitchner-like stitch to secure the warp threads. In knitting, the Kitchner stitch is a grafting method that takes the yarn in a winding path under and over two alternating strands at a time.
Photo description: binding off the Sprang by stitching
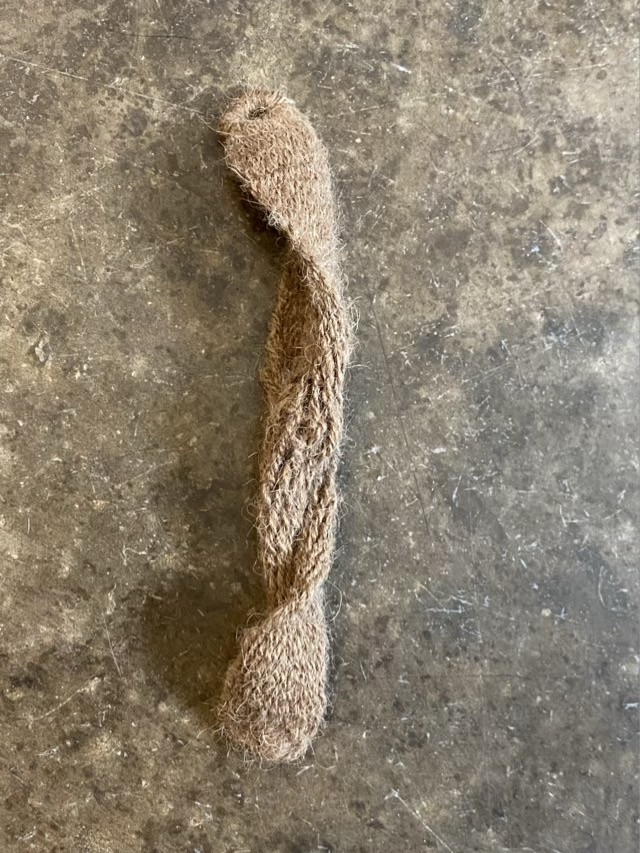
I finished the ends by pulling a section of yarn through the loops, doubling it, then wrapping the resulting circle with more yarn, forming a grommet.
Photo description: the end of the sprang swatch formed into a yarn grommetPhoto description: fresh off the loom unblocked Sprang swatch showing the tendency to twistPhoto description: same Sprang swatch laying flat after blocking (getting it wet and pinning it to a drying rack)Photo description: Sprang swatch pulled horizontally open to show the interlinked warp strands
I quite like the grommet finish for the ends, I’m sure I’ll think of a use for the structure eventually. I don’t care for how messy the center stitches look when the fabric is stretched. I like the chain method less, though. Experiments will continue.
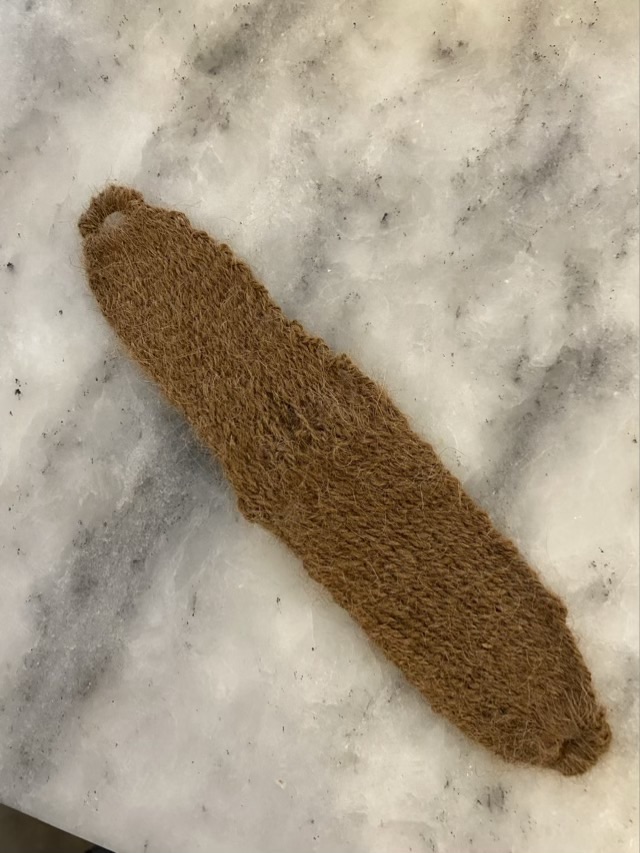
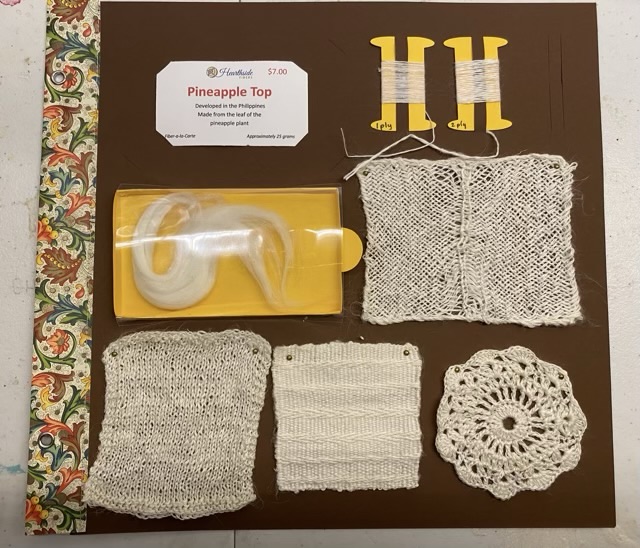
My fiber study page for my pineapple fiber sample is done!
Photo description: clockwise from top left: card from Hearthside fibers that says “Pineapple Top, Developed in the Philippines, Made from the leaf of the pineapple plant”, paper bobbins with single spun and 2-ply hand spun yarn, sprang swatch, crochet swatch, woven swatch, knit swatch, unspun fiber
The crochet round gave me fits with this fiber. I spun it so fine I was having trouble getting the right gauge for my regular coaster pattern. I think I ripped it apart three times. I ended up winging it, filling the space with stitches and numbers that fit.
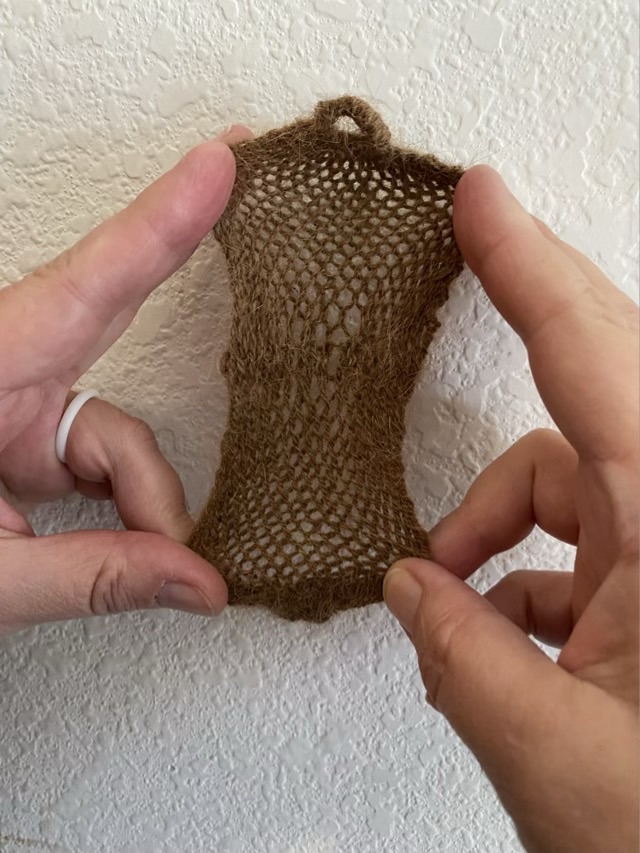
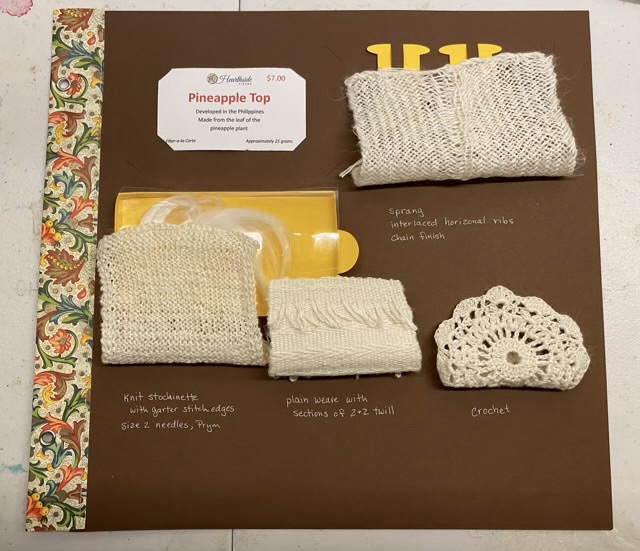
Photo description: same page with the swatches flipped up to show hand written descriptions: “Sprang interlaced horizontal ribs chain finished”, “crochet”, “plain weave with sections of 2×2 twill”, “knit stockinette with garter stitch edges size 2 needles, Prym”
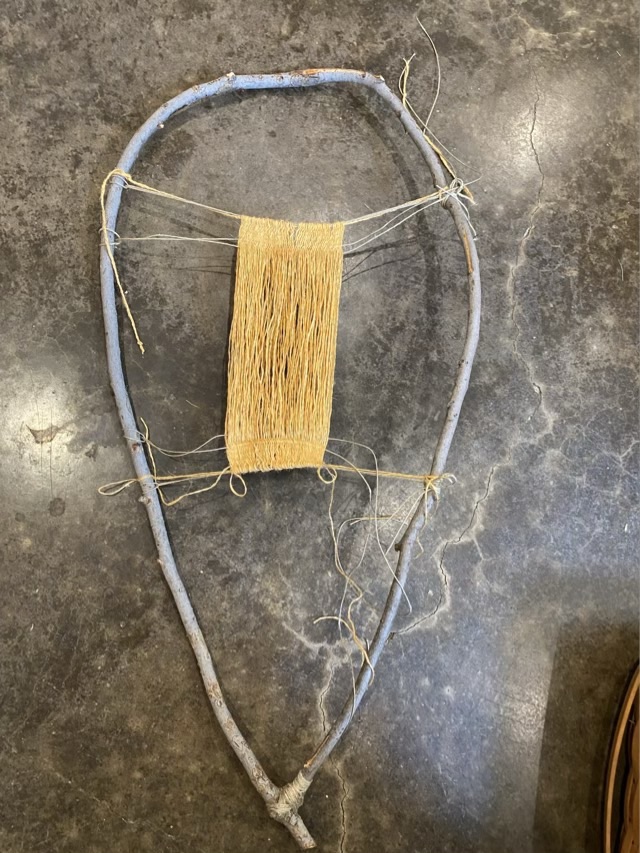
I intended to just trim the grass going to the coop, then, while I was out there, decided to uncover a path that I hadn’t cleared in over a year, then decided to trim some of the branches across the path, then decided to use a branch to make a bigger sprang loom. Logical, right? Once I secured the branch into a loop shape with hemp cord and added life lines, I now had the means to attempt to make an ancient style hair net. I warped the loom with some left over linen yarn that I spun from nettle dyed roving (that was also a lesson learned).
Photo description: Sprang loom made of a cedar elm branch tied with hemp cord and warped with hand spun nettle dyed linen yarn
The number of warp threads on this loom was easily triple what I’ve previously attempted. I intended to do interlinked sprang with some lace holes, and switch twist direction halfway through. Here is where the mistake study starts. I ended up with holes that spanned three or four rows instead of just two, and rows that changed technique midway through. Oops.
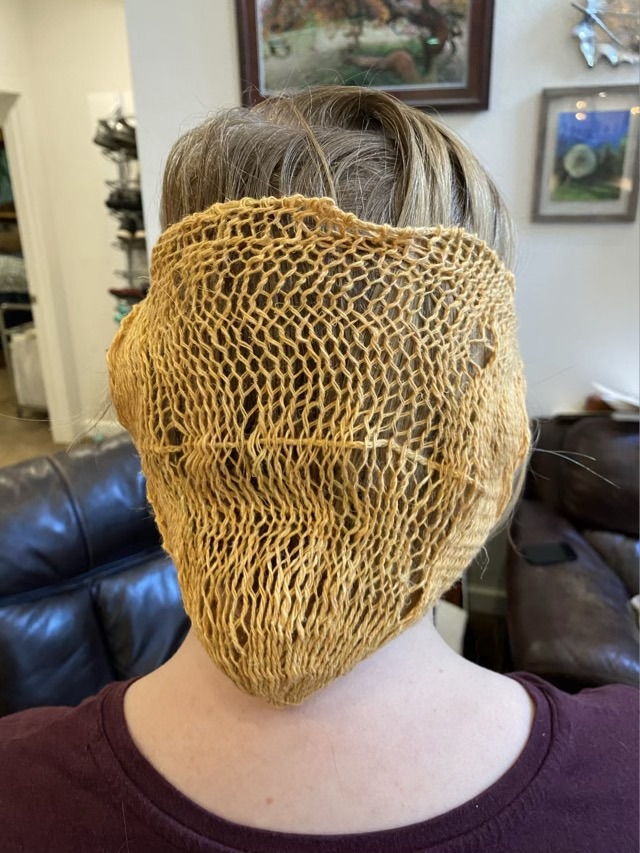
Photo description: Sprang hairnet full of weaving errors
I think, to solve the errors, I need to do a check at the end of each row by pulling open the weave and looking at the thread path. The yarn was also loosely plied, which made it difficult to tell what was plied yarn, and what was a single strand. I will add some twist before the next attempt. The happy note on this project is the finishing cord through the middle. This was a much neater way to secure the final twist and also acts as a second tie to secure the hairnet. On one end of the sprang I pulled the cord tight to gather the side together, but I left the middle and other end loose on the cords.
Photo description: Sprang hairnet on my eldest, back view
To wear the hairnet, the top cord ties around the temples, across the front of the forehead. The middle cord comes up at an angle and ties at the hairline. The back of the hair is tucked into the lower gathered section.
I will make another attempt, armed with the data gained from this project.