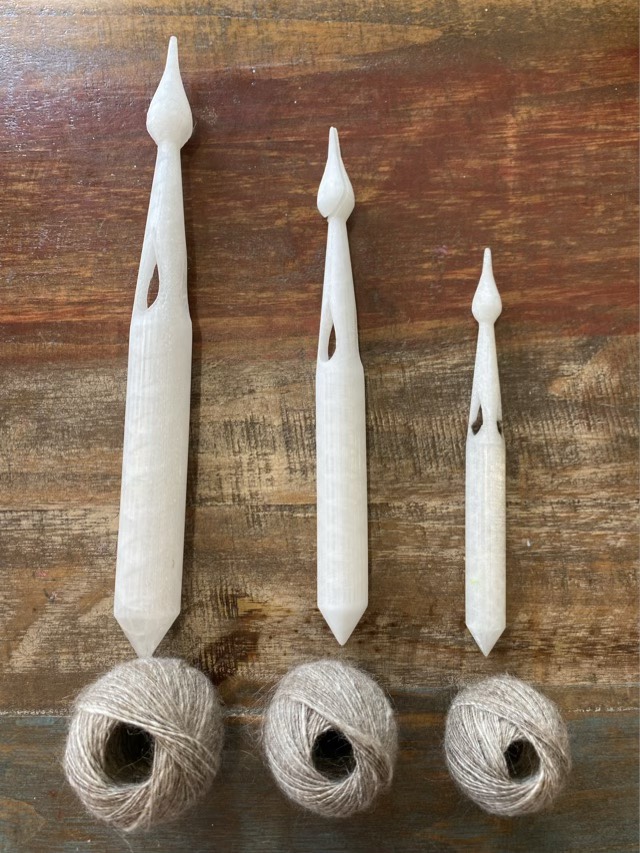
I’m still working on the design of my 3D printed spindle. I’ve now had a local printer make up three sizes, and have tested them all with the same fiber blend.
Three spindle sizes with corresponding cops of single spun yarn
We aren’t there quite yet. I need some input from other spinners, and we need to change the printing density to reinforce the neck. The smallest version has never broken, but the hole in the yarn ball is too small. The largest has a great diameter hole in the cop of yarn, but is unwieldy. The middle one is the closest to feeling right, but still needs some adjustments.
In developing my 3D printed spindle design I’ve had three sizes printed up. The smallest works well, but the bore of the shaft is a little small. The largest version had a good sized shaft, but wasn’t as sturdy and was a little unwieldy. I’m hoping this new middle sized version is the winner.
Three sizes of spindle 3D prints
First, though, I need to sand down the printing artifacts, which are small bumps of filament that didn’t quite go where they were programmed to go. Filament is like that. Resin printing has less of these artifacts than filament printing, but the PETG filament is tremendously more durable. Plus it makes the spindle look like a calcite crystal. Nice.
I put together seven top/bottom whorl spindles to sell at our local spinning/game store. I put the length and weight on each one on a custom stamped tag. I consider these student spindles, since the whorls are made from wooden toy wheels. I did shape the shaft with a notch on one end, and a reinforced hook at the other end, so they are fancier than the mass produced versions. Each spindle is also slightly different, which I think it good to appeal to different preferences.
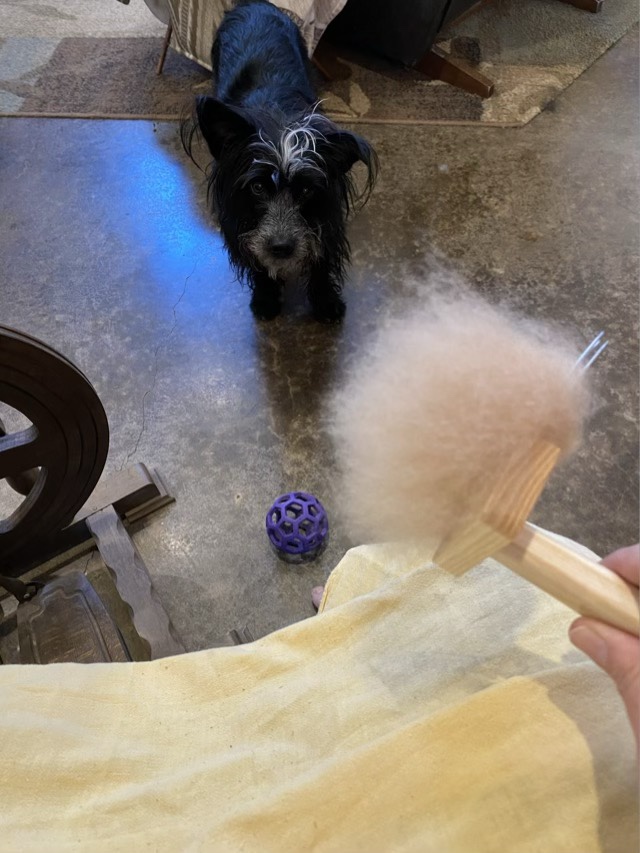
Thanks to Missy (IAB (Identified At Birth) dog) , I am learning new skills. I can now kick a ball while combing out alpaca fiber. I started singing and she thinks that is my signal I want to throw the ball (laughter also prompts her to bring someone a ball, hmm). My hand were full of combs, but my feet were available to send the ball in various directions. She was quite disappointed when I started to spin and both hands and feet were busy.
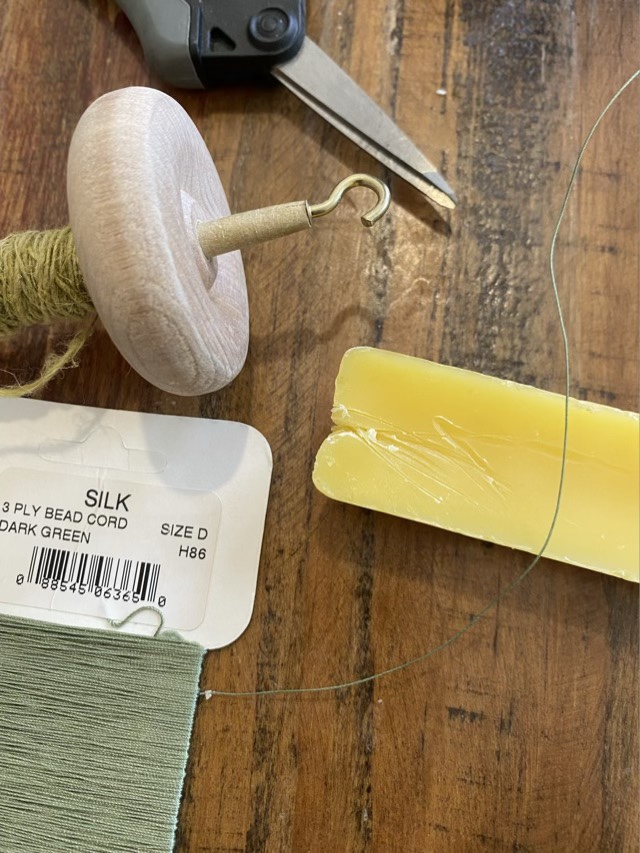
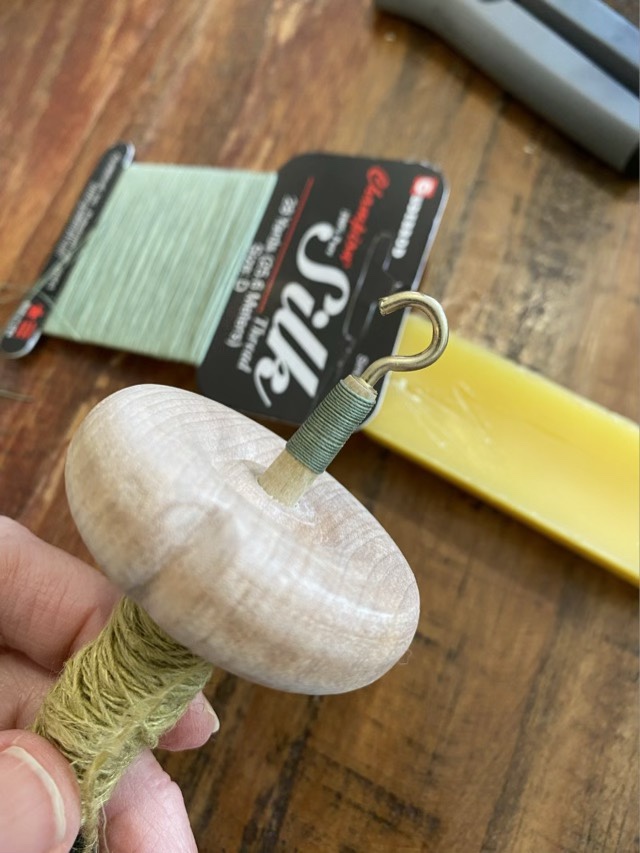
Spindles with hooks have a weak point where the hook screw connects with the wood, especially if the shaft is slender. I like slender shaft drop spindles because I feel I can control the spin better and the light weight is more comfortable. I don’t like when I drop it and the shaft cracks. To give the metal to wood join some reinforcements, I decided the wrap the weak area with waxed silk.
Clockwise: scissors, beeswax, silk cord size D, drop spindle
The method I used to wrap is called common whipping. Plugging those two words into your search engine will generate all sorts of illustrations and tutorials, as long as you get the words right. It took me an hour of searching to find the right words, I had a synonym of whipping in my head that I couldn’t dislodge. So, two words: “common whipping” are my gift to my readers today.
Common whipping on a drop spindle with waxed silk cord
I ran an arms span of the silk cord through my wax block three or four times to build up a layer of wax. The wax helps protect the cord and makes it stay in place better. I start my whipping with a loop laid along the shaft. I wrap toward the loop, run the end of the cord through the loop, then pull the loop end to draw the ends into the middle of the wrap. (This is where the internet search comes in handy if you are a visual learner.)
I used silk because I tried hemp and it wasn’t strong enough and the diameter made a wrap thicker than I wanted. Waxed linen is also commonly used, and is strong, but I didn’t have any on hand.