I am not a fan of ironing, but my steamer makes me happy. That and neat stacks of in-process masks.
Neatly pressed in-process masks (adult and kid sizes)
I also enjoy seeing the steamer do its work on the masks after they come out of the wash. I straighten out the wire, then steam the mask mostly flat. I’m sure there are wizards of ironing out there that could make them as crisp as new; I don’t have that patience, but I do appreciate storing mostly flat masks. Yes, these masks follow the first pattern I made in bulk. For the kid size, instead of starting with a 10”x14” piece of fabric, I downsized to 8”x14”. This pattern stores nicely, fits nicely, and is easy to make in an assembly line method, which means I can make more a little faster!
My cotton fabric stash is gone, transformed into masks and donated to a local children’s hospital and given to friends. I had to break down and buy fabric (gasp!). Good quilting fabric is expensive, by the way. Although I liked the pattern I used for the donated masks (they were relatively easy to make, stored nicely, and had filter pockets), they were bulky with the pleats and after washing were a bunched up mess because the wire was sewn in. So I started mixing and matching patterns to see if I can come up with something better. Looming on the horizon is the potential for my kids to go back to school with masks. I need something easy to wear and wash.
Mixed pattern mask with tie sleeves
One of the top features I like in a mask is tie sleeves, so that it is easy to trade out kinds of ties. This is important for us as we move forward because ear loops work for one kid, but not the other. And if the ear loops start to irritate, we can switch to a different strap method. Here is a quick video on using a U shaped wire to thread the ties. In the mask above, I used this basic pattern, but extended the sides to give room to make the sleeves (thanks Mom for that idea!). I also printed two more copies of the pattern and made overlapping mouth and cheek sections to allow a filter to be slipped into the mask. I like this filter pocket better because the cotton is between the filter material and the mouth of the wearer. The idea for this came from this pattern.
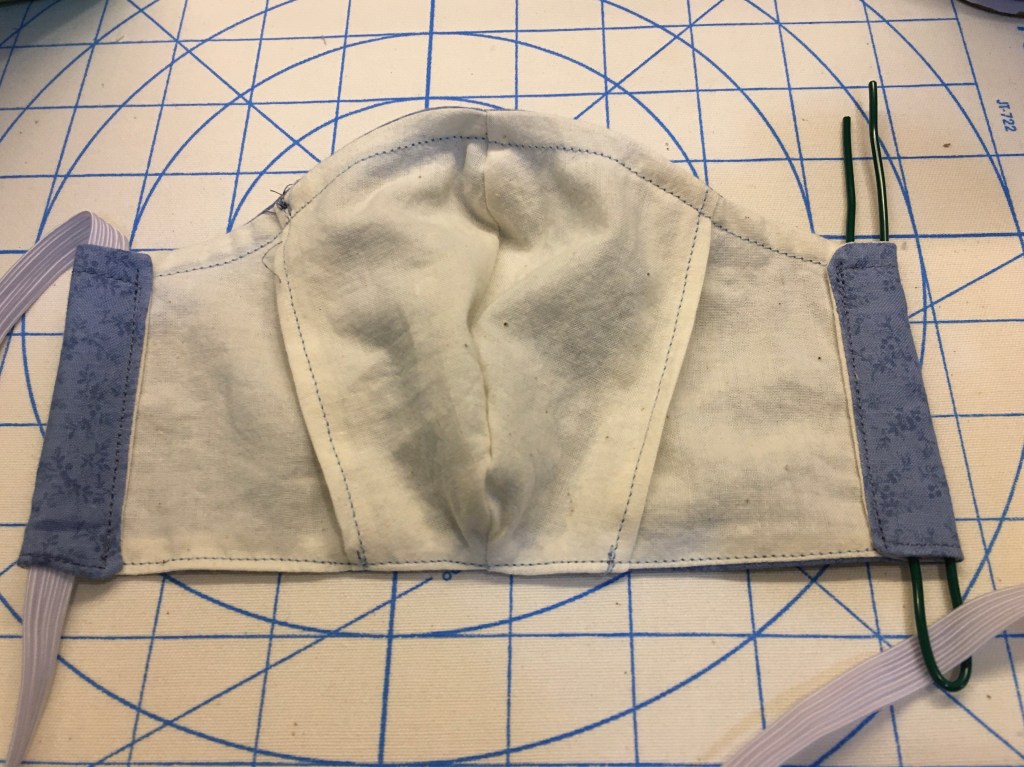
Removable wire pocket
The other thing my masks need is a removable wire, so I can take the wire out before I wash the mask. As it turns out, by making the inner layer with three pieces, then sewing along the edge (wider at the top to accommodate the wire), it forms a pocket with two access slits. It takes a little wiggling to get the wire in and under the cheek sections, but once in it stays put. Getting the wire out isn’t terribly hard either, just fiddly. A wire slightly longer than the mouth section with the ends curled works well.
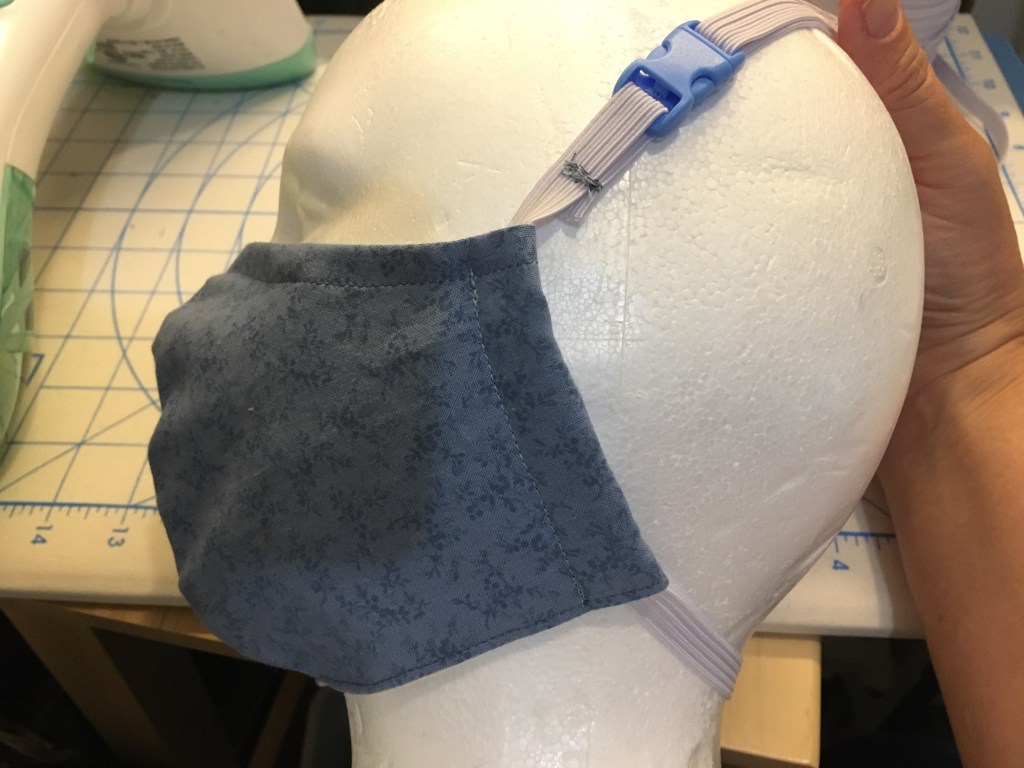
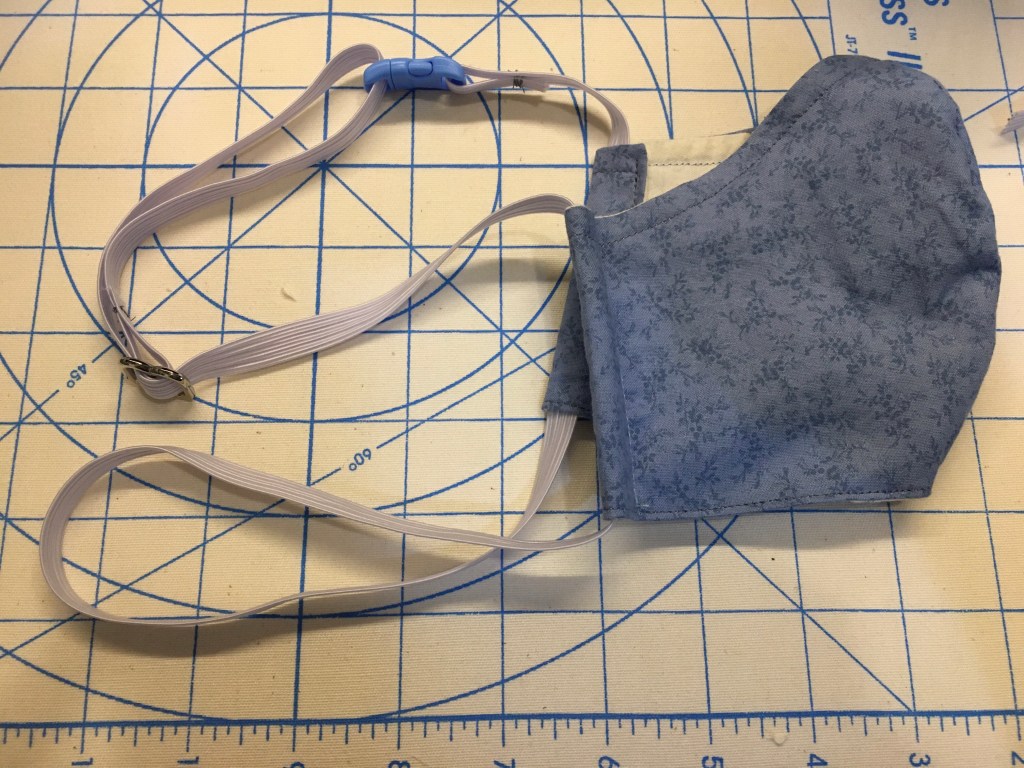
Alternate strap method3/8” elastic with buckle and figure 8 slide
The final thing we are testing is an alternate strap method to ties or ear loops. My youngest wears glasses and hearing aids, so ear loops are out. Tying straps behind the head is also fiddly. So we are trying 3/8” elastic in a loop. The loop is adjustable with the use of a figure 8 slide, and clips together with a buckle (although once at the right size, the elastic has enough stretch to just pull it into place).
No, I don’t think masks can guarantee not catching a virus, but they do a great job reminding me not to touch my face!
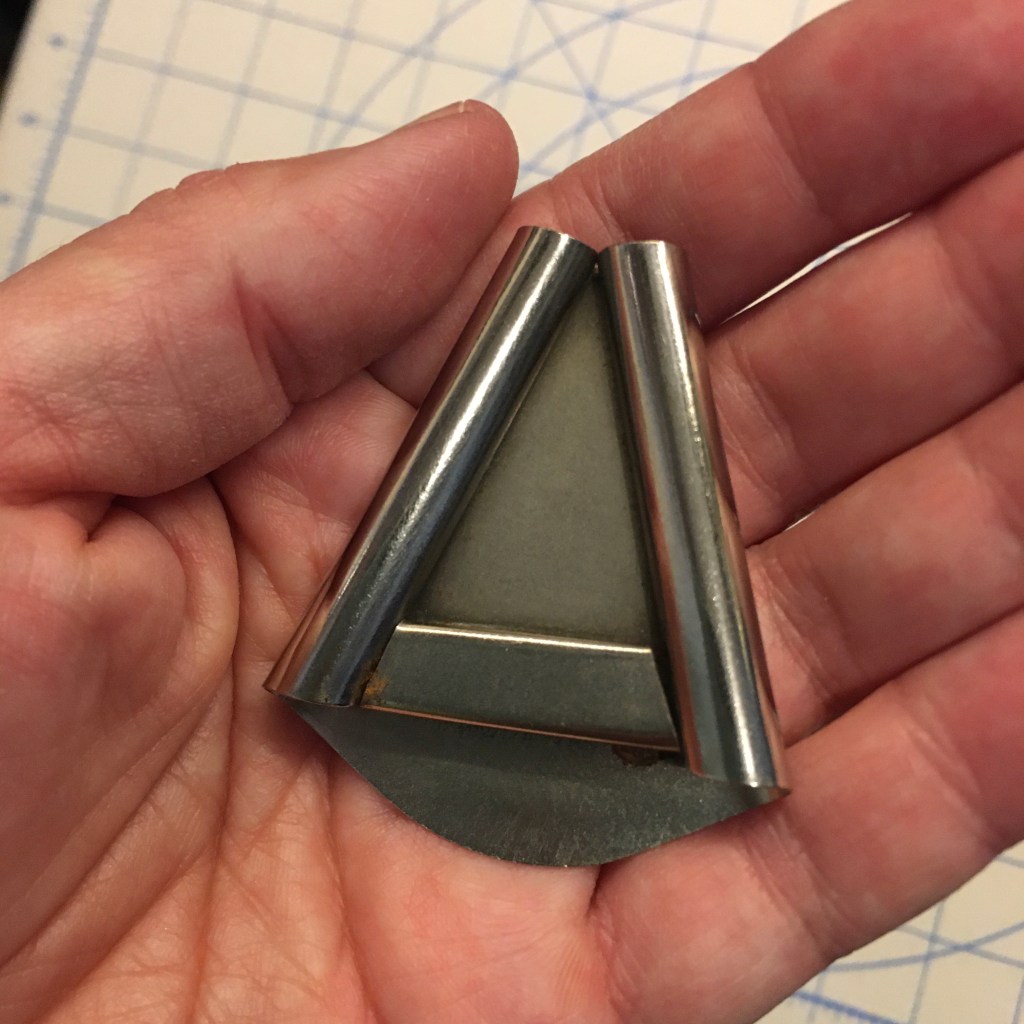
I dug out an old bias tape maker from my sewing box and put it to use making fabric ties for cloth masks. I’m honestly not sure whether this particular well-made piece came from one of my grandmothers, or from a bundle of goodies from a garage sale. There are no makers marks, and definitely no remaining packaging.
Bias tape maker
This tool makes 3/4” single fold bias tape. For garments, bias tape is cut on the … wait for it … bias. Which means at a 45 degree angle to the fabric grain. It makes a tape that is more flexible than those cut along the grain. But I am making fabric ties from scrap fabric, so I can get more by cutting with the grain. (Here is a great blog post about bias tape, if you want to know more from a quilter’s perspective.)
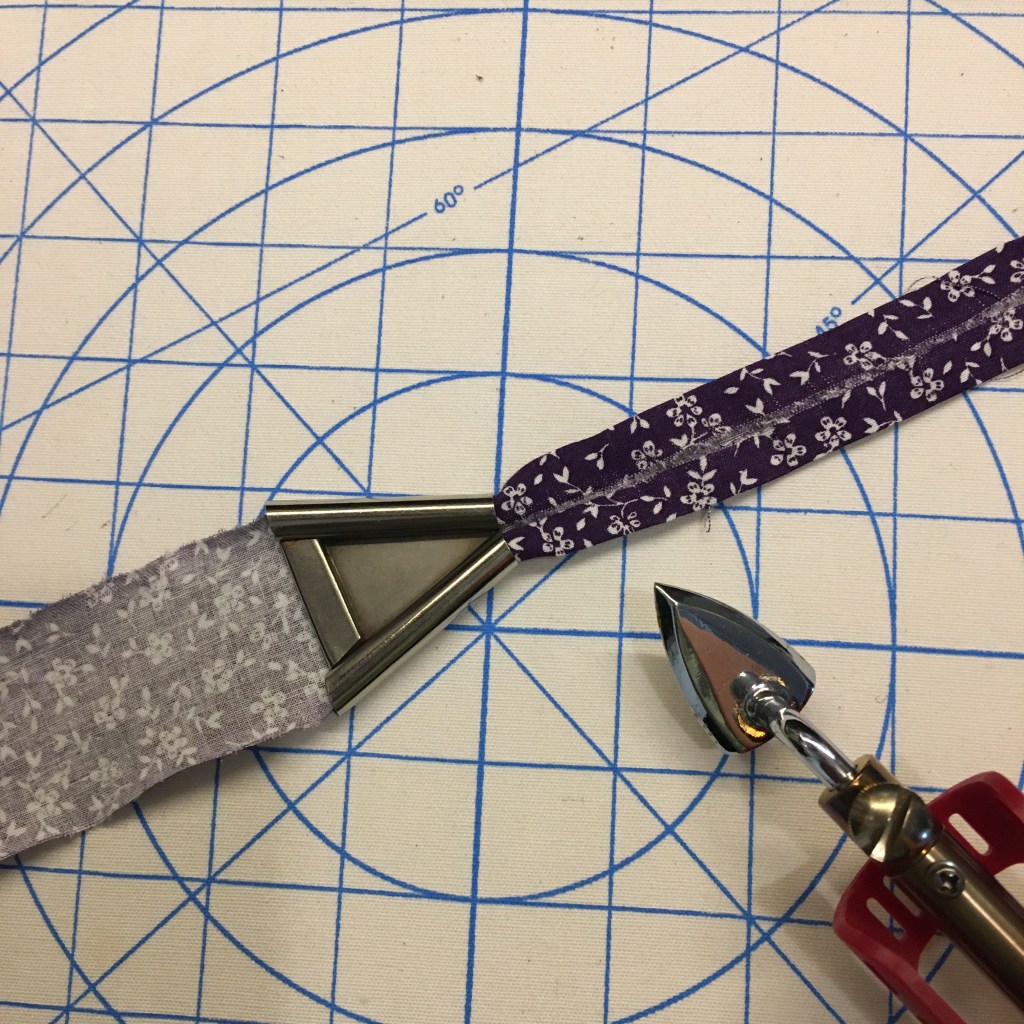
Bias tape maker in use
To make the ties, I fold the single fold bias tape in half to make double fold bias tape (it is nice when nomenclature makes sense). I then sew along the edge to finish the tie. I do tuck in the ends so they are neat. The mask pattern I’m using has a pocket for the ties (or elastic if you have it), which I really like because it means I can have ties that slide and can be changed out for different ties.
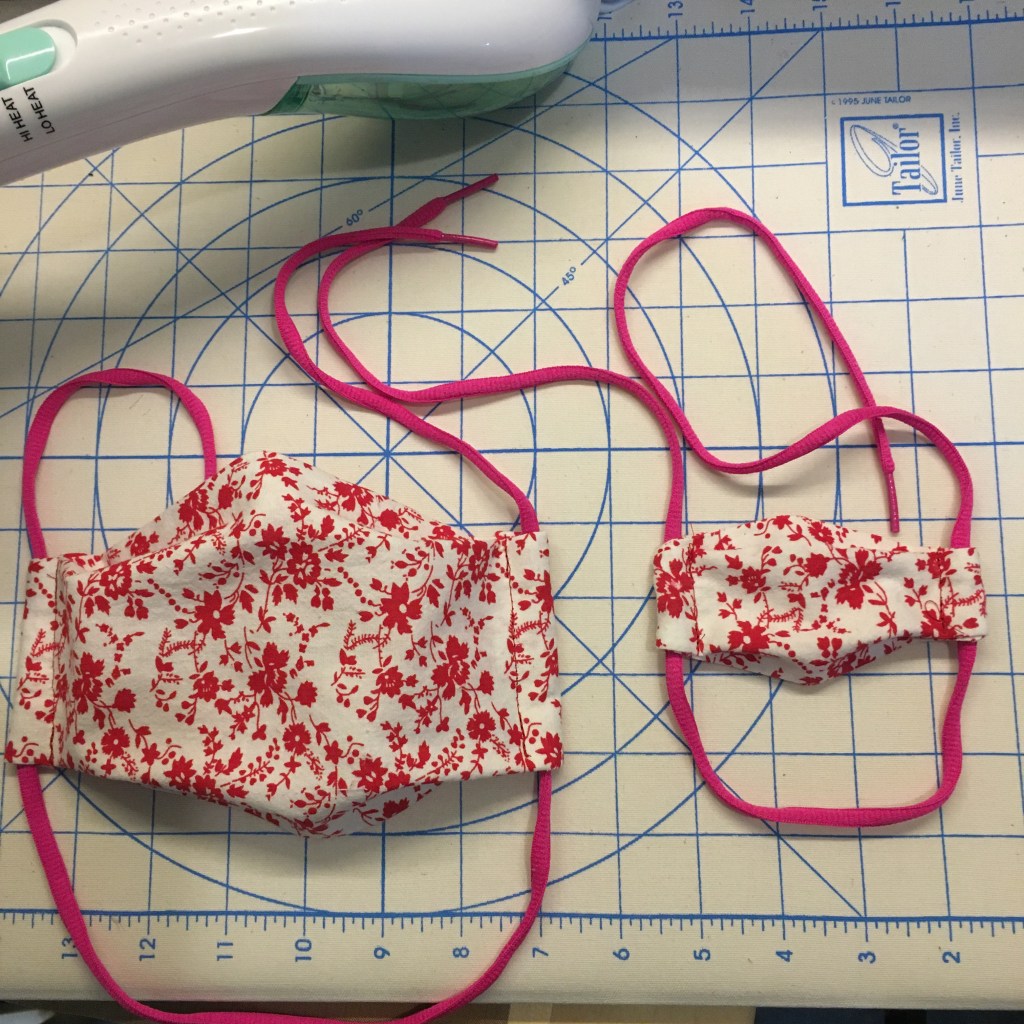
Is the mask on the right a little small? Yes, yes it is. It is for my youngest’s doll. We put the mask on the doll first, then put her mask on. Just in the house, just for a minute, just to start adjusting to the idea. My youngest wears glasses with a strap and has hearing aids, so no “behind the ears” elastic for her; she has enough going on behind there. These are unused shoe laces that I found in my stash (and they’re pink, so perfect). The loop goes behind her neck, then the ties tie behind her head. It works. We all now have cloth masks, and will start wearing them a little at a time to get used to them. Turns out my eldest needs this gradual introduction too. I was not expecting her aversion to mask wearing. So here we go, taking it easy, one baby step at a time.
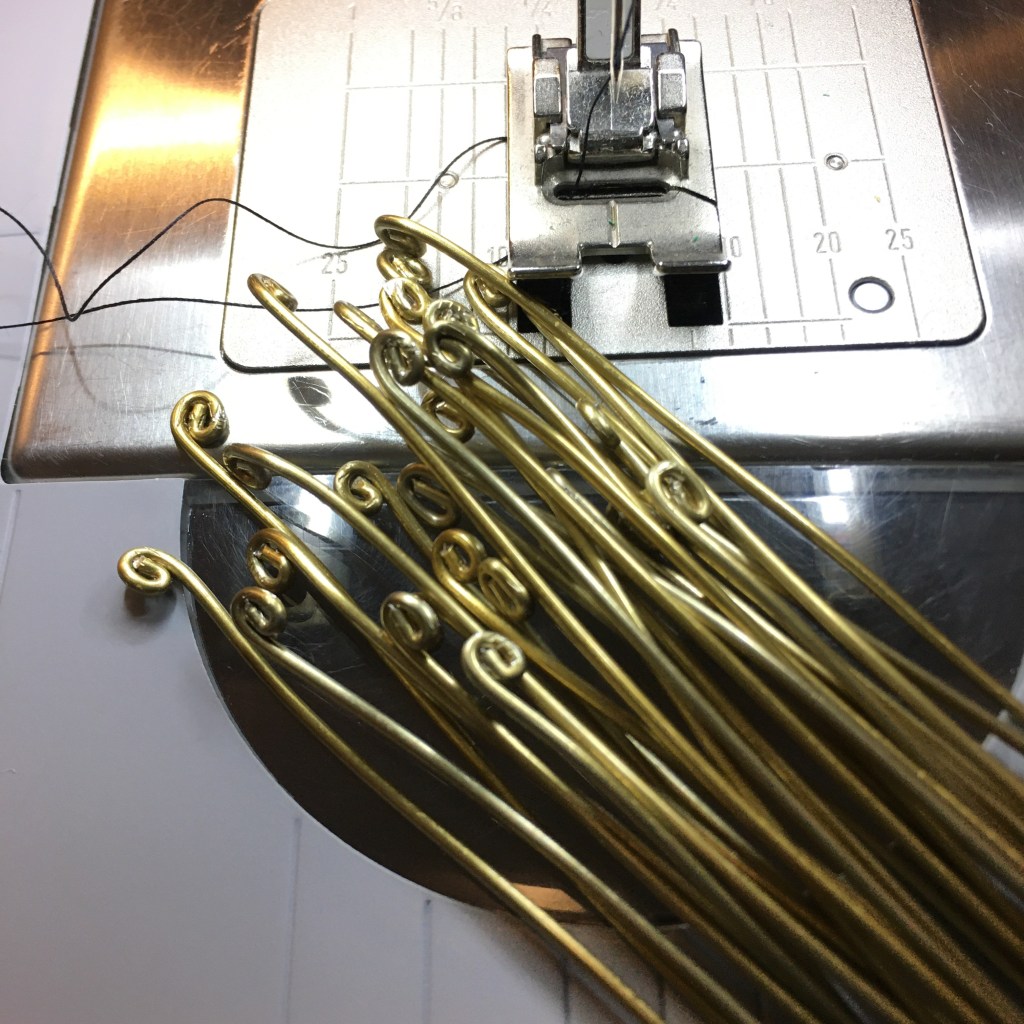
The pattern for the cotton masks I’m making calls for using twist ties. Probably because they are readily available, except in my house. But, as wire is one of my favorite media for crafting, I have a large supply of spooled wire and can “shop” in my craft room. I chose aluminum wire because it is light and bends easily, which makes it easier to conform around the bridge of the nose. I made them about 6”, then curled the ends in twice so it can’t poke through the fabric. The wire pictured above is about 18 gauge (that describes the thickness of the wire), and dead soft (that describes how easily it bends or the “hardness”). I won’t soon run out of wire; I even have a spool of electric fence wire that is aluminum and 17 gauge, and although it is a little harder, may still work. I might have to anneal it though. Hmm.
Making easy semi-elastic ties
Elastic is again running low, even after I cut up all my 1” elastic. For our own masks, I’m making ties from old t-shirts. I cut 2” off of the shirt and pull it to make it curl in on itself. No sew, and more comfy than ribbon. I’ll save the elastic for the donated masks, though, since the hospitals don’t want things made of used (even if clean) clothing!
And yes, the title of this article particularly amuses me. Six months ago it would have had very different connotations and would have fit better in a piercing blog than a craft blog!