Thread zapper

I have a new favorite tool! I have been sealing the ends and of my cords (that are not natural fiber) with the flame of a candle, which is not very precise. So I went looking for something heated and controlled, like my pyrography pen, but without getting goo on my wood burning tools. I found a thread zapper.

Photo description: Bead Smith Thread Zap II device with a neon rainbow hued lucet cord bracelet

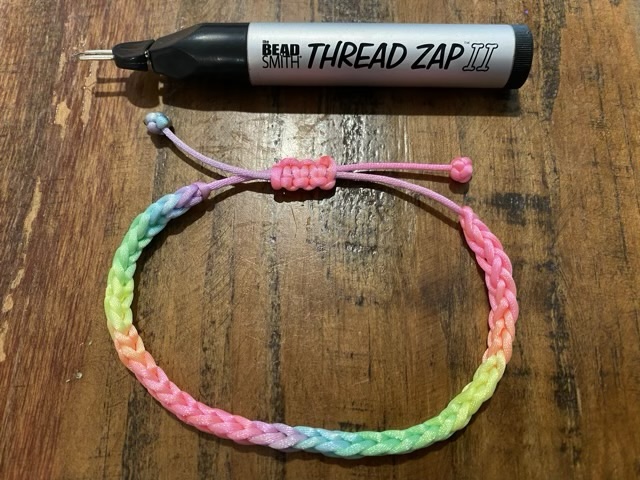
This AA battery powered, hand held device has a thin wire loop, and when you press the button, the loop glows red hot. I can apply that heat to the end to the cut end of a cord and melt the fibers together. I can even melt the end a little to the side of an adjacent cord to lock the knot in place.

Photo description: Button knot with the cut end melted and tacked with a thread zapper

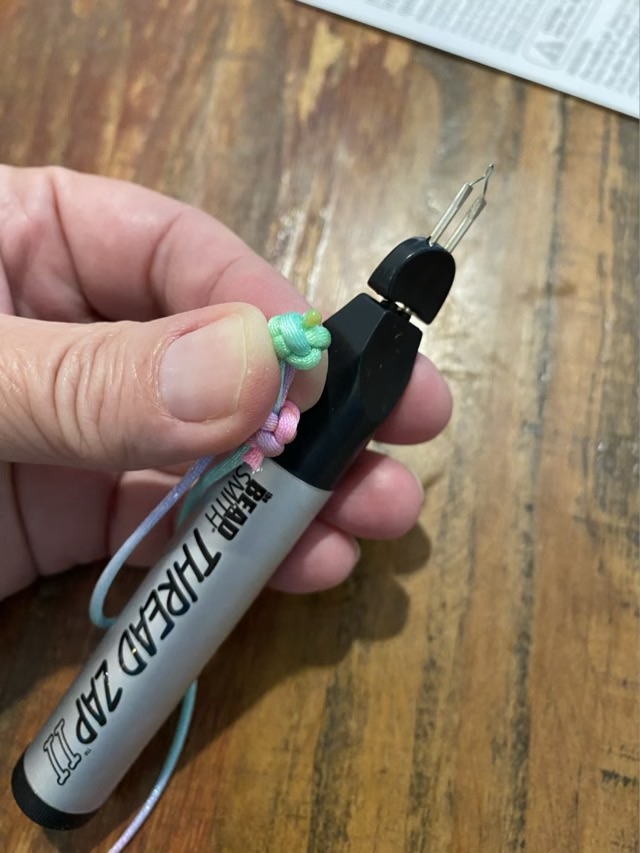
To make the bracelet I first made a Lucet cord from neon rainbow satin cord.

Photo description: Antler Lucet Fork with an in-process cord

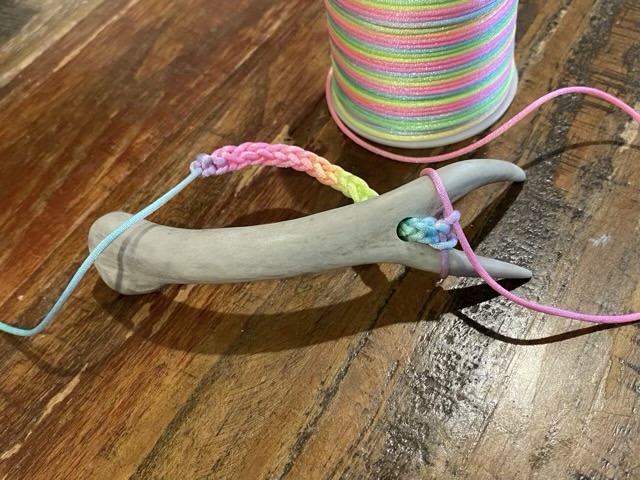
To finish the bracelet I took a separate piece of rainbow cord and made macrame square knots over the doubled ends of the Lucet cord. I then made celtic button knots at each end to keep them from sliding all the way out of the knot.

Photo description: Zoom in on the bracelet closure with square knot macrame slide

Without the thread zapper, securing all the ends of the bracelet with a candle flame was an exercise in frustration. With the tool, the ends came out neat and secure. I really like the ability to have a little sculpting power over the melting as well.

This is not a paid advertisement, by the way. I just really like the tool.

Antler lucet fork

I have a bag of deer antlers that I picked up at a local garage sale, and noticed that the tines on some of the sets looked like lucet fork prongs. So I cut off the tines, sanded down the end, and drilled a center hole. (Definitely wear a mask while working bone.)

Photo description: deer antler made into a lucet fork

I sanded the surface down to a shine (1500 grit) and used satin cord to test out the cord making ability.

Photo description: rainbow hued satin cord made into a braided cord using an antler lucet fork.

The antler works well to make cord! The shiny bone surface allows the string to move smoothly along the tines, and which aids the ease of making. Curious on how lucet forks are used? Here is a link to my video how-to!

Making lucet cord

How to make a lucet cord, no turn method, splash screen from video

Since I’ve been making lucets, I thought it was appropriate that I make a video on how to use them! I marked my yarn with colored dots to help the viewer see how the yarn moves around the lucet and how the loops are tightened. I talk about starting, tension, lengthening, and finishing (and have marked the sections so it is easy to skip through the video).

Lucet cord showing loose, nice, and too tight tension and loop size

Above is an image of how the lucet cord looks with different tension issues. If you pull the loops too tight, it is very difficult to make new loops because it is harder to pull the yarn through. Too loose and the cord doesn’t have the classic look. A classic lucet cord is square and even. Making the cord is also relaxing and a little addictive once you have the moves down. I’m thinking of keeping a ball of yarn and a lucet in my bag for moments I need to fidget!

DIY drying rack

When I am applying finish on small items, such as lucets or painted rocks, I like to coat all surfaces then place them on a drying rack. The drying rack uses nails to minimize contact and keep the finish nice on the bottom of the piece. I had the idea after seeing how potters prop up their pieces for firing after coating with glaze.

Lucets with one coat of tung oil sitting on the drying rack (left lucet is a commissioned piece, the other two are available on my Etsy site)

I start with a thin rectangle of wood, and mark out the hole pattern with a pencil. The hole pattern doesn’t need to be precise, in fact, having areas of different sizes helps for pieces of different shapes.

1/4” birch plank with pencil marks for hole pattern

I pre-drill the holes with a bit that is slightly smaller than my finish nails. Pre-drilling reduces the likelihood of splitting the board (it still can happen though, so go slow, watch carefully).

Drill bit slightly smaller in diameter than the finish nail

Using a clamp work bench, I support the sides of the board and drive the nails in on the back side of the piece. The open space insures that I don’t nail the board to the workbench.

Hammering the nails through the board supported on a split work bench

After I made my new drying rack, I spotted the one I thought I lost. Sigh. It had fallen under the work bench and was hiding. I pulled it out, dusted it off, and used it for putting a clear coat on painted rocks. But hey, I was able to do a post about making one, with pictures! And now I have two.

Painted rocks with a thick coat of clear urethane on a drying rack. Wax paper is for accidental seepage.