Shockingly I have started a new project. I wanted something small and modular to travel with, and found a crochet book about making lace squares. Granny Square Flair by Shelley Husband includes patterns for 50 different crocheted squares, and if you use the same hook and yarn, she designed them all to block to the same size. My plan is to make them all. Not only will I learn about how lace squares are constructed, I will use gifted alpaca yarn to make myself… something. It depends on how many squares I can make with the amount of yarn I have.
It is an exciting project, but not a great one for travel or distraction. The patterns are given both in text and chart form, which I love, but I have to pay close attention to each round, which is not conducive to chatting or watching scenery. I was only able to make four on my week long trip.
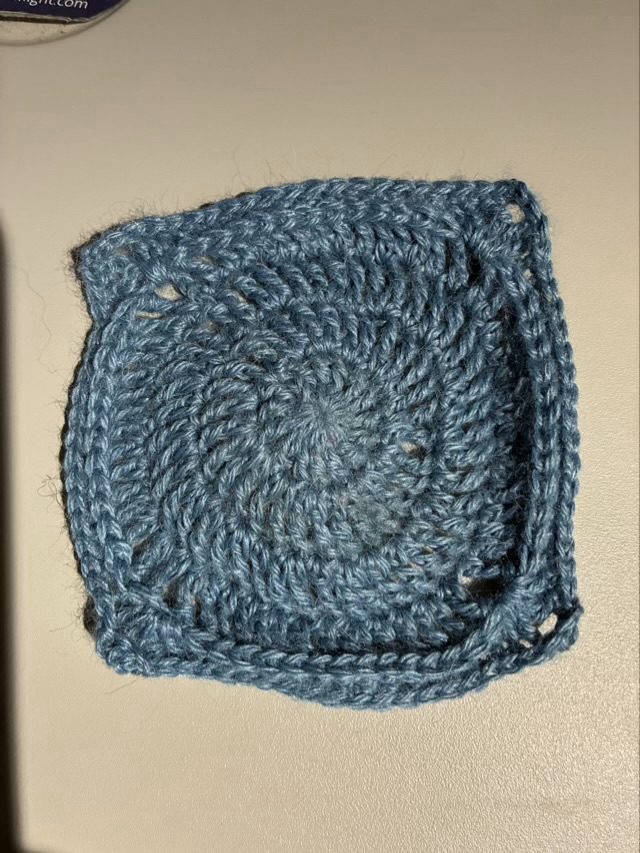
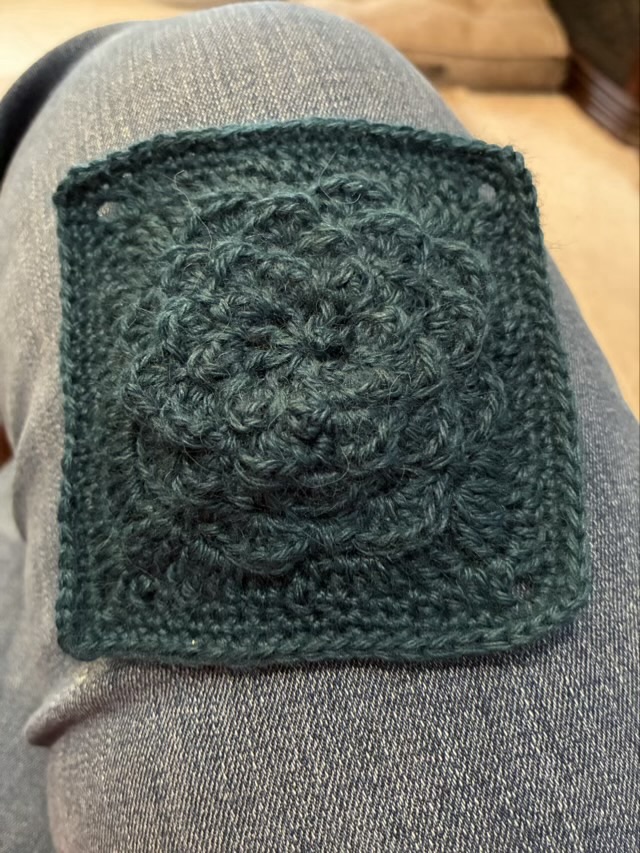
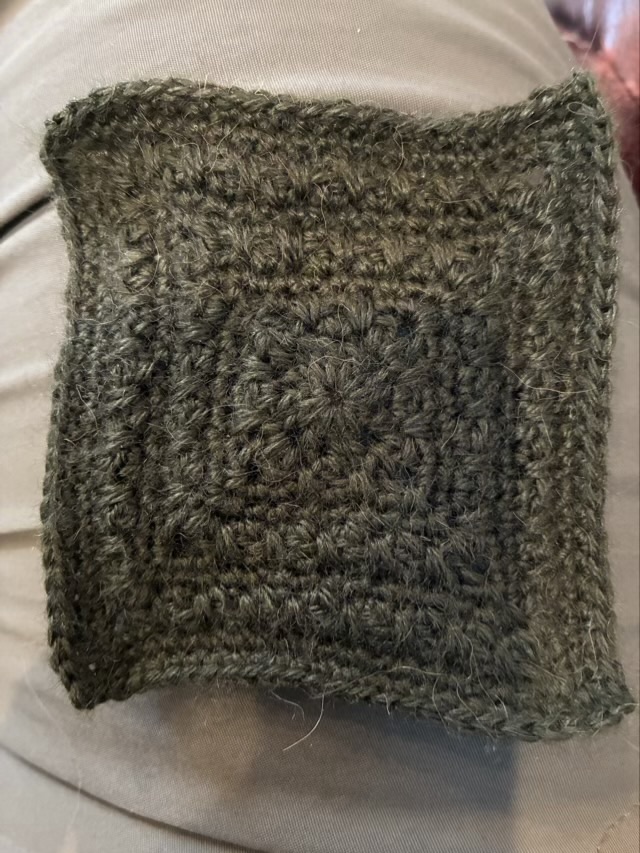
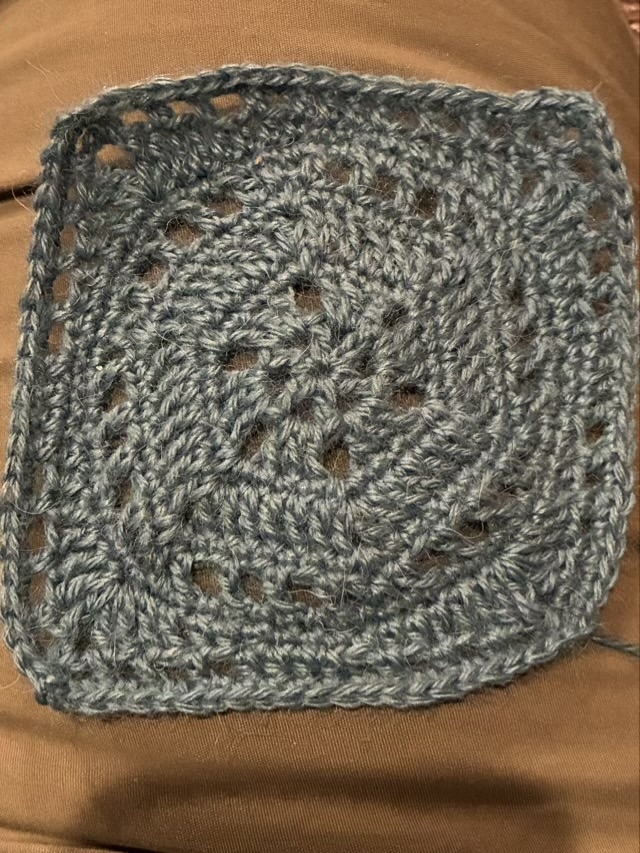
Photo description: square crocheted from light teal fingering weight alpaca yarn using a pattern from Granny Square FlairPhoto description: square crocheted from dark teal fingering weight alpaca yarn using a pattern from Granny Square FlairPhoto description: square crocheted from olive green fingering weight alpaca yarn using a pattern from Granny Square FlairPhoto description: square crocheted from light teal fingering weight alpaca yarn using a pattern from Granny Square Flair
The photos of these squares are all taken fresh off the hook, before blocking, so they aren’t yet square. Also, teal is a difficult color to photograph, so none of the photos are true to actual color. Hm.
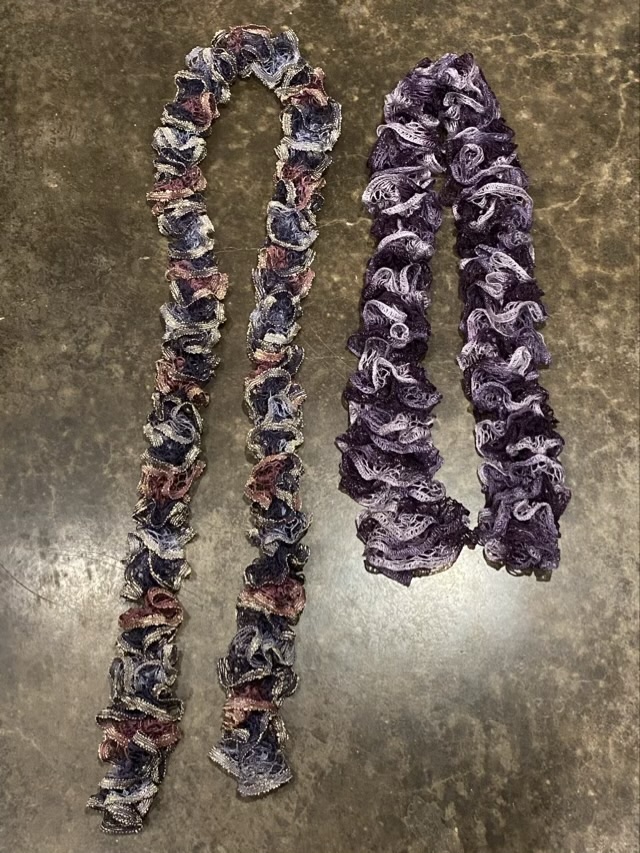
One more comment on ruffle scarves knitted from machine lace “yarn”. Here are two scarves, one using six stitches (purple) and one using 4 stitches (faded glory).
Photo description: two ruffle scarves, “Faded glory” red, white, and cream on the left is longer, the purple scarf on the right is shorter and thicker
Really it is a matter of personal taste when choosing how many stitches to use.
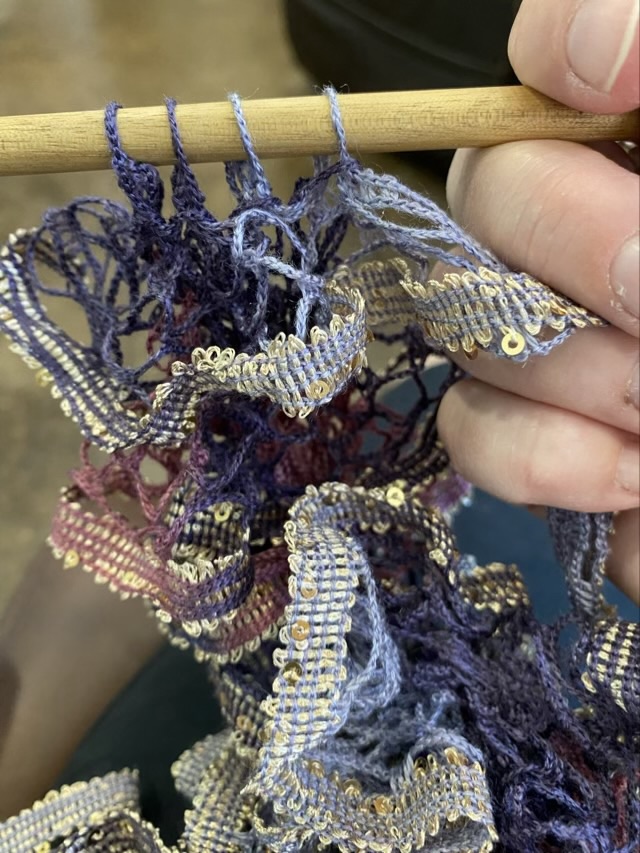
Photo description: in progress work with four stitches on the needle, picked up from the edge of the machine lace
I have stated before that this blog is a collection of rabbit holes, a written account of my exploration of craft related warrens. I have never been a frilly kind of person, not into ruffles and ribbons, but that might change as I have found a reason to be interested in lace.
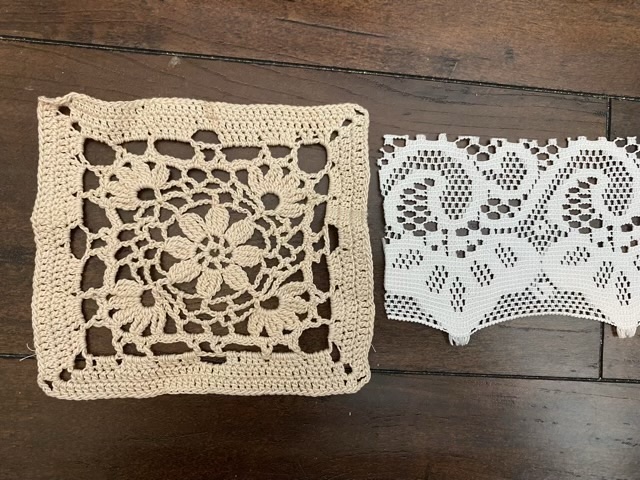
Photo description: two pieces of lacy fabric, on the left a crocheted square made from natural colored cotton yarn, on the right a section of machine made lace curtain made from white synthetic thread
I have a few pieces of inherited lace in my craft room. Mostly crocheted doilies and machine made lace. My husband and I went antiquing and I found a couple new-to-me kinds of lace examples. It made me want to know how to tell hand made lace from machine made lace. Here is the rabbit hole. I was lumping machine made lace into one big discardable pile, but not only are there varying ratios of hand/machine made, there are different machines that produce different lace, and ways to tell them apart. Ooo, craft identification: lace edition. I see the rabbit hole, have taken a peek, and there are more tunnels. I need to do more reading, but hope to scratch the surface enough to share my findings.
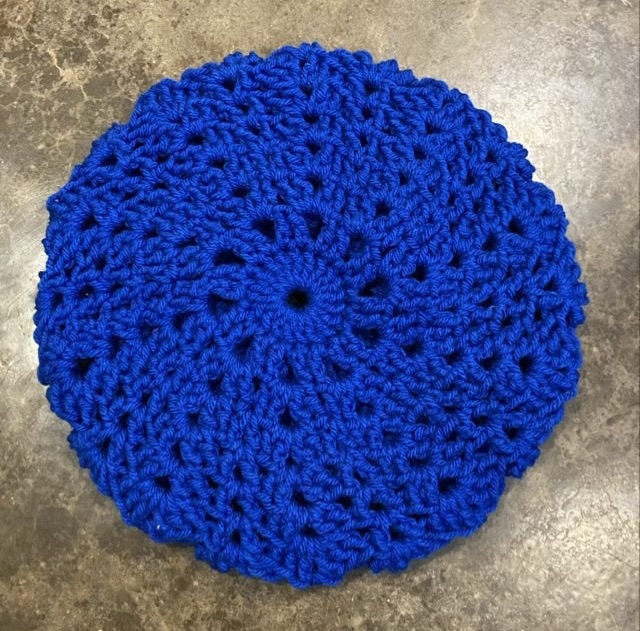
I’ve intentionally made a beret this time, rather than another beanie mishap. The idea was a lace beret with a solid band, like a head band with a lace topper. It is Texas and it just doesn’t stay cold for long, so this would be something to stylishly keep the ears warm. I started with my favorite crocheted lace coaster pattern, then instead of finishing it off with shell stitches, increased it using a mix of V stitches.
Photo description: top of the blue beret showing the radial lace pattern
I finished the beret with a single crochet ribbed band.
Photo description: underside of the same beret showing the open lace against the solid ribbed band
This was a try-as-you-fly kind of project, so I’ll work on a written pattern with another go. I really am pleased with how it came out.
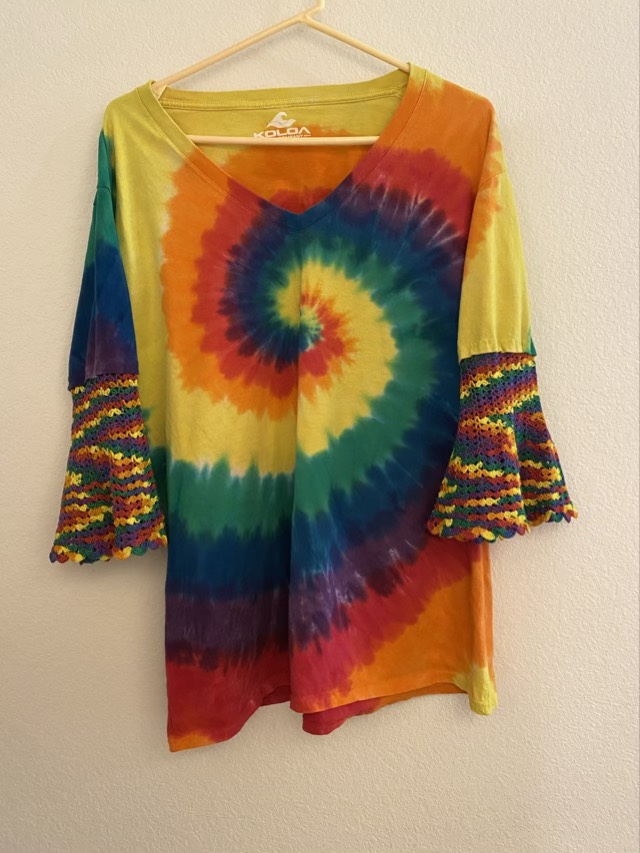
I really wanted bell sleeves on my tie-dyed t-shirt. My first attempt did not please me, so I ripped it out and tried again. I tried some crocheted lace with worsted yarn, but it was too thick and stiff. So I fell back on a crochet standard: number 10 cotton. This cotton is in every craft store, and nearly always comes in at least white, black, and rainbow. It is great for crocheting lace. I sewed a chain stitch to the inside of the sleeve hem, then crocheted in the round a simple alternating shell pattern.
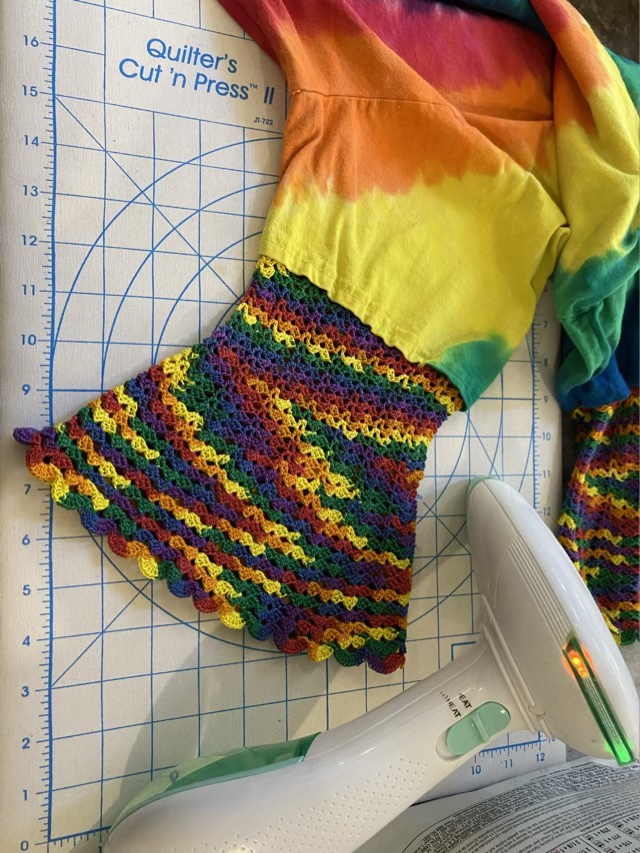
Photo description: Rainbow colored fabric, with a rainbow colored cotton thread sewn as a chain stitch, showing the needle mid-stitch.Photo description: Rainbow colored crocheted lace bell sleeves on an ironing board with steamer at the ready.
When the sleeves were done, I steamed them, which worked brilliantly to even out the stitches. The rainbow thread made serendipitous color pooling as the stitch pattern changed, which goes along with the tie-dye nicely.
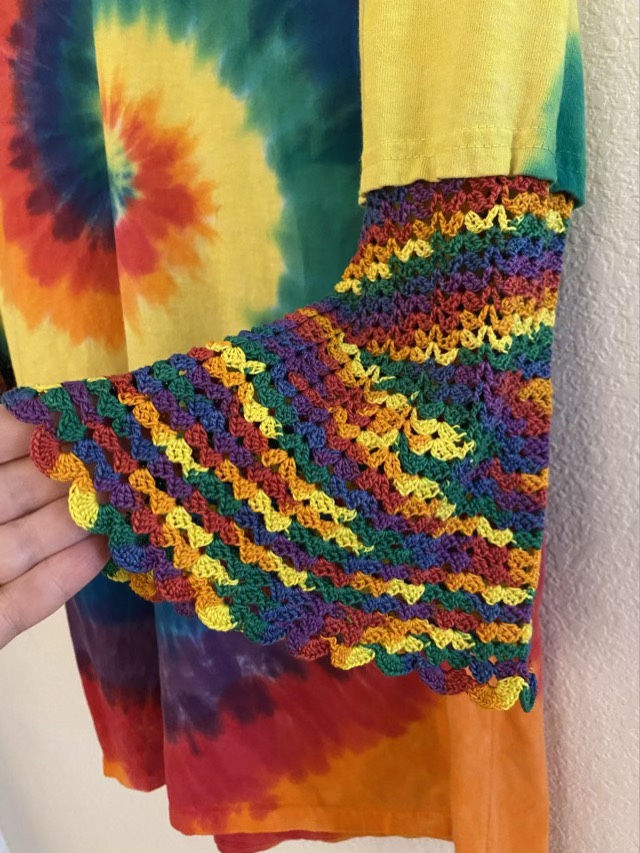
Photo description: Rainbow tie-dyed spiral t-shirt with crocheted lace bell sleeves.Photo description: Close-up of bell sleeve being held open.
So here comes the crochet pattern and math, for those that are interested.
With needle and crochet thread, make an embroidered chain stitch around the inside hem of the sleeve. The size of the stitches should be slightly larger than a crocheted chain done with a size 0 hook.
Row A: With a size 0 crochet hook (2mm), join the thread to the first chain, chain (ch 3), double crochet (dc) into the same chain, ch 2, 2 dc in same chain. Skip 2 chains, (dc, ch 1, dc) in same chain. *Skip 2 chains, (2dc, ch2, 2dc), skip two chains, (dc, ch1, dc). Repeat from * around. At this point you can tell if the work is bunching up the fabric, or ruffling out, depending on how long the embroidered stitches were. If it is not to your liking, rip out and use a different number of skipped chains. This is the only place it will matter, just note how many shell sequences you make, so you can match it on the second sleeve. For instance, if you have 72 chains and 12 shell sets, each shell set will span 6 chains, so you’ll skip two chains between shells. A shell set consists of a shell stitch and a v-stitch.
Row B: Slip stitch (sl st) into the center of the first shell, (ch3, dc, ch2, 2dc) into same shell, (dc, ch1, dc) in next V-stitch, *(2dc, ch2, 2dc) in next shell, (dc, ch1, dc) in next v-stitch. Repeat from * around.
Repeat row B, 8 more times, or until the straight part of the sleeve is the length you want. Now we will start the bell.
Row C: Sl st into the center of the first shell, (ch3, 2dc, ch2, 3dc) into same shell, (dc, ch1, dc) in next V-stitch, *(3dc, ch2, 3dc) in next shell, (dc, ch1, dc) in next v-stitch. Repeat from * around.
Repeat row C, 4 more times.
Row D: Sl st into the center of the first shell, (ch3, 2dc, ch2, 3dc) into same shell, (2dc, ch2, 2dc) in next V-stitch, *(3dc, ch2, 3dc) in next shell, (2dc, ch2, 2dc) in next v-stitch. Repeat from * around.
Repeat row D, 4 more times.
Row E: Sl st into the center of the first shell, (ch3, 2dc, ch2, 3dc) into same shell, (3dc, ch2, 3dc) in each shell all the way around.
Repeat row E, 4 more times.
Row F: Sl st into the center of the first shell, (ch3, 3dc, ch3, 4dc) into same shell, (4dc, ch3, 4dc) in each shell all the way around.
Row G: Sl st into the center of the first shell, (ch3, 12dc) into same shell, (13dc) in each shell all the way around.
Join first shell, weave in ends, steam.
It writes up much more complicated than it works up.