Long Turks head knot

So there are Turks head knots, and long Turks head knots. Yes, this is what I have been looking for. I found a video tutorial, dug some hemp string from my stash, a pencil from my side table, and dug into weaving. The learning curve on this knot was made easier since I’ve been working on Turks head knots. The most time consuming part is tightening the knot because it is made from a single strand that winds around and around (and around), and the loose loop needs to be traced all through the knot. These are not quick projects, but they are so rewarding.

Photo description: tripled long Turks head knot on a #2 pencil made from natural colored hemp string, sleeping calico cat as the background

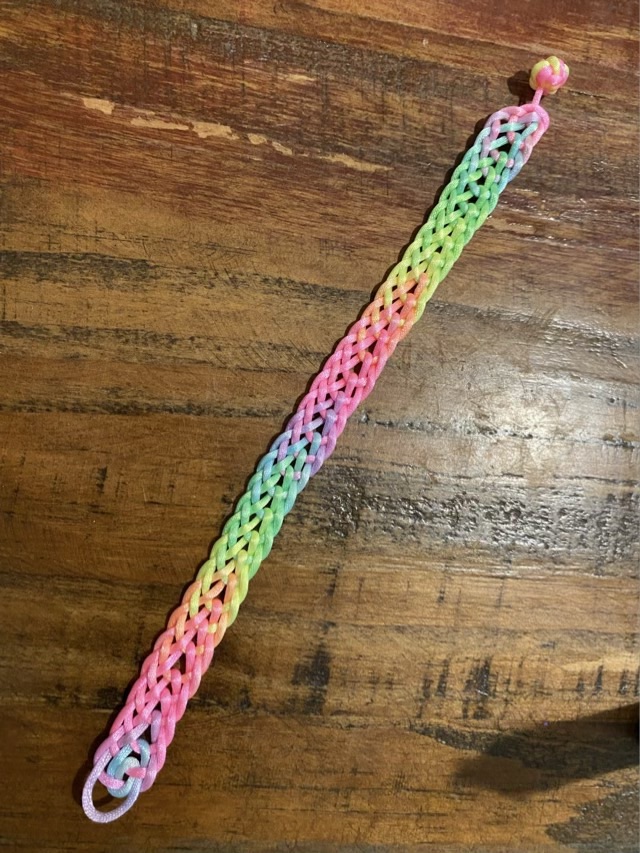
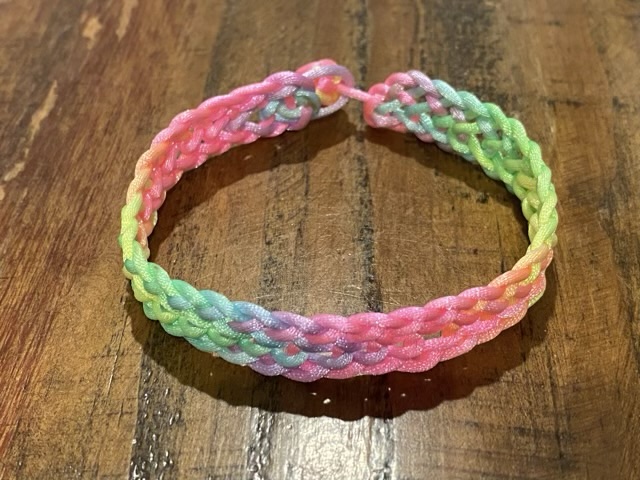
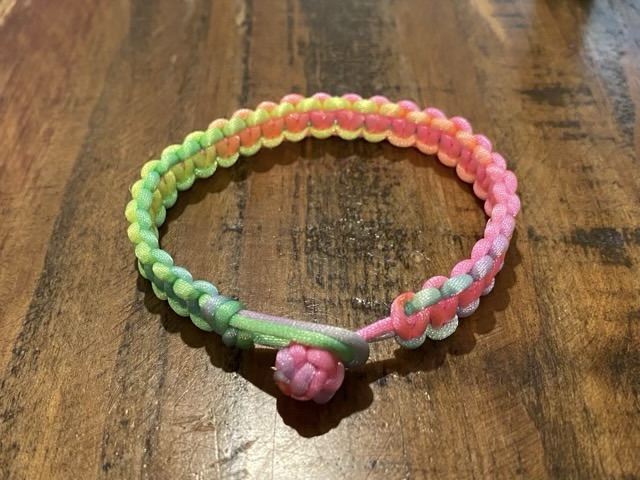
I tripled the knot, meaning I wove three strands parallel to the first grid. (My nautical and knot tying terminology is rubbish.) The knot isn’t perfect, but is stable enough to remove and replace, so it can live on, even if the pencil is sharpened down. Pencils of the house, beware!

Turks head knot

I started following a rope tying group and my bucket of things to learn overflowed. Number one on my list is learning to make a Turks head knot. This marvelous bit of knotting looks like weaving in the round and is created with a single strand, rather than a warp and a weft for flat weaving. I found a YouTube video from the Paracord guild and pulled some paracord out of my stash. I couldn’t find a suitable length of PVC pipe, so I rolled up some card stock for my form. I was able to figure out the first increase, but ran out of cord for the second increase, so mine is not as wide as in the tutorial.

Photo description: Turks head knot with rainbow colored paracord, and a Thread Zap II

I used a Thread Zap to seal off the ends and actually connect the beginning and end inside the knot. I still need to learn how to tighten the weave, sorry, knot, but I think that will come with practice. The lexicon for rope tying and weaving are definitely warring in my head.

Photo description: same Turks head knot slid onto a pencil sharpener

I did happily discover that the knot would fit over a pencil sharpener, so that is where it is currently living. I have a feeling that random tools around the house are going to sprout rope work.

Not historical nålbinding

My experiments with nålbound bracelets continue. I tried para cord, which I did not like at all because the stitch method puts a twist into the cord, and para cord changes visually when twisted.

Photo description: orange and purple para cord nålbound with the Dalby (UOU/OUOO) stitch, showing changes in texture and width as the cord picks up twist

Although untwisting the para cord for every stitch is possible, I don’t like that the white core of the cord shows through on sharp bends or snagged sections. I do like the Dalby stitch as well as the Telemark stitch for flat interesting single row weaves. I tried some stiff finished leather cord as well, which did not work because the leather couldn’t make the bends required to lay flat. I will try it again with unfinished leather cord so I can soak it into submission.

I went back to my favorite satin cord, also called rat tail or mouse tail depending on who is doing the labeling. It is made of solid color nylon, has a nice drape for this work, and melts readily with a thread zapper.

Photo description: purple satin cord bracelet done with the Dalby stitch and finished with a macrame square knot slide and Celtic button knot end stops.

Best for last

The colored bracelet experiments continue, and this one is a winner. I tried a nålbinding stitch with the neon rainbow satin cord, specifically the Telemark stitch in the Russian stitch family. It works beautifully. Not only do the interwoven loops look pretty, the color transitions are aesthetically pleasing.

Photo description: neon rainbow satin cord looped into a wide woven band using a Telemark nålbinding stitch, finished with a loop on one end and a celtic button knot on the other

The nature of nålbinding also makes finishing the ends less awkward. For the looped end, I pulled out the beginning stitches (which for me are always weird), and spiraled the end into the weave, securing it by melting with the hot wire Thread Zap.

Photo description: loop end of the bracelet showing the end of the cord melted to the neighboring cord and the Thread Zap II tool

The other end I pulled the loops closed, leaving a tail end which I tied into a button knot. The loops are stable, the clasp mechanism elegant, and I’m already planning additional projects!

Photo description: same bracelet shown closed.

More color exploration

I enjoy the way the variegated color satin cord interacts with knotting, so I am continuing my bracelet series with an experiment with macrame. This is a four strand bracelet with the outer two strands tied with macrame square knots around the inner two.

Photo description: macrame bracelet with a double loop and Celtic button knot closure made from neon rainbow satin cord
Photo description: same bracelet shown in a closed loop

The color play in this piece also pleases me. The way the color shifts in each strand and how it transitions in relationship to the other strands is attractive.

I realized today that I am a curator of rabbit holes. My posts are the tiny plaques in a museum of potential deep dives. I am OK with this.