Twined bag 1

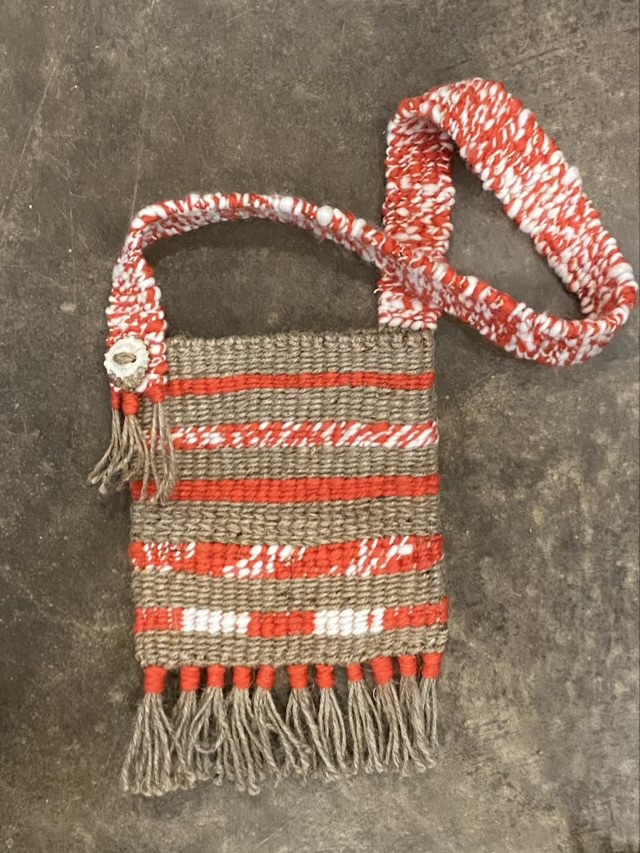
I have finished my twined bag. Yes, I was obsessed with making it and spent three days working on it. (Should I have been doing other things? Oh yes, but this was fun.)

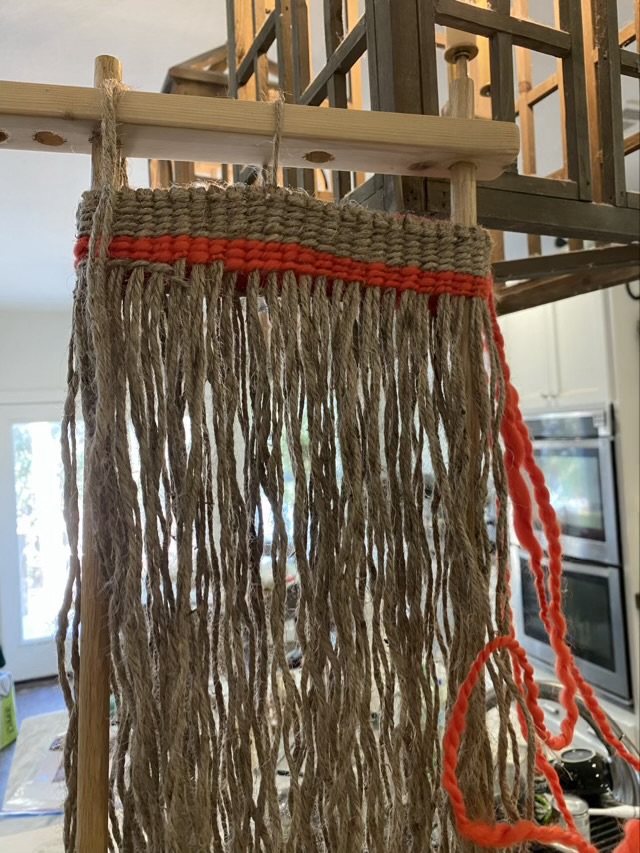
I experimented with the weave as I progressed, not only doing stripes, but changing twist direction and number of twists between warp threads to control which color was on top, using this project as sampler.

Photo description: body of a twined bag made with natural jute and hand spun orange and white wool showing different styled stripes

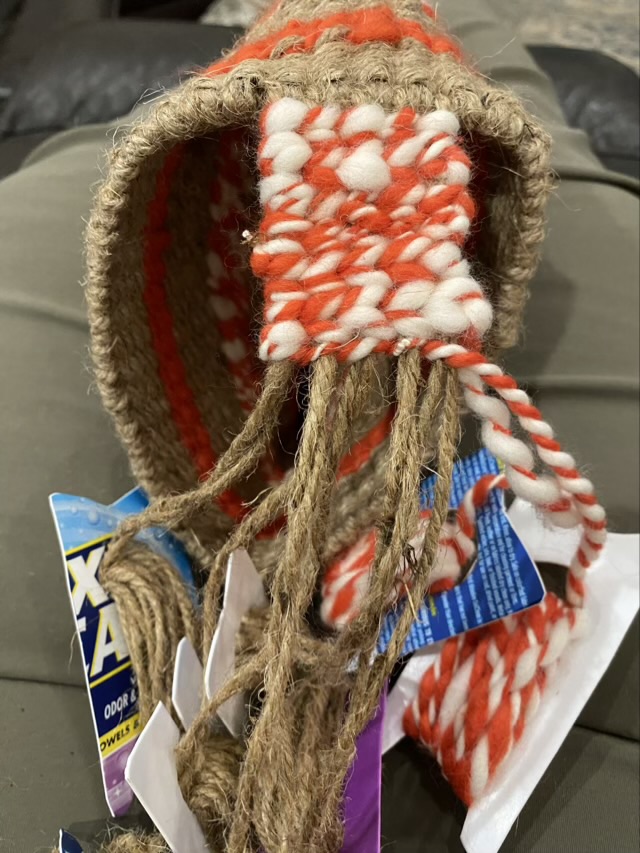
To make the strap, I threaded long strands of jute through the top edge of the bag, then used more hand-spun wool to cover the jute, reversing twine direction on each row, so as not to introduce bias twist in the final strap.

Photo description: starting the strap, with the excess yarn wrapped onto recycled plastic bobbins

I felt the other end of the strap needed some adornment, so I cut a slice of antler and drilled two holes to make a decorative button. It is sewn on, not functional, but I think it came out nice and coordinates well with the natural jute.

Photo description: antler decorative button attached at the other end of the strap.

I finished the bottom end of the bag and the end of the strap with tassels lashed with wool.

Photo description: finished twined shoulder bag made with jute, wool, and antler

I absolutely love this weaving technique. Want to learn more about twining a bag? There is an excellent book called “Twined Bags: A Historic finger weaving craft of the Native Americans” available from Livingston Press, written by Monica Newman Moore.

Twined bag

I have a crafting friend who taught me to twine a bag! I’m borrowing her wood frame, made by her husband, and using jute twine and her hand spun wool. Below is the picture of the progress I made on our crafting morning.

Photo description: wood loom with jute twine and orange hand spun wool twined around the upright poles of the loom with one stripe of natural jute and one stripe of orange finished

The warp is attached with larks head knots to a circle of jute at the top of the frame. Two longer strands are then twined around two hanging threads at a time, with one twist between each pair of warp threads. I love the open ended warp technique; it is so much easier to twine than on a loom where both ends of the warp are fixed in place. I also love twining, but to this point have only made cordage. This is the next step in my twining journey.

Twining is found historically around the world, and this type of twining with the open ended warp was used by Native Americans.

My friend also has a great book called “Twined Bags: A Historic finger weaving craft of the Native Americans” available from Livingston Press, written and signed by Monica Newman Moore. It is a very comprehensive book with instructions on the basic twining as well as tips on patterns.

What a wonderful rabbit hole!

Cat post rewrap

The jute rope wrapped around one of the scratching posts was really getting worn. I ordered some new 1/4” rope, then cut off the top of the old rope. The bottom portion was still in decent shape, so I stapled the old end to the back of the post (which is actually two 2×4 boards.) I then stapled the new rope on and wrapped it tightly around the wood. I cut off some of the carpet so I could take the rope higher, because I have a couple long cats. I used a heavy duty stapler designed for furniture, with 1/2” staples.

Photo description: carpet and rope cat scratcher post with new rope on the upper half of the post. Gray tabby looking like he is about to start something standing behind the post.