Scrolling I saw reference to a Chaunacops fish, which is a deep ocean variety of sea toad that can be a lurid red. One of the commenters said it looked like their grandma crocheted it. Hm. Could I crochet one?
Photo description: screen shot of an image search for Chaunacops fish, with four images and image sources showing light pink to bright red walking fish
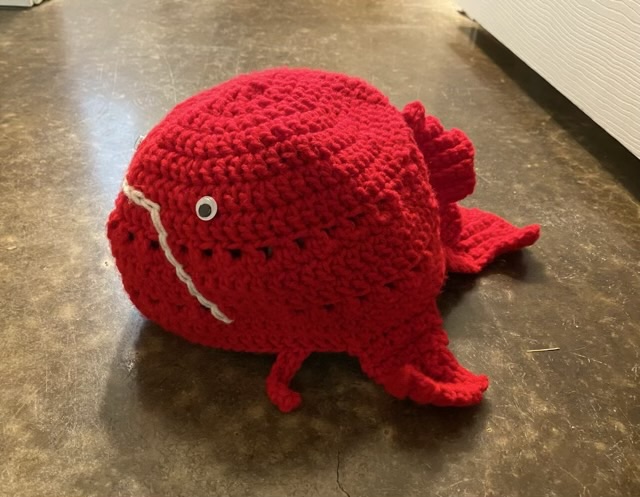
I’m in hat making mode, so rather than make a stuffed animal, I decorated a red beanie with fins, tail, and mouth.
Photo description: bright red sea toad hat with embroidered white mouth and sew-on googly eyes
I didn’t do a pattern, this just was a fun little experiment. I do like how well a single crochet ribbing does for making fins.
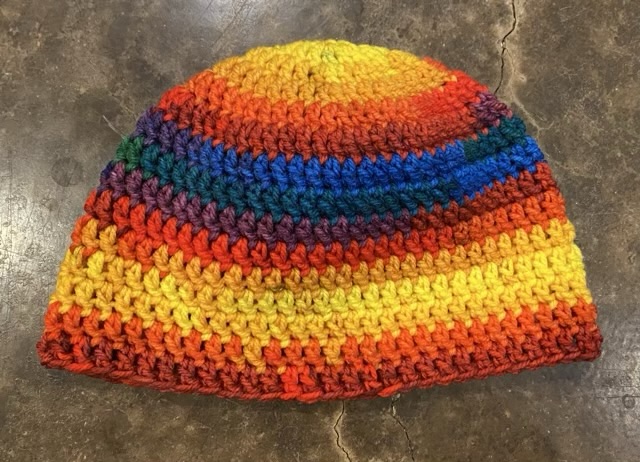
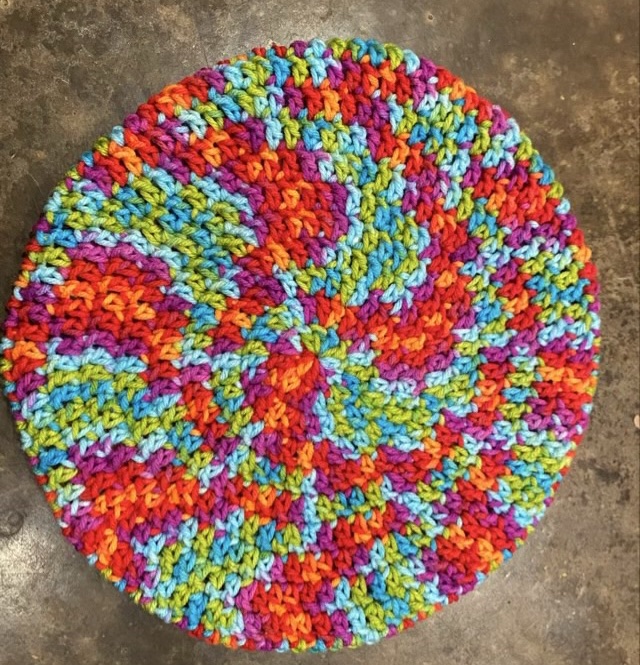
Another way to start a beanie is making a spiral. The good part of the spiral is that there is no seam where a row starts, so it works well with variegated yarn with a long stretches of color. The tricky part is you need to use stitch markers to mark the beginning of the round to get your increases correct, and you need to decrease stitch size at the brim before weaving in the end.
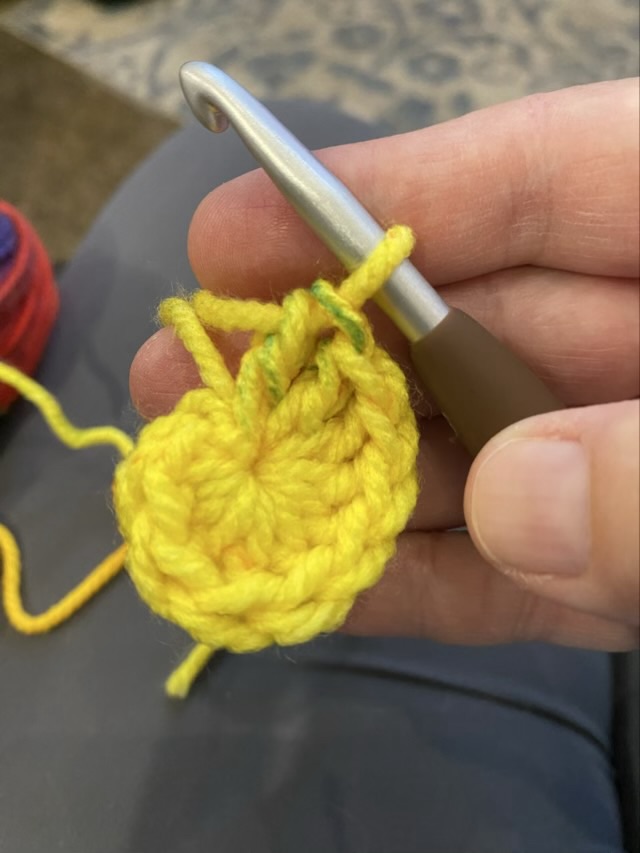
Photo description: magic circle spiral start, chain 1 in a magic circle, then single crochet, half double crochet, and eight double crochet, pull circle tightPhoto description: rainbow beanie crocheted as a spiral, but looking like stripes because of the long color repeatsPhoto description: the crocheted hat pairs well with a woven scarf made of the same yarn
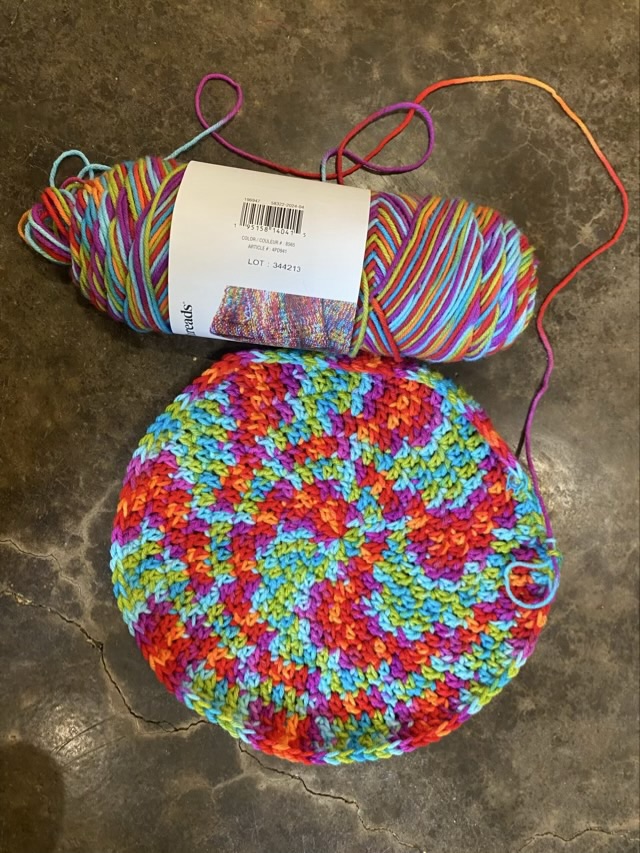
I’m not a fan of color pooling, which is when a variegated yarn lines up as you knit or crochet and you get patches of color. Random, strangely shaped patches. I was in the craft store with my youngest doing a store walk to get some exercise and fill time, and a skein of brightly colored yarn called my name. (Walking a craft store makes for an expensive trip, just for future information.) I started making a beanie and then the colors pooled. Yuck. This is probably one of the worst examples of color pooling. I didn’t realize that they put the cool shades and warm shades together and I ended up with garish almost paisleys rather than a blended rainbow.
Photo description: rainbow skein of yarn with a label showing a nice blended rainbow blanket, with my crocheted hat with pooling rather than blending in reds and teals
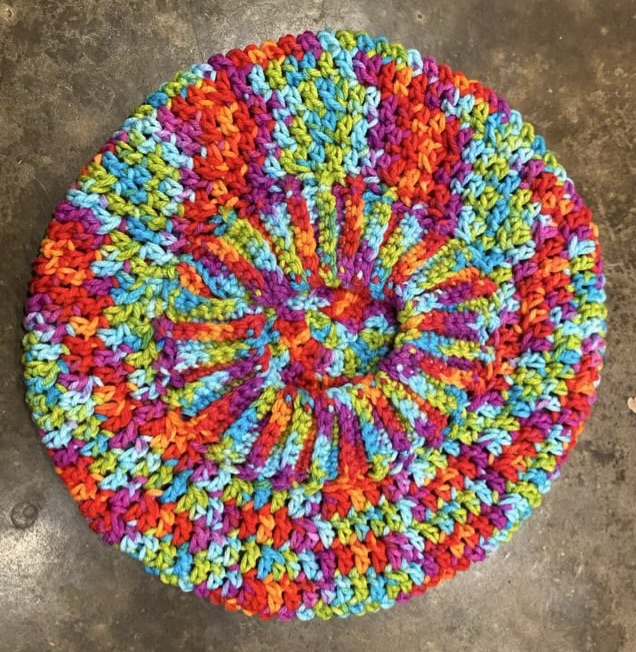
Something this bold and in your face needs to be a beret rather than a beanie, so I kept going with the diameter. I made a stretchy band with ribbed single crochet, and there finally achieved a more pleasant to my eye color shift.
Photo description: top of the beretPhoto description: band side of the same beret
I didn’t rip out the work, because everyone is different and there might be someone attracted to the fire and ice flames of the hat, and have the personality to pull off the bold beret. Or at least keep their head warm.
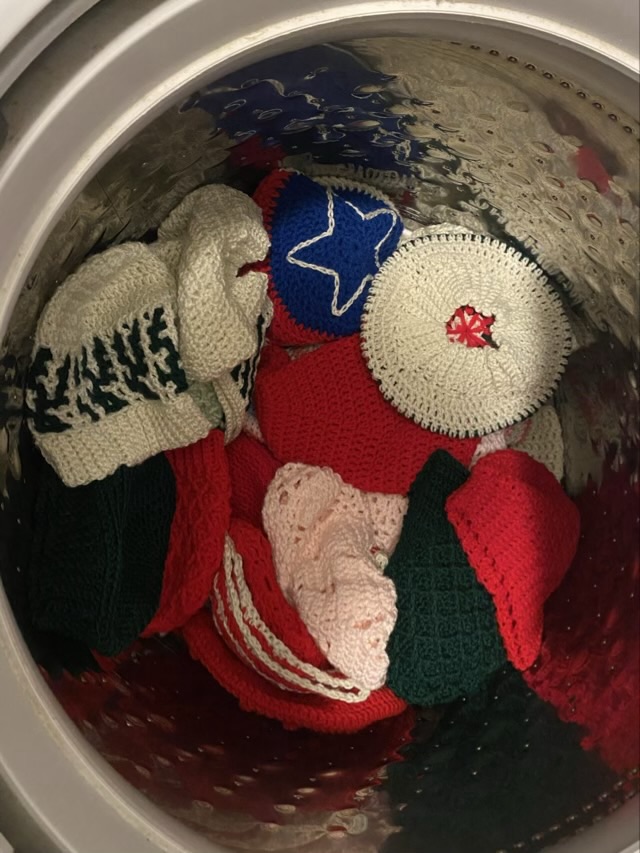
I washed a load of crocheted hats with fabric softener and then dried them with a dryer sheet to get the inexpensive acrylic to soften up some. The technique works and the hats just need some labels and they’ll be ready for the chorus craft sale.
Photo description: washer tub full of crocheted hats in a variety of colors and shapes
Current hat count: 35. I’m almost through all the acrylic yarn.
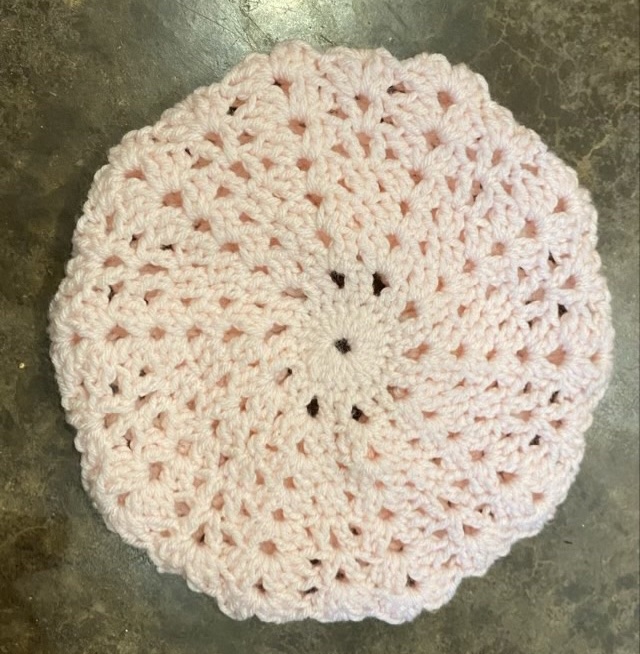
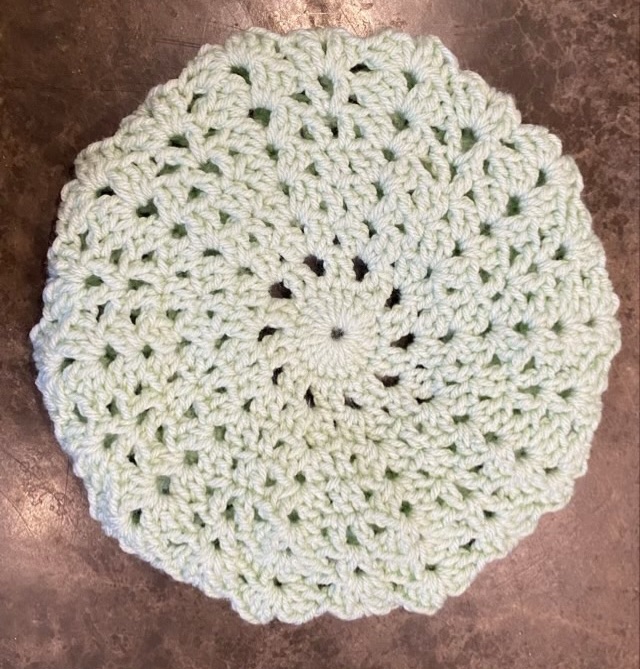
So I wrote up a pattern for my lace beret, and even tested the pattern with a second beret.
Materials: worsted weight yarn, size I hook, yarn needle
Terms:
ch – chain
sl st – slip stitch
sc – single crochet
scbl – single crochet in the back loop
sc2tog – sc two stitches together
dc – double crochet
CDCS – Chainless Double Crochet Start (I like Moogly’s method)
Row 1: ch 2, 20 dc in magic circle, sl st to first DC
Row 2: CDCS, dc, ch 2, *dc, dc, ch 2* repeat ** 9 more times, sl st to start (10 ch 2 spaces)
Row 3: Sl st to ch2 space, CDCS, dc, ch 2, 2 dc, *in next space 2 dc, ch 2, 2 dc* repeat ** 9 more times, sl st to start
Row 4: CDCS, *in next space (2dc, ch 2, 2dc), skip 2 dc, dc in next dc* repeat ** 8 more times, in next space (2dc, ch 2, 2dc), sl st to start
Row 5: CDCS, dc in same st, *in next space (2dc, ch 2, 2dc), skip 2 dc, 2 dc in next dc* repeat ** 8 more times, in next space (2dc, ch 2, 2dc), sl st to start
Row 6: CDCS, ch 1, dc in next st, *in next space (2dc, ch 2, 2dc), skip 2 dc, dc in next dc, ch 1, dc in next dc* repeat ** 8 more times, in next space (2dc, ch 2, 2dc), sl st to start
Row 7: sl st to 1 ch space, CDCS, ch 1, dc in same space, *in next space (3dc, ch 2, 3dc), in next ch 1 space, (dc, ch 1, dc)* repeat ** 8 more times, in next space (3dc, ch 2, 3dc), sl st to start
Row 8: sl st to 1 ch space, CDCS, dc, ch 1, 2dc in same space, *in next space (3 dc, ch 2, 3 dc), in next ch 1 space, (2dc, ch 1, 2dc)* repeat ** 8 more times, in next space (3 dc, ch 2, 3 dc), sl st to start
Row 9: sl st to 1 ch space, CDCS, dc, ch 1, 2 dc in same space, *in next space (2dc, ch 2, 2dc), in next ch 1 space, (2dc, ch 1, 2dc)* repeat ** 8 more times, in next space (2dc, ch 2, 2dc), sl st to start
Row 10: sl st to 1 ch space, CDCS, ch 1, dc in same space, *in next space (2dc, ch 2, 2dc), in next ch 1 space, (dc, ch 1, dc)* repeat ** 8 more times, in next space (2dc, ch 2, 2dc), sl st to start
Row 11: sl st to 1 ch space, CDCS, ch 1, dc in same space, *in next space (dc, ch 2, dc), in next ch 1 space, (dc, ch 1, dc)* repeat ** 8 more times, in next space (dc, ch 2, dc), sl st to start
Band: ch 8, turn. 7 sc, sc2tog, turn. *7 scbl, ch 1, turn. 7 scbl, sc2tog, turn.* repeat ** until beginning is reached. Stitch sides of band together, weave in ends.
Photo description: light pink lace beret top showing straight lines of holes radiating from the centerPhoto description: same hat, showing the opposite side of the beret with the band laying flatPhoto description: another lace beret in light green