Zelda Cosplay part 2

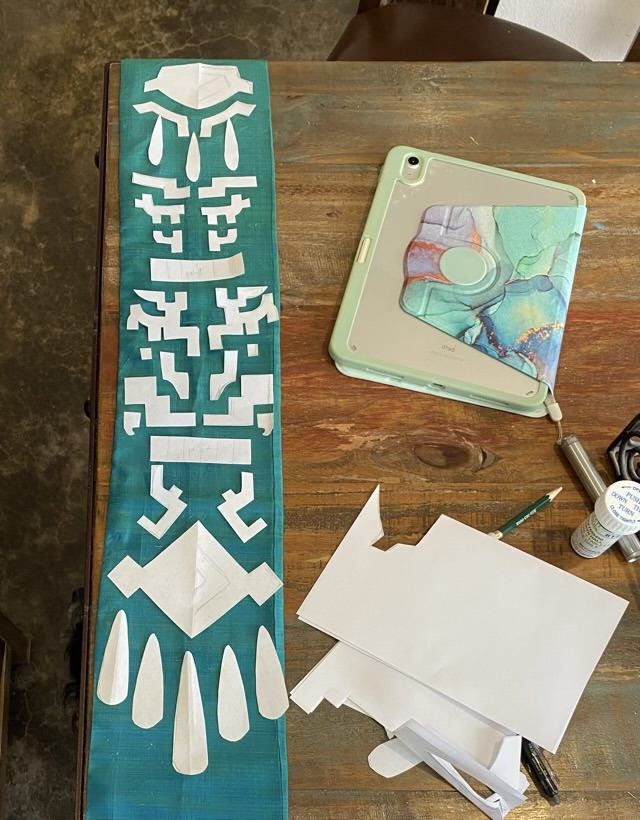
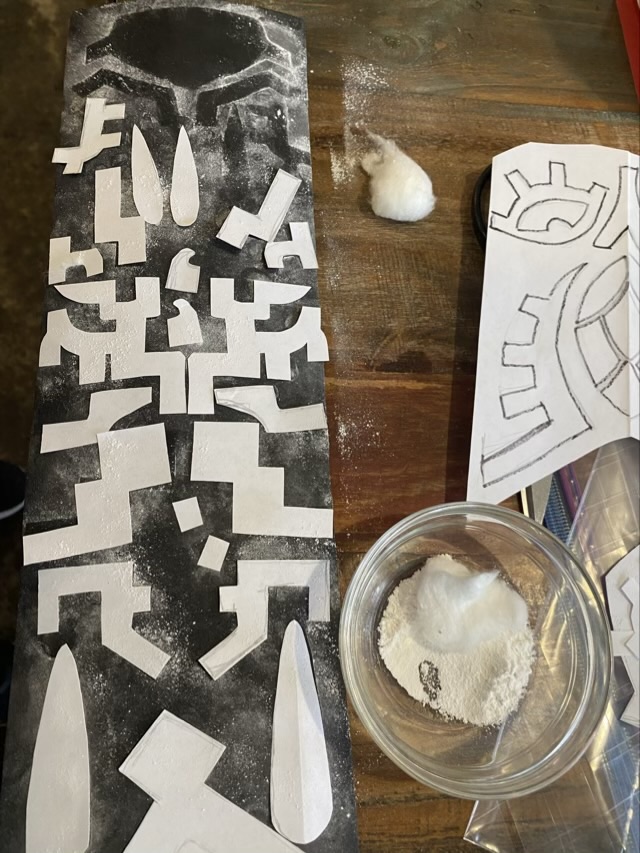
I’m still working in the Zonai panel that Zelda wears in Tears of the Kingdom. Once I cut out shapes in the EVA foam sheet and gave them an initial coat of paint, I flipped them over on some wax paper to work on connecting all the pieces into a coherent whole. I used gold-colored, 49-strand cable beading wire inserted into a slit on the back of the pieces that I cut with a ruler and thin knife blade. It helped to use a small screw driver to tuck the wire into the slots. Once the wires were in place, I lifted the whole assembly to make sure everything hung evenly. To anchor the ends, I crimped on metal beads, then ran super glue down all the seams and ends.

Photo description: EVA foam pieces connected with cable beading wire inserted into slits

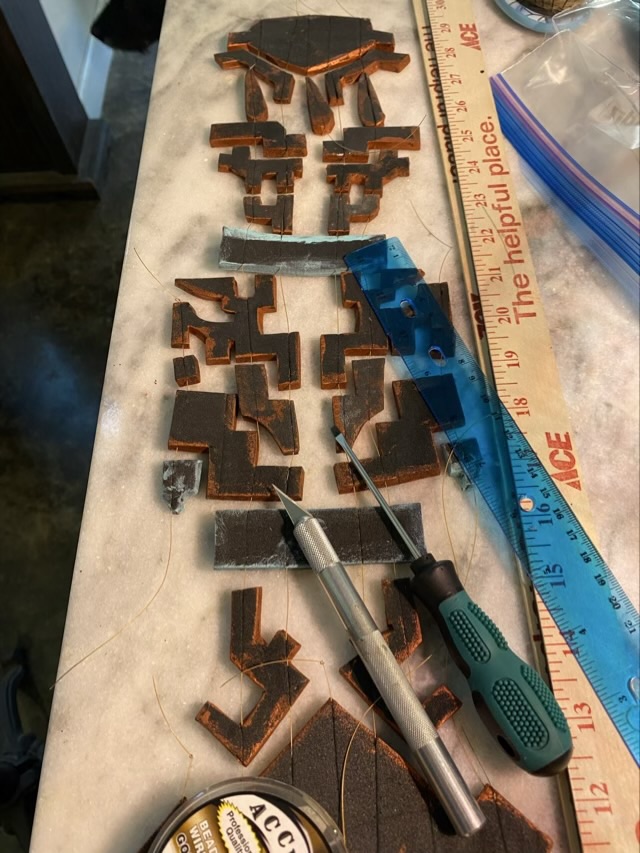
Once the wire was secure, I painted the back of the pieces, let it dry, then did the finishing coat of paint on the front.

Photo description: final coat of paint on the Zonai beaded panel using metallic copper acrylic paint and simulated green patina using metallic green base coat and light green wash

I absolutely love how this turned out. For cosplay, EVA foam is fantastic stuff. It is light, easily cut and carved, and paintable.

Zelda Cosplay part 1

My eldest had a fantastic idea for a cosplay costume and I volunteered to help. (Ok, I may have begged, and “I’ll be in charge of this part” may have passed my lips. I’m definitely a Zelda fan, especially Tears of the Kingdom.) One of the parts I claimed was an elaborate panel that hangs on the front of Zelda’s Zonai dress. The panel has two layers, a silk banner and a copper beaded piece. To make the copper pieces light, I wanted to use EVA foam sheet and paint them. I cut shapes from paper first and laid them out on a banner of green/blue recycled silk.

Photo description: blue/green silk banner with white paper pieces laid out on top of a table with an iPad for reference and scraps of paper on the side

To transfer the paper pattern to the foam, my Mom suggested dusting the pieces. I laid them out on paper on the EVA foam, and used tapioca flour and a cotton ball to dust the surface.

Photo description: black EVA foam sheet with paper pieces covered in a thin layer of flour, bowl of tapioca flour and cotton ball to the side

The flour settled where the pieces weren’t, leaving a dark outline that was more precise than tracing. When I do this next I’ll use a foundation brush or something other than a cotton ball, because the cotton caught on the edges of the paper and did not lay down an even coat of flour.

Photo description: black EVA foam sheet without the paper

I was able to cut out most of the pieces using the flour shadows, and only on a few needed to use the original paper piece.

I’m going to break this project into several blog posts. My apologies to those who are not Zelda fans, I’ll be geeking out for a while. I hope there will be some techniques you will find interesting or useful.