Using offset square knots I made a pouch beneath the macrame design I did earlier to hold a tongue drum.
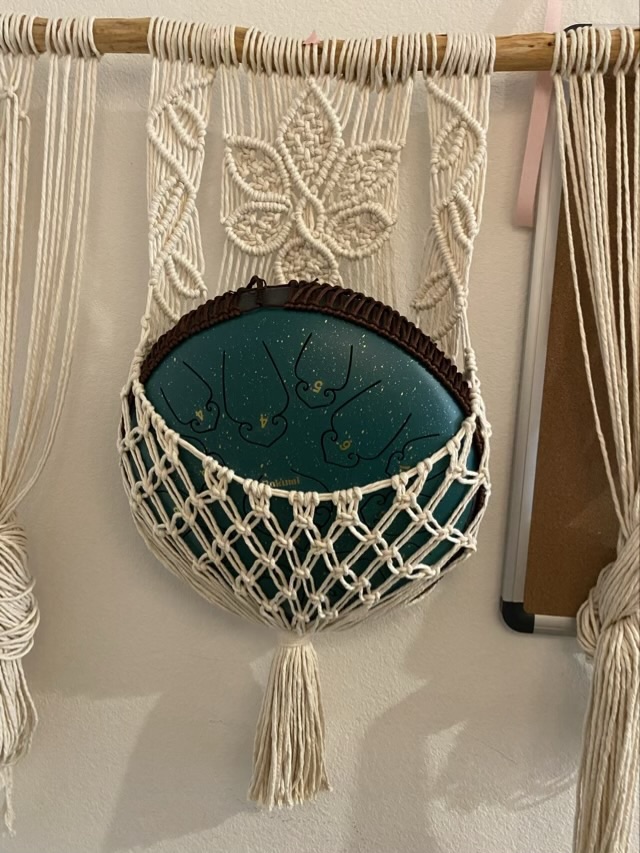
The idea is to create more storage for small musical instruments on either side. Knotting continues.

Using offset square knots I made a pouch beneath the macrame design I did earlier to hold a tongue drum.
The idea is to create more storage for small musical instruments on either side. Knotting continues.
I finished spinning Egyptian cotton single spun yarn onto three bobbins on an Ashford Traveller spinning wheel (Yes! I spun cotton on a wheel using a high speed whorl.) I found the largest diameter on the high speed whorl, the one that matches the bobbin end diameter, worked best for me. The smaller diameter gears went too fast and I over spun. I also had the wheel set up with Scottish tension with a very light take up on the bobbin. I prefer to dictate the amount of spin in my yarn rather than have it controlled by the wheel.
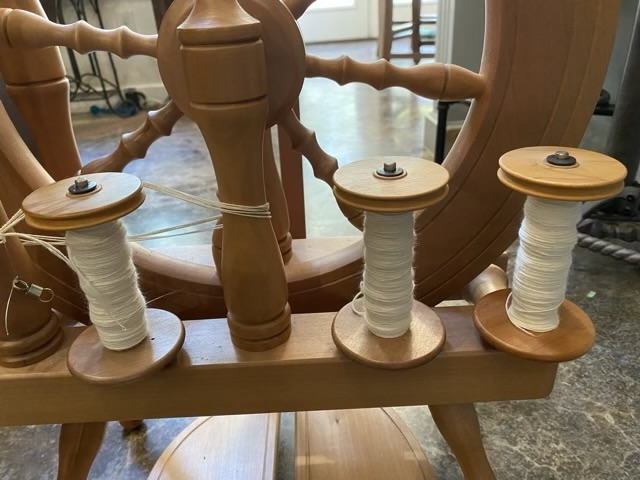
The next task was to ply the cotton. I was nervous about this because the singles had a high degree of twist, and liked to kink up. If a strand broke I would also be dealing with the rapid unwinding of the single, which results in a whole sale unbinding of a large section of yarn (ask me how I know). I did let the singles sit on the bobbin for a few days to set the twist a little. Remarkably, I was able to ply the yarn from the three bobbins with no breakage and only a few missed kinked knots.
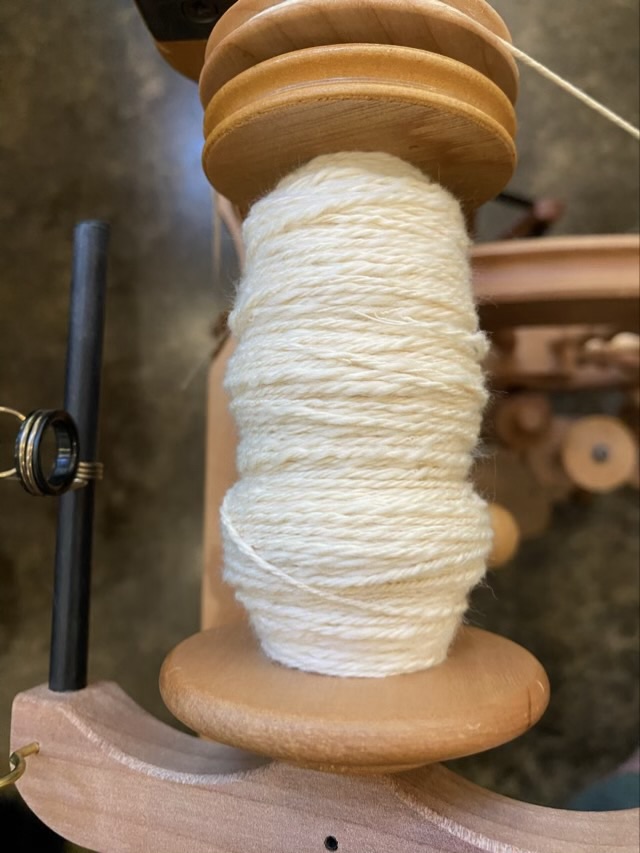
My spinning definitely looks like homespun, but as I practiced, my technique improved and there were some sections of smooth and even spun yarn.
I’m slowly progressing on my macrame wall hanging. I finished the central design, now everything else will be storage pockets. The central design was my first attempt at making shapes with half hitch knots. The petals of the flower aren’t as even as the pictures in the tutorial (beware, the site is chock full of ads), but I was learning. Next time I’ll put a sketch behind the work to help keep the balance, rather than just eyeballing it.
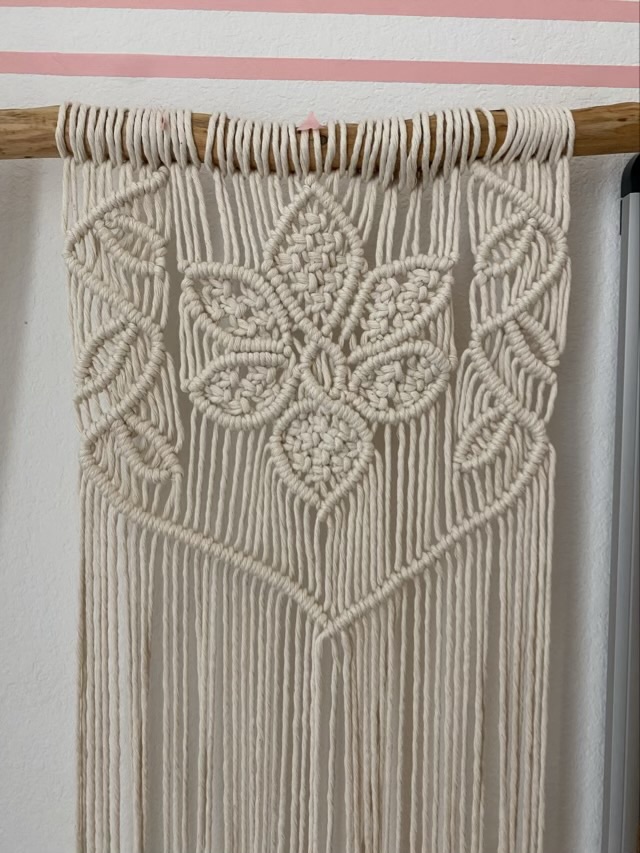
The side vines were an add-on from seeing variations of leafed vines, and I wanted to attempt them. I’m still having some left/right issues on my half hitches, and sometimes I get a full hitch and have to take it out. Here’s my tip: if you have a line of knots that need undoing, pull out the core cord so all the half hitches fall open. Much easier than untying each one.
Since I purchased a high speed whorl for the Ashford Traveller spinning wheel, I thought I would see if I could spin cotton. Cotton has a short staple length and needs a high degree of twist to hold together.

I’m definitely still working on my learning curve, but I’ve been getting sections that are even and not over spun. There are still lumps and bumps, and sometimes I’ll under spin and have several bits let go before I get back to stable yarn. I’ve divided my fiber into three sections to spin on three bobbins to make a three ply later. I hope.
I realized that I had a free substitute for the thin dowel I tried to use for a large macrame hanging: a branch from the yard. Not only do we have copious available branches, naturally shaped wood looks really nice with macrame. I even had a nice long cedar branch that I had cut a few months ago that didn’t work for the project at the time, that had been sitting out and curing. I stripped off the bark, which is much easier after the rain when the bark is wet, then let the wood dry. I used an oscillating spindle sander to get the remaining traces of bark removed, then sealed it with several applications of Howard’s Feed-n-Wax.
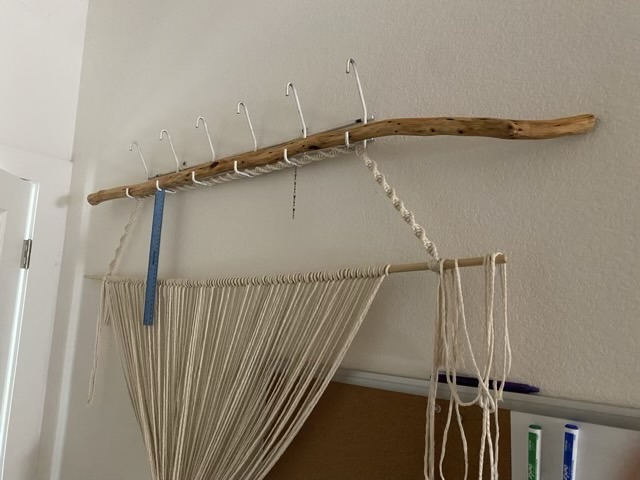
Transferring the cotton cord from the dowel to the branch wasn’t difficult once I used some spare cord to tie it up above the dowel. Larks head knots are very stable, but very easy to remove.

I left the old thin dowel hanging as a pattern line, and added a couple more guide lines to the wall using washi tape.
Now I have to settle on my macrame pattern. I initially intended a simple all-over grid, but my ideas keep getting fancier and I’m thinking of pockets and loops. Hm.
