The urgent need cotton thread that I picked up on vacation because I ran out was a natural colored size 3. I haven’t worked with this size before, so it was an intriguing purchase. It didn’t take much thread to fill up my tatting bobbins, but the tatting work went well.
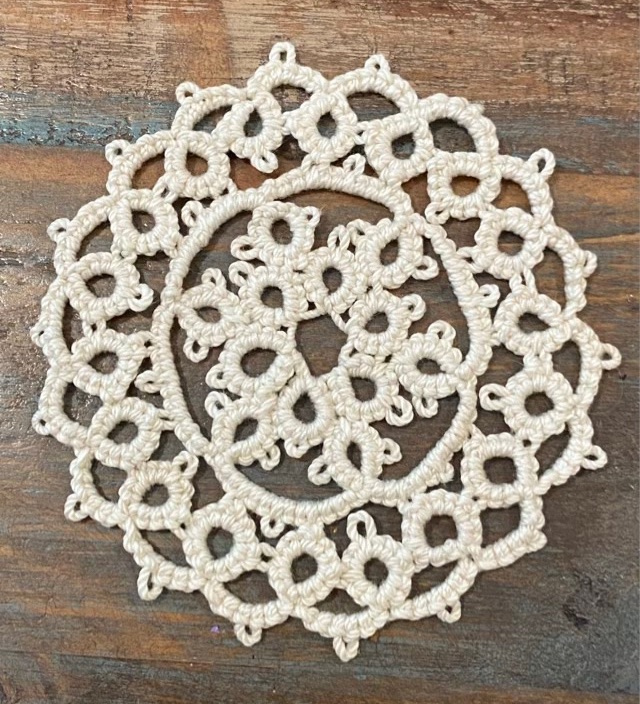
Photo description: three round tatted coaster using different sized Josephine knots, unblockedPhoto description: same tatted coaster after getting it wet and letting it dry flat (blocking)
What drives me crazy about crochet thread is how it is wound around a cardboard tube. I’m sure this is a marketing thing, to make it look like you are getting more yarn. I have not figured out if it is possible to center pull from the factory wrapped tube, which is frustrating, and pulling thread from the outside is vexing because the tube jumps around. So I rewound it. Next time I will use a nostepinne style wrap, but this time I really wanted to try put my new laser cut plywood spool.
Photo description: transferring the number 3 cotton thread to a wooden bobbin/spool/shuttle/holder
The thread is now much more compact and can fit in my small project bag.
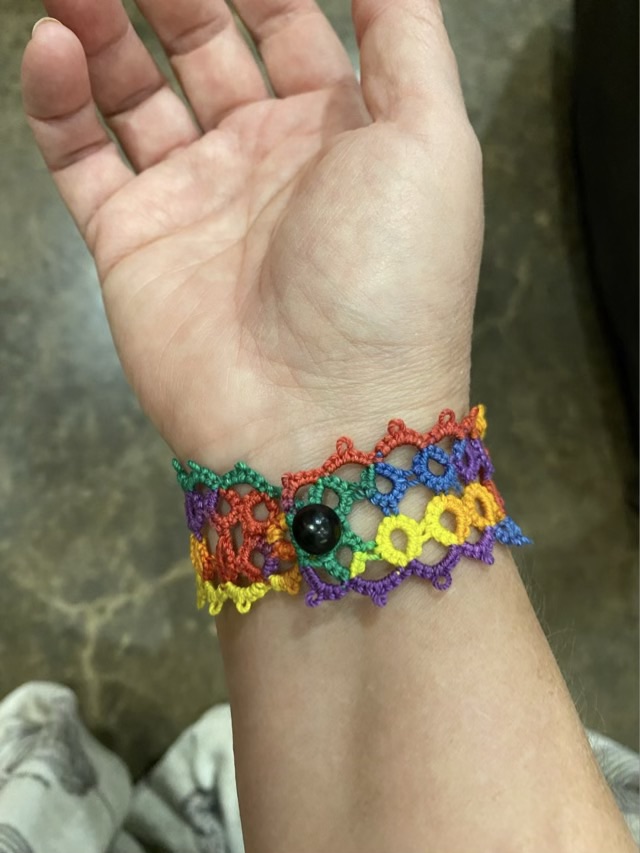
Here is another item I couldn’t finish on the plane, but not because I ran out of thread, but in need of a button. (I actually worked on this before my critical thread shortage on my mini doily posted yesterday, and considered taking it apart for the thread, but opted to keep it intact.)
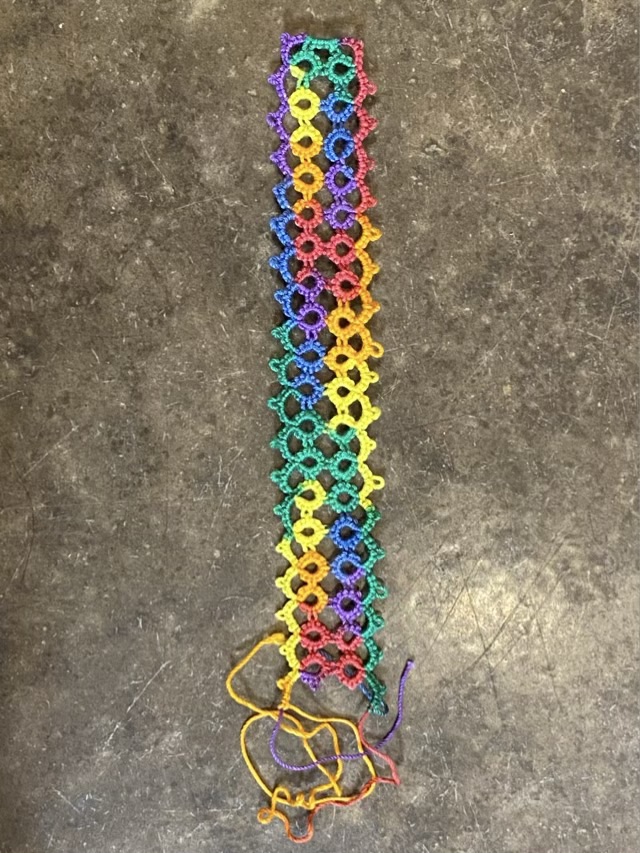
Photo description: rainbow variegated thread knotted into a lace bracelet, unfinished on one end
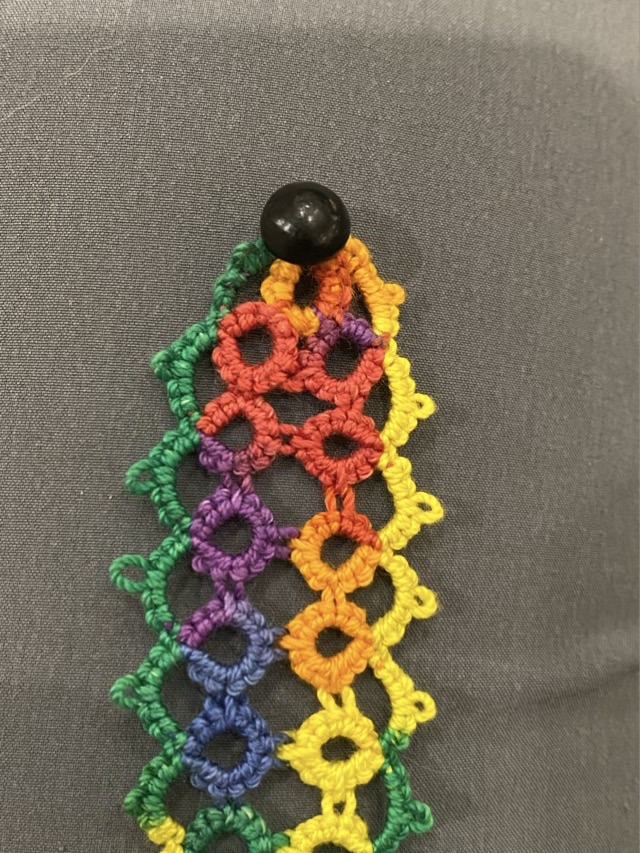
I found a small, probably vintage, black shank button in my button stash at home, and fashioned the end into the bracelet clasp. The inner circle below the button was too small for the tatting shuttle, but I was able to do the square knots with a needle to cover the threads and add structure around the button.
Photo description: finished end of the tatted bracelet with button Photo description: tatted bracelet attached with a button on my wrist
I am getting better at estimating how many knots will get me the shape I want when I’m tatting. How tight I pull the center thread also makes a difference in shape and size. This bracelet is made of two opposing rows of basic Josephine knots.
We recently took a flight for the first time (for me) in years. I was hoping to get some knitting done, but once I sat down in the seat, I could tell I didn’t have room for my paper pattern, yarn bag, and knitting with two circular needles. Nuts. I pulled put my emergency craft from my purse, which this trip was tatting shuttles and extra wound bobbins. This I could do within the confines of my seat. I pulled up my Pinterest Tatting list, and started on a round pattern. On the second round, I could tell I had a problem.
Photo description: tatting with white #10 cotton thread, the second round of Josephine knots is open
The way the pattern was laid out did not fit what I was doing; my second round could not lay flat and still connect to the beginning of the round. I could undo the second round and try something different, or clip out the center. Hm. I opted to clip out the center, literally, because I couldn’t have scissors on the plane so only had nail clippers.
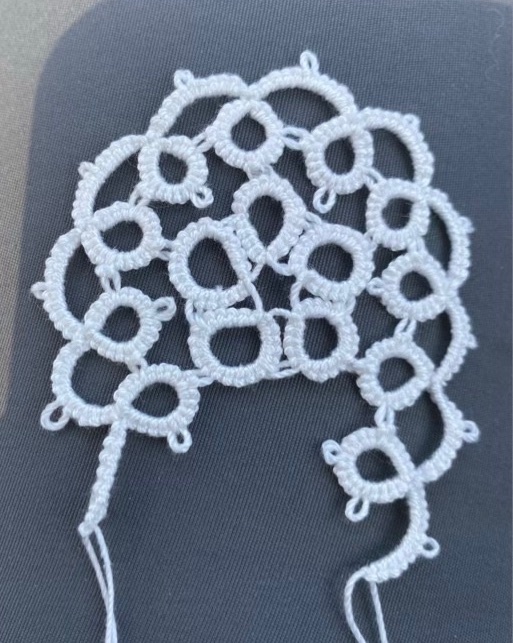
Photo description: same work with the center clipped out, the picot loops teased out, and additional Josephine knots added until the project lay flat
After getting the second round to lay flat, I replaced the center with six loops done in rainbow thread, which worked out nicely and stayed flat.
Photo description: same work, but with a red, purple, blue, green, and orange variegated thread knotted into six loops and attached at every other picot to the outer round
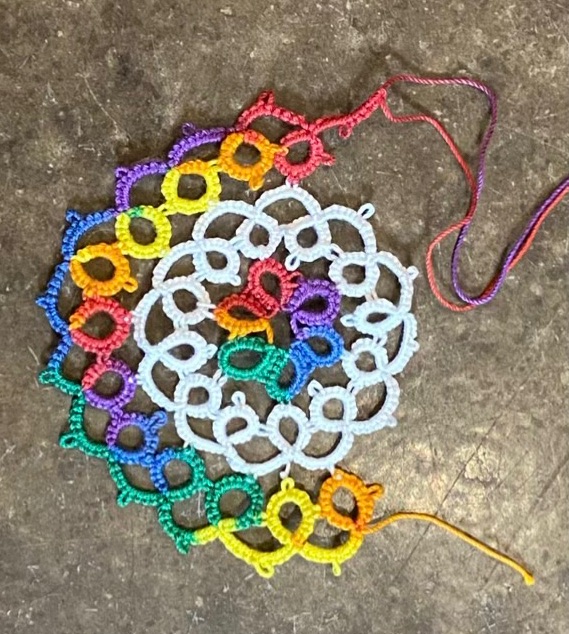
I started on the third round with the colored thread to balance the center color. To my horror, I ran out of thread. During travel. Luckily, Walmart carries cotton crochet thread, and there are Walmarts nearly everywhere in the states. They did not have the colored yarn, but they did have something I could craft with (that will be another post). The little coaster had to wait until I returned home.
Photo description: partially finished cotton tatted mini doily
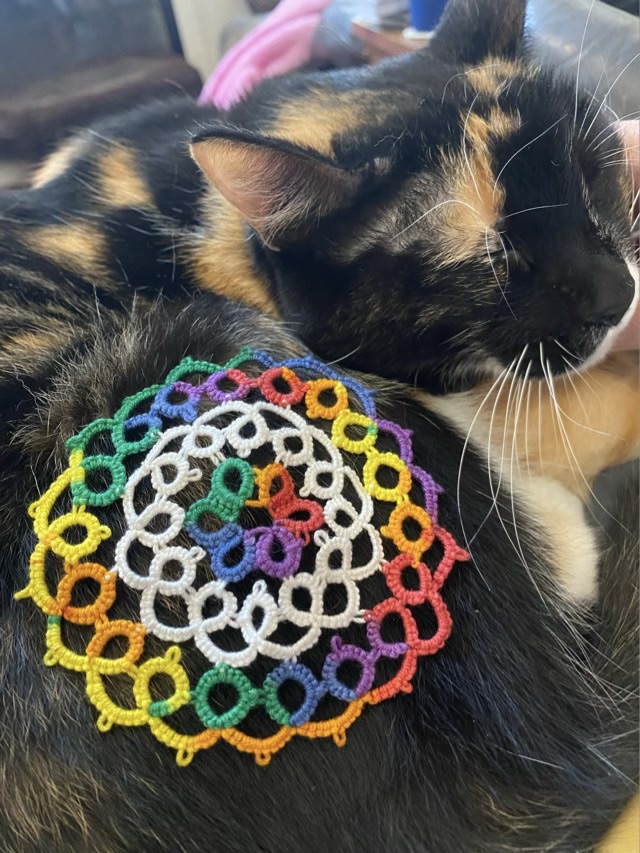
At home, I loaded up a bobbin with the same colored cotton thread and was able to finish the third round and weave in the ends.
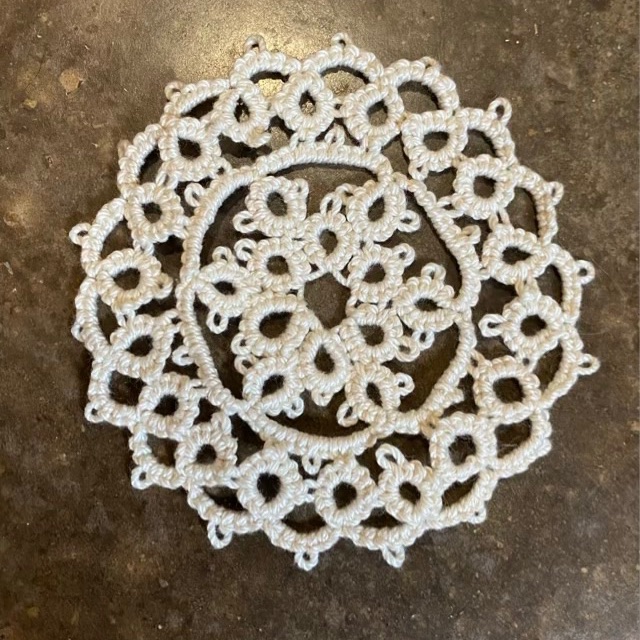
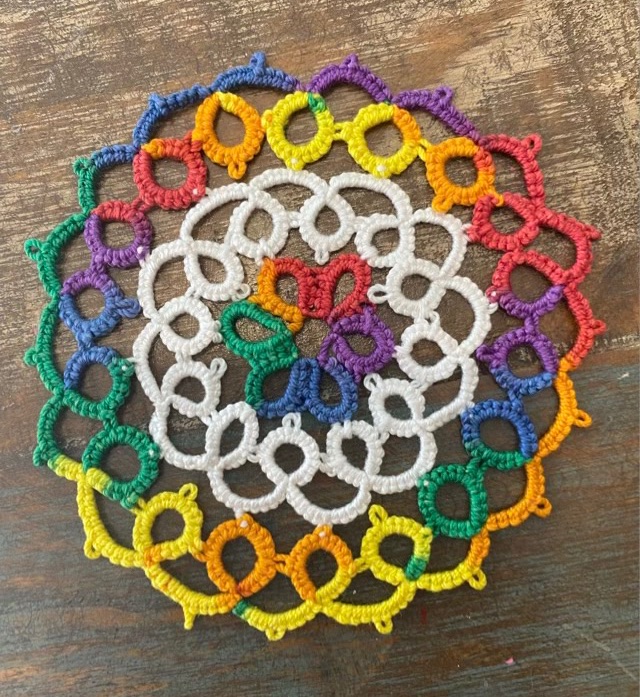
Photo description: finished tatted mini doily on a calico cat that is very happy to be back on my lapPhoto description: small tatted doily made from #10 cotton thread in white and variegated thread alternating three rounds, blocked by wetting and laying it flat to dry
The finished lace is a nice coaster size, and it amuses me to see a bit of lace peeking out from under my cup. Apparently I am a lace person down deep (but not a frilly person). I am finding the tatting to be soothing now that my skills are developing.
I’ve been wanting to attempt making sprang fabric for awhile now. I even made a small sprang loom from a trimmed elm branch. Sprang is a type of weaving where all the threads are warp threads (vertical), with no weft (horizontal). The threads are twisted around each other and the fabric is worked from the top or bottom simultaneously (what is done with threads at the top happens in opposite to the threads at the bottom). AI tells me that sprang dates back to the bronze age, although it seems like the summary was gleaned from Wikipedia, which at least gives me a list of references that confirm this art is ancient.
I had some #10 crochet cotton next to my chair (crochet is probably my youngest craft), so decided to use that after watching a video from Sally Pointer, who is an accomplished heritage educator.
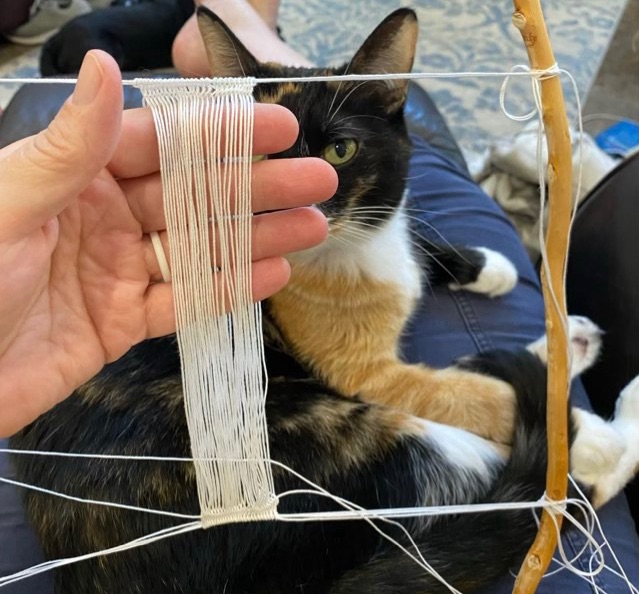
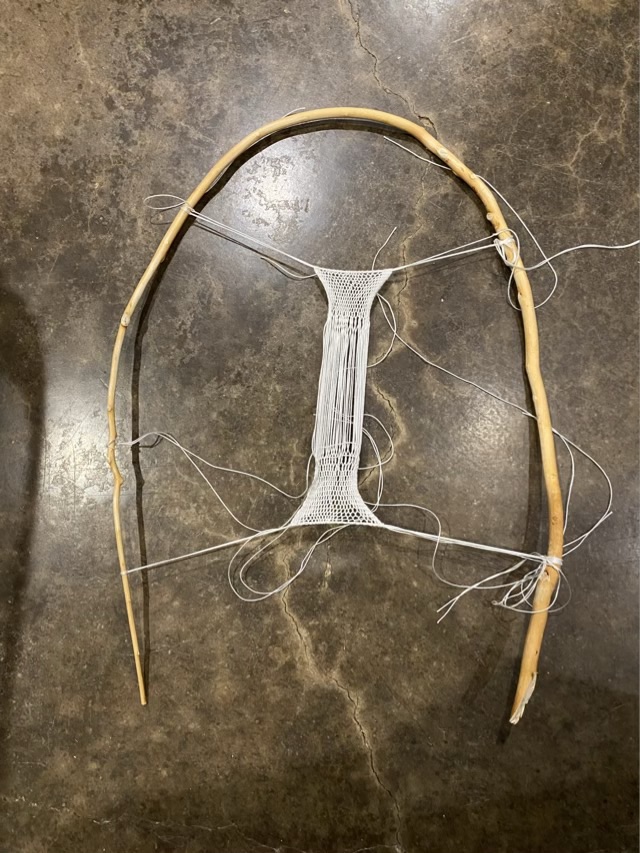
Photo description: starting to weave sprang, I was warned that sprang holds special fascination for cats, and Izzy the cat was quite enthralled with the many stringsPhoto description: sprang in progress with the loom on the floor and several rows completed
I achieved several rows without too much panic, but then the fabric started to make a hard bias twist that made it difficult to sort where the threads needed to go. I gave up and removed it from the loom, took a picture, and consulted a Sprang group on FB.
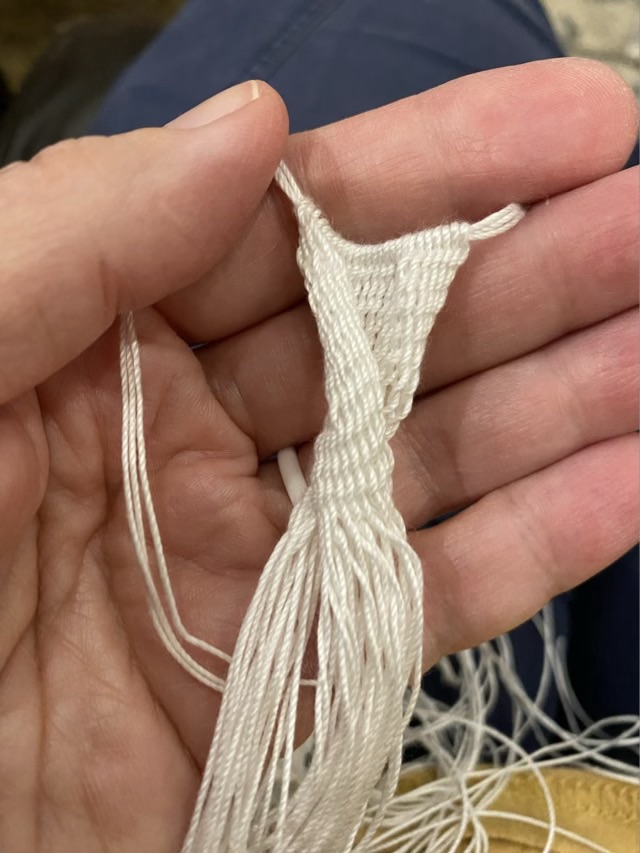
Photo description: partially woven sprang made from cotton thread, removed from the loom to show the twist
I was assured that twisting is what sprang does, and to try wool which blocks very well. While scanning the group posts, I also noticed that some weavers secure the edges to the loom periodically, which would also help manage the twist. I was told that narrow bands are particularly susceptible, and another way to manage the phenomenon is to switch twist direction, which is a more advanced technique. I have my marching orders.
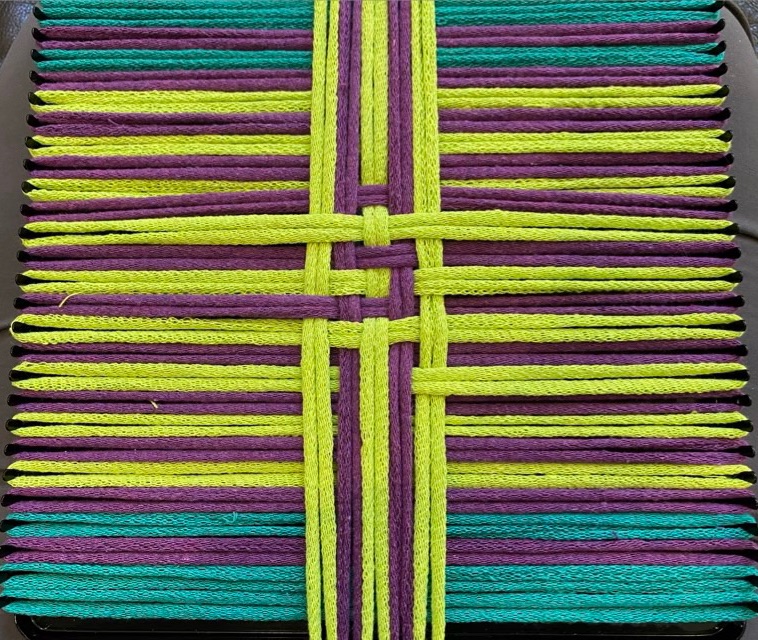
Once again I was down to the last set of cotton loops for a potholder loom. I actually started several patterns gleaned from Pinterest, didn’t like them, and took them apart. Once woven, the knitted cotton loops are quite robust, but if woven and unwoven repeatedly, they have a tendency to unravel. I needed to make a choice and stick to it. I love spirals so decided to tackle a spiral pattern potholder. This was easier decided than done. I did find a picture of a spiral potholder, but couldn’t wrap my head around the sequence of under overs working straight across. I ended up working from the center, slowly adding loops on each side and meticulously tracing the spiral, fixing the woven path as I went.
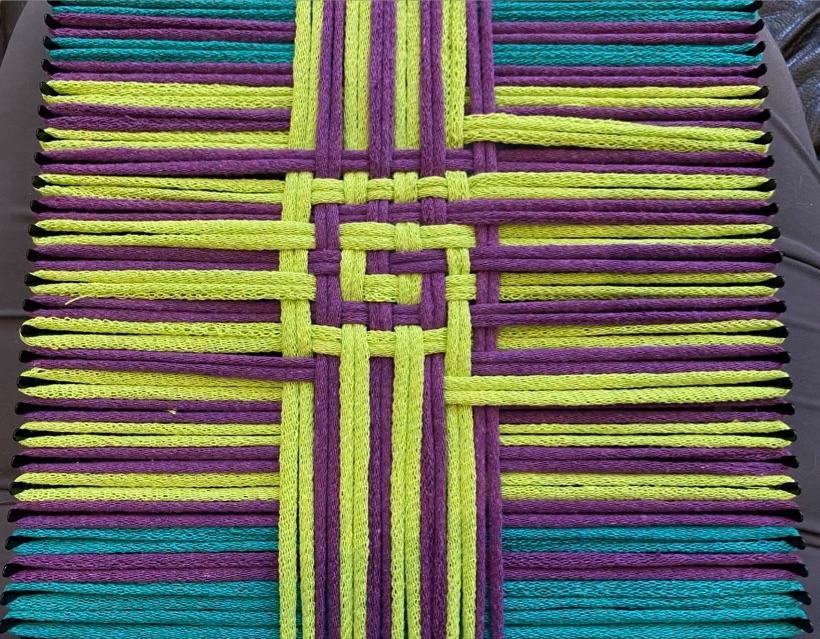
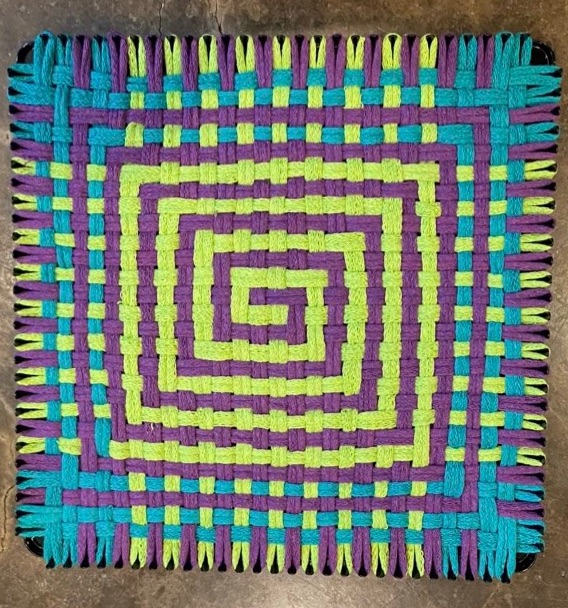
Photo description: potholder pro loom with horizontal loops set and five vertical loops woven together only in the centerPhoto description: more loops added, the spiral growing out from the center of the loomPhoto description: spiral is largerPhoto description: weaving complete, the spiral disintegrates toward the outside because I ran out of purple loops
The key to the spiral is that sometimes loops go over two, rather than one opposing loop. These floats happen at the corners when the color needs to be continuous. The order of loop color is the same for the vertical and horizontal.
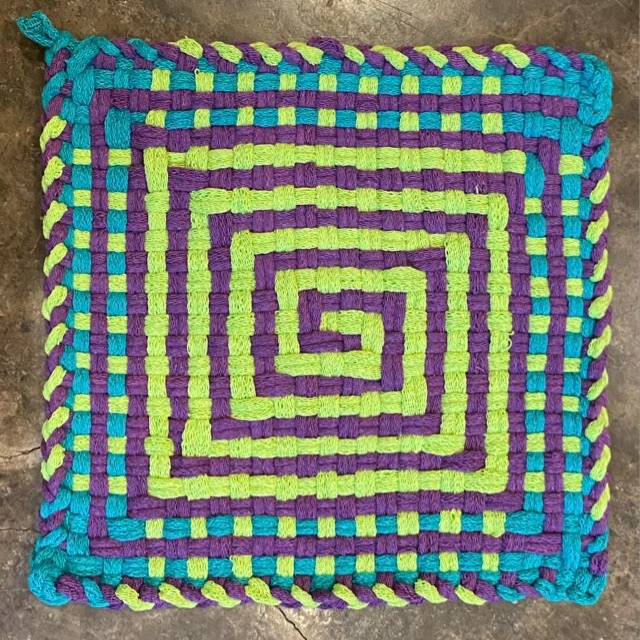
Photo description: finished potholder with chain edge and corner loopPhoto description: back side of the same potholder showing an equally interesting V pattern
I managed the make this whole week a throwback with this series of potholder experiments! The loops are now all gone and the looms have been absorbed into my weaving tool box. I plan to use the pin looms with yarn next. Tomorrow will be an actual throwback post.