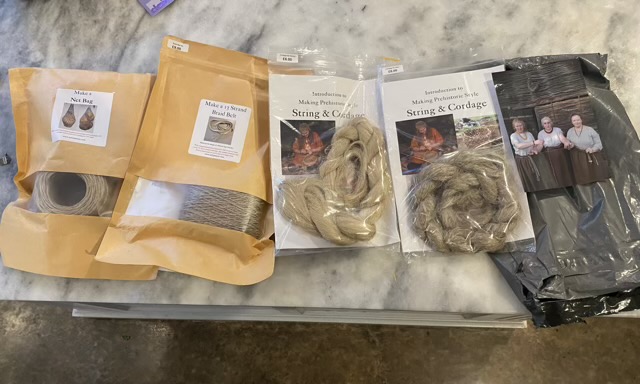
I read that Sally Pointer, an expert in Heritage Education in the UK, had developed a new pamphlet on making cordage and although I know how to make cordage, I wanted to see how she recommends construction. Since the kit is coming from the UK, with air mail prices, I maximized my kit to mailing cost ratio and bought four kits for the same mailing cost as one kit. So excited.
Photo description: string bag kit, braided belt kit, flax cordage kit, and hemp cordage kit from Sally Pointer
I follow Sally on Facebook and YouTube and thoroughly enjoy seeing the historic recreations she makes and appreciate her dedication to education.
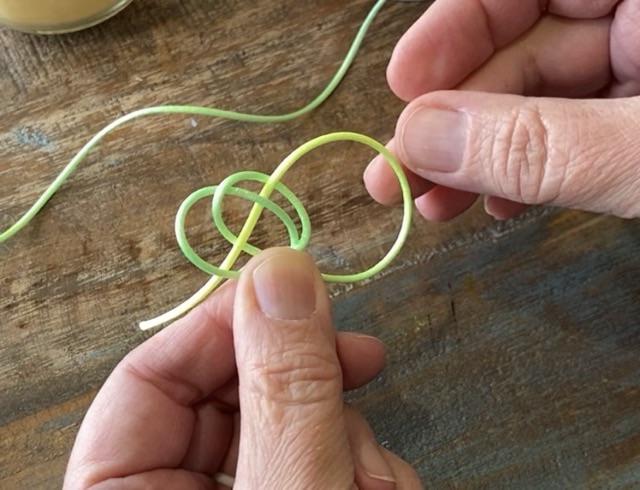
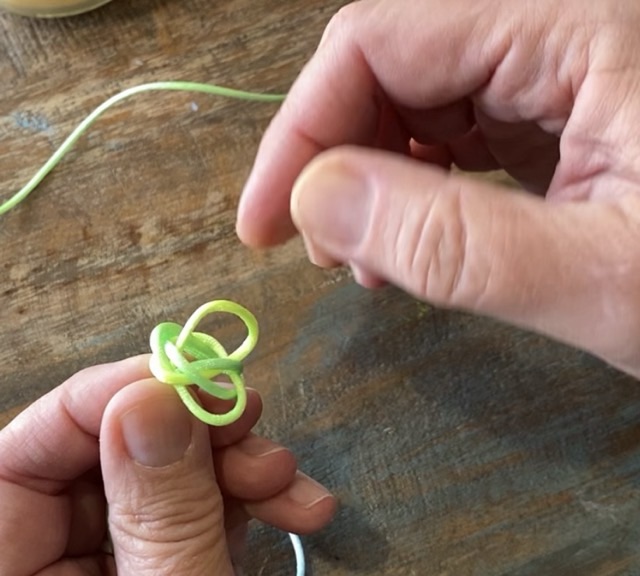
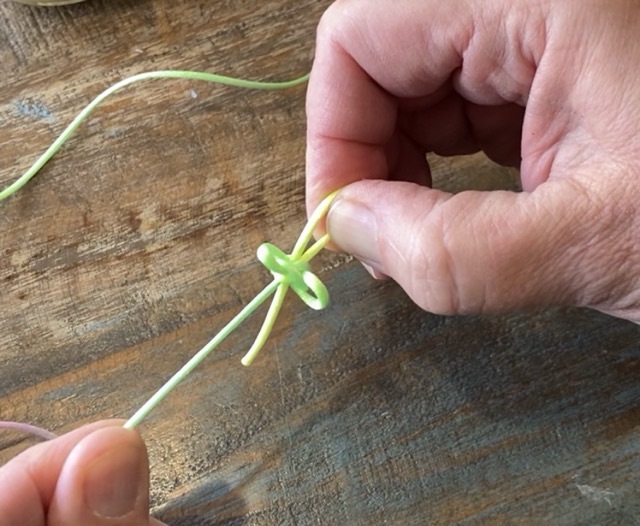
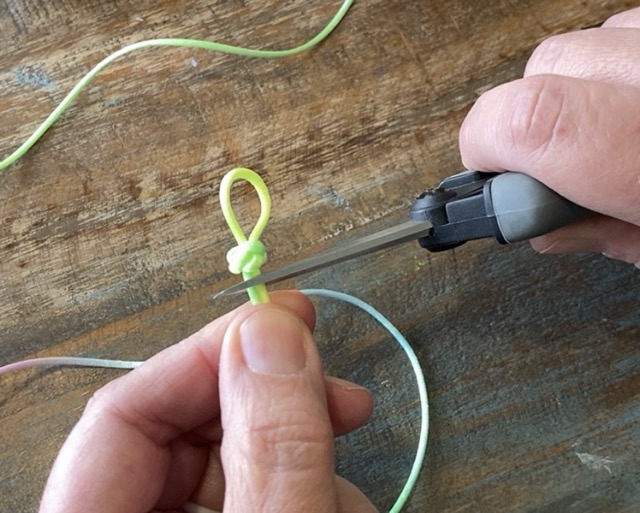
Making Celtic button knots is one of my favorite things to do. I use them for decorative ends, jewelry clasps, and now I have a way of making stitch markers for knitting! It is a great DIY for the stitch marker exchange at your favorite fiber meetup.
Photo description: ten rainbow hued stitch markers made from satin cord, with a decorative knot and a loop.
Here is my DIY video. It is a single take and you can hear my dogs pacing around me in the video, but all the data is there. For those that prefer pictures and words, I’ve provided steps below.
Step 1: With the satin cord, make a counterclockwise loop, pinch with thumb. Make a second loop about the same size, also counterclockwise, laying on top but slightly to the right of the first loop.Step 2: From right to left weave the end over, under, over, under the sides of the two overlapped loops.Step 3: Take the end counterclockwise over the right most loop side, under two strands, and up through the middle. Pull the knot gently but leave the center hole open.Step 4: Put the end through the center hole, but leave a loop. Hold onto the end and pull the knot tight using the cords next to the knot. Step 5: There will be loops in the knot after tightening, gently pull these taught by tracing the cord around the knot. This is the longest part of the process.Step 6: When the knot is tight and neat around the loop, cut off the ends leaving a very short tail. Melt the ends using a candle flame so the ends fuse together. If you are using leather or cotton, glue the ends so they don’t pull out.
I saw the viral video of someone making an i-cord using three latch hooks, and saw the subsequent string of videos of people showing how to make them. I have seen 3D printed ones, and tools with the base made out of oven hardened clay. I like woodwork, so decided to make one.
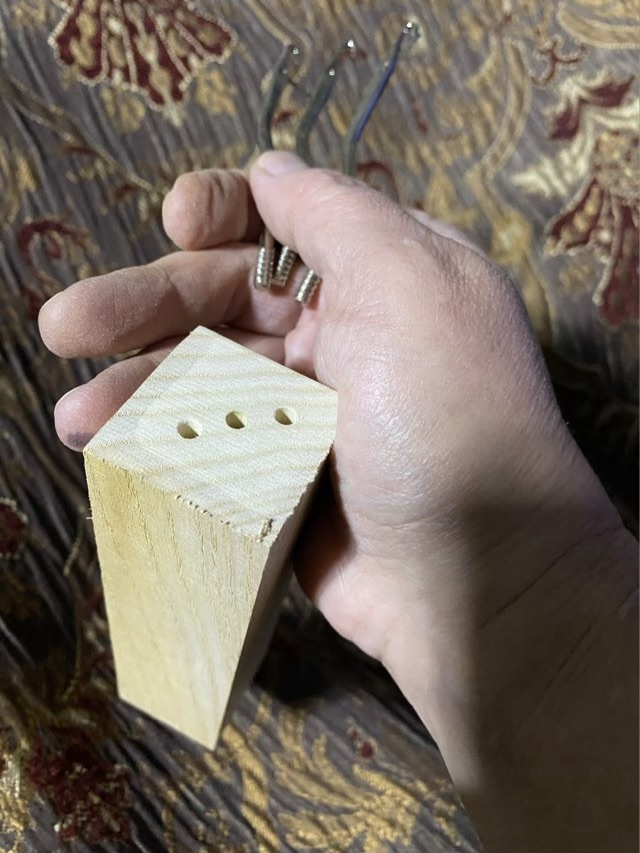
I purchased inexpensive latch hooks intended for rug hooking and broke the metal hook out of the wooden handles. I then made my own wooden handle out of a scrap of 2×2 hickory wood.
Photo description: three holes drilled at the diagonal in a 2×2 chunk of hickory hard wood, with the hooks free of their old handles and held in my hand.
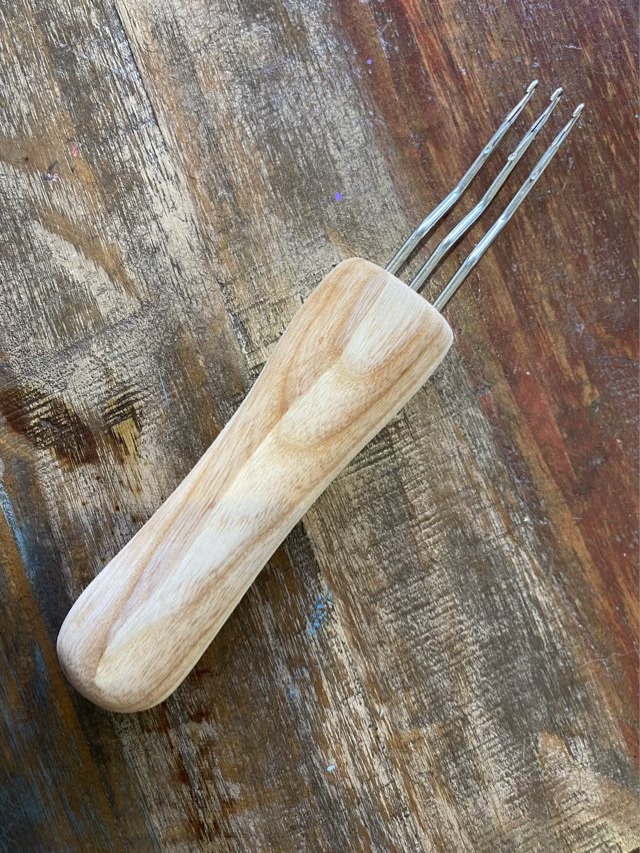
After drilling the holes, I shaped the handle using an oscillating spindle sander with the largest sanding tube with a medium grit. When I had the shape to my liking, I hand sanded with finer and finer grit, getting down to 400. I glued in the hooks using wood glue.
Photo description: shaped hickory handle with three latch hooks in parallel.
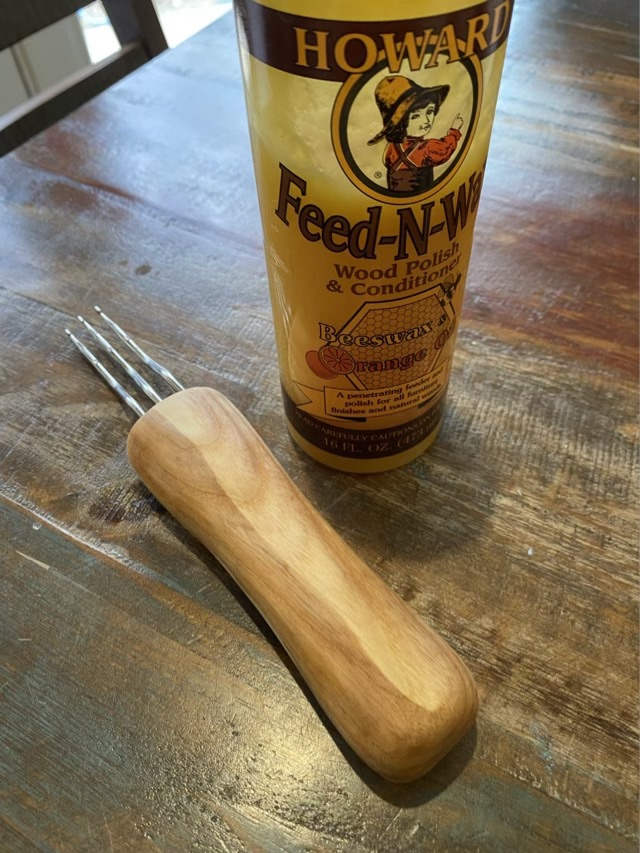
To finish, I used Howard’s Feed-N-Wax, which, I was pleased to read, could be used on finished or unfinished wood.
Photo description: three hook cord tool finished with two coats of Howard Feed-N-Wax sitting next to the bottle.
Waiting for the finish to cure is the hardest part. I’m looking forward to testing!