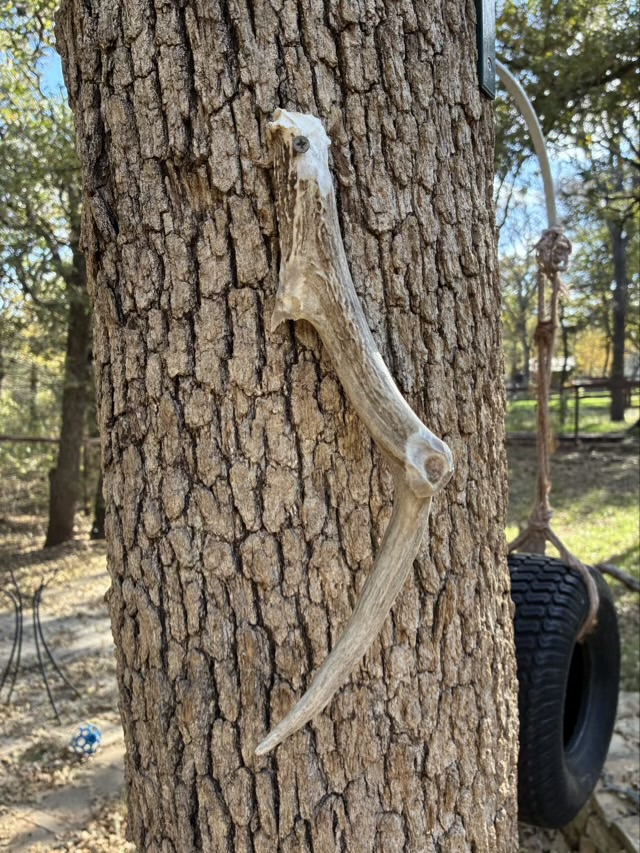
I read that squirrels will gnaw on antlers and bone, so I attached a deer antler to a tree. The squirrels love it, so much so that they chewed through it.
Photo description: deer antler with many, many squirrel teeth marks, especially at the top near the screw holding it to the tree and at the bend where they chewed completely through the antler
When I look out the window I’m just as likely to see a squirrel gnawing away at the antler as I am to see them eating corn or gathering peanuts.
I do regret not having a trail cam pointed at the antler for the moment the chewed through section fell off, since it was also a favorite squirrel perch.
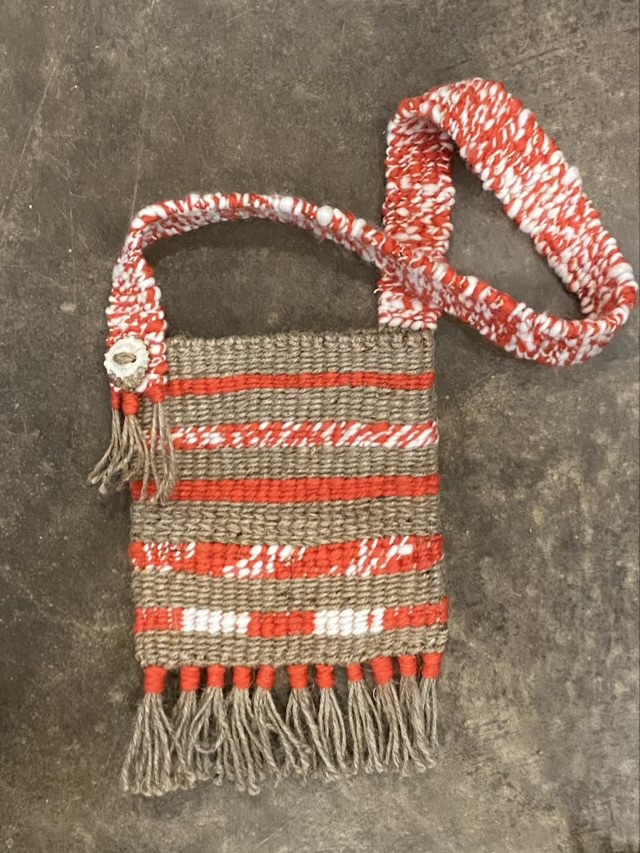
I have finished my twined bag. Yes, I was obsessed with making it and spent three days working on it. (Should I have been doing other things? Oh yes, but this was fun.)
I experimented with the weave as I progressed, not only doing stripes, but changing twist direction and number of twists between warp threads to control which color was on top, using this project as sampler.
Photo description: body of a twined bag made with natural jute and hand spun orange and white wool showing different styled stripes
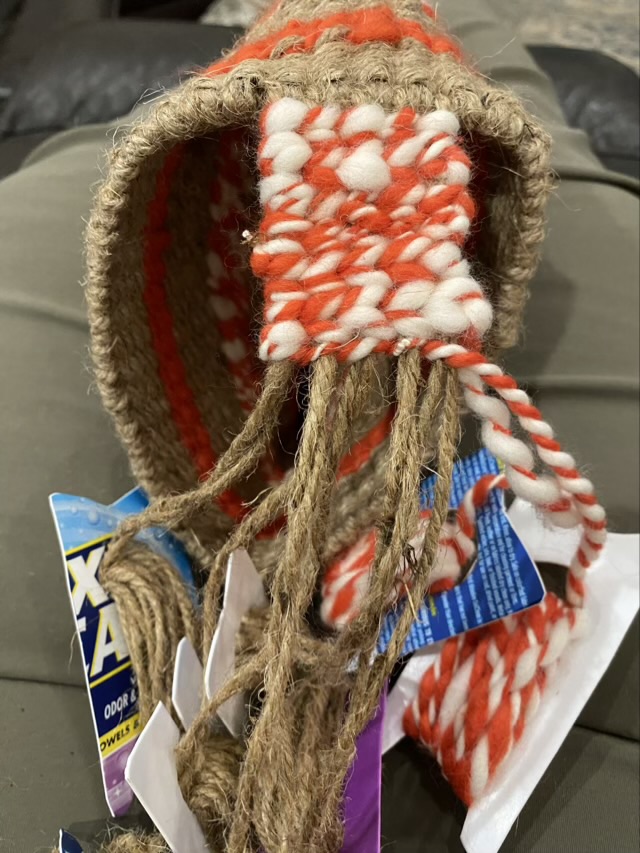
To make the strap, I threaded long strands of jute through the top edge of the bag, then used more hand-spun wool to cover the jute, reversing twine direction on each row, so as not to introduce bias twist in the final strap.
Photo description: starting the strap, with the excess yarn wrapped onto recycled plastic bobbins
I felt the other end of the strap needed some adornment, so I cut a slice of antler and drilled two holes to make a decorative button. It is sewn on, not functional, but I think it came out nice and coordinates well with the natural jute.
Photo description: antler decorative button attached at the other end of the strap.
I finished the bottom end of the bag and the end of the strap with tassels lashed with wool.
Photo description: finished twined shoulder bag made with jute, wool, and antler
I absolutely love this weaving technique. Want to learn more about twining a bag? There is an excellent book called “Twined Bags: A Historic finger weaving craft of the Native Americans” available from Livingston Press, written by Monica Newman Moore.
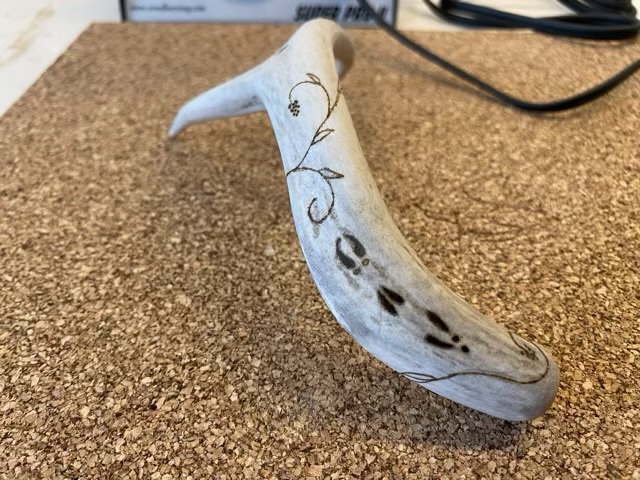
The pyrography pen is out, all things must be adorned.
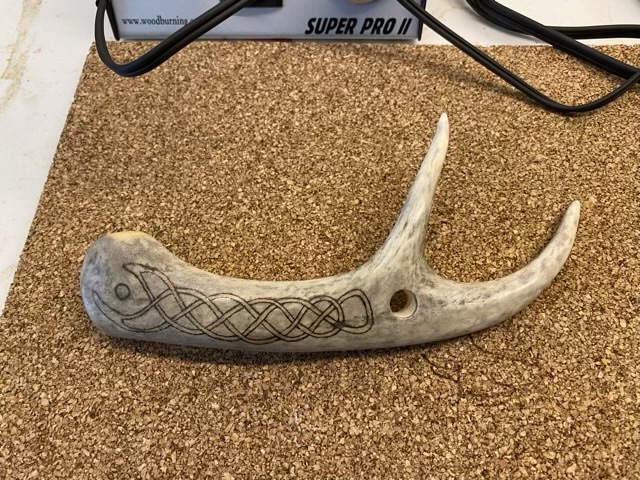
Photo description: side view of a small antler lucet fork with animal prints (alpaca, rabbit, cat, bison, sheep) done in pyrography.Photo description: side view of a medium-sized antler lucet fork with animal prints (rabbit, sheep, bison), and flowering vines done in pyrography.Photo description: side view of a large antler lucet fork with a Celtic knot, hand drawn, then done in pyrography.Photo description: wood drop spindle with vines done with pyrography around the edge of the whorl. The top of the shaft, below the hook, is wrapped in waxed red silk to reinforce the wood at the weakest point. Calwood Super Pro II in the background.
We had a little pyrography on wood with yesterday’s throwback, so today is my new obsession: pyrography on antler. I recently made nåls for nålbinding from the tines of deer antler. I’m experimenting with different shapes and curves and am quite pleased with the results. I was thinking of inking them for decoration, but the dried ink literally just wipes off the slick bone surface. I turned to pyrography instead. I have a Colwood Super Pro II wood burning unit, which can be fitted with a vast array of tips. No more messing with old soldering irons. I can also control the degree of heat, which makes a difference. For wood I use the detail setting around 5-6. For the antler I had to crank it up to 9. Even then, it took several back and forth motions to burn the color into the fine lines. I achieved the color without cutting into the bone, which left a silky smooth surface after a light sanding and buffing. I finish each nål with a coat of Renaissance wax. Here is a video short of a thicker nål with a wrap-around pyrography vine.
Photo description: four antler nåls, two with pyrography. The left most nål has four foot prints: alpaca, rabbit, bison, and sheep. The second from the right has a line drawing of a flax stem and bloom. The other two are plain, because people are different.
My nåls sold well at a recent Earth Day Market. The ones that remain I will be selling on Etsy.
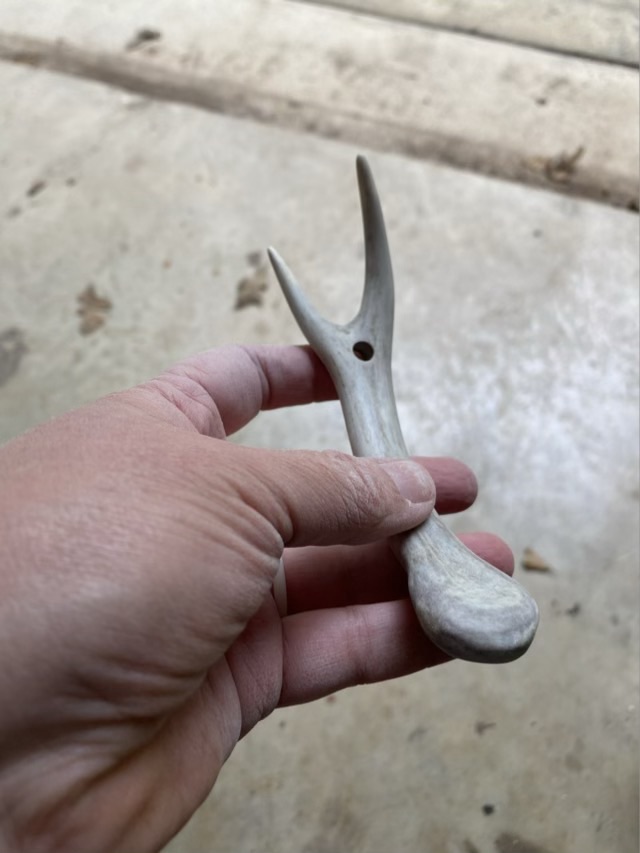
I have a bag of deer antlers that I picked up at a local garage sale, and noticed that the tines on some of the sets looked like lucet fork prongs. So I cut off the tines, sanded down the end, and drilled a center hole. (Definitely wear a mask while working bone.)
Photo description: deer antler made into a lucet fork
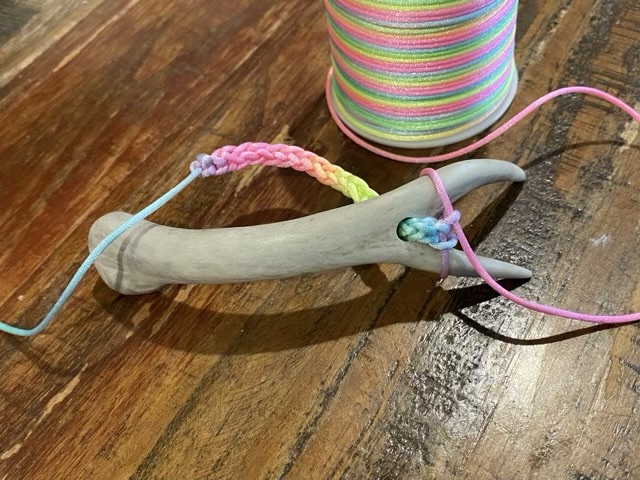
I sanded the surface down to a shine (1500 grit) and used satin cord to test out the cord making ability.
Photo description: rainbow hued satin cord made into a braided cord using an antler lucet fork.
The antler works well to make cord! The shiny bone surface allows the string to move smoothly along the tines, and which aids the ease of making. Curious on how lucet forks are used? Here is a link to my video how-to!