Phase spindle (my design)

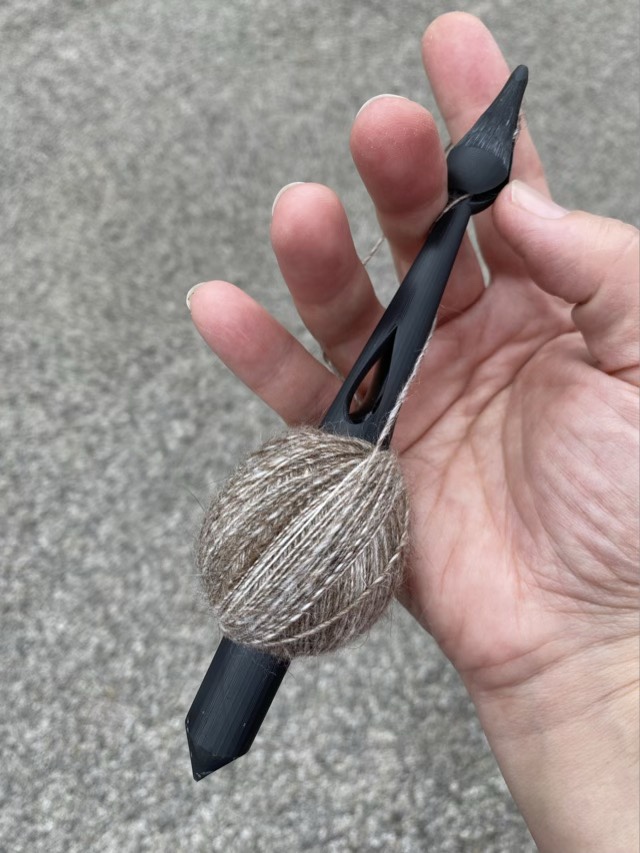
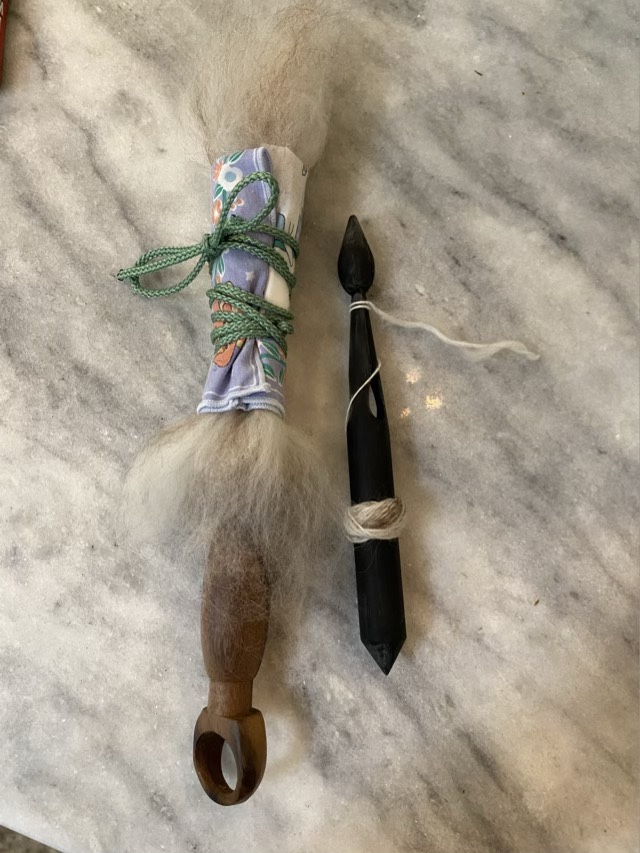
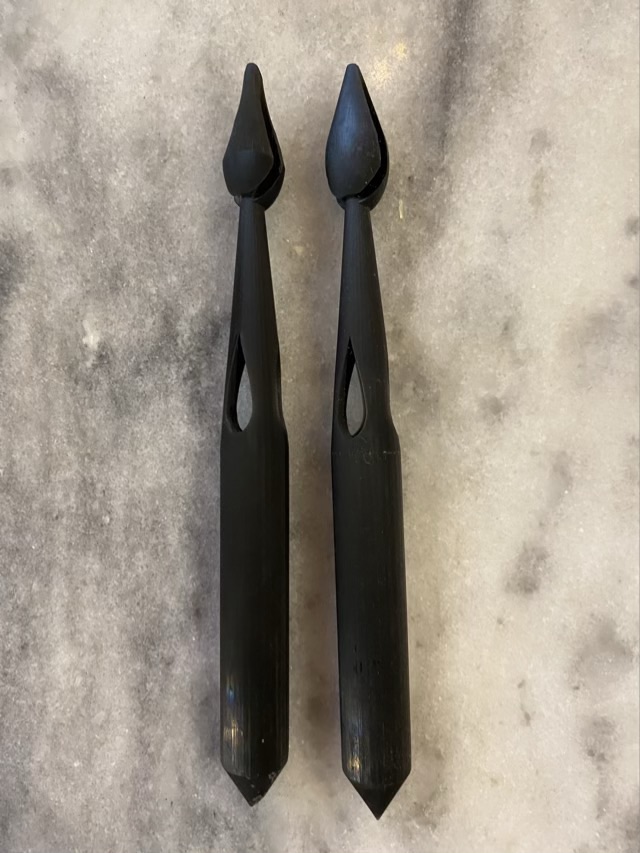
I have decided to name my 3D printed spindle design a “Phase Spindle”. It takes on many aspects of traditional spindle and tool design and combines them to increase the functionality. The barrel shape of this whorl-less spindle comes from the Scottish dealgan, and is used to create a center pull ball as you spin. Where the dealgan has a flat base, this has a point so it can be used as a supported spindle as well as a drop spindle. The head of the spindle has grooves to bring the yarn closer to the center of the spin and stabilize the spindle. There are two grooves so they work spinning clockwise or counterclockwise. The center of the spindle is hollow to reduce weight. As a bonus, the cavity is large enough to add beads if the user wishes to add weight to the spindle. The spindle is made of Tough Resin, which resists breakage when dropped, better than wood.

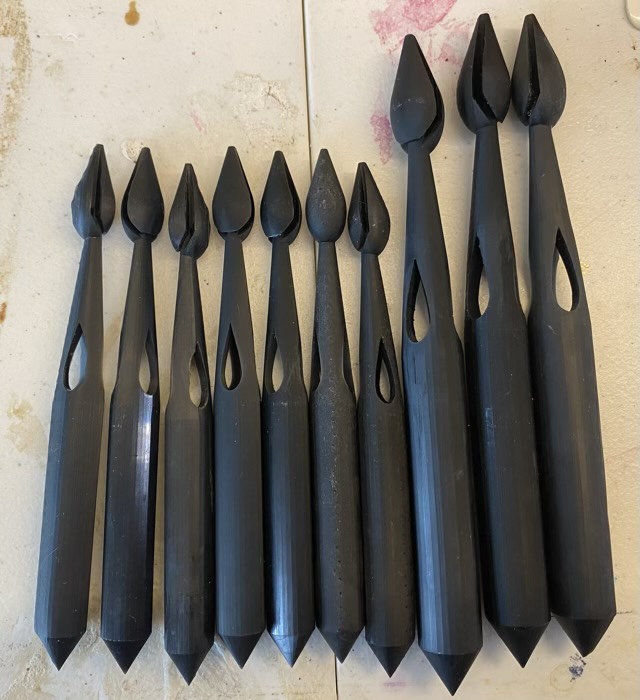
This project has been on the shelf for a while because I needed to reevaluate the head design. The printed spindle had a convex head, which didn’t give enough finger tip contact for flicking the spindle into action. I sanded each head into a straight to slightly convex curve to make spinning it easier.

Photo description: two black Phase Spindles, the one on the left has the head re-contoured with a concave tip, the one on the right shows the convex curve.

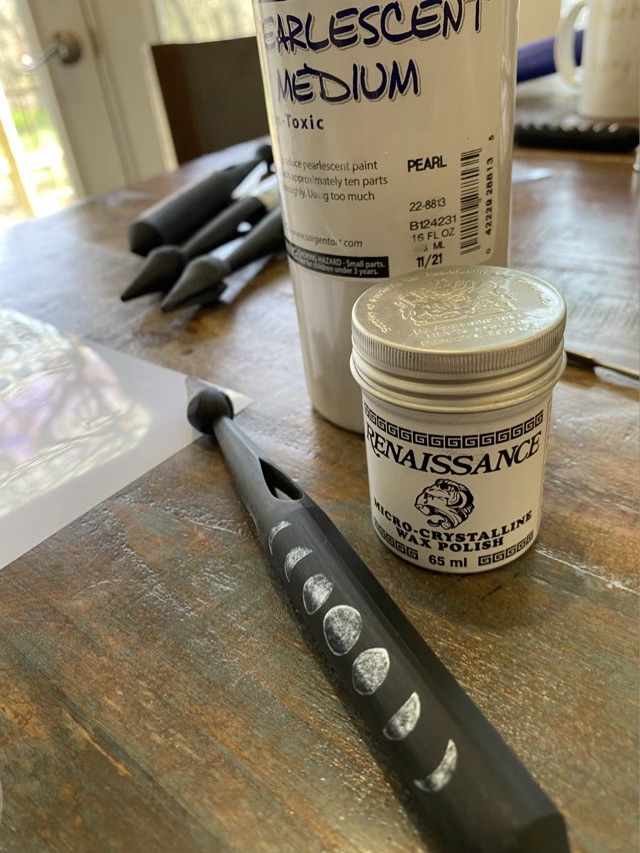
One side of the spindle has the lovely chatoyancy created by the precise parallel lines 3D printers make, but the other side had artifacts from the support structures. I sanded these smooth and used a stencil that I designed and cut out of removable vinyl to paint on a moon graphic.

Photo description: removable vinyl stencil applied to the barrel of a small Phase Spindle, my favorite weeding tool to the right.

To seal in the paint and protect it, I finished each spindle with a double coat of micro crystalline wax. The wax helps enhance the color of the resin as well.

Photo description: small Phase Spindle with moon graphic in iridescent silver and sealed with microcrystalline wax. Bottles of pearlescent paint and wax in the background.

I quite like the way the moon graphic came out. As a bonus, I also have moon phase stickers weeded from the stencil.

Photo description: three large Phase Spindles and six small Phase spindles with moon graphics applied. Bonus moon phase stickers shown in the foreground.

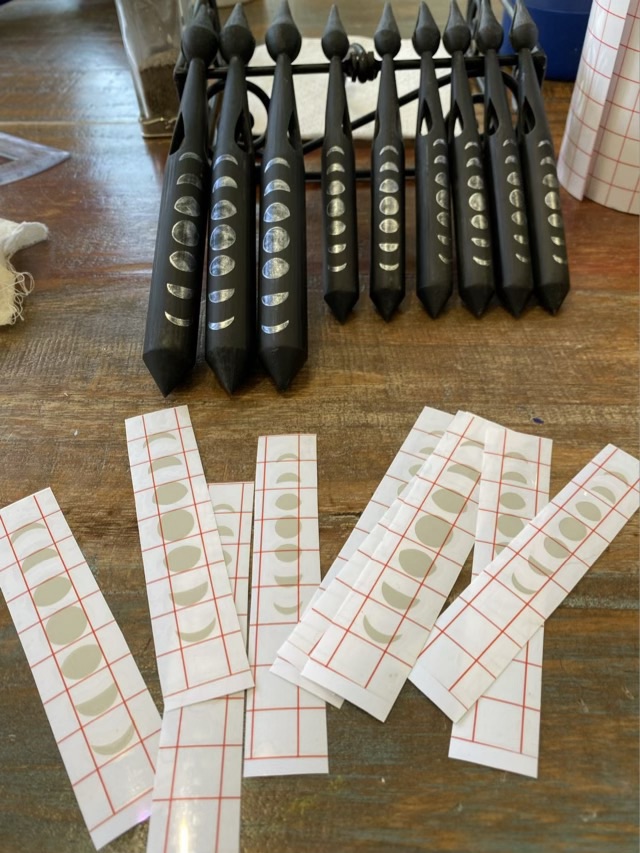
Next task: packaging.

A matter of angle

I am still testing the newest spindle design, even though I had a batch run, something was still off, but I couldn’t put my finger on what bothered me. I was having trouble getting a good spin. I thought maybe it was weight, but it didn’t improve as the cop of yarn increased. So I looked at the head, and decided to thin down the top. I used my oscillating drum sander, and with the curve of the drum was able to make just the top of the spindle concave rather than convex.

Photo description: Closeup of the head of my 3D printed spindle, showing a convex surface from tip to midline.
Photo description: Same spindle after some sanding with an oscillating drum sander to make the tip to midline concave.

This small change made a huge difference. My fingers now had more contact with the surface of the top of the spindle and I could get it spinning much easier. The grooves left by the rough sandpaper also aided my grip, so I think I will not sand that part smooth. I now need to be careful not to spin the spindle so fast that it flies up sideways, unwinds itself, and falls to the ground. I probably dropped the spindle a dozen times on my walk; there are a couple marks, but it did not break, even when hitting asphalt.

Photo description: 3D printed spindle with a ball of blended single spun yarn on the shaft, held in my hand with the road in the background.

I will sand down the rest of the spindles, then before posting them to Etsy, I still need to develop a decoration and packaging. Development is slow, but inching forward!

Testing

Photo description: One the left a rosewood ring distaff dressed with blended wool and a handkerchief, on the right a custom 3D printed drop spindle with a small amount of spun yarn.

The test of the new 3D printed spindle went well. I dressed my distaff with a locally obtained wool blend and took my new spindle for a walk. I dropped it twice on the asphalt to no ill effect. Hurray! This is the first time I’ve used this distaff for wool; I figured out how to use it when I needed to control flax roving, and it works just as well for wool. I’ve seen others wrap their wool roving around the distaff, which for me is maddening. As I draft, the fibers pull tight and lock in a spiral. By laying the wool out parallel to the distaff in small sections, and securing it with a handkerchief and cord, the fibers drafted easily off the bottom of the bundle. Nice.

Bamboo page

Photo description: Clockwise from top left: “Bamboo Top” card which reads “Developed in China, plant based, made from the leaves and interior”, single spun yarn on a paper bobbin, 2-ply yarn, swatch woven on a Clover mini loom with 3 selvages, crocheted lace round, knitted rectangle, unspun fiber in a paper box.

Spinning my bamboo sample was very enjoyable. The fiber is soft, and the staple is a nice length. I did have some static issues, but those that were resolved with a spritz of water. I spun the singles on a drop spindle, and I kept the fiber and spindle in my purse to spin during waiting times. I made the two ply yarn from a center-pull ball using the same spindle. The fiber has a beautiful luster.

Photo description: A hand holding a single spun bamboo yarn wrapped nostepinne style on a 3D printed spindle.

First production run

I recently received 3D printed spindles from our first production run! Very exciting. The spindles have passed their drop tests, so the tough resin is holding up well. They aren’t completely indestructible, but it takes a great deal of effort to snap the neck (yes, I should have measured the force, but hindsight is 20/20.) The next step is to sand down the production marks (they take sanding well), and apply some decoration. Then I need to design the packaging. Phew! But I am inching forward!

Photo description: Seven small 3D printed spindles and three large spindles in black tough resin with grooved heads and teardrop holes above a straight shaft and pointed end.

I’m leaning toward calling these “phase” spindles, because they have aspects of other historical designs; the large diameter shaft is similar to a dealgan, it can be used as a supported spindle or a drop spindle, and the weight is adjustable.