Finishing: woven scarf

The warp I prepared for a local kid’s event has been on my tapestry loom for awhile. I did get to use it as a demonstration, and was hoping to use it again, but it didn’t happen this summer, and I want to use the loom for something else, so I finished it.

Photo description: weaving finished on a tabletop tapestry loom showing the string heddles and twined first and last row

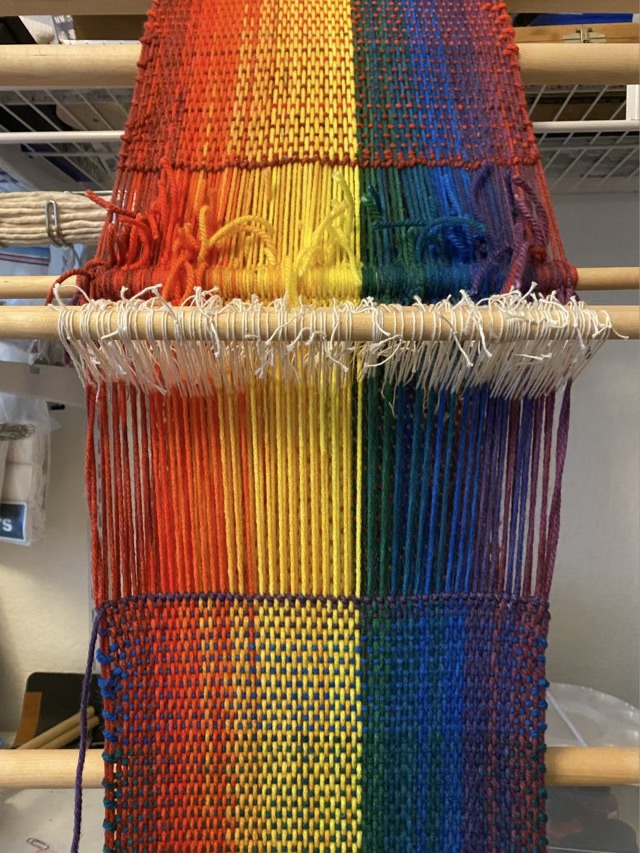
The edges were wonky, so I decided to run a row of coordinating crochet stitches along the outer double warp. It helped hide the contrasting weft and gave it a nicer finish.

Photo description: top edge finished with a row of single crochet stitches, bottom edge unfinished. Missy the dog in the background.
Photo description: finished scarf with knotted fringe and crocheted edges
Photo description: entire scarf laid out on the floor showing the strong warp color and a much more subtle weft color shift

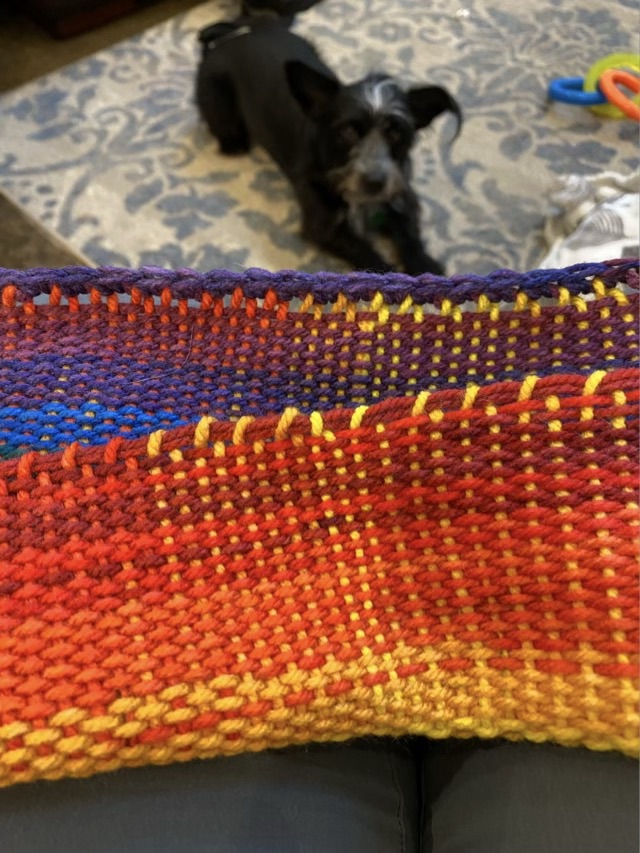
I think it is interesting that even though the warp and the weft are visible in the weave, the warp color shift is much more prominent, I was hoping for an even split.

Throwback Thursday: iron oxide

This throwback goes to September 2009, and makes me a little sad. I was fusing images into glass using fusible film printed with a laser printer. The film would burn off leaving the image in a sepia tone. The method only works with high iron oxide content toner, which of course is getting rare. I had to resource the transfer paper I was using twice, retesting each time the previous brand stopped making it. Then when I invested in a large stack of paper that worked, my printer died. I found a backup printer at a garage sale, but the print quality was poor. Investing in a printer that may or may not work was risky, and I wasn’t getting enough orders to justify the expense. So production stopped. The photo below is line art that I produced a batch of for my grandmother for a reunion. I also did portraits and sketches.

Photo description: wire wrapped glass pendants with iron oxide fused image on silicone cords in multicolored mesh bags

I was producing these from about 2009-2018.

White hats

I did say that I have a boat load of acrylic yarn and am on a hat kick, right? And I mentioned that this an experimentation time, since I can’t do the same thing more than twice? Oh good, that established, here are more hats.

Photo description: white crocheted hat with woven band and ribbed edge

I tried the new-to-me crocheted ribbing technique combined with one of my favorite crochet textures: a woven stitch.

Technical summary: (American notation) Double crochet (dc) 12 into a magic circle. Increase 12 each row until diameter matches desired hat size. Switch to waffle pattern which is two front post crochet and two back post crochet for two rows. Offset the waffle pattern by two for the next two rows. Continue until the hat reaches the top of the ears. Chain 8, make single crochet back loop ribbing around the edge.

I also made Moogly’s Diamond hat in white.

Photo description: white acrylic hat with diamond pattern from crown and ribbed edge

I may be able to make an exception to the “only two” distractibility rule by interspersing different hats between making the diamond hat pattern. I like it that much.

Tshirt restyle

This poor shirt. I previously added crocheted elements, but didn’t like the way the sleeve crinkled in my elbow, so took off all the crochet.

Photo description: Black Tshirt with The Smashing Pumpkins cover art for Mellon Collie and the Infinite Sadness

It hung sadly in my closet along with another shirt that had acquired stains on the front. Eventually they caught my attention again and I combined them. I used the black shirt as a base, removed the flutter sleeves from the purple shirt and sewed them to the bottom of the black sleeves by adding gathers to match the circumference. Then I took sections from the unstained fabric to make a hem extension, overlapping the sides in a petal formation and adding a narrow hand sewn hemmed edge. Honestly I hand sewed all the added bits, because I like to.

Photo description: restyled tshirt with added purple at the sleeves and hem

Pattern Review: Diamond Hat

It is that time again. I have a build up of gifted acrylic yarn, and a chorus craft fair coming up, so it is time to crochet hats. I can’t bring myself to make the same hat over and over, so it is also a time for me to explore patterns and techniques. Moogy is running a campaign with Warm Up America for a hats, scarves, and mitten drive. Moogy graciously provided some of their free patterns for the drive, including a Diamond Hat pattern. This pattern had two techniques that were new to me: using treble crochet stitches to make diamonds, and using back loop single crochet to make ribbing. I like both methods! This hat crochets up quickly because of the double crochets, but has a very classic look. It did take me a few rows to figure out exactly where to hook in the treble crochets: under the leg so all four legs have a single join point. The picture below is actually my second hat. The first did not have as much definition near the crown. There is a PDF version available of the pattern for a price, but unfortunately the designer included links for the special stitches in the PDF, which don’t work when you print the pattern (obviously).

Photo description: Diamond crochet hat in green acrylic using a pattern by Moogly

The hat is flexible, thick, and warm. I think I will make a few in different colors without getting distracted (much). This is definitely a pattern that I will keep in my repertoire.